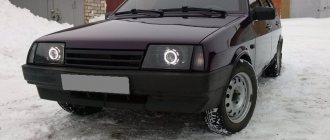
Lighting elements of Lada Largus
It is worth noting that all lamps used in headlight lighting of Lada Largus cars are divided into three types:
- halogen;
- xenon;
- LED
The most common type of headlights for low or high beam are LED variations, since these are the most powerful and efficient lamps in terms of energy conservation. In addition, they can be used for brake lights, turn signals or markers.
Features of additional optics
With such lights, the LADA Largus becomes much more visible to other traffic participants. It is especially important to turn on these devices in the dark or in poor visibility conditions. The use of optics improves safety on the road.
The material used for this product is ABS plastic and PMMA glass. The light source is diodes. Devices applicable to Lada Largus are capable of functioning in two modes:
- like brake lights;
- as dimensional lighting equipment.
The weight of the entire set reaches 2 kg. It includes:
- a pair of lighting devices (for both sides of the car);
- cable harness;
- diagram according to which installation and switching with the on-board network is carried out.
After the rear additional lights are installed, the exterior of the car is transformed; the rear looks especially impressive in the dark when the lighting devices are turned on.
Today, there are companies on the market that perform tuning of cars of domestic origin. Among such companies one can single out TuneAuto. This company sells additional rear lighting equipment made using LED technology and made of ABS plastic. These lighting devices have three functional modes:
- side light;
- brake signals;
- these two functions at the same time.
The devices are provided with a warranty for a period of six months. The weight of the set does not exceed 1.8 kg. The devices combine perfectly with standard optics and are not subject to fading under the influence of the sun.
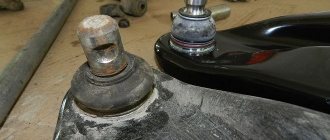
Standard replacement procedure
- Replacing the low beam lamp, as well as the high beam, begins by disconnecting the on-board power supply. This precedes all electrical repair work. In this case, a special switch is turned or the negative terminal is disconnected from the battery, which avoids accidental short circuits or erroneous connections during installation.
- The place where the Largus lamp will be replaced is determined. There, the rubber plugs covering the electrical components are removed, and two metal antennae are opened in front of the car owner, fixing them in the reflector. They are separated so that the used parts can come out of their seat without damaging the housing.
- Next, you need to disconnect the plugs from the wiring that was previously disconnected. Here it is worth paying attention to the order of arrangement, otherwise, during the installation of new parts, everything can be mixed up and they will have to be changed again.
- After connecting the plug with wiring to the new parts, they are mounted in place and secured with antennae. You should try not to touch the flasks with your hands, as this can lead to their rapid failure.
- If the light is dim during lighting, and the headlights flash when you turn on the headlights, then it is imperative to restore the contacts of the wires with the vehicle body. This is especially true for a marker lamp, because the fat that gets there begins to evaporate when heated and can cause ignition.
- At the end of this procedure, you need to put on the rubber plugs and secure all the parts in their places. After this, the car will be ready for use and the driver does not have to worry about malfunctions of the Lada Largus lighting fixtures.
As practice shows, in modern domestic cars, one of which is the Lada Largus, lamps with directional luminous flux are most often used. The essence of such lighting is a reliable view in front of and behind the car. At the same time, inconvenience to other traffic participants heading towards the driver or driving behind is excluded.
Washing methods and products used for it
There are three ways to flush the carburetor yourself:
- without removing the engine or disassembling it;
- by partial disassembly;
- by complete disassembly.
The first option involves adding chemically active liquids (additives) to the fuel. In other words, you need to pour a certain amount of cleaning agent into the tank and continue driving your car quietly, without wasting your time. Gasoline with an additive, moving through the fuel system, will itself dissolve and remove dirt. Of course, this method cannot be called effective, and everything that we tried to get rid of will inevitably end up in the engine cylinders.
To flush the carburetor without dismantling it, special additives are used
Flushing the carburetor by partial disassembly is the most popular type of maintenance. We will have to remove the air filter, cover, remove all elements that may be dirty, wash them and put the device back together. The efficiency of this method is quite high, and we can visually determine how clean the unit has become.
To flush, you will need to remove the air filter and carburetor cover.
Well, if you remove and disassemble the device completely, soak all its parts in cleaning liquid, and then rinse them manually and blow them with a stream of air, we will get a practically new carburetor.
Not so long ago, car owners cleaned the carburetors of their cars using liquids that can usually be found at home:
- refined gasoline;
- kerosene;
- diesel fuel;
- solvent.
Yes, they do a good job of removing various types of dirt and deposits on the internal walls of the device, especially if you have the opportunity and time to soak the necessary parts in them for a while. But today there is no need to use such means. It is better to purchase a special liquid from a car store. There are products on sale for both self-cleaning of the fuel system (filling the tank) and for servicing carburetors. The most popular and effective of them are:
Hi-Gear is a line of products for flushing the fuel system and carburetor. It has high dissolving abilities. Does not harm system elements. Available both in the form of additives and in the form of an aerosol;
- Mannol Vergaser Reiniger is an aerosol carburetor cleaner. Used for cleaning carburetors and injectors. Copes well with soot, oily deposits, and other contaminants;
- Jet 100 Ultra is a spray for quick cleaning of carburetors. It has the same properties, however, it acts faster.
Stop signal
The principle of replacement is similar to the installation of the above-mentioned lamps, but it has its own nuances. Here, first, the trunk lid is opened and its decorative panel is removed. So, in order to replace the brake light, you must first of all clear the approach to the wing nuts.
After removing them, the entire headlight is turned out, which would be very problematic to do on your own. After all, you need to bring out its upper and lower parts at the same time so that they do not become a surprise. After unscrewing the screws, access to the lamp is open. The failed part is replaced, and all the previously listed steps are performed in the reverse order.
Repair of additional rear lights or correction of Tune-Auto jambs.
I recommend reading it.
Before installing additional rear lights from “Tune-Auto” (rev.1.0) on your car, open and look at the LED boards! If on the board you see traces of cutting the “GO” track (next to the blue wire) and a soldered resistor, then this is for you. I recommend reading this bortovik. To avoid the subsequent incorrect operation of the lights, frustration, and not to disassemble or remove these lights once again!
Part 1. Sad backstory. (You can skip it!)
After purchasing the car, I decided for myself that I want to install these lights for “Trifon”!
Conceived, decided, purchased and installed! The installation procedure is covered in my bortovik on a parallel forum.
Everything worked and was pleasing to the eye. That's what I thought then. Alas, there weren’t many of these lights installed in our city, maybe I was one of the first, and I had no idea how they should work. After connecting, I checked their “operability”, i.e. in “GO” mode (side lights) they work, in STOP mode they work! What else is needed for happiness? Still done with my own hands. So I drove for more than 7 months! Without suspecting anything. But then, unfortunately, I was hit, two rear left lights, an additional one and the main one, fortunately nothing was damaged except the lights.
There was no reason to buy a new set of additional lights; looking for only one left one was hopeless! I addressed my problem to Largus Shop, they met me and sent (sold) the one left-hand lamp I needed! For which we thank them very much! Having installed this flashlight, I was immediately struck by the fact that it shines much brighter in the “GO” mode than the old one on the right. This problem was written about in Largus-Shop and they advised to contact the manufacturer Tune-Auto LLC!
Here is the letter itself written to the manufacturer (the essence of the problems was written in it): >>
I received this response from the manufacturer: >>
In general, there was correspondence, videos, photos, etc. Result: the cart remained in the same place, as did the additional lights in their place!
This is how I traveled through 2015 and all of 2021. And a few days ago I met a friend at a gas station, while we were standing and talking, the cars were parked at emergency stops. A friend of mine has a Lada Largus CROSS with installed Rev2.0 headlights (2 rows of LEDs) on one of which 2 LEDs were no longer lit! He turned on my “GO”, look at my additional flashlights, and said I want to change my Rev2.0 flashlights to my version of Rev1.0 flashlights! We approached my car, and I quietly began to flow around. The glow of my right flashlight was close to “smoldering”, while he diligently tried to wink in time with the “emergency lights”. At the same time, my left light was working properly! This was the last “drop in the bucket”!
I contacted the manufacturer on Wednesday and received recommendations for troubleshooting: solder the “GO” wire. Look at the place where the “GO” wire is soldered to the board on the short circuit, and next to the soldering points! If this does not give results, send the boards to the manufacturer! And they will either repair or send new boards to my address! They cover the shipping costs themselves! By the way, this is a huge plus for them! Everyone would support the guarantee like that! In a word: Warranty support is AT A WORTHY LEVEL!
Part 2. Cheerful. DIY repairs.
Yesterday the right light was removed! The connection has been checked (inset) - everything is normal. I connected the flashlight directly to the battery! “STOP” – the “STOP” mode works normally, the “GO” mode – “smolders”. A quick inspection for a short circuit and “soldering” the wires did not help. I figured it should be sent to the manufacturer. This did not bring me any joy. Being left without lights for 1-2-3 weeks, removing and installing “dummy” lights or old plugs, while disassembling and assembling the interior trim was not part of my plans! And somehow I didn’t see anything positive in this! Today I took it to the garage! I removed the LED board from a broken lamp! And I decided to start repairing the board myself! I decided to use the board from the broken left lamp as a standard, or use it as a “Donor”!
Dimensions
A special feature of this procedure is the preliminary dismantling of the headlight unit, under which the side light lamps are located. After this, it is necessary to disconnect the wires from the battery, which is done with extreme care.
Removing the front bumper will allow you to get to the cover that protects the dimensions. Since they come into contact with other light devices, it is advisable to carry out all procedures using sterile gloves. If any device has been touched, it must be wiped with a clean, lint-free cloth.
Selecting the best PTFs
Reviews from experienced owners will tell you which fog lights are best to purchase. Based on this information, we have compiled the most successful headlight options into a single rating:
- original products;
- product of the French brand “Valeo”;
- analogues from Taiwanese and “TYC”;
- PTF of Polish origin “Polcar”.
Now we move on to considering two options for installing and replacing fog lights. The first case is a more competent approach and involves removing the bumper, and the second option indicates an operational replacement method without dismantling the body element.
Replacing a stop largus lamp
The first part is here - www.drive2.ru/cars/lada/l...us/dim-x/journal/3159157/ Bullshit. It turned out to be complete garbage. As the hero of the famous Soviet plasticine cartoon said: “It won’t be enough!”, in this case, light.
Not a single lamp, even a converted one, gave light like an ordinary incandescent lamp. I decided to redo it again. And so we will collective farm.
Well, quite by accident I came across normal diodes for the rear light. In a store on the outskirts of the glorious city of Mineralnye Vody, there was a fairly wide range of diodes and very low prices. I took four pieces - 2 two-pin (parking brake light) and two single-pin ( rear fog light, reversing light).
The process turned out to be simple, but rather inconvenient. The plastic wings were so tight that I could barely unscrew them, I was afraid to break them.
but in the end everything seems to be fine. The flashlight came off easily, the only thing that got in the way, due to the shape of the body, was the rubber corrugation with wires that goes to the rear door.
The board is made of rather tacky plastic and is held in place by three latches, but apparently it requires gentle handling. It can be removed quite easily.
Base lamps, 1 and 2-pin. Can be removed and installed easily. The sad thing is that I haven’t found any for the turn signals (orange LEDs). They burn clearly brighter in daylight than incandescent lamps. I’m very interested in how the diode will behave in reversing lamp.
Photos will be up in the evening.
as promised - photos)))
This is what the whole thing looks like in sunlight:
for comparison, the original lamp:
although the issue with the fog lamp remains unclear. Since the diode gives directional light, the reflector remains out of use, and the whole thing doesn’t shine very well, to put it mildly...
in general, the foglight turned out to be quite sad...
although the reversing light is not much better. Apparently, you need to look for LEDs of a different type, with non-directional light.
The question is also confusing: the difference between the parking light and brake light modes, in my opinion, is quite insignificant. It’s sad...
In short, I thought hard about whether the game was worth the candle.
Price: 340 ₽ Mileage: 16400 km
Lada Largus Fully stock. Name is Laura › Logbook › A story about how I filmed a torpedo.
Sooo! After Laura tried to kill us, namely freeze us, refusing to turn on the stove in the frosty winter, it was decided not to put off finding the problem. After reading Drive2, just some information on the Internet, I just wanted to remove the motor, because this simple method through the Kama Sutra solved the problem for many, but something inside me said that the motor was working and the problem was before it. Yes, and they changed it for me under warranty, and I can’t believe that 2 motors have the same malfunction in the form of a self-correcting defect, but I called everything before the motor three years ago, the resistor and control unit are normal. Taking the electrical circuit, I found an electric motor on it, which is connected through a kind of extension cord