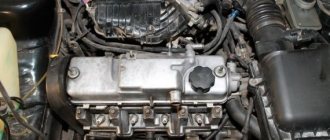
The valve mechanism refers to the engine's gas distribution system. The efficiency of the power unit depends on its correct settings. Cars of the Lada Largus family are equipped with Renault engines with one gas camshaft and 8 valves - the K7M engine - and with two camshafts and 16 valves - the K4M engine. An important parameter for adjusting valves is the gaps between them and the camshaft cam. They must strictly comply with technical regulations. Sixteen-valve K4M engines are equipped with hydraulic compensators, and they do not provide the ability to adjust the clearances.
Checking and adjusting thermal clearances in the valve drive (8V) Lada Largus
Tools:
- Open-end wrench 10 mm
- Set of flat probes
- adjustable wrench
Notes:
We carry out the work when characteristic clicking knocks appear in the area of the cylinder head with a frequency half the speed of the crankshaft. Basically, knocking occurs as a result of wear of valve mechanism parts and the associated increase in thermal clearances in the valve drive.
Knocks can be heard clearly when the engine is idling.
It is also recommended to check the gaps when the car has driven more than 100 thousand km.
We carry out the work on a cold engine.
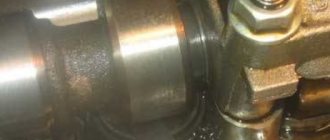
Valve arrangement in the cylinder head
1 – row of intake valves; 2 – row of exhaust valves.
1. Remove the cylinder head cover.
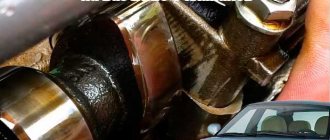
2. We remove the upper timing cover and, following the mark on the camshaft gear pulley, set the piston of the first cylinder to TDC at the end of the compression stroke.
Note:
The cylinders are counted from the flywheel.
3. Then we check one by one and, if necessary, adjust the clearances in the drive of the intake and exhaust valves of the 1st cylinder. When checking (in this position of the crankshaft and camshaft), the heels of the rocker arms of the indicated valves should face the backs of the heads - the cylindrical parts of the camshaft cams. In this case, the rocker arms can swing on the axis within the clearance in the drive.
4. Using the flat feeler gauges from the kit, we check the thermal gap between the ends of the valve stem and the adjusting screw.
The gap should be within 0.2 (+0.05 -0.075) mm for intake valves and 0.4 (+0.05 -0.075) mm for exhaust valves. The feeler gauge should move in the gap with little effort.
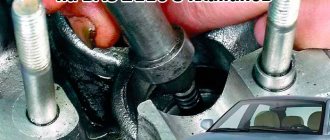
5. If the gap size (thickness of the feeler gauge) differs from the required value, use a 10 wrench to loosen the tightening of the lock nut of the adjusting screw, holding the screw by the flats (width - 3 mm) with an adjustable wrench.
6. Then, by rotating the adjusting screw, we set the desired gap.
7. Tighten the locknut while holding the adjusting screw with a wrench. We check the gap again and repeat the adjustment if necessary.
8. Consistently turning the crankshaft clockwise each time by the bolt securing the auxiliary drive pulley 180°, we check and, if necessary, adjust the thermal clearances in the valve drive of the 3rd, then the 4th and then the 2nd cylinders.
9. After adjusting the thermal clearances in the valve drive, install the removed parts in the reverse order.
The article is missing:
- High-quality photos of repairs
- Photo of the instrument
Installing a new timing belt
- We get a fresh timing belt kit.
- We install the tension roller in place.
- There are two marks and arrows for the direction of rotation on the timing belt; align the bottom mark with the mark on the crankshaft sprocket.
- Reinstall the sprocket along with the belt.
- At the same time, put the belt on the camshaft sprocket, aligning the top marks and the tension roller. Make sure that the right branch of the belt is tensioned.
- We tighten the tension roller, always following the arrows, until the marks on it match.
- Tighten the nut.
On some forums I came across a grief-stricken adviser who said that you need to tighten the belt a little and it will stretch over time and everything will fall into place. Do not give in to provocations, if there is a certain moment of belt tension, you must adhere to it!! Remember that an untensioned belt leads to rapid wear of the teeth and, as a result, it jumps. An overtightened belt means increased wear on the pump bearing and significantly reduced reliability.
Thermal clearance of the valve and its adjustment
- We turn the crankshaft clockwise two turns and look at the tension, if we tighten anything. We install all parts in the reverse order of removal. Don't forget about antifreeze. Well, that's all guys.
Adjusting thermal clearances in valves
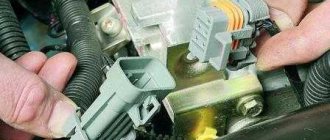
First, select a level area on which to place the car. Next, use a jack to release one of the front wheels and engage fourth speed. In the engine compartment, remove the air filter, first disconnecting the pipes from it. Next, remove the spark plug high-voltage wires, remove the connector connected to the ignition module and carefully move all the wire harnesses towards the passenger compartment. Be sure to wipe the valve cover: this must be done so that any dirt on it is not transferred inside the mechanism. If you think that the ignition module is bothering you, remove it too. Further steps:
- Transferring the pistons to top dead center (TDC). To achieve this, spin the freed front wheel so that the Latin letter “F2” appears on the edge of the camshaft drive gear. In this case, the piston of the 1st cylinder (you need to count from the flywheel) will be in the TDC position, then both the intake and exhaust valves will be closed.
- Arm yourself with 0.2 and 0.4 mm probes. Using the first of them, check the valve operating on the inlet, the second - on the outlet. The feeler gauge should fit into the gap between the valve and the adjusting screw with little force. If this is not the case, the mechanism should be adjusted.
- Take pliers and tighten the adjusting nut with them. Unscrew the locknut with an open-end wrench to “10”. Achieve the required gap and secure it with a nut.
- The order of adjustment for cylinders is: 1,3,4,2. That is, the rocker should touch the camshaft cam within the smallest radius when viewed from the center of rotation.
- After completing the procedure, carry out a control check of the gaps and, if necessary, adjust those that do not meet the standard.
Adjusting valves on Lada Largus
What is valve adjustment? This is an increase or decrease in thermal clearances between the camshaft cam and the part of the mechanism that opens the valve.
If the gap is larger or smaller than necessary, the engine will not be able to operate at full capacity. Because of this, parts will wear out faster, fuel consumption will increase and traction will deteriorate.
TIP: On the Lada Largus you need to adjust the valves every 100 thousand km. mileage If the car runs on gas, then the valves need to be checked more often - every 50-70 thousand km.
INTERESTING: The correct thermal gap is extremely important because metal expands when heated. The valves lengthen slightly as they warm up. If changes in size are not compensated, the combustion chamber loses its tightness.
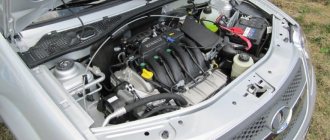
Engine characteristics
The initial version of the 1.6 liter engine with a power of 105 hp. With. was designed for AI-92 fuel. After the requirement to increase the environmental standard to Euro-5, some adjustments were made to the engine design, which is why the number of horses was reduced to 102. However, the Largus 16-valve engine did not undergo any major changes. The eight-valve version of the power unit initially produced 87 hp. s., and after the eco-standard - 84 l. With. As a result, the Romanian-made engine was replaced with a domestic version, maintaining the volume of 1.6 liters. More details about the motors:
- LADA Largus 8-valve. The initial model of the power unit was installed from a Renault K7M with an output of 84 hp. s., as stated earlier. The only difference from the similar K4M is the cylinder head. Later, it was decided to replace the engine with a domestic version, using the VAZ 11189 as a basis with a torque of 140 Nm and 87 hp. With. Already on Largus under the B0 platform, French engineers redid the engine mounts: from the body to the subframe.
- LADA Largus 16-valve. Consists of 2 camshafts with a cast iron block, as well as an aluminum cylinder head. The K4M model is a four-cylinder power unit with a hydraulic compensation system that does not require valve adjustment. It is distinguished by the reliability and durability of the timing belt.
Based on this, on the Lada Largus, valve adjustment of the 8 valve engine is still required, unlike the 16 version, which has a hydraulic compensator.
What happens if you don't adjust the valves?
The main noticeable consequences of incorrect clearances are increased fuel consumption, poor traction and noisy engine operation.
Due to incorrect clearances, the load on the valves and catalyst increases. The valves cool less well and the engine does not operate at full capacity.
Increased and decreased thermal gap
The thermal gap may increase or decrease over time.
With an increased thermal gap, the camshaft hits the valve mechanism. The valves do not close completely and at the wrong time. Because of this, not all of the fuel-air mixture burns, and the engine produces noticeably less power.
With a reduced clearance, the valves do not close tightly, and the combustion chamber ceases to be sealed. Because of this, compression drops. The valves cool less well and may burn out over time. The load on the catalyst also increases.
In both cases the motor does not work properly. Fuel consumption increases, engine power decreases and the load on parts increases.
How do you know when the valves need to be adjusted?
Adjusting the valves is a standard procedure. We recommend that Lada Largus owners contact the service every 100 thousand kilometers if the car runs on gasoline. If gas equipment is installed, then you need to check the gaps more often.
INTERESTING: The main sign of a changed thermal gap: the “clattering” of an unheated engine.
TIP: In critical cases, the “clicking” does not stop even after warming up. This means that the gaps have already changed too much and you need to urgently contact service.
If the engine begins to run louder than usual, then first of all you need to listen to the valves. Quite often, it is the changed thermal clearances that explain the increased noise.
How are valves adjusted?
The procedure takes approximately one and a half hours. During this time, the technician will measure the gaps and adjust them if necessary.
- Remove the valve cover.
- We measure the gaps with a feeler gauge in 0.05 mm increments.
- We adjust thermal gaps.
- Clean the cover and space for the gasket.
- We install a new gasket and put on the cover.
- We tighten the cover in 2 stages with a torque wrench.
- We check the operation of the engine.
In addition to adjusting the gaps, it is important to clean the surfaces and seal the valve cover tightly. Otherwise oil will leak.
After adjusting and installing the cover, it is tightened in 2 stages with a torque wrench. First with a load of 2 Newton meters, then with a load of 10. Thanks to this, the lid stands evenly, without distortions or deformation of the gasket.
Adjusting valves in Logan-Shop St. Petersburg takes only an hour and a half. We recommend periodically listening to a running, cold engine and contacting service as soon as you hear a “clunking” sound. This way you will significantly extend the life of the valves, catalyst and engine as a whole.
Why should you choose the Engine Comtrans car service?
You can find many well-equipped car repair shops. In addition to modern special tools, diagnostic and repair stands, we can boast of experienced craftsmen. The mechanics completed an internship and thoroughly studied the features of the VAZ and Renault-Nissan engine line, as well as their maintenance, setting the gas distribution mechanism and adjusting the valves.
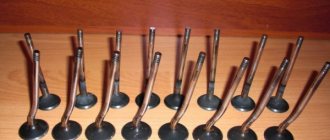
Valve replacement includes:
- dismantling the head, removing damaged valves;
- removing carbon deposits, replacing, if necessary, damaged parts;
- grinding in new valves using a special paste;
- washing the cylinder block to remove metal shavings, abrasive particles, and lapping paste;
- assembly of the block with replacement of fluids, gaskets, timing kit (belt, rollers), valve stem seals;
- valve clearance adjustment.
When performing internal combustion engine repairs, we strictly follow the manufacturer's recommendations and use approved technical fluids. Our own spare parts warehouse allows us to begin repairs immediately, without waiting for parts to be delivered. You can find out prices and get more information by phone.