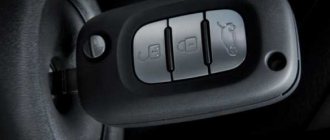
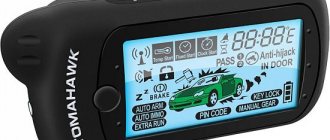
Key to Lada Vesta
The Lada Vesta car comes with two ignition control panels: one is the main one, the other is a spare one. The basic (flip) remote control has three buttons on its body. The first two are responsible for the locking and unlocking options, and the third button is responsible for the functionality of the trunk. Spare ignition keys for Lada Vesta have a disadvantage: there is a delay in the door signal when pressed. The buyer will use the second remote control in case of loss of the main one. The spare ignition key for Lada Vesta does not have the option of opening and closing the car and is intended for use in a critical situation.
Key to Lada Vesta
How to change the battery in the Lada Vesta ignition key
Buttons consume energy, so you need to remember the battery charge and change it in time. The first sign of low battery will be a slow response when pressed. The Lada Vesta flip key is synchronized with a standard battery. To change it you need a screwdriver. The remote control opens with the blade extended, otherwise the case and microcircuits can be damaged. The tool is inserted into the hole in the center line of the case and with a simple movement separates the remote control into two halves. After changing the battery, you need to use a light snapping motion to assemble the product.
How to disassemble a Lada key
For Lada Vesta/XRAY: open the key body by unsnapping the latches around the perimeter using a thin slotted screwdriver.
For Lada Largus: unscrew the fastening screw (Phillips screwdriver), and then open the key body, unclicking the latches around the perimeter using a thin slotted screwdriver.
For Lada Priora/Kalina/Granta: unscrew the fastening screw (Phillips screwdriver), and then open the key body, unclicking the latches around the perimeter using a thin slotted screwdriver.
The process is also shown in the video:
Let us remind you that if after replacing the battery the standard alarm still does not work, read these instructions. By the way, do you know how to make a flip key for a Lada yourself?
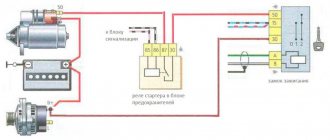
LADA VESTA. ELECTRICAL EQUIPMENT OF THE LADA VEST A - REMOVAL / INSTALLATION OF MAIN UNITS AND PARTS
1 GENERAL DESCRIPTION OF THE SYSTEM, DEVICE AND OPERATION FEATURES
The electrical equipment is made according to a single-wire circuit - the negative terminals of sources and consumers of electricity are connected to the car body, which acts as a second wire. Rated voltage 12 V.
The vehicle's main power circuits are protected by fuses. Before replacing a blown fuse, it is necessary to find out the cause of its blown and eliminate it.
Attention! When repairing a vehicle or electrical system, it is necessary to disconnect the earth wire terminal from the battery.
When operating a vehicle and when checking the electrical circuit of the vehicle, it is not allowed to use fuses that are not provided for by the design of the vehicle.
LADA VESTA.
BATTERY – REMOVAL / INSTALLATION Removal
Place the car in a working place, apply the parking brake, turn off the ignition, raise the hood.
Before disconnecting the terminals from the battery terminals, you must:
– wait until the electric fan of the engine cooling system stops;
– wait until the end of the data saving procedure in the ECU (1 min).
Do not remove the terminals from the battery terminals while the ignition is on, as this may cause errors in the ECM or lead to failure of electrical components.
The reliability of the visual battery status indicator is not guaranteed by after-sales service, so the visual indicator should not be used as a means of monitoring battery status.
Loosen the tightening of nut 7, Figure 2-1, of the bolt securing the battery ground wire terminal (wrench 10).
How to open a Lada Vesta if the key is left inside
It will be useful for the car owner to learn how to open the door of a Lada Vesta without a key if its only copy remains inside a locked car. The main difficulty here is to unlock the doors without damaging the locking mechanism and the upholstery of the car. Today, several methods are known for accurately opening locks with improvised objects.
Using a tennis ball
In discussions, you can come across a description of a technique for breaking into a car with a tennis ball with a hole. The trick is to use it as a pump to create a powerful air draft that will lift the door flag and open the car. In fact, the described method is nothing more than a myth that came from cinema.
The procedure for converting the ignition key into a switch
The keys on various configurations and models of Lada differ in shape, however, the process of independently converting them into switchgear ones is quite simple. You will need to purchase a blank switch key, after which a copy of the key tip is made. The key chip is then trained to work with the alarm system installed on your car.
When choosing a flip key without a chip, you should take into account the dimensions of the workpiece, since its board should easily fit inside the case. If the standard key board breaks or wears out, it is better to buy a flip key with a chip.
Sometimes, to make a key groove, you have to remove the tip, for which the pin at the base of the key is squeezed out. But there are cases when such a procedure may require disassembling its body. The key learning process has already been described above.
Key programming instructions for Lada Kalina, Priora, Granta, etc.
Carrying out the training procedure leads to the following consequences:
- the engine control controller activates the anti-theft function if it has not been activated;
- the system changes its password to a new one chosen at random;
- a new system password is written into the training key;
- all remote controls that were previously trained are erased from memory;
- The codes of those remote control units that were trained in this training procedure are stored in memory.
The training procedure is applied in the following cases:
- activating the anti-theft function in the controller (for example, in a new car or replacing a faulty controller);
- erasing old and training new remote controls if lost;
- changing the system password if the owner admits that his system password may have been read (for example, when selling a car from one owner to another)
- remote control training when replacing a faulty immobilizer with a new one.
Only new remote control units or those that were previously trained using the training key used in this training procedure can be trained. It is impossible to learn a remote control key from another car into your car.
Please note: Due to the importance of the training key, it is not recommended to use it for everyday use and should be kept in a safe place. Before starting the training procedure, fill the car with at least 10 liters of gasoline, so as not to get confused by squeaks
Before starting the training procedure, fill the car with at least 10 liters of gasoline so as not to get confused by the squeaks.
- Close all doors. Turn on the ignition with the training key and wait in the on state for at least 6 seconds.
- Turn off the ignition. The indicator light in the warning lamp unit should flash quickly (at a frequency of 5 times per second) while the learning procedure is being carried out correctly. If the lamp stops flashing quickly, it indicates an incorrect operation, an out-of-time interval, or a malfunction. Remove the training key from the ignition switch.
- While the warning lamp is flashing (about 6 seconds), insert the remote control and turn on the ignition. The immobilizer buzzer should emit three beeps. If the buzzer does not sound and the indicator has stopped flashing, this means: - the time interval of 6 seconds has been exceeded and it is necessary to repeat the learning procedure, starting from step 1; -immobilizer is faulty
- Wait 6 seconds for the buzzer to emit two more beeps and turn off the ignition.
- If it is necessary to train the second remote control, then you should perform steps 3...4 again, using the second learning remote control to turn on the ignition. If not, continue from step 6.
- After turning off the ignition for no more than 6 seconds, while the indicator is flashing, remove the remote control, insert the learning key and turn on the ignition. The buzzer should beep three times. Wait 6 seconds until the buzzer beeps two more times.
- Turn off the ignition without removing the training key, wait 6 seconds until the buzzer sounds a single sound signal. The indicator should flash twice as fast. If the sound signal does not sound and the flashing indicator stops, you should return to step 1 and repeat the learning procedure. If a repeated failure occurs when performing step 7, this means that the ECM was previously trained with a different key, in which case the controller should be replaced.
- After the buzzer gives a single sound signal, no later than 3 seconds, turn on the ignition for 2...3 seconds and then turn it off (after turning on the ignition, the buzzer will sound three times and the indicator will stop flashing). The hazard warning lights should flash and the car horn should beep.
- Remove the learning key. Wait with the ignition off for at least 10 seconds. Insert the working key and turn on the ignition. Wait 6 seconds, if the indicator does not flash, test start the engine, the engine should start. If the indicator flashes, turn off the ignition and wait at least 10 seconds. Turn on the ignition. The warning light should not flash and the engine should start. If, after turning on the ignition, after 6 seconds the indicator lights up with a constant light, then the learning procedure must be repeated, starting from step 1.
When choosing a flip key without a chip, you should take into account the dimensions of the workpiece, since its board should easily fit inside the case. If the standard key board breaks or wears out, it is better to buy a flip key with a chip.
Sometimes, to make a key groove, you have to remove the tip, for which the pin at the base of the key is squeezed out. But there are cases when such a procedure may require disassembling its body. The key learning process has already been described above.
Soundproofing the interior floor of a Lada Granta
Adjusting the trunk lid closure
Fuses and relays Lada Granta (mounting block)
How to replace the battery in a Ford S-Max key - DVRs All about cars
To do this, press any button on the key. I didn’t know that when replacing a battery there could be such nuances and the way to solve it is to change the position of the key.
Start of sales of the new Lada Vesta Cross station wagon: Review of the new Lada 4x4 Urban model of the year. Could a Chevrolet Cruze appear in Russia?
How the body of the Lada Grant liftback will change this year. Lada Largus Cross of the year in a new body configuration and prices: We change the battery in the key for Ford Focus 2 with our own hands. Contents 1 When is it necessary to replace the battery in the key for a Ford Focus 2? Insert a flathead screwdriver and slowly turn counterclockwise until the key comes apart. Using your hands or using the same screwdriver, remove the half with the Ford emblem. There will be a microcircuit in one half, and a battery in the other.
It should be pulled out and replaced. Assembly is carried out in reverse order.
Insert a screwdriver into the groove and separate the two parts of the key. The part on which the logo is located must also be disconnected.
This is where the battery is located. It should be taken out and a new one installed. This completes the work. After replacing the battery, certain problems may occur. This means that the key needs to be reprogrammed. You must turn the ignition key to position 2 four times in a row. It will sound in 10 seconds.
How to determine if the battery is dead
For Lada Vesta, Largus and XRAY cars. If the clarity and range of the remote control decreases, the battery must be replaced.
For Lada Priora, Granta and Kalina cars. If the supply voltage of the remote control is within normal limits, then each time you press any button on the remote control, the indicator lights up with a short flash. If it lights up with two short flashes or does not light up at all, then the battery should be replaced.
Read also: BMW 1990 photo
Replacement in a switch key
Using a flat-head screwdriver, you need to separate the two parts of the key. The part on which the company logo is printed contains the battery itself . It also needs to be separated into two parts using a screwdriver. There will be a microcircuit in one half, and a battery in the other. It should be pulled out and replaced. Assembly is carried out in reverse order.
Replacement in chip key
Insert a screwdriver into the groove and separate the two parts of the key. The part on which the logo is located must also be disconnected . This is where the battery is located.
It should be taken out and a new one installed. This completes the work. Assembly is carried out in reverse order.
We take out the old battery and install a new one.