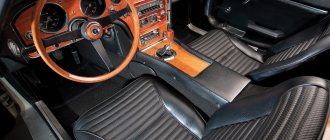
On many cars, the front panel has a console in the middle part, which rests on the floor and serves to accommodate a wide variety of equipment. The so-called beard of the VAZ 2107 model is a fairly functional interior detail. The central console is an excellent stylistic solution for the developers of the VAZ 2107 car interior, and it is also very functional. Tuning enthusiasts often make this unit with their own hands and give it an original look. Additional elements are added to the design that increase the usefulness of this device and give it uniqueness. They often put on the beard:
- Watch.
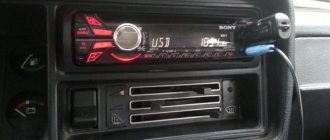
- Radio or other multimedia device.
- Dimmer switch for instrument panel lighting.
- Switch block for electric fan, exterior lighting and fog lights.
- At the bottom of the gear lever there is a convenient pocket for small items.
Materials and interior preparation
Making this unit yourself is usually done from a plywood sheet with a thickness of at least 6 mm. For exterior finishing, a wide variety of materials can be used, mainly leatherette, matched to match the upholstery of other interior parts. Advanced tuning enthusiasts go further; they cover the front panel, the inner surface of the doors, and some other parts with this material.
To make the center console for a VAZ 2107 car from the materials listed above, you use the following tools yourself:
- electric jigsaw;
- battery drill or screwdriver;
- angle grinder;
- tape measure, plumbing corner, pencil;
- assembly gun for glue;
- furniture stapler.
The beard, made by yourself, is installed in place of the standard unit. It must be carefully dismantled in order to free up a platform for a homemade console.
The procedure for dressing a beard
Each of the craftsmen develops their own design of this element for the VAZ 2107 car, allowing it to achieve its maximum uniqueness. A beard is a spatial structure of complex shape, made up of flat parts. When making patterns for the side surfaces, it is recommended to use hard cardboard. This will make it possible to achieve maximum precision in the manufacture of individual parts.
The shape of the central console of the VAZ 2107 car, which is made by hand, can be completely different. Most often, craftsmen prefer to combine it with a box that is installed between the front row seats. This part houses the handbrake lever.
How to Remove the Dashboard of a VAZ 2107 Video ~ AUTOTEXNIKA.RU
Home page » How to Remove the Dashboard of a VAZ 2107 Video
14.09.2018
We independently remove the dashboard of a VAZ 2107
For a novice car enthusiast, removing the toolbar may not seem too difficult. But this impression is deceptive. Before the dashboard
The VAZ 2107 will be completely removed; we will have to do a lot of manipulations, which we will tell the reader about in this article.
The most common reasons for dismantling
- One or more devices failed.
- The panel joints began to creak during the trip, and the car owner decided to glue them from the inside to eliminate this annoying creak.
- Several light bulbs burned out on the panel.
- The speedometer cable has become unusable and requires urgent replacement.
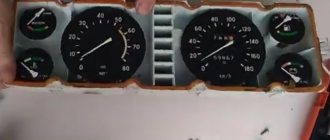
How to remove the instrument panel and shield VAZ 2107
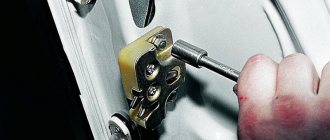
The car hood opens and the negative terminal is removed from the battery. Using a screwdriver, the dashboard shelf and glove box housing are unscrewed and removed. The two connectors that supply the glove lights in the glove box are now disconnected. Light bulb power connectors are disconnected
The sub-instrument panel is carefully clamped with a flathead screwdriver on the lower right edge and its clips are removed from the grooves, after which they are removed along with all devices. The additional panel can be removed using a screwdriver
Behind this panel there are connectors from which the lighting of devices, clocks, warning lights and the cigarette lighter are activated. All this is disabled
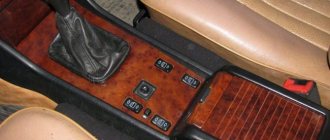
Auxiliary connectors are manually disconnected A flathead screwdriver is used to push out and push out all the switches located near the shift lever. Switch connectors are disabled.
There are two screws under the switches. They are unscrewed with a screwdriver. The screws are tightened with a Phillips screwdriver. Using a 10 wrench, the upper bolts holding the center console are unscrewed. After this it is deleted. The center console is removed manually
A Phillips-head screwdriver is unscrewed using the self-tapping screws that hold the lower protective cover of the steering column, after which it is removed along with the upper half of the column housing. The tips on the stove sticks are pierced with a screwdriver and then removed by hand. The deflector channels are located next to them; they are also removed manually. After this, the 4 screws that hold the cover on the heating system are removed and it is removed.
A Phillips head screwdriver is used to remove the screws holding the furnace control unit to the dashboard. This opens up access to the screws that hold the screen with the devices. The right edge of the flap is pulled out so that an arm that passes through the gap is formed. After this, the fastening nut of the speedometer cable is unscrewed behind the valve, all other wires are disconnected. The instrument panel has been removed. The shield is removed from its original position
Provides access to the upper mounting nuts of the instrument panel. They are unscrewed with a 10 mm carabiner wrench. The panel is then removed. The instrument panel has been completely removed. Reassemble in reverse order.
Important points
- It is recommended to label wires and connectors before disconnecting them to make assembly easier. These marks are easy to apply with a black marker or felt-tip pen (since most of the connectors are located under the white dashboard).
- To remove
the upper part of the steering column protective cover, it is necessary to be precise, since you can damage the rubber ring on the ignition switch (it gets caught on the edge of the housing and breaks easily). - When removing the optional panel, do not tilt the screwdriver too far; the latches that hold this panel in place are plastic and break very easily.
As can be seen from this article, removing the dashboard for the VAZ 2107 task is both labor-intensive, but feasible. Main.
Follow the instructions above and do not use too much force when removing: the panel material, despite its apparent strength, breaks quite easily.
Materials and tools
Console tuning usually consists of making a new VAZ 2107 beard, on which mounting locations for switches, indicators, control devices and other equipment are pre-provisioned. The most affordable material for making your own beard is plywood. The thickness must be at least 6 mm, otherwise it will not be possible to achieve the required rigidity of the product. For finishing, artificial leather is most often used, matched to the color of the interior elements, or, more recently, carbon fiber of a suitable color.
Sometimes tuning the beard of a VAZ 2107 is accompanied by a comprehensive redesign of the interior design with the replacement of finishing materials for the door trim and trim of the front panel with carbon fiber or leatherette. To make a tuned VAZ 2107 beard, in addition to finishing materials, the following devices and tools are needed:
- jigsaw;
- electric drill or cordless screwdriver;
- “grinder” (angle grinder);
- locksmith corner;
- pencil;
- ruler (roulette);
- glue gun (tube of glue);
- furniture stapler (for fastening leatherette).
The new console (beard) is installed in place of the standard one, which should be dismantled to free up space and take the measurements necessary to create the workpiece drawings.
Making a beard VAZ 2107
Depending on your skills, imagination and personal preferences, you can develop an individual console (beard) design or implement a ready-made solution by copying the product you like. A beard is a complex spatial structure made from flat parts. To make it, you need patterns, which are best made from hard cardboard. Solid material allows for high precision manufacturing of console parts. If you are not entirely confident in your skills, you can first make a cardboard mock-up of the console. This will ensure the drawings are correct and check how well the new beard fits into the installation location.
The design of a do-it-yourself center console can be very diverse. Typically, the design includes a spacious box placed between the driver and front passenger seats (where the gear shift and handbrake levers are located). It can accommodate compartments for small items, appliances, switches or just coasters for glasses.
After the patterns are made and the console parts are marked, they are cut out of plywood with a jigsaw. It is better to connect parts using self-tapping screws and glue. The first will allow you to fix the elements motionlessly while the glue sets. This is the easiest and most reliable way to connect console parts.
The finished beard is covered with leatherette, fabric or carbon fiber. Glue and furniture clips are used to attach finishing materials.
When the glue dries, all that remains is to install the new console in place and secure it. Before mounting it, you should fix some of the instruments and switches, which will be difficult to install if the beard is fixed in its regular place. However, this depends on the design features of the tuned console. Sometimes it is easier to attach switches, instruments and devices after the console is fixed.
On the front panel of the VAZ 2107 in the middle there is a console (beard), on which various equipment is placed (clock, radio, switches, indicators). This part of the car interior is often referred to by drivers as the “beard”. Often car enthusiasts pay special attention to this console, making it original and at the same time increasing its functionality.
Beard tuning includes adding additional devices and elements that make it more informative and useful:
- Car radio.
- Dashboard lighting control.
- USB sockets for charging smartphones and tablets.
- Watch.
- Switch for fog lights, exterior lighting, heated rear window.
- Vehicle control instruments (ammeter, voltmeter).
- Pocket for small items near the gearshift lever.
Removing the dashboard of VAZ 21074
If you are the owner of a VAZ2107 car (injector), then it is quite possible that one day you will be faced with the need to remove the instrument panel. It's not difficult at all, especially if you have our video at hand, which clearly demonstrates the whole process.
There is only one bolt for fastening, which greatly simplifies the procedure. Accordingly, we unscrew it first. Naturally, power and wires for your car’s devices are supplied to the panel.
Pulling off the socket, we disconnect all kinds of plugs and devices.
Everything is simple and elementary, pay attention to the video
- We are in social networks:
Select it and press Ctrl + Enter
The car received a three-door body of frame-panel construction. At the same time, the supporting cage was welded from steel pipes with a rectangular cross-section. ABS plastic is used to form the outer panels.
The development of the model was carried out by designers of a private company engaged in the mass production of elements made of plastic and composite materials.
An interesting point is the fact that the prototype of the SUV was created back in 2000. But due to lack of funding, the project was postponed indefinitely. It was decided to resume the project in 2021. Moreover, the designers had to almost completely redo the original version of the machine.
Although Chinese cars are popular among Russian car enthusiasts, they only buy them with great caution. Russians are afraid that great difficulties may arise when maintaining such a car.
So, what are the most common problems that bother our car enthusiasts?
Problem #1 is rust on the body. Unfortunately, used Chinese cars suffer from corrosion. If the car is about 5 years old, you can find a lot of rust marks. Therefore, if you choose a Chinese car, do not be lazy to lift it on a lift and carefully inspect the bottom, because this is where the main rust spots are most often hidden.
Problem #2 - electronics. Despite the fact that the equipment of Chinese cars in terms of electronics is not so rich and complex, these electronic systems can still bring their own troubles to the car owner. The most common electronics problem is poor contact. Most often this happens because the metal oxidizes over time and stops passing current.
Therefore, when choosing a car for yourself, pay attention to how well all the electronic systems of the car work, so that you do not encounter problems with their repair in the future. Problem #3 - perceptions of quality
The build quality and materials of Chinese manufacturers are very different from their competitors. The most important thing is that it is low-quality plastic, which is very hard and brittle. This type of plastic is very scratchy and wears out quickly.
Problem No. 3 - perceptions of quality. The build quality and materials of Chinese manufacturers are very different from their competitors. The most important thing is that it is low-quality plastic, which is very hard and brittle. This type of plastic is very scratched and wears out quickly.
The leatherette in the cabin is also not particularly durable - it cracks quickly. And in general, if the car is about 5 years old from the date of operation, then you should not expect the interior to be intact as a whole.
Problem #4 - spare parts. No matter how strange it may sound, “Chinese” spare parts are produced for Chinese cars. It seems that there will be a lot of details, but alas, this is not the case. Consumables can be found without problems, but everything else needs to be ordered and there is a long wait. And if you want to change a car interior part, you will have to directly search for and order this part from China.
Problem #5 - subsequent resale. Perhaps the most unpleasant story is the further resale of the car. Not everyone will want to purchase a Chinese car for further use, even with several owners in its history.
So the conclusion emerges by itself - before purchasing a used Chinese car, think about whether you can maintain such a vehicle in the future.
Tools and materials
Tuning consists of making a new beard, on which it is necessary to provide in advance the mounting locations for indicators, switches, control devices and other equipment. The most affordable material for making a beard with your own hands is plywood. The thickness must be chosen at least 6 mm, otherwise the product will not be very rigid. To trim the console, artificial leather is most often used; it is matched to the color of the interior, or carbon fiber of a suitable color.
Often, tuning the beard of a VAZ 2107 is done by covering the front panel and doors with leatherette or carbon fiber. To make a customized beard, you will need the following tools and equipment:
- pencil;
- locksmith corner;
- roulette;
- jigsaw;
- grinder;
- drill or screwdriver;
- glue gun;
- furniture stapler.
The new beard is installed in place of the old one, the old console is dismantled to make the measurements necessary for the workpiece.
Changing the torpedo
Some drivers are not satisfied with the appearance of the torpedo on the VAZ 2107. Sometimes this element from the “five” may be installed on the car. In this case, a purely practical inconvenience is added to the unpleasant appearance. You have to close the glove compartment with a universal “lock”, or rather, seal it with tape. Otherwise it will constantly open. Therefore, you can change the torpedo.
Of our models, the best fit is a spare part from a VAZ 2115. You just have to use polyurethane foam to seal small non-joints. Of the foreign cars, the best fit here is a torpedo from a BMW E30
. She will look much more advantageous.
There is another option, install a torpedo from a Toyota Camry
.
It is slightly wider than the standard part. Therefore, for a more accurate installation, you will have to trim the torpedo a little from the bottom on the sides. But even in this case, it will interfere with the window regulators. So get ready to install electric lifts right away. This will be the best option. You will also have to struggle with installing the steering wheel cover.
The standard cover will not fit into the steering wheel opening on the BMW dashboard. Therefore, craftsmen usually perform adjustments. Some people cut the panel, but it is much easier to cut off the excess from the casing. It is better to use standard mounts from the original torpedo, only they are slightly bent. Often the torpedo can sag downwards, so it is advisable to immediately provide support.
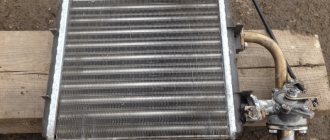
Connecting the stove
. Many drivers cannot connect the stove. The problem is that the air ducts do not match. Therefore, you will have to make special adapters. To do this, you can use air ducts from the Gazelle. All that remains is to adjust them a little and secure them. It is best to use a cable from the heater from BMW. It is much easier to connect it to the stove than a native Zhiguli to a new torpedo.
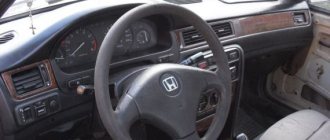
The VAZ 2107 is distinguished by a rather modest and simple, by today's standards, interior design. Therefore, car owners do their own tuning, making the appearance bright and individual. Tuning the instrument panel is probably the first way to improve its discreet and simple appearance.
Why is the VAZ 2107 dashboard given special attention when tuning? Precisely because passengers, including the driver himself, pay attention to the dashboard during the trip. Therefore, tuning the interior should begin with refining the instrument panel
Making your own beard
A beard is a complex structure; it is made of flat parts. To make them you need to make patterns; it is best to make them from cardboard. It is necessary to achieve high precision of the console parts; rigid cardboard is quite suitable for this. If you are not confident in your skills, first make a mock-up of the console from cardboard. This will allow you to make sure that the drawings are made correctly and to estimate how the new beard will fit into the installation site.
After making the pattern, mark the details of the beard and cut them out of plywood with a jigsaw. All parts are connected using glue and screws. The latter will allow you to fix the console elements until the glue sets. This is the most reliable and easiest way to connect beard parts.
After the beard frame is ready, it is covered with carbon fiber, leatherette or fabric. For their fastening, finishing materials, furniture stapler and glue.
After the glue has dried, all that remains is to install the new console in place of the standard one. Attach switches and devices and secure.