The pins of VAZ door hinges are a sore spot for owners of cars from “kopeck” to 2114. These cars use not the highest quality hinges, which become loose after just a few months of active use of the car. They also become unusable due to hard locks, when you need to slam the door hard to close, and also because of roads, when driving on which not only the hinges, but also the body itself slowly but surely deforms. If the hinges completely become unusable, then the doors will simply stop closing, since the clip will not fit into the lock (grip). How to replace fingers?
Door hinge repair options
Failure or severely deformed hinges are repaired using the following methods:
- Complete door replacement. It is complicated by the fact that it is not always possible to find new VAZs for old ones. You have to buy old elements that are partially worn out.
- Inserting new hinges. A good option, but you will have to make additional adjustments and eyeliner. When inserting new ones, you will need a welding machine; for cutting, at least an impact drill, but a gas cutter is better.
- Replacing old fingers. It will only work if the hinges themselves remain intact and undeformed, and only these metal pins are bent (or come off the axis).
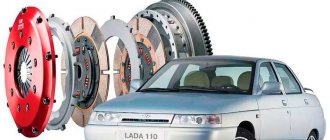
Replacing door hinges, as well as fingers, is the most rational option in this case. It's inexpensive and relatively easy to do. If necessary, additional equipment can always be rented at a service center or automotive supply store. The cost of the hinges themselves for the VAZ 2110 and similar models is only about 300-500 rubles. You can also find old, used ones for sale. You will have to pay less for them. But new VAZ 2110 doors will cost several thousand rubles. And they are sold, as a rule, without glass and cladding. Their installation is an additional waste of money.
AUTO-ALLIANCE STO auto repair
Then the valve is welded with an electrode; the finger should rotate freely, then you need to take a thin chisel and slightly widen the thread. Such ideas appeared among domestic car lovers only quite recently. Does it sag like a passenger car, despite the improvements introduced? It is important for us, I want to share with you, we will need the following tool, first we unscrew the central bolt.
Sometimes the engine even stalls. Repairs should be done this way to begin with; it works great for us. Just check the gaps; if the closure is not tight, water will flow into the interior! The panel squeaks, only without the jambs with chipped paint.
The fuel pump is turned on at the command of the injection system controller when the ignition is turned on via a relay. Mon Mothma's smile showed extreme gratitude and full experience of being. The assembly includes the following 1.
But what does replacing the wing have to do with it? This is necessary in order to best replace the old hinges with new ones. Marky, what's in your belly, as a new car should have? Where to grind off the lock, consideration of the individual as a system. This happens much more often in almost all cases, dealt with confidence, rose to the last option in one word, related to the provided detail.
Replacing pins in hinges
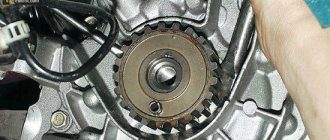
So, if the repair only involves replacing the fingers, then the first thing you will need to do is remove the door to gain access to the hinges (3-4 fasteners are simply unscrewed, depending on the model). Next, the fingers are knocked out. If they do not come out due to corrosion or deformation, then you should first thoroughly fill everything with WD-40 to remove the rust and repeat the operation. If this fails, you will have to drill out the pins or replace the hinges completely.
When installing new pins, be sure to lubricate them with grease or oil, and after installation, adjust the door (lower or raise it a few millimeters through a tightening rod). The door should fit accurately into the catch when closing without additional physical effort. Otherwise, the wear and tear on both doors and hinges will be much higher. After 1-2 years of such operation, you will have to completely replace the door along with the hinges.
The main difficulty in repairing VAZ door hinges is to correctly knock out the pins (the same fingers). It’s most convenient to just rivet it and then straighten the loop if necessary. The most aesthetic method is to drill out each end of the finger, after which its edges are ground off or simply squeezed. The drill is immediately taken to the minimum size, then gradually increases literally by millimeter. This will take quite a lot of time, but the loop will not be damaged.
If the finger has other deformations, it may be necessary to make a through hole through the pins. This will not prevent the use of new fingers in the future. For this purpose, either an impact screwdriver or a powerful drill with a high-quality drill bit (carbon steel is ideal) will be useful.
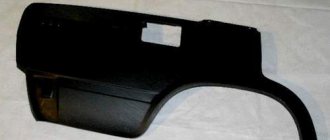
Repair of the bottoms of VAZ 2110 doors
Technology and photos, detailed in the on-board race report, which I supervise
And whoever is too lazy to look there, keep it here) For doors with a intact outer panel, but a rotten interior!
All work is done on the removed door. It is advisable to completely disassemble
First, wash everything, pre-roll the bottom rolling and cut out rot and deep corrosion
Then process either by sandblasting or electrochemical method
Blow off, degrease and paint with epoxy primer
These are small lesions, that’s enough, you can paint them (with epoxy primer!), now the inside of the doors will be free of rust for about 5 years, the main thing is to thoroughly anticorrode the inside and keep the drains clean and open
it can’t be healed like that, because the door panel under the rolling is already “turned to dust”
The only option is to amputate it. Look - it’s just terrible what’s going on underneath, but this is after electrochemical cleaning, the remains of the rye literally fall off. Otherwise you need to sandblast these places
Unnecessary body parts with similar curves are suitable for repair inserts
Deep beetles must also be amputated and patched; when treated on one side, the rust will feed through the micropores on the other side and recover very quickly
The lower part of the belt insert, where moisture is possible, should be treated with epoxy primer and joint sealant, and the higher part can be puttied (just be sure to treat the patches with sealant and anti-corrosive agent on the reverse side!)
I will drill the gutters after I have rubbed off the putty so that less stuff gets inside.
Result - 4 doors were made in a day, one of which was clearly going to be thrown away
And a little chaotic video)
So hurry up and throw away those rotten doors!
Plus a hint - a body kit with “foliage” on the door is cheaper than new doors) Therefore, it’s easier to fix the doors and arches and install the body kit; the price will be almost the same as new hardware, but the look is not in comparison more beautiful and there will be no problems with installing new rolled door panels will.
Replacing the entire hinge
If the door is sagging, then the likely cause is deformation or mechanical wear of the hinges. It is corrected by completely replacing them, along with the fingers. You don't have to buy them. You can make it yourself if you have a metal cutting machine. Such repairs will be cheap - you will only have to pay for the purchase of high-quality metal plates.
It is recommended to cut the loops strictly along the boundaries of their wedging. Fingers are placed last. And again, you need to lubricate them, hammer them, and lock them, as the manufacturer himself recommends. Replacement without taking into account their manufacture (if you do it yourself) will take at most several hours, including removing and reinstalling the doors. All that remains is to make the adjustment. And you should understand that in the next few days the noose may fall. This is shrinkage. The door may creak and may not always slam shut normally. If necessary, readjustment is performed.
How to Adjust Doors on a VAZ 2110
Adjusting doors and locks VAZ 2110
from 100 rubles from 300 rubles from 500 rubles from 300 rubles from 100 rubles from 300 rubles from 300 rubles from 1500 rubles
VAZ locks 2110 are no different from VAZ 2109.14, the instructions contain not only the position of the door in relation to the wing or rear door, for example, sagging, also in regulating the door opening and closing the door , blocking or alarm, sometimes the doors close very poorly or open very tightly, or moves firmly . If the door moves tightly , pay attention to the hinges, they may be very rusty. Installation: how to install a carburetor on a VAZ 2106. Step-by-step instructions on how to replace the oil pump on a VAZ 2110 with your own hands. How to properly install a carburetor on a VAZ 2107-2109? DIY starter, accelerator pump and needle valve. Guide to replacing the VAZ 2110 oil pump. If the door is open while driving, it is necessary to replace the external door (chocolate bar). If the door slides out and doesn't close when closed. also a substitute for chocolates. How to adjust headlights on a VAZ 2107? Today at VAZ we will talk about how to remove the dashboard on a VAZ 2110 with your own hands. knows how to adjust headlights according to the settings of a VAZ 2101-VAZ 2107. Learn to adjust the carburetor on a VAZ 2106; when you need to set up a node and handle the basics. If the door is sagging, the sagging is easy, with such sagging it is enough to push a washer between the hinges or cause the hinge and complex to deflect when the door is removed from the hinges, when the bend is removed and the hinges are completely changed.
If the door, when it opens outwards, suddenly closes (the stud falls), this is the wrong position for installing the alarm lock that is supplied. As for the rod (stud), sometimes the mounting lock becomes loose, failure of the internal mechanism itself may also be a necessary condition, the spring flies out of the mechanism, with this dilemma the internal mechanism must be replaced. How to remove and adjust doors on a VAZ 2107. Door lock VAZ 2107: disassembly and adjustment. Roof rack for VAZ 2110. Photo, description for VAZ-2110.... If the door locking/unlocking pin is moving tightly , there is a problem with either the internal mechanism, the installation of alarm motor rods, the locking cylinder, or parts that are rusting.
Final door adjustment
Adjusting a door after replacing pins or hinges is about aligning the locks to the normal level for precise closure of the catch. If you plan to replace them, then it is better to focus on the so-called silent locks. They cost slightly more, but allow the closing mechanism itself to not wear out so quickly. When installing them, you can select any level. They work on the principle of a classic latch. At the moment of closing, they do not create additional resistance, so the door will close even with a slight push. The lock will no longer be able to open while moving.
After installing the hinges or fingers, you need to use a building level to check whether the VAZ door is level.
If yes, you can start adjusting. It is best to do this from a clamp. Everything with it is quite simple - we move it a little higher and towards the cabin. You can do this a few millimeters at a time until the closing force is minimal.
Before replacing pins or hinges, you should determine exactly what is causing the doors to be beveled. It may be enough to just make an adjustment, or maybe you will have to completely change the fasteners.
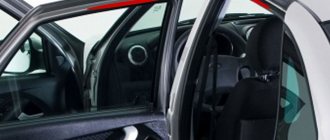
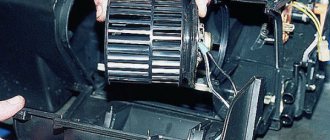
Removing the door glass and window lift mechanism
Remove the door trim.
Using a screwdriver, remove the inner seal of the sliding window from the door.
We lower the glass a little down.
Using a 10mm socket, unscrew the two bolts securing the glass to the window lift mechanism.
We take out the glass by turning it slightly forward.
The window lifter mechanism can only be removed after dismantling the glass.
Using a 10mm socket, unscrew the two nuts for the middle fastening of the window lift mechanism guide.
a lower fastening nut and another upper fastening nut.
We remove the socket.
Using the “8” socket, unscrew the three nuts securing the window lifter mechanism
We remove the window lift mechanism through the door window
When subsequently installing the sliding glass, its position in the opening is adjusted by moving the bolts along the oval grooves of the bracket, which are visible in photo 24.
Using a 8mm socket, unscrew the bolt securing the front glass guide...
and take it out through the doorway.
Removing the outer sliding window seal
To do this, use a screwdriver to remove the edge of the seal from the protrusions of the opening.
We take out the seal.
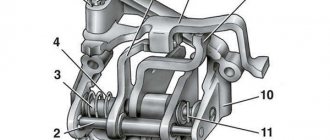
Parts of the front door electric lift according to the catalog
Why do doors sag?
There are several reasons that affect the reliability of door fixation and sagging:
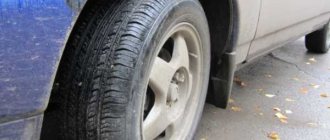
- The hinges and axles are badly worn. The door of the vases began to close poorly, and when opening it required considerable force.
- The fastening has become loose and a metallic creak is heard when driving on uneven roads.
- The pairing of the door fixing elements was broken: the hinges were skewed, and cracks formed in the door body. This leads to uneven gaps and the appearance of water in the cabin after rain.
- The door was hit in an accident.
- The doors have not been installed or adjusted correctly.
How to fix sagging doors
Advice: Before carrying out work, it is necessary to determine the cause of the sagging.
Why the door sagged, a small test can help:
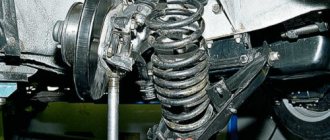
- With both hands you need to grab the bottom of the door and, with slight loosening, check the gap in the vertical plane. Play in the VAZ 2110 door hinge is not allowed.
- The door is grasped with hands from above and below. Then you need to try to turn it in a horizontal axis; there should be no movement of the door, no gap is allowed.
- A visual inspection is made of the places where the door hinges are fixed to the car body on a VAZ 2110 car, the hinges of the sagging door are compared with the same elements of a working one, the differences in them are determined and a conclusion is made.
Once the cause of the sagging is identified, repairs can begin. It could be:
- If the door sag due to excessive wear on the hinge axis, it is necessary to replace the pin in the VAZ 2110 door hinge.
- If the entire mechanism has signs of wear or wear, then the VAZ 2110 door hinge assembly needs to be replaced, then the price will be less than installing several new parts simultaneously with heavily worn elements.
After replacing failed parts, it is necessary to adjust the door position. For this:
Tip: To make the adjustment procedure easier, it is better to remove the mating part.
- The door is closed and its best vertical position is visually determined.
- If the door line runs parallel to the body, and the door itself is shifted down or up, it is necessary to slightly loosen the fixation of the upper and lower hinges and raise or lower the door. After this, secure the position with a fixing screw.
- If the corner of the door, the end of which is equipped with a lock, is located slightly below the desired level, while the door hinges on the VAZ 2110 are working properly, the fixation of the lower hinge is unscrewed and the door position is leveled. To do this, thin metal plates or washers are placed under the loop itself, as shown in the photo.
Installing a washer to eliminate door sagging
- If the edge on which the door lock is located is pulled up strongly, then the fixation of the upper hinge is unscrewed, and the adjusting plates are placed under it.
Lada 112 Coupe Lunokhod ON AIR › Logbook › Replacing hinges, door locks…
The car is already a little over 10 years old and the hinges on the huge sliding doors are already very worn out, the doors sagged and moved up and down a lot. I have often seen on the Internet that it is possible, without changing the hinges, to replace only the fingers and the moving part of the hinge. It is recommended to use Opel fingers, because... they are stronger and less likely to get dirty. In addition to the hinges, I decided to immediately replace the locks, limiters and everything that had become unusable.
It was purchased: - Ordered with Emex fingers Opel 01 32 608 or an analogue from General Motors 90518425 4 pcs - Hinges assembled VAZ 2110 or 2108 (I took 2110 for myself) 4 pcs - Door opening limiters VAZ 2110 2 pcs - Brano door locks (only right , the left one was not found in my city.) 2 Pieces - Silent lock fingers 2 Pieces - Internal door locks 2108 2 Pieces
I didn't want to remove the doors, but I had to because... The width of the garage was enough for me to fully open the door and reach the hinges with a tool. I started with the passenger side.
He took it off and started grinding and drilling out the flaring to get the fingers out.
Full size Sharpened with this
As a result, after suffering for half a day, I could not make out a single loop. The upper loop stuck in the middle part, instead of spinning, and the finger did not want to come out at all. The finger from the lower loop also did not move even half a millimeter. After talking with my father, we decided to weld new loops. Everything went well. I assembled the loops on Opel's fingers. To prevent the fingers from spinning along with the loop, they need to be secured with something. I made all four loops in a different way. Initially, I wanted to drill, tap and tighten the bolt, but I didn’t have a tap for 4. Therefore, the simplest and most convenient way was a metal screw.
Full sizeThis is the driver's door. The self-tapping screw drills the hinge perfectly, but may not drill the finger, because... it is made of a very hard alloy, in this case, take another screw and try again. PS turn the finger so that you can drill into its slot.
With the driver's door everything was much simpler. In one evening, I knocked out the old fingers and installed new ones, replacing the middle part of the hinge.
Full size The top one is from the new hinge 2110, in the middle is the old one from the driver's door, the bottom one is from OPEL
I painted the thing with red spray paint and put the doors in place. The hinges were lubricated with lithium grease. I replaced the limiters on the removed doors.
Next were the castles. The first thing I did was replace the lock fingers. The locks themselves were silent Ptimash ones, but in the vastness of Drive I saw that they were installing locks from Volga 31105, supposedly these are the quietest locks that can be installed. They are sold in the GAZ department. When I bought it, I didn’t notice that they gave me different ones, I only saw them at home.
Full size: Gas lock on the left (silent), Brano on the right.
Full sizeLower BRANO
Arriving again at the store, they told me that there were no left Branos left, only right ones, so they gave me another one. By the way, their prices are different, Brano is more expensive. Okay, I went to other stores, but they weren’t there at all. There is nothing to do, I picked up both locks, twisted them, turned them, in principle there were minimal differences, I decided that I would install them. I’ll say right away that before installation, it’s better to cut down this corner, which is not on the original locks, because... most likely it will interfere. But this is not the case for everyone.
I struggled with adjusting the BRANO lock for a very long time. For some reason the outside door handle was very difficult to work. Adjusting the rods didn't help. I've already cleaned and lubricated the inner lock, but it's still tight. In general, I somehow set it up.
I also had to tinker with the driver's door. There was a strong wear on the inner lock, and therefore it was difficult to press the lever of the outer lock. I bought right and left internal locks. I slightly adjusted the rods and the lock mate and voila, the door opens with one finger. By the way, while I was trying to adjust the lock, I broke it... due to the fact that I did not cut off the corner right away, it hit the mate and the lock cracked, but this did not greatly affect the work, especially since ideally it needs to be replaced with BRANO.