The oil pump for the VAZ 2110 is designed to distill oil in a car engine. If the pump is faulty, this can have a detrimental effect on the performance of the car's engine, and in some cases it may fail completely. And this leads to additional costs and expensive repairs of the unit. Therefore, any driver should know some signs of oil pump failure on a VAZ 2110.
And very often, when you start the car, an icon in the form of a watering can appears on the dashboard. This means that the car's oil pump may fail.
This part in the car must be carefully monitored, since it is responsible for the entire operation of the engine as a whole.
Oil pump design and location
Content
In the engine, the oil pump for the VAZ 2110 is the main element that exerts pressure on the engine lubrication. The pump is driven by the crankshaft and camshaft. The pump consists of gears and is attached to the engine with bolts; they make the fastening reliable. There is no way to see it right away; first you need to remove some parts in order to replace or repair it.
Oil pump design: 1 – pump housing; 2 – driven gear; 3 – drive gear; 4 – pressure reducing valve; 5 – pressure reducing valve spring; 6 – plug; 7 – sealing ring; 8 – front crankshaft oil seal; 9 – pump cover; 10 – rubber sealing ring; 11 – oil receiver.
Oil pump composition:
- Frame.
- Driven and driving gears.
- Reducing valve and spring.
- Mesh oil intake.
In principle, there is nothing complicated or unnecessary in the design of the part.
Attachment points for the oil pump cover when milling planes: 1 – crankshaft oil seal; 2 – cover attachment points; 3 – pressure reducing valve plug; X, Y - milling planes.
First, open the hood of the car, remove the plastic from the engine, then unscrew the wheel and remove the pulley. After this, all fasteners are removed from the oil pump, and you can remove it from its location.
Engine VAZ-2110 (8 valves) injector: device. VAZ-2110: injector diagram
The topic of this article is the VAZ-2110 engine (8 valves) injector in the fuel injection system. The main task is to find all its advantages and disadvantages and compare it with a carburetor engine. But to do this, you will need to delve a little deeper into history, look at how this engine was developed, how good it is in operation and repair. And the story will begin in the late 70s of the last century, when VAZ engineers started thinking about designing front-wheel drive cars. And then we will look at the injection system, its differences from the carburetor, its advantages and disadvantages.
Possible faults
The first sign is the light on the instrument panel, which immediately indicates that there is a malfunction in the lubrication system.
Also, do not forget about monitoring the oil level in the engine; if the car begins to burn oil, then this is also a call to check this system. If any breakdowns occur, you should immediately:
- Stop the car and turn off the engine.
- Allow time for the oil to return to the engine and then check its level. If the level is too low, then you need to add oil.
- Then they start the car.
- If the lamp does not go out and extraneous sounds are heard from the engine, this indicates a breakdown in the oil pump.
Signs of a faulty oil pump
There are several typical symptoms of a faulty oil pump. These include:
- Reduced engine oil pressure. This will be indicated by the oil can light on the dashboard.
- Increasing engine oil pressure. Engine oil is squeezed out of various seals and joints in the system. For example, oil seals, gaskets, oil filter connection points. In more rare cases, due to excess pressure in the oil system, the car refuses to start at all. This happens because the hydraulic compensators stop performing their functions, and accordingly, the valves function poorly.
- Increased oil consumption. Occurs due to leakage or waste.
It is necessary to understand that some of them may indicate failure of other elements of the oil system. Therefore, it is advisable to carry out the check in a comprehensive manner.
Checking the oil pump
To check the part, it is not necessary to remove the unit from the car. To do this, you need to measure the pressure in the lubrication system and look at the readings. When replacing a part, you must purchase only original spare parts to avoid problems in the future.
You can also check the oil pump on a special stand; such a test will help determine the performance of the device, as well as how it works. All such procedures are carried out in a specialized workshop where warm oil is used. Such a check will be accurate, and you can immediately determine whether there are any malfunctions in the operation of the oil pump.
Pump repair
Some car owners try to carry out repair work themselves. And if you don’t want to purchase a new part, then you can repair the oil pump of the VAZ 2110. After all, very often malfunctions occur because the gears or the valve itself are badly worn.
- First, remove the gasket from the device.
- Then unscrew the bolt that secures the crankshaft sensor.
- If you unscrew the fasteners from the pump, you can remove the cover.
- Using screwdrivers, remove the cover, and then the body itself.
- Then the gears are taken out, and one of them is driving, and the second is driven.
- Now you can begin to remove the pressure reducing valve; there is a special plug and a sealing ring on it.
- The sealing ring should not be damaged; if any, replace it with a new one.
- Remove the spring on the valve.
- And after that, you can remove the valve itself, it is not so easy to remove; to do this, you need to have a knife on hand to pry and remove the part.
- Check the condition of the cover; if there is deformation, the cover must be replaced.
- Also, do not forget to check all pump elements; if there are even minor deviations, then it is best to replace the part with a new one.
After replacing all the elements of the parts, it is necessary to lubricate everything thoroughly and, together with the oil pump, the oil seal is immediately changed.
The main reasons for oil pump failure
The service life of the VAZ 2110–12 oil pump regulated by the manufacturer is 150–200 thousand km. This, however, does not mean that the pump will not last longer or fail much earlier. The main reasons why it may stop functioning normally are:
- spent resource;
- untimely replacement of the oil filter, as a result of which metal particles (friction products) enter the system, acting on the pump parts as an abrasive, and the filter mesh of the oil receiver becomes clogged;
- use of oil whose characteristics do not meet the requirements of the car manufacturer.
How to change the oil pump on a VAZ 2110
In order to remove the oil pump, it is necessary to carry out all work in the following order:
- First, remove the timing case; to do this, use a 10mm wrench.
- Then loosen the belt itself and carefully remove it.
- Then you need to unscrew the gears on the crankshaft.
- Remove the pulley and screw the bolt back in.
- They look at the mark.
- The oil pan and protection must be removed.
- After this, carefully remove the bolts securing the oil pump.
- And then you can remove the gasket between the oil pump and the block itself.
When normally replacing the oil pump on a VAZ 2110, it is necessary to reassemble it in the reverse order of this instruction, and then carry out all the necessary measurements of the pressure and oil level in the engine.
How to replace the oil pump?
Tools
Before we talk about how to remove the oil pump on a VAZ 2114, we first outline the list of tools necessary for this:
- open-end wrenches “10” and “13”;
- set of socket heads;
- gimbal adapter;
- extension;
- crank/ratchet;
- highly desirable - a torque wrench.
Removing the oil pump
Replacement
Before moving on to the description of replacing the oil pump, it is worth noting that according to the rules, the crankshaft oil seal is also replaced at the same time.
The replacement of the VAZ 2114 oil pump itself is carried out in the following order:
- Disconnect the negative cable from the corresponding battery terminal.
- Drain the engine oil.
- Remove the belt from the generator.
- Remove the belt from the camshaft.
- Using a pair of screwdrivers, remove the pulley from the crankshaft (after this you should pay attention to the key - if it does not sit tightly on the shaft, you should remove it and set it aside so as not to accidentally lose it).
Crankshaft key
- Remove the engine oil sump.
- Remove the pair of bolts securing the oil pickup to the main bearing.
Oil receiver mounting bolts
- Unscrew the bolt securing the oil pump to the oil receiver and remove the latter.
Bolt securing the oil receiver to the oil pump
- Unscrew the six bolts that secure the oil pump (important - there are flat washers under each bolt).
Oil pump mounting
- Use a screwdriver to pry up the oil pump, resting it between the main bearing and the pump cover, and then move it.
- Remove the pump from the crankshaft.
Removing the oil pump
At this point, the entire process of removing the oil pump can be considered complete.
After the camshaft drive belt is removed during the dismantling process, it is strictly forbidden to turn both the camshaft itself and the crankshaft.
Reinstalling the oil pump occurs in exactly the same order, but in reverse order. Before starting installation, you should inspect the pump and rotate its main gear so that the protrusions on it coincide with the splines located on the crankshaft, and the working edge of the oil seal must be lubricated with liquid lubricant and carefully tucked into the crankshaft journal.
Setting the drive gear lugs to the correct position
After the new oil pump is installed, a new oil filter should be installed, and then oil should be added to the system. Then you should start the car engine and let it idle for at least three minutes - this is necessary to distribute the oil on its moving elements. After this, the car can be operated as usual.
Adjusting the oil pump pressure
To correctly adjust the pressure in the device, the following operations must be performed:
- Check the oil level in the system, and it is better to use high-quality lubricants.
- The drain plug should be securely tightened and oil should not leak anywhere.
- The pump drive must be in good working order.
- Often the gasket in the pump fails; if this is the case, replace it.
- All bolts on the pump are securely fastened.
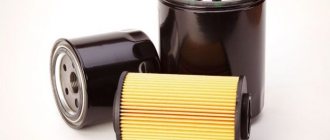
- With each new oil change, the oil filter must be changed.
It is best to fill in lubricants that are recommended by the car manufacturer, and they are specified in the car’s operating instructions.
The 2110 oil pump has its own labor resource; it usually lasts about 120 thousand mileage, and after that it is completely replaced with a new part.
Many drivers are wondering how much an oil filter costs for a VAZ 2110; the answer is quite simple. If you choose an original product for the VAZ 2110, then the cost is not high.
Of course, replacing and repairing the oil pump on a VAZ 2110 is easy, but not everyone can do it. Some are afraid of harming the car and its parts, while others have never repaired a car at all. If there are such problems, it is best to entrust the car to qualified specialists who will help carry out all the necessary work.
But all parts of the car must be monitored and periodically replaced and diagnosed so that everything works like a clock, thereby increasing the service life of the parts and the car as a whole.
Signs and causes of oil pump failure
If the VAZ 2114 oil pump starts to malfunction, this immediately affects the oil pressure in the system (it drops sharply), as a result of which the warning light comes on. True, it’s not worth replacing the pump with a new one right away. You should first check whether the sensor itself is working? This is very simple to do - you need to take the wire coming from this device and press it to ground (motor housing).
If the sensor is working properly, the emergency light will go out immediately after pressing. In this case, the pump will still have to be repaired. If the lamp continues to glow, then the sensor itself is not working and will need to be replaced.
Oil pressure light on panel
There can be several reasons for an oil pump failure. Most often, its gears fail (especially often when the oil is changed infrequently, which, as already mentioned, causes abrasive wear). In addition, there may be problems with the filter valve (it may get stuck), as well as with the sealing elements. In the latter case, oil leaks from the system.
