Tuning the instrument panel of VAZ 2114
Today, many car enthusiasts are interested in tuning the VAZ 2114 panel. This is explained by its design, which is perfect for this activity.
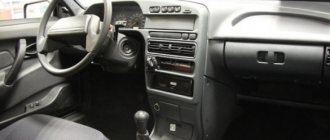
In general, if we talk about the 2114th model, it should be noted that it is one of the last, well-designed and executed models of the VAZ “family” of cars. For most, do-it-yourself VAZ 2114 tuning in general, and interior improvements in particular, is just a matter of replacing seat covers.
However, this is a deep misconception; there are many objects in the salon that can be beautifully updated. Throughout the history of the VAZ 2114 brand, it was believed that interior tuning is a large-scale, multi-level complex of work, which consists of many different actions to improve various elements and, of course, among others, the instrument panel.
Comprehensive modernization of the VAZ-2114 instrument panel: first steps
Most often, a set of works to improve the dashboard of a VAZ 2114 is important and necessary, but at the same time, an interesting and serious task. The main task is to choose the right details and decorate them beautifully. It is always better to think through all actions related to various updates in advance, in advance.
Subsequently, this will avoid unnecessary mistakes and disturbing fuss. The right decision would be to draw up a work plan that you will follow and thanks to which you will not make mistakes, and the whole process will be a complete pleasure for you.
Tuning the dashboard can be performed in the following sequence:
- First you need to disassemble the car “device”. Every car enthusiast should know how to remove the instrument panel of a VAZ 2114. There is nothing complicated here, everything is quite clear, and the process itself does not require special skills or knowledge.
- Then it is necessary to refine the elements and parts. There can always be many nuances here. They depend on what you want to change and improve in your car. Everything should be thought through very carefully.
- At the end, you need to install the remade, updated “socket” into place.
Do-it-yourself VAZ-2114 panel tuning: features, options and photos
Many owners of domestic cars consider tuning a VAZ-2114 torpedo with their own hands to be a pressing topic for themselves. The improvement of the dashboard is carried out in order to improve its appearance and for functional modernization, which is considered one of the important points in tuning cars from domestic manufacturers.
Nowadays, there are a large number of different tuning options. Most often, car enthusiasts carry out minor restyling of the car’s exterior, while improving the VAZ-2114 dashboard is considered a significant improvement.
Let us highlight the main stages of changing the appearance and features of tuning a VAZ-2114 torpedo with your own hands:
- First, disassemble the front panel of your car. Literally every owner of a domestic car should know how to remove this part. There is nothing complicated here. Everything is quite clear, because the dismantling process does not require special knowledge and skills.
- Next, modify the torpedo elements. At this stage, you may encounter many nuances. They directly depend on what you want to change and modify in the car. Everything should be thought through very carefully.
- At the end of the work, install the already remade and updated panel in place.
Panel painting
An excellent option for tuning a VAZ-2114 torpedo is painting the dashboard yourself. Before you start painting, you need to do the following:
- Thoroughly clean the entire surface from dirt and dust.
- Sand the dashboard with soft sandpaper to degrease it.
- Apply sealant.
- Carefully coat the torpedo with paint.
Before painting parts of your car, carefully read the instructions for using paint solutions. Despite the simplicity of restyling, certain skills will still be needed to perform this tuning and, most likely, this work is best left to professionals.
Panel cover
Covering a previously dismantled dashboard with natural, artificial leather or carbon fiber involves covering it with a ready-made pattern. It is best to prepare such templates in advance, that is, cut out the elements with a small allowance. Just like the previous version of tuning the VAZ-2114 torpedo, the upholstery is carried out after first cleaning the panel from all kinds of contaminants. The adhesive composition is chosen in such a way that it does not damage the material during the process of application and drying.
To modify the VAZ-2114 instrument panel, special overlays are used that have stylized images of the speedometer and tachometer. You can purchase such pads at literally any auto parts store.
With this VAZ-2114 torpedo tuning, you can change the color of the backlight using built-in light filters and transparent elements.
However, you need to attach such overlays correctly, because the result may be uneven illumination, for example, it is dim on the right and bright on the left, or the factory light bulbs will not have enough power to break through your additional built-in overlays.
European-style shields appeared on the domestic automotive market relatively recently. Despite this, they were very quickly able to gain the trust of many car enthusiasts. The main reasons for this are the stylish appearance and the ability to mount this version of tuning the VAZ-2114 torpedo without the risk of damaging the windshield wiper blades.
The main reason for the high demand for panels among domestic buyers is the material from which they are made.
Standard factory shields are made of soft plastic that is unpleasant to the touch, which begins to rattle in the near future.
The European standard panel is made of softer material, which looks much more attractive. Positive emotions are also caused by the ventilation of the interior space of the cabin with such a product.
Instrument arrows
Another element of a car dashboard that is easy to improve yourself is the arrows of the measuring instruments. As many car enthusiasts have noticed, in the factory configuration the car panel is very similar to a parody of a parrot:
- heating device backlight – yellow;
- green buttons;
- all indicators are orange.
Quite often, such a diverse range of colors interferes with comfortable movement at night, because they all merge into one obscure color. At the same time, it is quite difficult to notice the instrument arrows. To improve the situation, tune the torpedo on the VAZ-2114 by installing red LEDs.
To do this, carefully disassemble the VAZ-2114 instrument panel. Place one LED under each of the arrows and put on special heat shrinks. Lead the wires of each of the devices outside the panel, and then connect them to the heater wiring. Upon completion of work, reassemble the shield in the reverse order.
The safest is the steering wheel that is installed on a domestic car by the manufacturer. Attaching a new steering wheel is considered an excellent option for tuning a VAZ-2114 torpedo with your own hands. However, it should be remembered that installation of a non-certified product entails changes in the rotation force. This directly affects the car's handling, especially in critical situations.
Therefore, in our opinion, the optimal action in this case would be to install a factory steering wheel with a new braid. The trim can be made of materials that provide better hand contact with the surface of the steering wheel. For example, genuine leather is perfect for this. This “steering wheel” looks stylish and fits better in the hands due to the increased thickness of the rim.
Read more: Homemade trunk for UAZ 469. Do-it-yourself expedition trunk - more space in the cabin
The instrument panel of a domestic car has a special opening for attaching an additional trip computer. This nest is closed with a special plug. We decided to use this place for its intended purpose and perform tuning of the VAZ-2114 torpedo. In the photo you can clearly see what the dashboard improvement option looks like.
A route computer, or, as it is also called, an on-board computer, is an electronic device that allows the driver to receive information about fuel consumption, driving mode and other important parameters.
In addition, many models of “brains” for cars allow diagnostics of the electronic engine control system. It is important to note that on-board computers are also mounted on cars with carburetor engines.
However, in order for the equipment to perform its functions, it may be necessary to install special sensors on the dashboard.
Today there is a large selection of these devices on sale from different manufacturers. While they differ in the number of functions, they can also differ in the location of installation on the dashboard. Sequence of work:
- Connect the wiring harness block, which is intended to connect the VAZ-2114 trip computer, to the block on the back of the computer.
- Use a separate wire to connect the contact of the computer block to the contact of the diagnostic block.
- Insert the device into the slot.
Having done this work yourself, you will receive an updated instrument panel of the VAZ-2114, which has a completely different appearance.
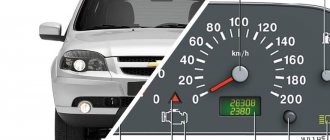
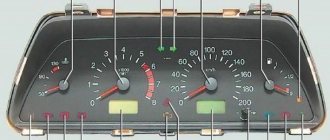
The VAZ 2114 dashboard readings include:
- Tachometer - shows the number of crankshaft revolutions per minute. This indicator is important because the driver understands at what point in time it is necessary to change gear;
- Speedometer – shows the current speed. Also, the digital window on the speedometer displays the current mileage and total mileage of the car;
- Fuel level indicator. An important indicator indicating the level of gasoline in the fuel tank;
- Coolant temperature indicator. The coolant is responsible for cooling the engine, so this indicator also plays an important role;
- On the dashboard there is a row of indicator lamps indicating: - turn signals on, handbrake pulled, lighting equipment working properly and engine malfunction.
You may also be interested in learning more about what the backlight of the VAZ 2107 instrument panel looks like.
The main manufacturers of tuned devices for the VAZ 2114 are domestic manufacturers Gamma and Ferrum. The products of these companies are famous for their reliability and workmanship. The hardware is mostly supplied from China, while the body is manufactured in Russia.
The cost of devices depends on the model and can vary from 14-19 thousand rubles. Installation is carried out in a standard place, since the fastenings of the tuned part completely coincide with the standard holes.
One of the modifications may be the engine, but this information will help you understand what equipment is needed for chip tuning VAZ cars.
Finalization
To improve the standard dashboard of the VAZ 2114, car enthusiasts most often do the following:
- Replacing the standard factory backlight with tuned LED backlight. This is a rather labor-intensive process that requires dismantling the devices.
Its removal occurs in several stages:
- first you need to unscrew several screws around the panel frame and remove the plastic panel trim,
- then you should carefully remove the panel from the seat and disconnect the power wires.
- On the back of the device there are circuit boards and indicator lamps that need to be replaced. Most often, when replacing, diodes of a certain color are used - they are easy to use, quite durable and cheap. The standard indicator lamps must be unsoldered and diodes soldered in their place.
- After soldering work, you should reassemble the entire structure in reverse order and check its functionality.
- The cost of the diode strip will be about 200 rubles.
- It will also be useful to learn more about what removable tinting on a VAZ looks like and how it is installed.
- Video of the dashboard lighting of the VAZ 2114:
- Another type of tuning is the installation of additional indicators or digital indicators in the dashboard. This work becomes even more labor-intensive. Typically, on-board computers connected to the car’s K-line are used as additional indicators.
- To connect them, it is necessary to dismantle the device and select a place for its installation.
- After this, make a neat cutout in the dashboard and insert the on-board computer, at the same time the wiring from the K-line is laid to the back of the panel and connected to the computer into a standard connector.
- The most time-consuming part is installing the switch buttons - some remove the protective glass of the panel, while others install buttons on the top of the instrument panel from the on-board computer, but for this it is necessary to solder the hardware of the on-board computer.
- It will also be useful to learn more and take care of protecting the VAZ engine.
- On the video, do-it-yourself tuning of the VAZ 2114 dashboard:
- The cost of a mini computer will be about 1,300 rubles, and installation at the service will cost 2,000 rubles.
How to easily update the “tidy” of a VAZ 2114
Upgrading the 2114's dashboard is actually not as complicated as it might seem at first. Buying such a “device” is quite simple. You should consider what options owners can use to update their VAZ 2114 wardrobe (examples in photos and videos).
1. AMS. This model has several features.
- To begin with, it is worth noting that you can order its design yourself;
- This panel is equipped with an integrated oil indicator, which is missing in the classic version. Its appearance is associated with the very persistent requests of many car enthusiasts to install this “component” as standard.
- This instrument panel looks more interesting due to the colored scales with chrome trim.
2. PRO-SPORT. This “tidy” is designed as an overlay for the instrument panel on the presented model. The updated design of this device gives them an impressive, completely new look. There are two options for its execution: with a light and dark backing. The backlight of the VAZ 2114 panel has a special brightness adjustment, but there is only one color - blue. The scales are glued after installing the insert. This is to give this element of the car an original look.
3. AMS-2. The central instrument was the tachometer, which was moved from left to center. The white scales create an overall sporty look for the entire panel. This allows you to quickly read the necessary information from it. The backlight has been redesigned and LEDs are used, with the help of which it is not difficult to read information at night. Installation is recommended to be carried out by qualified specialists, since its installation involves significant “redevelopment” of the classic model.
4. STREET STORM. The main feature of this model is its color design. Nothing was changed in the classic arrangement of instruments,
the emphasis was on the color scheme. The “appearance” of the dashboard has undergone certain changes, however, at the same time, its style fits harmoniously into the existing interior. Another feature of this model should be noted – its backlight. During the day it is light with red symbols. In the dark, you can easily change not only the brightness, but also the color.
5. "North Wind". This model is different in appearance. The developers have shown that even with a standard arrangement of instruments, the entire panel looks dynamic and bright. It clearly shows sporting features. The color of the backlight depends on the shade of the insert scales.
VAZ 2114 dashboard - how to remove and replace
A simple way to modify the dashboard on a domestic car is to remove the protective film from the odometer and speedometer.
This is easy to do: just remove the plastic and remove the film from the device. The only disadvantage of this modification is the layer of glue under the film. To remove it you will need a lot of effort.
The standard color for the dashboard on a VAZ is dark green. By removing the film from the screen, you will get a dark blue panel.
The color of the instrument scale can also be changed by a combination of simple steps:
- The first step is to remove the plastic from the instrument panel.
- Then, using a knife and solvent, you need to remove the scale image. If you take the matter seriously, you can completely remove old paint without damaging the main part of the panel.
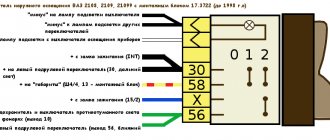
- Now you need to attach the LED strip of the desired color to the base and install it in the light bulb socket.
- To make the work look complete, it is also recommended to change the color of the arrows themselves to the one most compatible with the color of the scale.
- Remove the arrows and remove the old paint.
- Using a special car polish or nail polish, paint the arrows in the desired color.
If you look at the photo of the VAZ panel tuning, you will notice that the most suitable backlight colors are green and white. This light does not hurt the eyes at night and can be seen quite well during the day.
In the process of driving a car, the VAZ 2114 dashboard plays a very important role. It is a set of instruments that display many vehicle parameters. Among them: speed, number of crankshaft revolutions, coolant temperature, remaining amount of gasoline. Many panels are equipped with voltmeters, oil pressure gauges and even an electronic thermometer.
Most often, the reason why the driver takes this step is an accident. After it, the dashboard becomes unusable: it cracks and loses its original appearance. There are situations when the shape of the product has not changed, but rather ugly cracks have appeared on it, which violates the overall aesthetics of the car.
There are many difficulties in this operation. The first of these is connecting electrical receivers. The fact is that many drivers forget to insert a plug and the device simply refuses to work.
In this regard, everything has to start all over again. The second difficulty is dismantling. Most often, during disassembly, drivers accidentally break some fastener or device.
All this forces the driver to turn to the services of auto repairmen and pay considerable sums for the work performed.
In fact, everything is much simpler than it seems. It is enough to strictly follow the instructions and be especially careful. Then you will save a lot of nerves and effort.
First of all, turn off the power to the electrical circuit. To do this, remove the “positive” terminal of the battery. So, the procedure for removing it looks like this:
- On the driver's side, on the left side of the console, the side trim must be removed. To do this, unscrew the five screws and dismantle the part. The same steps must be done on the passenger side. After this, disconnect the plugs leading to the radio, cigarette lighter, ashtray and their backlight.
- Now you need to pull out the heater switch handle. To do this, pry up its screwdriver and pull it towards you. The same is done with the damper control handles. It is best to put all small elements in some container so as not to lose them.
- Next, unscrew the screws on the instrument panel. Two of them are located on top, and the other two are located on the bottom. It is more convenient to perform this procedure with a figured screwdriver. Pull out the plug next to the heated rear window button and unscrew another screw. After this, the pad is lifted and moved towards the seats. You will immediately see a large number of plugs and chips. All of them must be removed and marked so as not to be confused during assembly. It is best to remove the steering wheel.
- Unscrew the steering column fasteners from the bottom and lower it down. This is done so that it does not interfere with further disassembly. On the heater control unit, unscrew all the screws and push the last one into the panel.
- Locate the metal brackets (from the floor to the panel) and remove all the screws that secure them. Don't forget to unscrew the cross member.
- Grasp the hydraulic headlight adjustment handle and pull it towards you. Remove it and the instrument panel backlight brightness adjustment knob. Now pull out the cover and remove the LED insert. After this, unscrew the nuts that appear.
- Pull out the remaining immobilizer plugs and the glove compartment lighting chip.
After this, unscrew the remaining large screws securing the panel and pull it towards you. With a final upward movement, pull it out of its seat. Installation of the new part is carried out in the reverse order along the pre-marked plugs.
The operation of the dashboard lamps provides illumination of controls and information about vehicle parameters in the dark. If they burn out, they must be replaced, since trying to find a button in the dark can end quite sadly.
All replacement work is carried out on a disassembled panel. How to remove the panel is described above. All you need to do is buy a set of new light bulbs. Why the kit? Because it will be more convenient to replace all the lamps at once than to change one, assemble them all and wait for the other one to burn out. All this is labor-intensive and can consume a lot of effort, so it is best to do everything in advance.
To change the lamps in the panel, just make a few simple movements. Unscrew the socket of the burnt out lamp and pull it out. You should twist it counterclockwise. After this, remove the old lamp and install a new one in its place. The cartridge is installed in the reverse order.
If you want to somehow improve the appearance of the dashboard or make it functional, you can tune it.
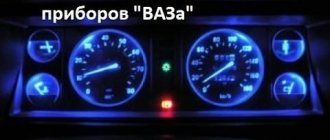
The most common type of dashboard tuning is installing new lamps in the instrument lighting or installing additional lighting. Most often, lamps are replaced with lamps with a different color of luminous flux (for example, green or blue).
The color selection should be such that it does not irritate the eyes, especially in the dark. Additional lighting is used mainly for the lower part of the panel at the feet.
To do this, you can buy a ready-made set of LEDs and connect them to the car’s on-board network.
As in the case of other models of domestic cars, the main thing in modernizing the VAZ 2114 instrument panel is the visual effect. Every car owner wants to make his car not only original, but also cozy.
The first element for improvement that comes to the attention of the craftsman is the instrument panel in the car interior. There can be a lot of options for tuning. But the most important thing is the desire and imagination of the driver himself. The easiest way to modernize the panel is to change the instrument lighting.
At the beginning of improvement work, it is necessary to prepare working material. To start tuning the instrument panel of the VAZ 2114, you need to completely remove the old dashboard. In addition, you will need to remove the speedometer protective glass.
Afterwards you need to remove the arrows of the device. This must be done extremely carefully, as the parts are very fragile. Then we take out the standard trim and change the light bulbs. In the factory configuration they were green.
Read more: Solid and split radiator grille of VAZ 2106, how to remove which one, you can supply instructions with photos and videos
We can replace them with parts of other shades.
At the final stage, we assemble the speedometer structure in the reverse order. We install the cover, after which we install the protective glass of the device. Thus, we tuned the VAZ 2114 speedometer lighting, spending only 30 minutes of our time.
Another element of the car’s instrument panel that is easy to modify yourself is the instrument arrows.
In general, in the standard configuration, the panel of a domestic car is very reminiscent of a parody of a parrot: the backlight of the heater is yellow, the buttons are green, and all the indicators are orange.
Often such a variety of colors interferes with comfortable driving at night, because they all merge into one incomprehensible color. At the same time, the instrument arrows become almost invisible. To correct the situation, you can tune the hands by installing red LEDs.
To do this, we disassemble the instrument panel of the VAZ 2114. We carefully place one red LED under each of the arrows and put on special heat shrinks. We bring the wires of each of the devices outside the panel, and then connect them to the heater wiring. Once this is completed, we can reassemble the shield in the reverse order.
Having completed this work, we received an updated instrument panel of the VAZ 2114, the arrows of which shine in a bright, non-blurring color, and the entire front part of the cabin received a completely different appearance.
Improving the instrument panel of the VAZ 2114 cannot be called difficult work. In fact, the driver only needs to buy a ready-made shield, which then needs to be installed instead of the standard one. Let's consider the most popular options that are in demand due to their attractive appearance.
The most common panel for tuning VAZ is the AMC model. This shield has the following features:
- Wide range of design options. The appropriate one can be selected using one of the tuning programs;
- The panel kit includes an oil quantity indicator, which is not included in any standard vehicle configuration. The device appeared after numerous requests from customers for replacement panels;
- the shield has an attractive appearance thanks to the colored scales with silver edging;
- It is possible to order the dashboard in different shades.
https://www.youtube.com/watch?v=HnHey6YLa_g
Another shield model that is in great demand is the PRO-SPORT panel. This product is made in the form of an overlay on a standard panel. The shield is produced in light and dark colors.
Tuning for your pleasure
The main thing in the process of modernizing any car is efficiency. Every owner would like his car to look original and, at the same time, to feel comfortable in it. Oddly enough, the instrument panel is considered one of the favorite parts for tuning enthusiasts. It can be modified in different ways and, thus, distinguish your own car from a huge number of similar machines.
At the starting stage, it is necessary to prepare the material for work. Replacing a VAZ 2114 panel or its original update requires dismantling the standard panel. It will only be necessary to remove the speedometer protective glass. It is important not to break it. After removing the protective glass, you need to “uninstall” the arrows and indicators.
It is important to be careful as the arrows are very fragile. After that, pull out the standard tab. Then you need to change the backlight bulbs. The standard ones were green, but the purchased ones will be blue. We replace standard light bulbs with purchased ones, then check how they work. After that, install a new tab.
All this will look very impressive. At the end we install directional arrows and protective glass. If you modify your car in this way, it will look very beautiful.
Option 1
Interior lighting does not always match the tastes of the owners. Therefore, a simple way of tuning the dashboard with your own hands can be considered replacing standard instrument lamps with LEDs. To do this we need to remove the instrument panel and disassemble it.
Useful : Where is the tidy fuse on the VAZ 2114?
We glue the LED strip to the places under the scales. An excellent method would be to install RGB strips, since you can change the color on them if you get tired of the old one over time. Next, in order for the main color to be visible, we need to remove the light filter from the overlay. To do this, we use cotton swabs and solvent. (Some inscriptions can be left under the filter so that they stand out)
Then we collect. This is the result.
But in the example, a regular white LED strip was used, and using an RGB strip you can get a similar result:
419c7cu-960.jpg
To begin with, the question arises: what is it good for? The old panel was made, to put it mildly, quickly: the steering wheel covers part of the instruments, the “tidy” itself is reflected on the windshield at night, thus turning the road into a computer quest.
Plastic, or rather its quality, does not stand up to criticism. After traveling several hundred kilometers, the entire cabin is filled with an obsessive creaking and terrible roar. Later the glove compartment begins to open. Ventilation is poor and it is cold inside the car in winter. However, all these problems can be solved. However, is it worth buying a car and immediately thinking about repairing it?
Another thing is the Europanel. She looks modern and fashionable. The material is softer and richer. It is certainly less noisy. Ventilation is also good.
Domestic assembly can be felt everywhere. The air flow control levers move slowly and do not reach the edges of the slots. There are also other little things: there is a big gap somewhere, something else falls off, the glove compartment sometimes opens by itself. But in terms of quantity and frequency, this is completely incomparable with the old version.
In addition, several drawers for small items warm the soul. Europanel is a modern and original solution to many problems associated with the “tidy” of domestic cars.
