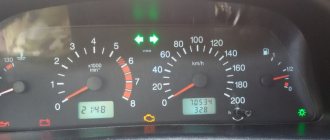
The Chevrolet Niva instrument cluster is designed to display driving characteristics, the current state of vehicle systems that ensure traffic safety, as well as the correct operation of the entire vehicle as a whole. If you are a novice driver, then this description of the dashboard will help you understand the readings of instruments and indicators.
Symbol designations on the Chevrolet Niva instrument panel
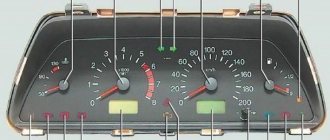
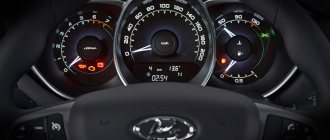
The stock 2004 version has a number of mechanical gauges and analogue icons. In the photo above the panel elements are numbered. The symbols are described below.
| Number | Meaning |
| 3/4 | Standard turn signals also illuminate when the hazard lights are activated. |
| 7 | Indicator of the minimum amount of fuel in the tank. Refuel. |
| 8 | This indicator indicates that the side lights are on. |
| 9 | The brake system is in disrepair. The system needs to be diagnosed. |
| 10 | The high beam of the head optics is on. |
| 12 | Digital mileage indicator, general on top – daily on bottom. |
| 13 | This indication indicates that there is a problem with the engine. In this case, you need to immediately go to the service station. |
| 14 | Emergency light indicator. |
| 15 | Digital display – daily time indicator. Also, during self-diagnosis, an error code is displayed here. |
| 16 | The battery is low. Check the generator and its drive belt. |
| 17 | Handbrake activation lamp. |
| 18 | The oil pressure in the crankcase is too low. |
| 19 | Reserve indicator. |
There is also an additional row of light bulbs on the dashboard, located outside the dashboard.
Here the description of the indicators looks like this.
| Number | Purpose |
| 1 | Empty |
| 2 | The center differential lock is activated. |
| 3 | The immobilizer is activated. |
| 4 | There are problems with the operation of the ABS module; the entire device needs to be checked completely. |
| 5/7 | Backup lamps. |
Panel buttons
Push-button switches are located to the right of the instrument panel. The following description is given in order from left to right.
- Emergency stop button.
- Rear door glass defroster.
- Switch for front and rear (located next to each other) fog lights. If they are installed on the car.
- Variably may be responsible for turning on the windshield washer/cleaner.
- The last slot contains a standard plug for an additional device.
Exclamation mark on the Shnivy tidy: what does it mean
Indicates problems in the car's electronic systems. Check for additional indicators that light up at the same time. Often this is accompanied by the car not starting.
Drivers mainly look for reasons in nodes:
- starter;
- ignition system;
- braking module;
- car wiring.
SRS on the Chevrolet Niva dashboard
If the indicator on the Shnivy dashboard lights up, it only indicates that there are problems in the car’s security system. Check the airbags, belt sensors and wiring.
Description and location of indicators and instruments on the panel
Niva Chevy control panel with designation of indicator devices The instrument cluster includes many elements.
In accordance with the diagram above, the shield structure is as follows:
- The coolant temperature control sensor, the arrow on it rises as the engine warms up. The controller needle should not be allowed to move into the red zone, as this will indicate overheating of the power unit.
- A tachometer is a device that measures the number of revolutions of the engine crankshaft.
- The left turn signal activation symbol, made in the form of a green arrow, appears when the corresponding indicator on the steering column switch is turned on. If the light blinks faster than usual, this may indicate a burnt out bulb.
- Right turn signal.
- Speedometer, this device allows the driver to know how fast the vehicle is moving. The speedometer is connected to the transfer case via an electric drive.
- Gasoline fuel level controller; the Chevy Niva uses an electromagnetic device that functions only when the ignition is activated. When the ignition is turned off, the controller needle moves down the scale.
- The fuel reserve indicator in the gas tank appears on the dashboard when the fuel level in the system is about 4-6.5 liters.
- The side light activation lamp appears on the dashboard when the corresponding optics are turned on.
- The brake system emergency symbol appears if the brake fluid level in the expansion tank has dropped to a critical level.
- High beam indicator.
- A key that allows you to reset the daily mileage readings. You can also use this button to switch to the clock or outside temperature sensor.
- A screen that displays the total and daily mileage of the vehicle.
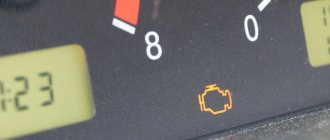
- The Check Engine indicator indicates the need for engine diagnostics. It should always appear when the ignition is turned on, and disappear after starting the engine. If this light remains on while driving, the engine management system needs to be checked.
- Light alarm activation lamp.
- Symbol of time and temperature; you can switch from one mode to another using button 11.
- Battery low indicator, this light should always appear when the ignition is turned on and disappear after the engine is started. If the indicator is always on, this indicates that there is no charging current in the on-board network. This may be due to a failure of the voltage regulator or generator unit, or the lamp may light up if the tension of the generator strap is insufficient or breaks.
- Handbrake activation symbol. If your Niva Chevy is on the handbrake, the indicator will light up when you turn on the ignition and start the engine.
- Indicator of emergency low pressure of engine fluid. It should always appear when the ignition is activated. If it lights up after turning on the engine, this indicates low pressure in the system or a lack of engine fluid.
- Reserve indicator (video author - Artem S).
Also interesting: How to disable abs on a Chevrolet Niva
Errors on the Shnivy panel
When performing self-diagnosis of the BC, the following faults may appear on the display.
| Number | Decoding |
| 0 | There are no problems in the system. |
| 1 | The ECU controller is faulty. |
| 2 | Fuel level indicator is broken. |
| 4/8 | High or low voltage inside the on-board network. Check that the generator set is operating correctly. |
| 12 | The warning lamp diagnostic circuit is faulty. |
| 13 | Open circuit DK1 |
| 14/15 | High/low signal level from DTOZH. |
| 16/17 | High/low voltage inside the on-board network. Here the distributor and battery are checked. |
| 19 | The DPKV is transmitting the wrong signal. |
| 21/22 | Likewise for TPS. |
| 23 | The intake air temperature sensor is reporting incorrect data. |
| 24 | Open circuit of the vehicle speed meter. |
| 25 | DD produces erroneous information. |
| 27/28 | Potentiometer CO – increased/lowered value. |
| 33/34 | The absolute pressure sensor is faulty. |
| 35 | The XX regulator is faulty or does not work correctly. |
| 41 | Phase sensor - incorrect signal. |
| 42 | The ignition control circuit is damaged. |
| 43 | DD – errors in the operation of the highway. |
| 44 | The fuel mixture is too lean. |
| 45 | Opposite meaning. |
| 49 | Loss of vacuum in the fuel line. Check the line for leaks. |
| 51 | The PROM is faulty. |
| 52 | RAM failure or circuit malfunction. |
| 53 | Increased voltage in the circuit. |
| 54 | The octane corrector is torn or out of order. |
| 55 | ECU circuit error. |
| 61 | Oxygen sensor degradation. |
Most errors can be caused by the overlap of several problems. For example, 8+2=10.
What can be improved in the Chevrolet Niva interior?
Many SUV owners, trying to make the inside of the car more comfortable, often get by with just one seat reupholstery. Genuine leather or a high-quality substitute will produce not only a functional, but also a visual effect. Some people consider this method of modernization irrational and replace the standard seats with sports seats from other cars. Upholstery and chrome inserts on the doors are an effective, but far from complete way to improve the interior.
You can also work on the following components with your own hands:
- Reupholstery of the dashboard;
- Dashboard tuning;
- Interior lighting upgrade;
- Improved acoustics.
“Baby” boasts a spacious and voluminous interior space. The manufacturer has provided a truly large area for the manifestation of creative imagination. It is enough to approach the work creatively, and after a few hours you can get a fun-filled car interior.
Shnivy tidy does not work: reasons
Usually this is damage to the module's power circuit, moisture/condensation on the board, or mechanical damage caused by improper repair.
The problem is simple when studied in detail, and can be easily eliminated without the help of specialists.
The shield does not light up
If it just goes out (the backlight has failed), check the corresponding fuse inside the mounting block. Next you need to follow the wires towards the tidy. Here the condition of the contact groups and the presence of oxidation on the terminals are checked. If there are such problems, the problems should be eliminated.
If only some of the light bulbs stop lighting, dismantle the device and check the lighting elements directly for damage.
Shnivy's shield is blinking
A typical problem in cars that are driven on rough terrain or broken roads. A symptom of trouble is that the device periodically goes out while driving or blinks quickly.
Check the wiring and connecting terminals for possible damage or loose contacts.
Instrument needles Strings stuck
In such a situation, check the systems.
- Fuse and power circuits of the interior lighting line. The design of the network is such that the power is crossed, which causes problems.
- Mass disappears on the connected elements of the on-board circuits.
How to remove the tidy
Follow the simple procedure.
- Disconnect the car. Usually users remove the battery terminal, but you can remove the power fuse.
- Next you need to remove the steering casing. This is done by unscrewing the five mounting screws.
- Next, the steering wheel and its switches are removed.
- Now you need to unscrew all the fastening bolts that hold the tidy in place.
- After this, you need to carefully lift the panel from its seat and disconnect all contacts of the shield wires.
- Now you can completely remove the part from the machine.
Reassembling the unit is performed in reverse order.
Parsing
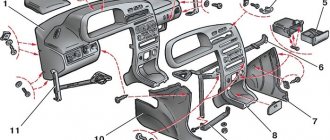
If you need to disassemble the Chevrolet Niva instrument panel, you need to do the following:
- Use a screwdriver to remove two plugs and unscrew the screws, which are located one on the right side of the emergency gang and the second in the right corner of the panel
- We remove the panel lining on the right side and dismantle all the connectors on the control buttons. It’s better to take a picture of which contact and where it fits before
- After this, we disconnect the lining on the left side and disconnect the pads from all the buttons, after which we completely remove the lining
- Unscrew the screws that secure the panel and remove it
As for the changes and innovations of the software, a new design of the car was recently presented, where it was clear that a new dashboard of the Chevrolet Niva 2021 was installed.
Also interesting: Buy auto parts resonator 2131 for foreign cars in the AUTOPITER online store
Read news about the new field
- Chevrolet Niva speedometer does not work
- Ignition relay Niva Chevrolet where is it located
- Review of the standard alarm system Niva Chevrolet
- Niva Chevrolet installation of air conditioning - Auto magazine MyDucato
- Niva Chevrolet alarm connection points
- Installation and repair of Niva Chevrolet cooling system fans
- Chevrolet Niva pinouts. Wire diagrams || Niva Chevrolet power window button diagram
- Instrument cluster Chevrolet Niva tuning
