Disassembly procedure
The first operation is not removing the wheel, but unscrewing the large wheel bearing nut. It is caulked, so it will be much more difficult to loosen when the car is raised. After this, the wheel bolts are loosened and the car is raised with a jack.
Do not forget to place reliable supports under the rear wheels to secure the car.
If the Priora has a metal sump protection installed, then it also needs to be removed in advance. In addition, it does not hurt to partially empty the gearbox oil sump to avoid liquid lubricant leaking through the open hole after removing the drive.
When is replacement required?
The hinge mechanisms of the Lada Priora, which transmit rotation from the engine to the front wheels, are considered quite reliable and in some cases last 100-150 thousand km. Grenades should be replaced in the following cases:
- The car's mileage is more than 100 thousand km;
- the parts of the unit have become unusable, as evidenced by crunching sounds when turning the front wheels.
The first type of replacement is preventative. Recommended for motorists for whom a car is a tool for making money, which must be constantly in combat readiness and serve without fail. Replacement due to wear is a more common option; it is practiced by most Priora owners.
In order to change expensive CV joint parts as rarely as possible, it is important to promptly detect torn boots, through which dirt and dust enter the mechanism. Grenades cannot be repaired; they only need to be replaced. It is much easier and cheaper to replace leaky anthers so that the assembly lasts as long as possible.
Preparing for work
To replace the grenades, you need a car lift or an inspection ditch, since some of the disassembly work is performed from below. The following tools and devices will be required:
- standard set of socket heads with a knob;
- mount;
- open-end wrenches;
- metalworking tools, which include screwdrivers, hammer and pliers;
- a device that helps press the steering rod ball pin out of its socket in the strut.
If you don’t have a steering rod puller, then it’s easy to find one from fellow car enthusiasts or just buy one; it’s inexpensive. This is a steel cylinder with a slot and a bottom into which an extrusion bolt is screwed. To carry out the replacement in the inspection hole, you will also need a jack with a wheel wrench to lift the car. To completely disassemble the unit, it is advisable to have a vice and purchase CV joint-4 thick lubricant.
Installation of new hinges
After disassembling the drive, it is necessary to install new parts and reassemble the transmission in the reverse order. Replacement is done as follows:
- The small clamp is put on the axle shaft first, followed by a new boot. The clamp must be placed around the end of the casing and tightened. It is better to turn the boot in the other direction so as not to interfere with the installation of the hinge.
- Add SHRUS-4 lubricant to the hinge mechanism. According to the instructions, there should be at least 40 cm³ in the outer grenade, and 80 cm³ of thick lubricant in the inner grenade.
- Place the grenade on the shaft, making sure the splines match. Using a wooden adapter, press it as far as possible with gentle hammer blows.
- Pull the boot onto the grenade, apply a large clamp and tighten it. In the same order, the operation is performed on the other side of the axle shaft.
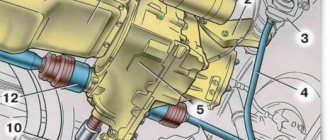
Now the drive assembly can be put into place. In order not to confuse the hinges, you should follow the mark placed on the axle during disassembly. The assembly is mounted into place from the inspection ditch, the splined part of the internal grenade being inserted first. To seat it in the slots all the way, you will have to rest the axle on the lower lever and apply several blows with a hammer through a piece of wood from the other side. Further assembly proceeds in reverse order.


