The Lada Vesta car is equipped with a combined fuel filter, which includes elements for coarse (mesh) and fine purification of gasoline where the filter is a paper element - it is located in the fuel module. The replacement itself is not frequent, but it must be done. Unlike most models, here the fuel filters are located in close proximity to the electric fuel pump, also known as the fuel pump, which significantly complicates the independent replacement of the fuel filter on the Lada Vesta. Nevertheless, the car periodically needs such replacement, so let’s deal with the fuel system in advance. Read the article to the end and you will understand this topic: you will know where the fuel block is located on the Lada Vesta, what filter can be changed in it, and are there any analogues of this part!
Fuel supply system design
The fuel supply system of the Lada Vesta car consists of 5 parts:
- Gas tank with filling pipe. The gasoline tank is made of compressed plastic and is attached to the bottom of the car with two metal clamps. The filler neck is located on the right side of the Vesta. The plug has 2 valve mechanisms. One ensures the release of excess pressure created in the tank due to thermal expansion. The other serves to intake air, which fills the container when the liquid level in the gas tank decreases.
- Fuel module. Provides pumping of gasoline into the fuel rail. Consists of a fuel pump, bypass valve, gasoline level sensor and filter device.
- Injectors. Located on the ramp. Fuel is injected into the internal combustion chamber.
- Adsorber. The main component of the vapor recovery system. Located on the right side of the car, near the front fender. Equipped with a purge valve.
- Pipelines. Serve to transport fuel and gases between components of the fuel supply system.
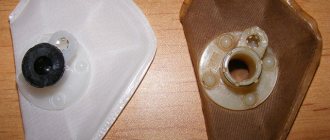
Where is the fuel filter on the Vesta? Photo source: https://www.drive2.ru/l/527598181760894565
Unlike the design of the unit installed on previous AvtoVAZ models, the Vesta fuel filter is not portable. According to the manufacturer, the cleaner's lifespan is sufficient for the entire life of the vehicle. Sometimes cases of low-quality gasoline are poured in, which forces owners to replace the mesh in the Vesta filter.
Replacing the fuel level sensor Lada Vesta
First of all, remove the tip from the output of the fuel pressure regulator.
Next, the plug with the wires is disconnected from the cover (which requires releasing the latches).
Then, using a screwdriver, the block mount is detached.
This makes it possible to disconnect the plug and the fuel pump.
In the end, all that remains is to unscrew a couple of fasteners and remove the fuel level sensor.
Article number and cost of the original fuel filter
The original Vesta filter element does not have an article number. On the open market, a mesh that performs rough cleaning can be found at a price of 165 rubles. Produces consumables. Under its logo you can find repair kits for the Lada Vesta fuel pump costing 950 rubles. The kit includes coarse and fine filtration devices, a pulsator tube and a lid (assembled).
Replacing the fuel filter. Photo source: https://www.drive2.ru/l/527598181760894565
In an official car service, they do not change individual components, but install a new unit. The catalog number of the fuel pump is 21800113900900. The cost of a new original unit averages 6,000 rubles.
Recommendations for selection
Service station foremen and managers of official representative offices advise purchasing consumables with original catalog numbers.
The high price of a product is not affordable for everyone, so car owners are forced to look for cheap analogues, but not always of high quality.
Check the packaging for integrity and the presence of holograms. Ask distributors to provide quality certificates for their products. Otherwise, avoid questionable purchases.
Conclusion
The design of the fuel system is quite complex, not every master can handle it, let alone an inexperienced driver. However, elements such as a filter or mesh can be replaced independently, without resorting to outside help. If you follow the recommendations, dismantling will take 10 - 15 minutes. If you doubt your abilities, or don’t have enough free time, contact the service station masters.
When to change the fuel filter on Vesta
According to the manufacturer, the service life of the fine gasket is equal to the service life of the fuel pump. The fuel pump has a resource of 180 thousand kilometers. Photos on the Internet show dirty filter elements with more modest mileage figures.
On forums, car owners say that they change the fuel filter on their Vesta every 30-40 thousand km. The frequency of replacement is directly affected by the purity of the fuel used. When refueling at a suspicious gas station, the filter elements may become clogged within the first kilometers of driving.
Signs that replacement is needed
You can understand that the filtration device is clogged by some characteristic features of the machine’s behavior. These include:
- fuel pump noise;
- increased fuel consumption;
- reduction in engine power;
- car jerks when driving;
- floating idle speed;
- Difficulty starting the engine.
When the “Check Engine” light comes on and subsequent computer diagnostics, a clogged fuel filter displays error P0171.
Photo of the fuel filter on the Vesta. Photo source: https://www.drive2.ru/l/527598181760894565
These signs may also indicate other problems. But if the filter device was changed a long time ago, then you can start eliminating the problems by replacing it.
Review of Manufacturer Prices
| Name / Catalog article | Price, rub.) |
| Electric fuel pump module 21800113900900 | From 5000 |
| —/— 8450008680 Motorika LLC | —/— |
| "AISIN" (Japan) 81B04480 | From 3500 |
| Original fuel pump 311111R000 (Kia Rio, Hyundai Solaris) | From 4500 |
| Standard fuel pump 311111G500 Compatible with KiaPicanto, Hyundai Elantra, Sonata | From 5500 |
*prices are as of January 30, 2019. When installing spare parts from other manufacturers, it is often necessary to file the mounting sockets by 1–3 mm and press the connectors.
Self-replacement of the coarse fuel filtration device
The process of removing the gasoline pre-purification mesh on Vesta is more complicated than dismantling the filter on AvtoVAZ cars of other models. Difficulties arise from the fact that the unit is built into the fuel pump. A flathead screwdriver may be needed when working to remove the fuel pump.
Video demonstrating how to replace the fuel filtration element on a Lada Vesta:
How to remove
Step-by-step instructions on how to remove the Vesta fuel filter:
- Remove the back cushion of the sofa. The seat is secured with latches at the front and hooks at the back. Remove the interior soundproofing gasket to provide access to the pump cover.
- Rotate the cover protecting the fuel pump and remove it.
- Vacuum and wipe everything thoroughly so that dust and small debris do not get into the gas tank.
- Disconnect the fuel pump power terminal.
- Start the car and let it run until it stalls.
- Remove the terminal from the battery.
- Disconnect the fuel line.
- Turn the fuel pump retaining ring counterclockwise and remove it.
- Remove the element in the plastic case. You need to pull out the knot carefully, at a slight angle. Otherwise, the float sensor that determines the fuel level may be damaged.
- Carefully pull the lower part of the pump, where the Lada Vesta fuel filter is located, and remove it.
- Disconnect the drain pipe.
- Remove all the springs from the glass, marking which part was on which guide.
- Unclip the 3 latches and remove the fuel module.
- Pry up the spring holding the mesh and remove the coarse cleaning element.
Getting to the place where the fuel filter is located in the Vesta is quite difficult. You need to remove the components of the assembly very carefully, otherwise the process of replacing the mesh will result in the purchase of a new fuel pump.
How to install a new one
The fuel pump is assembled and installed in the reverse order. After completing the work, you need to bleed the fuel supply system. To do this, insert the ignition key into the lock and turn it a couple of times without starting the car. Then the car is started.
Reviews
| № | Positive |
| 1. | Kirill , 32 years old, broker, owner of Lada Vesta: I actively use the car, I have no special comments about it. I fix minor damage and defects myself. The time has come to update the fuel, I replaced it myself. There is nothing complicated, I carefully studied the recommendations of specialists. Saved thousands of rubles at service stations. |
| 2. | Dmitry , 41 years old, manager: I systematically carry out technical inspections of the car and visit services. I try to buy original parts, but due to the high cost, I sometimes buy domestic analogues. They are 20–25% cheaper than imported ones, and the quality is in no way inferior. |
| 3. | Gennady , 37 years old, entrepreneur: I deliver goods, I travel a lot in a month, and there is no time left to independently diagnose the car. I constantly use the services of the service station. For me, a working car is the key to stability and income. I buy only original parts, despite the fact that they are sometimes a third more expensive than their analogues. |
| 4. | Dmitry , 40 years old, taxi driver: I’ve been working in a taxi company for the second year, driving a Lada Vesta. The car is good, the assembly is high quality. I replace many consumables myself, without visiting a service station. |
| 5. | Valentin , 30 years old, painter: I bought Vesta secondhand and received it in good condition. I periodically carry out maintenance on my own. The factory warranty has long expired, the design is clear to me, the principle of operation of the mechanisms is familiar from the Lada Granta. Replacing the same fuel filter is not difficult. Everything is simple and accessible. |
| 6. | Vladimir , 45 years old, entrepreneur: I use the car to travel to the office and on weekends out of town. I maintain Vesta in good condition, systematically carry out diagnostics, and replace consumables. Recently installed new air and fuel filters. There were no difficulties, I followed the instructions in the instructions. |
| Negative | |
| 7. | Victor , 45 years old, consultant: The domestic Lada Vesta is a good car, but replacing consumables with Russian ones is not the best solution. Instead of a fuel filter from Renault Duster, a domestic one is installed. Poor workmanship, insufficient cleaning. |
| 8. | Vasily , 40 years old, furniture salon worker: for me Vesta is still a crude model with many flaws and requires systematic care. Original imported spare parts are expensive, while domestic ones, although cheaper, are of lower quality. |
| 9. | Dmitry , 35 years old, employee of a recruiting company: I use the car mainly for commuting to work, the mileage is not large. There were no capital investments, but I constantly hang around her. When replacing consumables and filters, difficulties often arise; sometimes I turn to service. |
| 10. | Vladlen , 29 years old, correspondence student: overall I’m happy with the car, no particular complaints. Breakdowns happen, but they are insignificant, I promptly contact the service station to fix them. In the engine compartment, under the dashboard there is limited space, access to components is limited. For me this is discomfort. |
| Video - Disassembling the fuel pump |
| Video - How to replace the fuel filter |
Vesta and elastic bands from Solaris
Starting to study the systematic breakdowns that owners of the model experienced from time to time, it almost immediately became clear that a miracle had not happened - Vesta has plenty of weak points. First of all, I would like to talk about rubber products that wear out, tear, scratch and disturb the silence so actively that I had to devote an entire section to this topic.
Briefly about the quality of tires for a completely new car
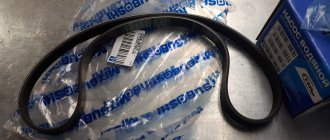
It is recommended to replace standard windshield wiper blades with something more kosher immediately after purchasing a new car, otherwise in rainy weather you will have to look at the road through arched stripes. Little things, of course, especially when you consider that normal rubber bands can be bought for 150 rubles apiece, but, as you may have guessed, this is just the beginning. Vesta owners are also concerned about the side window seals, which, as they lower and raise, become covered with a scattering of “eternal” scratches, and in order to prevent this from happening so intensely, the friction points have to be often cleaned of dust and dirt and, for reliability, lubricated with everyone’s favorite “magpie” ( WD-40). We have already seen something similar in a used Kia Ceed JD.
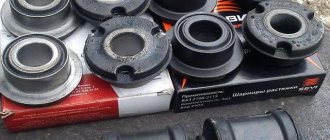
And, of course, sounds. Even though this is far from the only source of noise for the Lada Vesta, it is still the stabilizer bushings that begin to creak earlier than anything else, since this happens in the very first stages of the semi-domestic beauty’s life. It is useless to lubricate and replace with the original. The best thing you can do is to break allegiance to AvtoVAZ and install the rubber bands of the main competitors, with whom Vesta so bloodthirsty “fought” on advertising posters - the brothers Hyundai Solaris and Kia Rio. Someone is adding parts from the Kia Soul and this also works in the battle for silence.
Sometimes you have to change bushings every 30,000 km, or finally fit rubber bands from a competitor called Solaris
Sometimes you have to replace the rear silent blocks of the front control arms with something imported, the rubber of which is accustomed not to crack and tear, but to immediately peel off from the holder. Moreover, the instability of quality has led to the fact that for some people this happens after only 50 thousand kilometers, while others drive a solid 100 thousand without replacement.
Tubes from the vacuum brake booster and systems for changing the length of the intake manifold also end up in landfills near garages. In the first case, a “hissing” from under the hood will help you understand what happened; in the second case, floating speed and poor starting.
This hose has already given in, disrupting the operation of the engine.
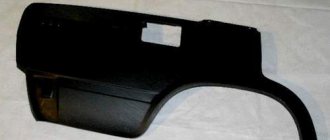
Finishing the topic of the total unsuitability of the rubber used in the Lada Vesta, one cannot ignore the exhaust gas removal system, that is, the muffler, which after the first year of operation “slides” down a couple of centimeters, bringing to motorists nostalgic feelings for the times when the pipe was hung on an air filter . At the same time, the old element ideally replaced sagging rubber bands forever, but Vesta, alas, does not have round filters and you will either have to reliably “collective farm” in another way, or just patriotically install the original every year
In this case, special attention should be paid to the condition of the intermediate corrugation, which has become one of the leaders in replacement during early car runs:
Torn corrugation
Why is it needed?
There is a coarse filter that comes first from the gas tank. After all, first the lid where the fuel tank is located is opened, a gun is inserted there, the magic button is pressed and the fuel flows. Yes, it takes a lot of your money along the way, but what can you do? The location of the tank can be on the left or right, but this does not play a special role. Coarse cleaning, which is a mesh that traps large particles of debris.
This is followed by a fine filter. This is exactly what we will talk about. This element is called a fuel filter. With its help, small particles are retained. But even they can penetrate your diesel engine or gasoline injector.
Dust, dirt, debris, rust elements. All this can penetrate the system, causing a clogged pipe, tube, valve, fuel hose, or fuel pump components. Nothing good will come of this if timely replacement is not made.
To understand how to replace the filter, which element to choose and how to choose an analogue for the device you are going to change, you need to have at least a basic understanding of such an important component of the car.
I suggest starting with varieties.
Kinds
Modern fuel filters installed on Ford Focus, Nissan Almera, Hyundai Solaris, Nexia, Mazda, Opel, BMW e60, Renault Logan and Megane, Kia Rio and many others have at least two degrees of purification.
- First degree. This is a rough cleansing that allows you to get rid of large contaminants. Not to be confused with a regular mesh in the tank, which is not available everywhere.
- Second degree. Fine cleaning. This is the main task that falls on the shoulders of the filter.
And here you probably have the main question - where is the filter device located? I don't know. No, I can answer, but if you tell me specifically what make of your car or what year of manufacture. After all, on the same Chevrolet Niva, different Opel, Toyota, Mazda models, on the Volkswagen Passat B3, as well as on the domestic VAZ 2114, 2112 and 2110, the location may differ.
However, they are always located somewhere between the engine and the gas tank, since the filter's job is to prevent contaminants from entering the engine while the fuel moves from the tank to the engine. What's in the gas tank itself? That's right, a coarse cleaning device. This is an additional filter element so that any unscrupulous gas stations do not spoil your car.
Now let’s talk about the types of filters themselves. What element will be on the car? It depends on the type of engine. There are three of them, as you know. Except for electric motors. Well, there is no need for a fuel filter, as you understand.
Therefore, there are three types of filters:
- carburetor;
- diesel;
- injection.
Location
So you bought yourself a brand new sedan and you think it’s time to change the filter for this engine. Want to choose the best? Well then, take a closer look at Cummins devices. Mann, Hertz. They have proven themselves well, and they cost quite a bit.
You probably know whether your engine is diesel, injection or carburetor
This is important to understand the location of the fine filter, that is, our today's hero
- Carburetor. In these engines, the TF (fuel filter) is placed in front of the carburetor itself, and is often in a transparent housing to control contamination. These are the most basic devices, because the carburetor is the least demanding on the quality of fuel.
- Injector. It uses nozzles and therefore requires high-quality filtration. And the fuel is supplied under high pressure. Therefore, the filters are enclosed in durable metal housings. The TF has to be regularly maintained, cleaned and monitored for its condition. They are placed mainly under the bottom of the car to make it easier to dismantle and replace.
- Diesel. A diesel engine also needs high-quality purified fuel, since the system is quite sensitive. Diesel fuel has a higher moisture content than gasoline. The TF is designed to filter debris and remove accumulated moisture. A separator is provided for this purpose. The location is quite simple - between the engine and the pump that pumps fuel.
Any fuel system must include a TF. They are replaced assembled, that is, there is no point in removing the filter elements themselves (usually special paper), leaving plastic or metal. Be sure to look at the number and article number of the filter that is installed on your machine, and check the operating manual from the factory. This is the only source of truthful information regarding the maintenance of your particular vehicle in this configuration and with this type of engine.
Vesta's competitors
At the start of sales, Lada Vesta challenged not just anyone, but the more expensive market leaders in the form of Hyundai Solaris and Kia Rio. However, so far the domestic model is significantly inferior both in terms of performance quality and, naturally, in sales. The most suitable rival for it at the moment will be the Renault Logan, which is already related by the manufacturer, or the also co-platform Nissan Almera. As an alternative, you can consider the “German” Volkswagen Polo and Skoda Rapid, or the Russian Datsun On-Do, if you need something simpler and cheaper.
Related article: Lada Vesta – VIN location and engine number
It’s clear what to do, let’s get to work!
We purchase the following components in the store:
Low frequency amplifier microcircuit TDA7560, without a letter code at the end of the name. Cost about 450 rub. Electrolyte with a capacity of 10,000 uF at 25 V with an operating temperature of 105 degrees. The radio is very hot when working. Cost about 100 rubles. Film capacitor with a capacity of 0.47 µF at 250 V, type K73-17. Cost about 20 rubles. We bought the components, remove the radio and take it to the desktop, where we will do the modernization.
This is what the radio looks like on the desktop, where we will solder the microcircuit and connectors.
And this is a marking plate, if anyone doesn’t know.
Let's disassemble the radio! This process did not cause any difficulties; we unscrewed the visible screws and that was it.
This is a view of the PCB with the top cover removed.
We disconnect the cable from the board and unscrew it from the case.
This is what the printed circuit board looks like.
And we will change these elements. The chip is circled in red, the electrolyte in yellow.
Option I
It was suggested by Alexander, who is known on Drive as MiheyA. The following components are required:
- Bosch brand fuel filter - it can be found under article number 0986450114. Price is about 500 rubles.
- Bicycle camera.
- Mounting the power steering reservoir from model 2110.
- Fuel hoses for model 2170 ramp – length 405 mm. The price is about 600 rubles.
The filter is placed on the bracket, and the mount itself is installed on the studs of the ABS block directly on top of the factory nuts.
To better fix the filter, a piece of rubber cut from the camera is glued to the inside of the mount.
In the end, all that remains is to connect the fuel hoses.
In addition, another piece of rubber must be attached to the fuel hose with clamps to eliminate the possibility of chafing.
Other shortcomings
The result of the still crude product was the following:
- rubbing of the cooling system pipes;
- sagging rubber bands for attaching the muffler (rubber bands are enough for 20-30 thousand km);
- problems with the exhaust resonator (there are cases of burnout at 60-80 thousand km);
- there is no lock on the gas tank cap - we don’t live in 90, but they can try to drain the gas;
- The decorative caps on the alloy wheels, which are located in the center of the hub, fly off.
- Weaknesses in the Chevrolet Aveo T250 The most possible first malfunctions and diseases of the Chevrolet Aveo
- Top 5 most terrifying facts about Hyundai Creta
- Review of KIA Sportage 3 (Kia Sportage 3) with mileage 2010-2015. Review
- Lada Granta engine malfunctions