The latest releases of VAZ "tens" engines included rubber valve seals. The kit consisted of an expander spring and a steel bushing. The manufacturer recommends replacing the oil removal part after the car has run 150 thousand kilometers. Many car owners do this within the walls of a car service center. At the same time, they are completely unaware that in a VAZ 2110, replacing the oil seals of 8 valves can be completely done independently.
The main purpose of the valve stem seal is to seal the joint between the rods. This circumstance ensures that engine oil will not flow into the gap.
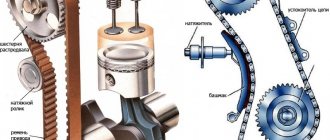
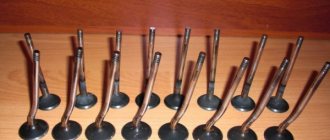
The engine will operate efficiently only when the components in the gas distribution mechanism are continuously operating. Engine parts are constantly subject to friction. To minimize their wear, they should be lubricated with oil. But it should not enter the combustion chamber. For this purpose, seals are installed.
When they wear out, the oil will end up in the engine cylinders. This will cause a circumstance to arise in which the oil will begin to burn and form carbon deposits on the walls of various elements. The result will be a drop in compression and the valve will not close tightly.
Design of valve stem seals
Content
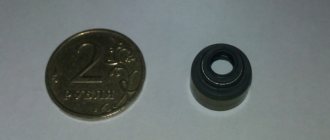
The valve stem seal has a simple design consisting of three basic elements:
- base . It is represented by a steel bushing. This is a kind of frame to give strength;
- spring _ Thanks to this element, maximum adherence of the edge of the rubber seal to the valve stem is ensured;
- stuffing box . It is made from rubber or recycled rubber. This element removes excess lubricant.
Product selection
The choice of valve stem seals should be taken seriously, since the normal operation of the power unit will depend on this.
A visual inspection is required before installation.
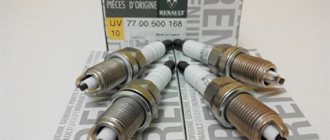
Typically, the manufacturer recommends installing only original (factory-produced) parts. As for AvtoVAZ, for 2110 it will be under catalog number 2112-1007026. The average cost will be 700 rubles.
Motorists recommend paying attention to analogues!
But, as practice shows, most car engine repair specialists do not recommend using original caps. Valve seals manufactured by Elring with catalog number 825.050 are considered the best for installation. Their price will be 700 rubles, the same as the original ones, but the quality is much higher.
In addition to the presented companies, there are a number of analogues that can be used for installation on the VAZ-2110.
Why do rubber seals wear out?
When the engine is running, heavy loads occur.
This is understandable, since the valve performs over 1000 strokes in one minute. Additionally, it should be noted the effect of the chemical factor, which is caused by heated oil and exhaust gases. The following signs may indicate that the oil seal has worn out:
- The candle thread becomes coated with oil.
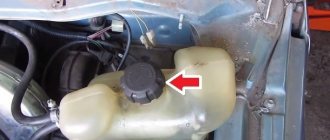
- Smoke appears from the neck where the oil is poured.
- The car's exhaust pipe itself smokes heavily.
- Soot appears on the spark plug electrodes.
- Fuel consumption increases noticeably.
- The recently filled oil is contaminated.
If such manifestations occur, it is necessary to replace the valve stem seals of the VAZ 2110.
Important! It is recommended to change the caps to those intended for this car model.
However, there are exceptions:
- the price of “original” caps is much higher than those offered to the buyer in the nearest specialized store;
- If the cap is damaged, there is simply no time to search for and purchase exactly the same part. This forces you to use some other options.
Causes of failure
The most obvious factor indicating problems with the crankshaft oil seal is numerous traces of oil on and near the engine. There may be several reasons for the loss of strength of the crankshaft oil seal (CS). Here are the main ones:
- Natural physical wear of the part associated with a long service life, which has already approached 3 years or even exceeded it;
- Problems that arose during the last installation of a new SC;
- Incorrect assembly of the unit, which resulted in a violation of the tightness and integrity of the cuff;
- Presence of mechanical damage on the element;
- The use of rubber of dubious quality, which even theoretically could not last long.
The design of the “ten” provides for the presence of two crankshaft oil seals - front and rear. Their replacement is somewhat different. Therefore, they should be considered separately.
Tools and materials
What's a repair without tools?! You will need a certain set of everything you need. This set includes:
- Car keys;
- Timing belt tensioner;
- Set of screwdrivers with bits;
- Waste collection container;
- Antifreeze or high-quality graphite lubricant;
- Container with motor oil;
- Heat-resistant sealant;
- New crankshaft seals.
Procedure for replacement
If you need to replace VAZ 2110 8 valve stem seals intended for other cars, then the following points must be taken into account:
- The diameters of the valve stem and the guide bushing, the location of which is the seat belt, must match.
- In comparison with the “original” valve, the height should not be exceeded by more than 0.5 millimeters. Otherwise, the valve stroke will be very large and the spring retainer may be damaged.
- The cap should not have a diameter that is too large. This will ensure freedom of passage inside the valve spring. This is most important for those engines whose valve has two springs. In this case, the outer diameter of the cap will be limited by the internal spring.
- The length of the seat on the cap and the guide sleeve should be close in size. If the belt is short, it may be damaged by the edge of the sleeve.
- Pay attention to the internal profile that the surface of the cap has.
- When replacing VAZ 2110 valve stem seals, the year it was produced is taken into account.
Instructions
You can replace the oil seals on a VAZ yourself. To do this, you should find a place where the operation will be performed; it is better to use an inspection hole or overpass.
Required Tools
To perform the procedure you need to prepare:
- set of sockets and keys;
- screwdrivers with bits;
- container for draining the working fluid;
- new cuffs;
- sealant.
Stages
The procedure for replacing the front crankshaft seal consists of the following steps:
- The negative terminal of the battery is disconnected to de-energize the car.
- We remove the timing belt and engine protection.
- Then you should loosen the timing belt tension and remove it. In this case, you need to ensure that the marks match.
- Next, unscrew and dismantle the right front wheel.
- Now remove the generator drive belt.
- Then you need to unscrew the mounting bolt and remove the crankshaft pulley.
- Drain the oil from the engine.
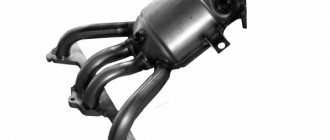
- We dismantle the oil pump on which the front oil seal is installed.
- We replace the front cuff with a new one, lubricating it on the outside with sealant and on the inside with machine oil.
- Assembly is carried out in reverse order.
Replacing the back cuff is a little more complicated and involves the following steps:
- First of all, the negative terminal from the battery is disconnected.
- Then you need to remove the clutch basket.
- Next, the flywheel is dismantled.
- Remove the clutch housing protective cover.
- Unscrew the bolts securing the rear oil seal holder and remove it together with the seal.
- Having secured the clamp in a vice, remove the seal.
- We inspect the cuff retainer. If defects are found, the part must be replaced.
- Using a suitable mandrel, insert the new cuff into the holder with the working edge inside the retainer.
- We change the holder gasket and put it in place, having previously lubricated the crankshaft edge and flange with engine oil.
- When mounting the holder, you need to carefully tuck the working edge of the seal ring onto the shaft flange using a wooden stick.
- Next we carry out the reverse assembly.
After replacing the shaft seals on a VAZ, you should check after a while for oil leaks.
Algorithm of actions for replacing valve stem seals on a VAZ 2110
Of course, to carry out such actions you will need certain tools.
First, the caps must be removed:
- The wire should be disconnected from the minus terminal of the power source.
- The camshaft has a pulley with teeth. It needs to be removed.
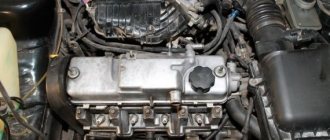
- The block head is released from the cover.
- The mass must be removed from the studs. To do this, you need to unscrew the two fastening nuts.
- The back cover is removed from the block head. It is secured with a bolt and two nuts.
- The cylinder head is closed with a cover. It along with the sealing ring should be removed.
- The nuts that secure the front and rear bearing housings must be unscrewed evenly.
- Both housings must be removed.
Important! The camshaft key must be removed immediately. Otherwise, you can simply lose it, since it does not fit quite tightly.
- The next step is to remove the camshaft from the cylinder head.
- It is necessary to remove the oil seal from it.
- The crankshaft should be turned. But this must be done so that the location of the piston is at top dead center.
- Next, you need to unscrew the spark plug. To prevent the valve from falling through, a metal rod must be inserted into the resulting hole.
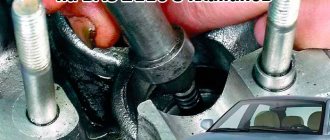
- Then a device is installed that will compress the valve spring. You will need a nut that does not have a toothed collar.
- When the spring is compressed and two crackers are removed, the device is removed.
Advice. When removing the caps, they should not be turned, otherwise this will damage the guide sleeve.
Then you need to install the caps:
- The cap must be inserted into the mandrel, but it must first be “bathed” in engine oil.
- The part is pressed all the way into the lower plate.
- After this, the spring is installed.
Install all remaining valve stem seals in a similar manner.
It is easy to see that replacing the oil seals on a VAZ 2110 8 valves without removing the head can be done completely independently, without resorting to the services of a car service. But it must be said that such actions are carried out only if the model is VAZ 2110. If there are other models, such procedures will not be required.
And one moment. Of course, independent work on changing valve stem seals is only possible if the car owner is knowledgeable about technology and is familiar with the tool. Otherwise, there is nothing left to do but seek help from a car service center. Qualified specialists will provide active assistance in this.
How to understand that it's time to change
The dense crankshaft rings are encased in a hard shell and consist of two parts - the front and rear oil seals. They prevent dust and dirt particles from entering the car crankcase and causing oil leakage.
Typically, the mileage of a part is designed to last one hundred and fifty thousand kilometers, but they can wear out earlier due to poor quality of the part or if the VAZ operates under high loads. The same can happen if there is constant overheating or if you do not change the oil and filter in a timely manner.
You can tell that a problem has arisen by the appearance of oily smudges on the gearbox or engine. It is worth considering that such problems with oil are fraught with rupture of the timing belt, which, as a rule, will lead to the risk of damage to the valves. This, in turn, already threatens serious repairs to the car’s engine, and therefore you cannot let the situation go on the brakes without doing anything to eliminate leaks.
Why do you need to change crankshaft seals?
Oil leaks on the rain cover may also indicate wear of the crankshaft oil seal.
Replacing crankshaft oil seals does not depend on operating time or total mileage. It depends on the:
- Operating conditions.
- The age of the car.
- Driving style.
- Periods of engine maintenance and prevention.
Oil seals can be changed in a timely manner if cracks are visible on their surface and the rubber loses its elasticity. Such measures will significantly extend the life of the motor.
Consequences
A worn oil seal is no longer able to hold oil, which begins to come out and settle on surfaces.
If you do not change the seals in time, this can lead to the following consequences:
- Oil consumption will increase significantly.
- Dirt will begin to accumulate under the hood, which can lead to unstable engine operation.
- Rubber parts under the hood that get oil on them will begin to deteriorate.
- If oil gets on the battery terminals, it will break the contacts and, accordingly, there will be problems with starting the car.