When servicing your car, you should carefully pay attention to its filter elements. Particular attention should be paid to fuel system filters. One of these filters is the fuel pump mesh; its replacement can be done quite simply and without much difficulty by following the instructions given in this article.
Purpose
The fuel pump mesh is a coarse fuel filter.
It serves to ensure that the fuel sucked in by the gasoline pump enters the fuel system without coarse particles of debris and is then processed in a fine filter, and then goes to the injectors.
Without the use of a mesh, the life of the gas pump is reduced significantly, since the quality of fuel in our gas stations leaves much to be desired.
Where is
The coarse filter is located directly in the car’s gas tank, namely in the gas pump cup and fits tightly onto its fitting. People call it a “diaper” - this is not the case, where the correct name suggests is a coarse fuel filter. Its cost starts from 50 rubles.
Signs of a clogged filter
By indirect signs you can determine whether it is dirty, but it is not always possible to reliably find out about its condition without visually assessing the mesh.
Signs of a dirty filter:
- The car accelerates poorly;
- There is no necessary dynamics;
- Unstable idle;
- The engine starts poorly and stalls;
- Increased engine vibrations;
Based on the signs already stated above, you should begin inspecting the fuel system and be sure to start with coarse and fine filters. You can read how to replace the fine filter here.
Also, if the mesh is very dirty, the fuel pump itself may fail. Therefore, it is not recommended to neglect its replacement.
Replacement process
Before proceeding with the replacement, it is necessary to prepare the tool and the place for disassembling the glass itself. To do this, you need a clean cloth to spread it on a workbench or table and work on it. This is necessary to prevent excess debris from getting into the fuel pump.
Required tool:
- Ratchet or crank;
- Head on “10” or “8”;
- Key to "17";
- Pliers;
- Screwdriver;
Step by step process
- The first step is to relieve the residual pressure in the fuel line. To do this, remove the fuel pump fuse (F3-15A). The fuel pump fuse is located under the center console on the passenger side behind the plastic footwell vent cover.
- We start the car and let it idle until the car stalls.
- Next we proceed to removing the rear seat. On sedan cars, you must press the seat latches on both sides.
- On station wagon and hatchback cars, you need to pull the tongue and lift the seat up.
- Unscrew the two self-tapping screws of the fuel pump glass cover.
- We clean out all the debris and dirt under the lid of the glass. You can use a brush, vacuum cleaner or compressor. This is necessary so that after the fuel pump glass is removed, excess dirt does not get into the tank.
- Remove the fuel pump connector.
- We unscrew the fuel pipe fittings on cars older than 2003. On cars manufactured after 2003. plastic fitting clamps were installed. In order to remove the plastic clamp, you need to press the buttons as shown in the picture and pull the fitting towards you.
- Next, using a “10” or “8” head (also depends on the year of manufacture of the car), carefully unscrew the 8 nuts securing the fuel pump cup ring.
- We remove the glass, without carefully bending the fuel level sensor, from the tank.
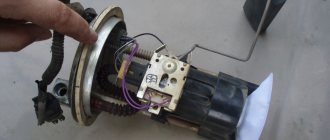
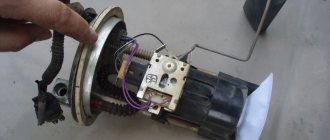
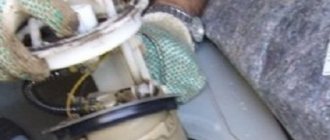
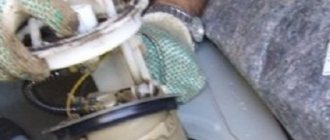
- Next, we proceed directly to disassembling the fuel pump glass on a clean rag.
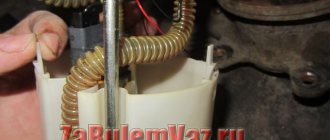
- We pull out the glass stopper and remove the sump.
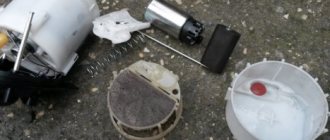
- We remove the old fuel pump mesh by prying it up with a screwdriver.
- We install a new mesh and reassemble in the reverse order.
- When tightening the fuel pump cup ring, do not apply excessive force, otherwise the pins on the gas tank may come off.
- We hope the article was useful to you, then you can watch a video on replacing the fuel pump mesh on a Priora.
Video on replacing the fuel pump mesh
Source: https://enginehack.ru/zamena-setochki-benzonasosa/
Replacing the fuel pump Priora/Granta
You will need : relieve pressure in the fuel system (see “replacing the fuel filter”), disconnect the negative terminal of the battery and prepare a Phillips, flat-head screwdriver, a hammer, a 10-point socket with an extension and a cloth.
Removing the fuel pump:
- Inside, use a Phillips screwdriver to unscrew the fuel pump hatch, which is located under the rear seat of the car.
- Disconnect the block from the fuel module cover by lifting the clamp.
- Disconnect the tip (No. 1) from the pump cover fitting by squeezing the clamps (in the direction of the arrows) of the tip (No. 2) of the fuel supply tube.
- Unscrew the 8 nuts securing the pressure plate of the fuel pump using a 10mm socket with an extension.
- Remove the washers and ground wire from the studs. Remove the pump pressure plate.
- Remove the Priora fuel module, being careful not to damage the fuel gauge sensor float.
Installation of the fuel pump is carried out in reverse order. The cut of the spacer should coincide with the protrusion on the fuel module cover. Replace the O-ring with a new one, otherwise you may smell gasoline in the cabin.
For reference:
By the way, if you had to remove the fuel module, then immediately clean or replace the pump mesh.
Replacing the fuel pump mesh on a Priora
Due to the short distance between the carburetor and the fuel pump, fuel is supplied at low pressure. Cars with an injection-type fuel system are equipped with electric fuel pumps that supply gasoline under high pressure.
The operation of such a pump is controlled by an electronic system that takes into account the throttle position, as well as the air-fuel ratio.
Basic fuel pump malfunctions
The fuel pump in the Prior may operate intermittently due to low-quality fuel. This is due to the fact that a fine fuel filter is installed here after the fuel pump.
At the inlet there is only a filter mesh that performs rough cleaning. The gasoline at some of our gas stations is so dirty that the mesh gets clogged quite quickly. The engine does not start well or stalls during operation.
The car jerks along the way and slowly picks up speed. If the filter mesh is partially clogged with debris, the optimal supply of gasoline to the engine is disrupted in different operating modes. When the pump is unable to maintain the required pressure in the fuel system 3.7-4.0 atmospheres , improper mixing of air and fuel occurs. As a result, the car loses speed.
In addition, even a well-warmed-up engine after a short stop can then start only after prolonged operation of the starter.
Unstable operation of the power unit is most often a consequence of a faulty fuel pump. First of all, you need to check the pressure level in it.
If after stopping the engine the pressure in the pump drops too quickly, then there is obviously damage to the diaphragm, as well as the sealing gasket. In this case, the gasket should be replaced, and the diaphragm should be reinforced with a special film.
There may also be foreign bodies in the fuel system, in which case the fuel pump must be disassembled and thoroughly washed. To do this, use the following tool:
- flat screwdriver;
- pliers;
- set of open-end wrenches;
- Phillips screwdriver;
- set of heads.
You can do this type of repair yourself in your own garage. Before you start, you should once again make sure that the fuel pump is not working as it should. To do this, you need to start the car and pay attention to the idle speed.
If it floats, then this is already one of the arguments in favor of carrying out repair work. In addition, you can go out onto the highway and sharply press the gas at about 3000 rpm. If the car starts to twitch while accelerating, then there is a second argument for making repairs.
Removing and disassembling the fuel pump
The fuel supply mechanism in the Priora is located in the gas tank, so to get it you need to:
- Remove the rear passenger seat. The latches holding it in place are on the sides.
- There is a hatch in the bottom of the car, secured with two self-tapping screws. Having removed it, we gain access to the fuel pump, which is fixed in the fuel tank with a flat metal ring.
- Remove the ring, which is held in place by nuts screwed onto eight threaded pins spaced evenly around the hole in the gas tank.
- We remove the two fuel hoses and remove the retaining ring.
- We disconnect the electrical connector through which power is supplied to the pump located in the plastic casing.
- We take out the housing; this must be done carefully so as not to damage the float, thanks to which the filling level of the gasoline tank is shown on the instrument panel.
- The next step is to pull out the pump itself, bend the four latches located on the body, and take out the fuel pump, at the bottom of which there is a coarse mesh.
As a rule, the entire mesh looks quite dirty, and its central part is literally clogged with various debris. To remove the old mesh, you just need to grab it on all sides with your fingers and pull it towards you, or pry it with a flat-head screwdriver.
It comes out of its seat relatively easily. After this we install a new mesh. A mesh for the Lada Priora fuel pump can be bought in a specialized store or on the market. It costs about 50 rubles .
There is usually also a lot of debris at the bottom of the plastic cup in which the pump was located. It needs to be rinsed well and wiped with a dry cloth.
Then everything is put together in reverse order. After replacing the mesh, the engine picks up speed smoothly and runs stably. While driving on the highway, the car no longer jerks and accelerates normally.
Source: https://mylada.net/remont/zamena-setochki-benzonasosa-na-priore.html
When is it necessary to replace the mesh on the fuel pump?
The condition of the unit can be judged by its performance and the pressure developed.
To do this, you need to connect a pressure gauge to the fuel system through a special adapter. Such diagnostics are done at a service station. An easier way to diagnose a fuel pump at home is something like this:
- The ignition is turned on, but it does not work, there is no characteristic hum or it makes a lot of noise, which entails an overload of the unit and shortens its service life.
- The pump performance decreases, which is clearly visible when driving at third and fourth speeds on a flat road. The car does not respond when the driver presses the gas pedal.
- If a VAZ 2112 car “spontaneously” slows down while driving. This most likely indicates that there is a problem with the fuel supply to the gas tank.
- The reasons may be: clogged coarse or fine filters. The fine filter must be replaced, and the coarse filter (mesh) can be washed. But this will only give a temporary effect; after a short period of time, you will still need to replace the fuel pump grid on the VAZ 2112. Any car owner can purchase it at a car store without any problems. The price of the part is small, the DIY process will take a little time, but the reliability of the gas pump will increase for a long time.
Removing and replacing the fuel pump for Lada Priora - Automaster
The fuel pump in a car is designed to supply gasoline from the fuel tank to the engine. For carburetor cars, mechanical pumps are used.
Due to the short distance between the carburetor and the fuel pump, fuel is supplied at low pressure. Cars with an injection-type fuel system are equipped with electric fuel pumps that supply gasoline under high pressure.
The operation of such a pump is controlled by an electronic system that takes into account the throttle position, as well as the air-fuel ratio.
Basic fuel pump malfunctions
The fuel pump in the Prior may operate intermittently due to low-quality fuel. This is due to the fact that a fine fuel filter is installed here after the fuel pump.
At the inlet there is only a filter mesh that performs rough cleaning. The gasoline at some of our gas stations is so dirty that the mesh gets clogged quite quickly. The engine does not start well or stalls during operation.
The car jerks along the way and slowly picks up speed. If the filter mesh is partially clogged with debris, the optimal supply of gasoline to the engine is disrupted in different operating modes. When the pump is unable to maintain the required pressure in the fuel system 3.7-4.0 atmospheres , improper mixing of air and fuel occurs. As a result, the car loses speed.
In addition, even a well-warmed-up engine after a short stop can then start only after prolonged operation of the starter.
Unstable operation of the power unit is most often a consequence of a faulty fuel pump. First of all, you need to check the pressure level in it.
If after stopping the engine the pressure in the pump drops too quickly, then there is obviously damage to the diaphragm, as well as the sealing gasket. In this case, the gasket should be replaced, and the diaphragm should be reinforced with a special film.
There may also be foreign bodies in the fuel system, in which case the fuel pump must be disassembled and thoroughly washed. To do this, use the following tool:
- flat screwdriver;
- pliers;
- set of open-end wrenches;
- Phillips screwdriver;
- set of heads.
You can do this type of repair yourself in your own garage. Before you start, you should once again make sure that the fuel pump is not working as it should. To do this, you need to start the car and pay attention to the idle speed.
If it floats, then this is already one of the arguments in favor of carrying out repair work. In addition, you can go out onto the highway and sharply press the gas at about 3000 rpm. If the car starts to twitch while accelerating, then there is a second argument for making repairs.
Removing and disassembling the fuel pump
The fuel supply mechanism in the Priora is located in the gas tank, so to get it you need to:
- Remove the rear passenger seat. The latches holding it in place are on the sides.
- There is a hatch in the bottom of the car, secured with two self-tapping screws. Having removed it, we gain access to the fuel pump, which is fixed in the fuel tank with a flat metal ring.
- Remove the ring, which is held in place by nuts screwed onto eight threaded pins spaced evenly around the hole in the gas tank.
- We remove the two fuel hoses and remove the retaining ring.
- We disconnect the electrical connector through which power is supplied to the pump located in the plastic casing.
- We take out the housing; this must be done carefully so as not to damage the float, thanks to which the filling level of the gasoline tank is shown on the instrument panel.
- The next step is to pull out the pump itself, bend the four latches located on the body, and take out the fuel pump, at the bottom of which there is a coarse mesh.
As a rule, the entire mesh looks quite dirty, and its central part is literally clogged with various debris. To remove the old mesh, you just need to grab it on all sides with your fingers and pull it towards you, or pry it with a flat-head screwdriver.
It comes out of its seat relatively easily. After this we install a new mesh. A mesh for the Lada Priora fuel pump can be bought in a specialized store or on the market. It costs about 50 rubles .
There is usually also a lot of debris at the bottom of the plastic cup in which the pump was located. It needs to be rinsed well and wiped with a dry cloth.
Then everything is put together in reverse order. After replacing the mesh, the engine picks up speed smoothly and runs stably. While driving on the highway, the car no longer jerks and accelerates normally.
Source:
Replacing the fuel pump mesh in Lada Priora
The working mixture is supplied to the combustion chambers of the engine through nozzles (injectors), which have an extremely small opening size.
Even a small particle of dirt can completely clog one of the injectors - as a result, the quality of the fuel will decrease, and with it the engine power (usually with increasing fuel consumption). In other cases, it may even be necessary to replace the nozzle.
On cars of the Priora family (and not only on them), on the way to dirt and harmful substances there is a filtration system that prevents the penetration of dirt in three stages:
- Primary (coarse) filter, also known as a fuel pump filter (catcher mesh).
- Fine filter (sump).
- Mesh in the nozzle of the injection system.
The last filter is installed directly in the nozzle. The sediment filter is located under the bottom of the car.
Primary cleaning is carried out by an element, which, in fact, is a mesh made of a plastic body with a soft material of a lattice structure.
This filter is fixed in a special support, and it, in turn, is fixed in the fuel tank. Fuel, passing through such a mesh, leaves most of the large contaminants, harmful substances and other dirt on it.
Replacing this mesh installed on the fuel pump will be discussed in our material. The manufacturer recommends changing this product along with the fine filter (every 50 thousand km). In the harsh Russian realities, replacement, as a rule, is carried out more often - about once every 30 thousand.
More frequent replacement may be required - if small dips begin to be observed during engine operation, the motor behaves unstably during acceleration, and the engine stalls from time to time.
First of all, you should check the injector filter, as well as the fine fuel filter - if they contain dirt, then the fuel pump mesh is also seriously dirty.
You can easily perform the replacement operation yourself - on an unofficial service you will be asked to pay 400 rubles or more for such an operation. Official service will cost you even more. Catcher nets for the Lada Priora fuel pump are sold in almost any car store, their cost starts from 30 rubles.
- So, let's say you bought a new mesh.
- We start by driving the car into a pit or putting it on a lift.
- To work we will need the following tools:
- 10 mm wrench (tube or head).
- Slotted screwdriver.
- Phillips screwdriver.
- Pliers.
- Rag (rags).
The fuel pump is located in the fuel tank - but it is accessible from the passenger compartment itself. Open the rear door, then recline the rear seat by sliding the latch.
There is a hatch in which the fuel pump housing is installed. Unscrew the two screws that secure the hatch cover.
Now we see the fuel pump housing. As a rule, gasoline leaks form around it. We lay a rag or rags around the opening of the body so that the smudges are absorbed there - this is better than leaving them on the car’s paint.
Then you will need to disconnect the block with wires. The fuel pump is turned off.
Then you need to start the engine and let it run for a few minutes. This will relieve excess pressure from the supply circuit.
After this, you will need to disconnect the two plastic fittings from the fuel pump itself. To do this, you will need to press on the iron brackets holding them and move both tubes away from you.
Fuel mesh Lada Granta, Kalina 2, Datsun, Priora, 21101 (1.6L) electric fuel pump filter
Dear customers, in order to avoid errors when sending an electric fuel pump, in the “Comment” line indicate your car model, year of manufacture, engine capacity L1.4 or L1.5 or L1.6.
The fuel pump is based on an electric motor. If the resource depended only on it (and this is roughly what happens in Western cars), then the gas pump would last for about 150 - 200,000 kilometers.
- An electric fuel pump uses the fuel itself as a lubricant, and our fuel is somewhat abrasive:
- — it is full of tiny particles, which over time grind down the working elements of the pump, and it begins to lose its working properties long before the electric motor fails;
- - if the fuel filter is dirty enough, the situation gets even worse.
- The wear rate can be reduced by timely cleaning of the fuel system and regular replacement of the fuel mesh and fuel filter.
- The mesh of the electric fuel pump acts as a filter, that is, when the fuel in the gas tank is pumped into the car engine, it first passes through the mesh, which in turn cleans the gasoline from dirt and small debris, which have a very detrimental effect on the fuel system when it gets into the engine car.
- The fuel mesh 21101 (1.6L) of the electric fuel pump needs to be changed from time to time, because when it is clogged, the fuel pumps into the engine with reduced pressure, that is, it passes very poorly through the clogged mesh and therefore the car drives jerkily and sometimes even poorly starts.
Wear of the electric fuel pump is accompanied by a rather interesting symptom: fuel consumption decreases. But at the same time, the engine’s throttle response also decreases, so there’s nothing to be particularly happy about.
One of the main reasons for a clogged mesh is poor quality fuel poured into the car, which may contain particles of debris, various types of deposits, etc.
Do not delay replacing the fuel grid to avoid clogging the fuel system. The fuel pump grid is located directly in it, that is, it is located at the bottom of the electric fuel pump.
- In order to replace the strainer, you need to remove the fuel pump from the tank. To do this you may need the following tools:
- — Flat and Phillips screwdrivers;
- — 7 mm socket and extension;
- — Ratchet or crank;
- — Wrench 17 (if the fittings are on nuts).
- When removing the fuel pump, carefully inspect the internal condition of the tank, and if necessary, thoroughly clean or rinse it to get rid of foreign particles and formations.
- After replacing the fuel grid of the electric fuel pump, turn the ignition key until the electric fuel pump pumps gasoline into the fuel system, and then start the car!
- VAZ 1117-1119, VAZ 2170, VAZ 2190, Kalina 2, Largus, Datsun, Vesta, except GM .
- Other article numbers of the product and its analogues in catalogues: 21101113920000.
- Any breakdown is not the end of the world, but a completely solvable problem!
- How to identify a problem with the electric fuel pump motor 2112 in a VAZ family car.
- How to independently replace the fuel grid of an electric fuel pump with an engine capacity of 1.6 liters on a VAZ family car.
- With the online store Discounter AvtoAzbuka, repair costs will be minimal.
Just COMPARE and BE SURE!!!
Don't forget to share the information you find with your friends and acquaintances, because they may also need it - just click one of the social networking buttons located above.
Source: https://avtoazbuka.net/lada-kalina-lada-1117-1119/setka-toplivnaya-lada-granta-2c-kalina-2-2c-datsun-2c-priora-2c-21101-1-2c6l- filtr-elektrobenzonasosa-detail

