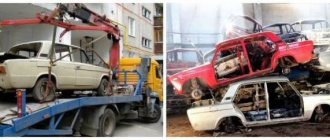
VAZ 2106 body with documents
The body of the VAZ 2106 is often searched for on forums and car portals. There may be several reasons for replacing it, and not all of them are related to old age. Anything can happen: a fire, an accident, and so on. It seems to beginners that replacing a body is very difficult, but this is not so. You just need to strictly adhere to a certain sequence, scheme. And one more thing - we remember that replacement is sometimes associated with a change in the registration certificate, because the body is considered a license plate part of the car.
Specific differences between the VAZ 2106 body
ATTENTION! A completely simple way to reduce fuel consumption has been found! Don't believe me? An auto mechanic with 15 years of experience also didn’t believe it until he tried it. And now he saves 35,000 rubles a year on gasoline! Read more"
First, let’s look at the characteristic features of the “six” body:
- The sedan body is 4-door, welded load-bearing structure and all-metal;
- It consists of a central skeleton and attached components, such as the hood, lid, doors, and so on.
Note. The frame of the “six” body is made in a rigid spatial structure. In turn, it consists of several separate components.
VAZ 2106 body with documents
- The doors of the VAZ 2106 also consist of separate elements. These are two sheets of steel connected to each other along the entire border. The card is fixed from inside the doors. Pistons are provided for its fastening.
VAZ 2106 body diagram photo
Note. The locks on the doors of the “six” are rotor type. They are equipped with a blocker.
- The hood is connected to the car frame from the front (hung). Locking is carried out using a cable mechanism. The lid release handle is located in the interior;
- As for the trunk lid, its structure is similar to the hood. It is equipped with torsion bars that are fixed to the lid hinges, thereby facilitating opening and holding the element in the open position;
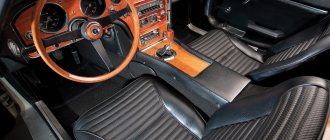
- The front seats of the “six” can be adjusted individually in terms of inclination and distance from the dashboard.
VAZ 2106 body diagram
Particular attention should be paid to the dimensions of the body. The picture above shows the VAZ 2106 body length and other important parameters.
Possible problems with the body
VAZ 2106 body iron
As a rule, there are certain types of malfunctions that are characteristic of the “six” body. Let's take a closer look at them.
Knowing the weak points of the body will allow you to replace it in parts, updating only the failed elements, thereby keeping the cost of repairs low. As you know, the assembled body of a VAZ 2106 is always more expensive.
So, common body problems are related to doors:
- The lock on them breaks down, the button in it is damaged or it simply cannot be locked with a key. The door itself may not open if there are problems with the outside handle. The door may also not close well.
Note. In all cases above, repairs can be made. If that doesn't help, then the only option is replacement.
Other body problems:
- The hood lock deserves special attention. If it does not open with a handle from the interior or the hood itself does not lock, it will have to be repaired or replaced;
- Another danger for drivers of the “six”: moisture gets into the cabin. This is due to a violation of the tightness of the seals, clogging of the drainage holes or a collapse of the metal frame;
- Water or dirt can also constantly seep into the trunk if the lid is dislodged or deformed. There may also be problems with the seal;
- The body of the “six” can become covered with various stains over the entire surface if careful attention is not paid to proper care.
Note. For example, if you wash it with too hot water, dark spots will appear, but light spots on dark cars will indicate exposure to excessive moisture during long-term storage of your favorite “six” under an impenetrable casing.
Body hardware VAZ 2106
- Finally, the most dangerous thing is the discovery of rust in some parts of the body in areas hidden from view, which is caused, as mentioned above, by many reasons. Washing and applying anticorrosive to these areas will help for a while, but you will still have to replace the body or its individual elements.
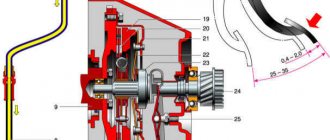
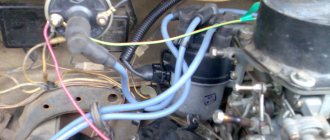
↑ Piston
The pistons are cast from aluminum alloy. To improve its wearability to the cylinder walls, the outer surface of the piston is coated with a thin layer of tin. To compensate for uneven thermal expansion, the piston skirt has a complex shape. It is conical in height and oval in cross section. Therefore, it is necessary to measure the piston diameter only in a plane perpendicular to the piston pin and at a distance of 52.4 mm from the piston bottom.
Based on the outer diameter, pistons (as well as cylinders) are divided into five classes: A, B, C, D and E, every 0.01 mm, and according to the diameter of the hole for the piston pin, they are divided into three categories, every 0.004 mm. The category is indicated by paint on the end (the first is blue, the second is green, the third is red). The piston class (Latin letter) and category (number) are marked on the piston bottom.
Spare parts include pistons of classes A, C, E, which are quite sufficient to select a piston for any cylinder, since pistons and cylinders are divided into classes with some overlapping sizes.
The hole for the piston pin is shifted from the axis of symmetry by 5 mm to the right side of the engine. Therefore, there is a mark on the piston in the form of the letter P for the correct orientation of the piston in the cylinder. The mark should face the front of the engine.
Since 1986, repair size pistons for all VAZ engine models have been manufactured with an outer diameter increased by 0.4 and 0.8 mm. Until 1986, repair size pistons for engines 2103 and 2106 were produced with an increase of 0.4; 0.7 and 1.00 mm.
The pistons of engines 2103 and 2106 differ only in size (diameter).
The piston rings are made of cast iron. Top compression ring with barrel-shaped chrome-plated outer surface. The lower compression ring is scraper type, phosphated.
The piston pins are pressed into the upper head of the connecting rod and rotate freely in the piston bosses. According to the outer diameter, the fingers are divided into three categories every 0.004 mm.
The category of the finger is marked on its end with the appropriate color:
- 1st – blue,
- 2nd – green,
- 3rd – red.
The connecting rod is steel, forged. The lower head of the connecting rod is detachable; connecting rod bearings are installed in it. The connecting rod is processed together with the cap and therefore they are not interchangeable with the caps of other connecting rods. To avoid mixing up the connecting rod caps during assembly, the connecting rod and its cap (on the side) are marked with the number of the cylinder in which they are installed. When assembling, the numbers on the connecting rod and cap must be on the same side.
Full scale replacement
Body with documents VAZ 2106
Such replacement is an important and, in some cases, inevitable process. Over time, any metal frame will be exposed to rust, and today it is almost impossible to avoid getting into an accident over a long period of driving.
It is clear that the list of work required to restore the body of the “six” depends on the degree of defects. After an accident, the most important structural part of the car undergoes changes: the geometry is disrupted, visible and invisible flaws appear, and the coordinates of the installation locations of body elements are shifted.
Advice. Any restoration measures should be carried out so that the body number on the VAZ 2106 remains clearly readable. If it involves correcting minor defects, straightening and other similar activities, the VIN code must remain intact.
Body with documents for VAZ 2106
If the body is badly damaged, then after hard work it will not be easy to return the original shape of the frame elements to their previous state. In some cases, welding special rings helps, but as a result of such operations the VIN code is damaged.
Passport details and number
VAZ 2106 body number
When replacing the body, you must take into account that it is a separate element of the car and is assigned an individual number. It is recommended to pay attention to the following points:
- The identification plate on the body of the “six” contains all the necessary information: the VAZ 2106 body number, the internal combustion engine model and other equally important information are indicated here;
- The identification number can be decrypted. As a rule, the first three characters indicate the car manufacturer code, the next 6 characters indicate the car model, the Latin Y is the model year code, and the numbers following it are the body code;
- You can find IT on the air supply box from the engine compartment (on the right).
Note. On some sixes, the number may be located on the left wheel arch connector in the left front corner of the luggage compartment.
Legal side of the issue
New body for the “six”
Be that as it may, every owner of a “six” can face a complete replacement of the body. And in this case, he should be interested in the proper execution of documents.
The first thing to do is prepare a documentation package:
- Write a statement outlining the essence of the appeal;
- Prepare a paper proving the material rights of the owner;
- Vehicle registration certificate and document confirming the identity of the owner;
- License plate for the car;
- Various certificates from regulatory authorities (customs, etc.);
- Insurance policies;
- Transit numbers (if available).
Note. If changes have been made to the design of the car, then it is necessary to prepare a certificate of their history.
Further, after this entire list of documentation is handed over to the inspector, they will be checked for accuracy, and the car will be inspected on the site. After which, the changes made will be formalized, the information will be entered into the database, and the owner of the car will be issued with the appropriate official papers.
Note. Until 8.10. In 2013, all these actions were considered full rights and any car owner could replace the body. But then new amendments appeared, which were never fully confirmed. Because of this, it is recommended that you obtain local recommendations before undertaking any replacement.
One rule applies strictly: body replacement can only be carried out with exact agreement on the number, which will be clearly visible on the metal surface.
Do-it-yourself front spar replacement
So, if a full body replacement causes such problems, wouldn't it be easier to do a partial repair? Of course, you can replace damaged body parts yourself, using your own garage.
The body of the “six” and any other car is divided into several parts. One of the most vulnerable elements of the body is the spar. Let's find out how to change it without spending a lot of time and effort.
Advice. More often the front spar fails. It is not necessary to completely replace it. It is enough to change only most of it. For example, if a beam is torn from the spar, then by replacing only the front of the element by 10-20 cm behind the studs, we solve the problem.
It will be useful to know the weak points of the front spar:
- The area where it comes into contact with the mounting point of the steering mechanism;
- In the area of contact with the beam;
- In the area of contact with the anti-roll bar.
Algorithm for replacing the spar (if damage is in the area with the beam)
VAZ 2106 body spar
The usual diagnosis for a failed front spar is:
- Used car;
- Driving over uneven surfaces;
- The weak and old spar cannot withstand it, its pins come out, and the beam breaks.
Note. If you continue to drive in this condition, the fender liner, which is rubbed by the wheel, will also suffer.
The following defects are present:
- Retracted suspension
- Collapsed beam
- Presence of a gap in the spar and beam
- The fender liner is a little worn.
Actions:
- We disassemble the suspension, releasing the beam fastenings.
Note. It is not necessary to remove the internal combustion engine, but the oil filter and exhaust system rods will have to be removed.
To better disassemble the suspension, it will be enough to remove the anti-roll bar on the right, and on the left - knock the axis of the lower arm off the beam. This will make it possible not to completely disassemble the suspension and not knock out the supports.
Let's continue:
- We take a grinder and cut off the damaged part of the spar;
- We cook a new piece, be sure to overlap.
Welded piece of spar
Advice. The fact is that it will be difficult for beginners (who are not qualified welders) to weld a new piece of spar without one piece overlapping another. True, the seam will be roughly visible, but it can be puttyed and that’s it. But everything will hold securely. It is imperative to weld not only the junction of the pieces, but also do this through the drilled holes of the new piece of spar.
In addition, we must remember: when adjusting a piece of spar, its bolt hole must coincide with the beam. We can say that this very bolt is a kind of guideline that helps to carry out the correct installation.
Note. You can check the compliance of the spar in other ways. For example, measuring everything on the body with your own hands.
And finally: to strengthen the spar, it is recommended to weld an additional strip of metal on top, directly onto the welding joint. A width of 10 cm for the strip will be sufficient.
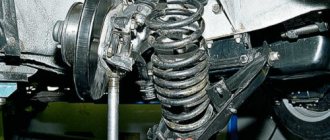
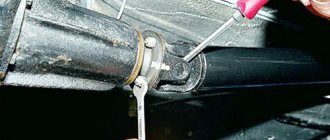
Diagnostics of the upper ball joint
To carry out the work you need to use help. Place an assistant in the car, behind the driver's seat, so that he squeezes the brake. Only in this case will you eliminate the possibility that during diagnostics you will be able to feel the wheel bearing being displaced.
Use sharp movements to rock the front wheel. If suddenly there is even the slightest play in the ball joint, you will definitely feel it. When pushing back and forth, the wheel will move freely. It is possible that there will be a creaking or crunching noise coming from the upper ball joint.
Famous pickup truck
For those who were looking for a spacious, convenient option, a pickup truck in any color was produced based on the VAZ 2107. It is called the VIS-2345 pickup, but it is also no longer produced. But despite this, it is still popular.
This subcompact pickup truck is easy to drive, giving you plenty of flexibility to haul as much stuff as you need. Even a refrigerator will fit into the wide isothermal booth.
The two-seater pickup truck has a fuel-injected engine. It reaches speeds of up to 110 km/h. Due to its convenience and original design, this body type is very common in America and Europe - so it’s a shame that production of this model was stopped.
Tools
To carry out work on restoring the body of the “six”, we will need the following set of tools:
- A set of hammers of different types and weights. Rubber mallets and percussion instruments with a grooved working surface.
- Special hooks.
- Reverse hammers.
- Impact spoons.
- Jack.
- Anvils and substrates of various shapes and sizes.
You should also stock up on 8 and 22 wrenches, as well as a screwdriver. You will need these tools to remove body parts such as bumpers or trim moldings.