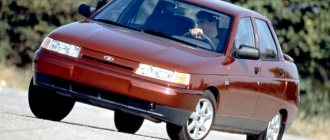
Pull the handbrake - your actions
So, the handbrake is tightened as follows.
First, use a jack and install the support. Then lift the brake lever. Now locate and loosen the adjuster locknut through the hatch in the brake drum. Tighten the adjusting nut, while making sure that the brake cable is tensioned. If, after performing all of the above steps, the cable tension does not occur, then you will need to replace this part. In this case, you need to contact specialists who will quickly help solve your problem. If everything went well, check the operation of the handbrake by pulling the lever towards you. Do a test: try turning the rear wheel by hand. The wheels should not rotate without force. And if the test passes, then tighten the locknut. Release the lever and perform another similar test. This time the wheels should spin freely. Now lower your vehicle to the ground and perform a test to determine whether the parking brake is working. The brake tension is complete. You can consider yourself a real master. But if you still do not dare to implement the described plan, then do not hesitate to contact knowledgeable people who will help solve not only this, but also other problems.
Home →
Maintenance and Repair → Brake system →
Installation methods
What kind of bulbs are in the headlights of the VAZ 2110
? There are several options for equipping your car with a fog lamp system. The choice depends on your personal preferences and capabilities.
| Way | Peculiarities |
| Buying a bumper with built-in PTF | Such bumpers are bought at a tuning studio, where everything will be connected and connected for you. The disadvantage of this option is the high cost |
| Buying a bumper from a VAZ 2115 and installing it yourself | To do this, you will have to buy a bumper from an older model, which has holes for fog lights. All that remains is to find a suitable set of PTFs and install them |
| Purchase of PTF and facing elements - glasses | Today this method is in greatest demand because it allows you to do the installation yourself for little money. |
The standard PTF kit includes several elements:
- Headlights;
- Light bulbs;
- Switching relay;
- Set of wires;
- Connection diagram;
- Button to turn on/off PTF.
When choosing a set, pay attention to the fact that the headlights match the shape of the glasses, that is, the facing elements. Standard kit
Standard kit
Today, for VAZ 2114 owners who want to install fog lights, it is recommended to choose rectangular kits from the Kirzhach company. It is used for factory installation of PTF on expensive versions of the model.
Xenon in PTF
Many car owners are thinking about installing xenon lamps in their fog lights. Is it good? Not really.
The thing is that when installing xenon in the PTF, focusing is disrupted. The operating principle of xenon is somewhat different compared to conventional Kirzhach type lamps.
Standard PTFs are designed for certain types of lamps, so they cannot cope with xenon. As a result, excessive reflection is observed in the reflector, rays are refracted, and the light is blurred. Where does this lead? To blind oncoming drivers.
The xenon option is not a practical or successful solution. Therefore, we recommend that you avoid it.
Another option is a combination of xenon and yellow fog lights. You will need H1 xenon bulbs, which are mounted in a bottle cap and only then placed in the headlight. This way the light beam has smoother boundaries, does not blind oncoming traffic, and better illuminates the roads in bad weather. Only after installing this combination lighting, be sure to make sure that your headlights really do not blind oncoming cars.
If oncoming cars stubbornly continue to shine their high beams on you, try adjusting the light beam. If this does not help, it is better to abandon xenon.
The base may be different
Depending on what type of fog lights are installed in YOUR car, there may be a different base. There can be two bases in total: H3 and H11.
To be completely sure, I recommend removing the burnt-out lamp and picking up a similar one at an auto store.
If you know for sure that you have original PTFs manufactured by Kirzhach installed, then the base is H11. Non-original fog lamps, for example, Bosch, work with the H3 socket. But there are also H4s.
In this PTF the base is H4
Installing LED lamps in a standard base
Let's say right away that PTF LED lamps shine worse.
My husband still managed to get the xenon in. Now it’s very cool to drive in the dark, just heaven and earth compared to the factory light.
The lamp base depends on the manufacturer, I personally have Bosch fog lights and have bulbs with an H4 base, but they can also be H3. My light bulbs are made in China, the so-called “halogen xenon”, they shine very well, and most importantly, they are not prohibited in our country.
Replacing light bulbs in fog lights of a VAZ 2114
Priora low beam lamp: what type of bulbs are in the Lada Priora headlights, how to choose the best ones and install them yourself
- To make it easier to remove the PTF housing, drive the car onto a pit or a lift;
- Next, move the protective rubber casing from the back of the PTF;
- Get to the headlight power connector and remove the chip from it;
- Having disconnected the wire, loosen the light bulb by squeezing the “legs” with your fingers and removing them from the seat;
- Remove the base along with the lamp and replace the faulty element with a new one.
When installing a new lighting part, do not touch the glass surface, as... Marks left on it will eventually lead to fading or complete burnout of the thread. When installing LEDs and xenon, before starting to operate the vehicle, adjust the tilt of the light beam so as not to dazzle other road users.
Bosch PTF bulb socket
An imported version of lighting parts in PTF is sockets from Bosch. Non-standard PTFs from this company are equipped with H3 .
Installing a light bulb in fog lamps on a VAZ 2114 in H3 (H4) format allows you to get brighter light compared to factory lighting elements.
Because Removing the housing of the lighting part is a simple process; you can find out which base is in the VAZ 2114 fog lights in a few minutes. Below we will look at the main differences in the two types of “four” foglights.
Which PTFs shine better?
Replacing the cigarette lighter bulb of a VAZ 2114
High-quality fog lights should have an almost horizontal beam of light. If you have “China” at your disposal, then you will immediately notice the difference
The best PTFs in our case are optics produced by Kirzhach (Avtosvet), but there are many fakes, so it is important and necessary to distinguish a fake from the original, because sellers will sell you the first product they come across
Hella products have also proven themselves quite well, but due to their high cost they are in little demand.
Fog lights (FTL) are an optics unit that can be located either as an assembly with the main headlight of the car, or placed separately - most often at the edges of the bumper. Fog lights are designed to illuminate the side of the road and the road in difficult weather conditions: when the rays of low and high beam are reflected against the thickness of the fog, thereby creating a wall of light in front of the car, then fog lights give a flat and wide beam that spreads exactly above the road so as not to illuminate the fog itself. In addition to illuminating your path in difficult weather conditions, fog lights also help make you more visible to other road users.
There are also rear fog lights - but, as a rule, this is an ordinary red light, the same as the side light, but 2-3 times brighter. The “luxury” versions of Samar 2114, 2113, 2115 are equipped from the factory with front PTFs, which are located at the edges of the bumper.
Owners of the standard equipment install the front PTFs with their own hands, and how to do this for you will be discussed below.
In fact, the headlights on the VAZ 2114 2113 2115 are very bad; at night you drive almost blind! Therefore, young people install xenon in the headlights, install PTF - and xenon in them! =) And older car owners are content with simply installing PTF! By the way, the head light for the VAZ 2114 also comes from different manufacturers, but which one to choose? You will find the answers here: Kirzhach or Bosch?
Manufacturers of lamps for VAZ 2114
Since lamps with an H4 socket are used in headlights of many models from different manufacturers, all manufacturers of car lamps produce such lamps. Among them are the following companies:
- A world-famous Dutch company, known for its low prices and good quality products;
- A German company with a long history and rich technological experience;
- Narva. This is another manufacturer from Germany, known for the quality and durability of its products;
- Bosh. Another German company that does not need any special introduction;
- Company based in Hong Kong and Germany. Produces a wide range of reliable lighting equipment.
Which modification is better?
H4 halogen lamps installed on the VAZ-2114 are divided into:
- Standard.
- Enhanced light beam.
- Improved visual overview.
- All-weather.
- Increased power.
They are two filaments for low and high beam lighting. Lamps with a power of 60/55W are considered optimal among them.
Standard H4 lamp
Such lamps are mounted on every car of this VAZ model.
High beam lamp
High light flux lamp +30%
They are designated as +30%, 50% and so on. In addition to consuming “their” 55W and percent, they produce brighter light. But the duration of their operation is not long, although the price is more expensive.
Improved visual overview
Illuminated with white light familiar to the eye. Consuming the usual 55 W, they illuminate brighter, despite the bluish tint of the bulb.
They provide an excellent background light on snowy and dry roads. On a wet road it is better to use yellow fog lights. Doesn't blind oncoming cars. The service life of these does not differ from standard ones, despite the inflated price. Manufacturers prefer lamps with a yellow or bluish tint.
All weather
All-weather yellow lamp
The lamps are specially coated with a yellowish tint, which allows the light to achieve the contrast of the area in bad weather, especially cloudy (foggy). Yellow light has less reflection.
Increased power
They are in demand among owners who do not particularly know the “subject of the dispute.”
High-power lamps lead to consequences such as blinding an oncoming car and causing an accident.
We choose which lamps are best to put in the headlights for the VAZ-2114
If we talk about choosing xenon headlights, it is obvious that the main indicator is power. The most justified options are from 4300K to 6000K, and more powerful illuminators are capable of only a decorative function. If the question concerns halogen headlights, then drivers sometimes find it difficult to decide which bulbs in the VAZ 2114 headlights will be most comfortable for them.
Of all the possible variations of H4 illuminators offered by the domestic market, the following deserve attention:
- OSRAM COOL BLUE INTENCE – have the highest brightness levels and illumination close to natural daylight. A clear winner in the categories of brightness, comfort and road safety. The consumption of these headlights fluctuates in the range of close to 80W, which is higher than the standard, but does not significantly load the system. The service life of such headlights is also close to classic BOSCH ones, but the price is noticeably higher;
- NARVA H4 RANGE POWER is a strong mid-ranger, not much different in price from the classic, but slightly better than it in all respects. If you want a confident analogy to standard headlights, and do not want to adapt to different road situations, Narva is definitely your choice;
- IPF SUPERDEAM are good all-weather headlights that can help a car enthusiast in difficult atmospheric conditions. Otherwise they are no different from regular BOSCH;
- PHILIPS h4 – illuminators are completely similar to Narva, the only minor difference is the price and longer service life;
- KOITO WHITE is a lighting device that has been promoted in the vastness of domestic auto stores, but nothing from the advertisement, except for full compliance with what the lamp and base of the VAZ 2114 should be, has been confirmed by tests.
Popular light bulbs for VAZ 2114
How to choose foglights VAZ 2115 and PTF VAZ 2114
Let's start with the fact that there are several types of fog lights. More precisely, there are two types: standard and universal PTFs
It is important to understand that their effectiveness greatly depends on the quality of the fogs themselves.
Let's move on. Standard PTFs can be original or analogues. In any case, they are produced for a specific car model, have similar mounts, housing, etc. Such PTFs are the easiest to install, especially if the bumper already has places for installation, covered with plugs.
Universal PTFs have a mount that allows them to be installed on different car models; such fog lights can be installed in the area of plugs on the bumper, on the radiator grille, hung on the bumper, etc.
The disadvantages are the insufficiently bright and strong glow of such lamps, as well as a short service life. At the same time, it is not always possible to replace the blades quickly and easily, taking into account possible difficulties with access (especially if the fogs are installed in standard places).
PTFs with a xenon lamp shine brighter than halogen lamps, the service life is also 50-60 or even 80-100% longer (provided that high-quality lamps are used). However, the cost of the equipment is much higher; for such lamps it is also necessary to install separate ignition units, correctly connect xenon, etc.
Also, brighter xenon light, which is better than halogen lights on a dry road, often provides worse visibility in fog and rain, since the color temperature is slightly different from halogen headlights, even for xenon analogues that are as close in characteristics as possible.
It is also worth noting that the brighter xenon glow can cause blinding oncoming drivers. Taking into account this feature, PTFs with xenon need to be lowered lower, constantly monitor their adjustment, keep the headlights clean and do not turn on the fog lights under normal conditions (when there is no fog, snow or rain).
LED PTFs are more economical in terms of energy consumption and place less load on the battery and wiring. The service life of good quality LED PTFs is usually longer than halogen or xenon ones.
Such fogs shine well (if the product is of high quality), in some cases you can change the temperature of the glow (from white to yellow, etc.). In practice, such PTFs may well perform the function of DRLs during daylight hours.
The downside is the high cost of high quality products. Additional requirements should be taken into account during installation, since in case of installation errors or poor ventilation, the LED headlights can become very hot, which renders them inoperable.
Types of lamps
Xenon
Gas discharge xenon lamps
Lamps equipped with xenon are three times brighter than conventional ones . They last ten times longer. Efficient in power consumption, almost two times, which allows the generator to operate in a gentle mode, preserving the engine life. A serious drawback is the inability of xenon to fit into a circuit designed for halogen lamps.
Halogen
Advantages : increased light output, choice of color, long service life, all-encompassing visibility of the road with coverage of the side of the road.
Disadvantages - high heating temperature of the bulb, poor quality of the lamp, inefficient energy consumption, the need for additional service.
Installation methods
There are several options to equip your car with a fog light system. The choice depends on your personal preferences and capabilities.
| Way | Peculiarities |
| Buying a bumper with built-in PTF | Such bumpers are bought at a tuning studio, where everything will be connected and connected for you. The disadvantage of this option is the high cost |
| Buying a bumper from a VAZ 2115 and installing it yourself | To do this, you will have to buy a bumper from an older model, which has holes for fog lights. All that remains is to find a suitable set of PTFs and install them |
| Purchase of PTF and facing elements - glasses | Today this method is in greatest demand because it allows you to do the installation yourself for little money. |
The standard PTF kit includes several elements:
- Headlights;
- Light bulbs;
- Switching relay;
- Set of wires;
- Connection diagram;
- Button to turn on/off PTF.
When choosing a set, pay attention to the fact that the headlights match the shape of the glasses, that is, the facing elements. Standard kit
Standard kit
Today, for VAZ 2114 owners who want to install fog lights, it is recommended to choose rectangular kits from the Kirzhach company. It is used for factory installation of PTF on expensive versions of the model.
Xenon in PTF
Many car owners are thinking about installing xenon lamps in their fog lights. Is it good? Not really.
The thing is that when installing xenon in the PTF, focusing is disrupted. The operating principle of xenon is somewhat different compared to conventional Kirzhach type lamps.
Standard PTFs are designed for certain types of lamps, so they cannot cope with xenon. As a result, excessive reflection is observed in the reflector, rays are refracted, and the light is blurred. Where does this lead? To blind oncoming drivers.
The xenon option is not a practical or successful solution. Therefore, we recommend that you avoid it.
Another option is a combination of xenon and yellow fog lights. You will need H1 xenon bulbs, which are mounted in a bottle cap and only then placed in the headlight. This way the light beam has smoother boundaries, does not blind oncoming traffic, and better illuminates the roads in bad weather. Only after installing this combination lighting, be sure to make sure that your headlights really do not blind oncoming cars.
If oncoming cars stubbornly continue to shine their high beams on you, try adjusting the light beam. If this does not help, it is better to abandon xenon.
Light at night is the “head” of everything
Visibility of the highway at night depends on the quality of light
Definitely, the quality of light affects the viewing range of the route. Behind all this is a reflector and diffuser in the lighting unit .
The VAZ-2114 is equipped with a BOSCH instrument unit, the directional beam of which is incomparable with previous domestic analogues.
Installation
The PTF installation process can be divided into three main stages:
- Installation of headlights;
- Network connection;
- Functionality check.
So now we will talk about each stage separately.
Installing headlights
We will consider the option of installing PTF on a standard bumper. Therefore, it does not have holes for new optics. You will have to do them yourself.
To work you will need a certain set of tools and materials:
- File;
- Drill and drill bits;
- Electric jigsaw;
- Roulette;
- Marker.
Connection elements
Now directly about work.
- First of all, remove the bumper. Work is performed only if it is disconnected from the seat.
- Remove all dirt from the bumper.
- Make markings for the installation of future fog optics.
- It is best to mount the headlights slightly to the side of the lower air intake. Try to place the PTF strictly under the main optics of your car.
- For decorative glasses that have outer and inner halves, make markings. The outer half is decorative, and the inner half is designed to fix the outer part and headlights.
- The outer part of the glasses has a protrusion on the inside. With this mounting protrusion, the element should fit into the hole made in the bumper.
- To determine the optimal dimensions, you should measure the landing protrusion. This way you can make the appropriate markings on your bumper.
- Using an electric jigsaw, holes of the required size and location are cut.
- Use a file to file the cut areas.
- The outer part of the glasses should eventually fit tightly into the hole.
- Fog lights are mounted in the resulting holes. For this purpose, the kit includes special mounting bolts.
- Attach decorative glasses to the top of the headlights. The bumper can then be returned to its place.
Connection
Together with the PTF, a diagram for connecting the devices must be attached. It is not complicated, so even a beginner will be able to understand all the nuances of connecting the components to each other.
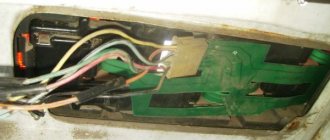
You will need to embed the wiring from the foglights into the mounting block, which is located in the engine compartment to the right of the windshield. To do this, just unscrew the bolts from the block, lift it and find the pads marked Ш7 and Ш8.
These blocks are used to connect fog lights, although these lighting devices are not installed standard at the factory. Wiring from the headlights and from the fog lamp relay, which is provided in the purchased PTF kit, is connected to these blocks.
Your job is to make the correct connection. This is done according to the following scheme:
- The output wire from pin 87 is ground, so you need to connect it to the car body;
- Pin number 85 goes to the block marked Ш7 and is connected to connector number 17;
- Pins numbered 30 and 86 go to block Ш8. In this case, connect pin 30 to connector 8, and lead 86 to connector number 1;
- Having installed the headlights, stretch the positive wire through the engine compartment, as they are connected to the Ш8 block. But these wires need to be inserted into connectors numbered 2 and 3;
- Now connect the block to the mounting block, and return the block to its place;
- Select an area near the block where the fog light relay will be installed.
Connection result
Button
Now all you have to do is connect the control system for your PTFs. Included with the fog lights is a corresponding button, which will stand on the panel in the seat provided by the manufacturer.
PTF button
The manufacturer, that is, AvtoVAZ, provided for this. Therefore, under the panel you will find a control block. The panel is removed, the corresponding block is located and the button is connected to it. That's it, the controls are ready.
Examination
The last stage is to check the functionality of your PTFs.
To check the efficiency of the lighting devices, turn on the headlights on your VAZ 2114, then press the button to turn on the fog lights. When the lights are turned off, even if the fog lights button is pressed, they should still go out.
The importance of PTF is difficult to overestimate. They help you see the road better during fog, rain, and snow. Moreover, fog lights are designed to improve the visibility of your car to oncoming and behind vehicles. Therefore, we strongly recommend installing PTF not only in front, but also in the rear.
Sources
The central light in the cabin does not light up 2114
Theme Options
- Subscribe to this topic...
Search by topic
The central light in the cabin does not light up 2114
The fisheye is on, but the central one is not. What’s interesting: there is voltage at the central one, but no current. I removed the lampshade, brought it home, cleaned the contacts, connected it to the power supply, everything is on, i.e. It's not about him. What could be the reason?
what a horror. I’ve never seen anything like this. If you describe it in more detail, you’ll look like you’ll outdo Nikola Tesla with your discovery.
Otherwise, check if the stoplights are burning. It could just be that the fuse has blown. If the front panel is intact and everything in the lampshade is normal, then just use a multimeter to test the entire circuit.
Yes, there is a bad contact somewhere. I had the same problem with the rear light. I called the machine, it shows 12 V. and the lamp does not light. I cleaned the contacts, everything worked. Look at the connector that goes to the light.
Mmmm. What's at the beginning of the HELP topic? did not write?
It doesn't light up for me either. But it doesn’t light because I pulled the light bulb out of there. But I pulled it out because it shorted out in rainy weather and the light bulb was shining. That's it. And as soon as I pulled out the light bulb, everything became great) We must look for simple solutions to problems))
I don’t know how it is on the 4, but I have a common power supply with stopacs. I also drove without a light bulb, came for a technical inspection, but my stopacs don’t light up (I just had to replace them before). That’s it. how long I rode without them and how no one came to my place.
Installation and connection of front and rear PTFs on VAZ 2113, 2114, 2115
Before you begin installing fog lights, you will need to select a certain list of tools and additional elements. You can purchase a ready-made connection kit or select the necessary spare parts separately. When everything is prepared, you can mark on the front bumper a place for installing future headlights. The VAZ 2115 comes with standard holes from the factory, but in the case of the VAZ 2113 and VAZ 2114 you will need to work with a tool (a jigsaw or a drill). If you don’t want to damage the bumper, you can install the lighting fixtures on special brackets.
To install foglights in the front bumper, you need to make holes using a jigsaw or drill with drill bits, having previously completed the markings
You will need:
- file;
- drill and drill bits;
- electric jigsaw;
- roulette;
- marker.
Installation materials
As a rule, the kit for installing PTF on VAZ 2113, 2114, 2115 includes the following elements:
- headlights with bulbs;
- set of wires;
- electromagnetic relay;
- PTF power button;
- ties and clips for fixing wires;
- PTF connection diagram VAZ 2113, 2114, 2115.
The kit for connecting fog lights should include wires with terminals and connectors, a relay, a button
The installation of the lighting sources in question must be carried out using a button and an electromagnetic relay. The fact is that fog lights consume quite a lot of current and connecting directly to the ignition switch will lead to burning and subsequently burnout of the contacts. All this can contribute to damage to the wire insulation and the occurrence of a short circuit, which may result in failure of the electrical wiring.
Step-by-step installation and connection of PTF
To install fog lights, the following procedure must be followed:
- Installation of the headlight switch button in the cabin. You can choose any location for the element, as long as the driver can easily operate the key. Quite often, the part is installed instead of plugs on the dashboard.
- The grille with the dynamic head is removed from the front panel. Behind it there are two blocks designed to turn on the headlights, indicate the operation of the PTF and illuminate the button.
- Having placed the button in a convenient place, connectors are connected to it. After this, the grate can be put back in place.
- The relay is installed under the hood on the partition of the engine compartment near the mounting block. To remove it, you need to unscrew 2 nuts, lift it and find 2 pads (numbers 7 and 8).
- A block with a harness of four wires with contacts included in the kit is laid to the relay block.
- The connection of the wires that come from the PTF relay is carried out according to the diagram in the following order: the wire from the 30th contact of the relay is connected to block No. 8 of the mounting block at the 8th terminal, the 87th contact of the relay goes to the 1st terminal of the connector, 86 is “ground”, and 85 is connected with the 17th terminal of block No. 7.
- The positive wires are pulled to the PTF, the mass is mainly secured to the nut of the headlights. The “+” voltage is supplied to the fog lights from the 2nd and 3rd contacts of block No. 8.
- After all connections, the connectors are installed in the mounting block and secured.
As for the rear PTFs on VAZ 2113, 2114, 2115, on these modifications of the car such a light source is installed from the factory, i.e. another light bulb is used in the rear light. Control is also carried out from the passenger compartment using a button, but without fixing, since a slightly different relay design (electronic) is used. It’s worth knowing about this and not trying to install a latching key.
Video: installing PTF on a VAZ 2114
Checking the performance of PTF on VAZ 2113, 2114, 2115
After the lighting devices are installed and connected, you need to check how correctly everything works. To do this, just turn on the headlights and press the key that supplies voltage to the PTF relay, after which the headlamp lamps should light up. When the headlights are turned off, the PTF lamps should also go out, regardless of the position of the fog light button. After checking the functionality of the light source, you will need to adjust the light output so that oncoming drivers are not dazzled.
After installation and connection, we check the operation of the PTF: when the lights are turned on and the fog lights are pressed, the lights should light up, when the lights are turned off, the lights should go out
Fog optics are essential lighting equipment for any car. Such devices greatly facilitate travel in poor visibility conditions. If a certain car model does not have PTF installed from the factory, you can carry out the installation yourself. This does not require special tools or special skills and knowledge.
PTF VAZ 2114 what kind of lamps?
Hello, the VAZ 2114 does not have fog lights installed, so there is no way to recognize the lamps. You can only add fog lights yourself, and then you can choose from it to suit your taste.
What lamps are best to install in fog lights on a Priora?
LEDs are better, they are brighter and have lower power consumption. They heat up slightly and almost never blind oncoming drivers.
Are you deprived of your license for LED low beam lamps?
Two answers above - if there is wind in your head, why try to seem smart? It’s better to remain silent - you’ll seem smarter! “Why don’t the police have the right to deprive people of their licenses for LEDs?
We remind you that at present there are simply no specific requirements defining the conditions for the use of LED lamps in headlights. Speaking of operating modes, at the moment only xenon is regulated in this direction. And since there are no requirements, the previously mentioned “operating mode” cannot be violated, therefore the maximum penalty for installing LED lamps should come from Part 1 of Article 12.5 of the Code of Administrative Offenses (for changing the design of a vehicle): Driving a vehicle in the presence of malfunctions or conditions , in which, in accordance with the Basic Provisions for the admission of vehicles to operation and the duties of officials to ensure road safety, the operation of the vehicle is prohibited, with the exception of malfunctions and conditions specified in parts 2 - 7 of this article, entails a warning or the imposition of an administrative fine in in the amount of five hundred rubles.
Additionally, it is important to note that international standards do not provide for personal labeling for LED lamps. Moreover, car manufacturers equate LED lamps with halogen, therefore such lamps, like halogen, are marked with the Latin letter H
It is in headlights marked HR, HC, HCR that you can find standard installed LEDs.
How to install and connect PTF?
Installation and connection are carried out in 3 stages:
- We install the PTF in the bumper.
- We connect the wiring to the mounting block via a relay.
- Install a button in the panel.
Connection diagram
Well, I think everything is clear here! However, the diagram is not indicated in full: the mass of the PTFs themselves on the body, which must be done without fail, is not indicated. It needs to be secured in a safe place, on metal of course! Before fastening, be sure to clean the metal from dirt and tighten the mass well so that there is no loss of tension. Otherwise, the PTF will burn dimly and unevenly.
Bumper installation
As stated above, there are two options - either install a new bumper with ready-made cutouts for the PTF, or cut it yourself with a jigsaw. To do this, remove the element, mark the mounting holes, and cut it.
Next, we install the “glasses” - they cover the cutout on the outside of the bumper, they consist of two parts:
- Decorative - external.
- Internal - attaches glasses to the bumper using side latches and holds the PTF.
Connecting wiring to the unit via a relay
Relay with wire set
- First of all, open the hood, find the required block and unscrew its two fastenings to the body on the sides, remove the cover.
- From the bottom of the mounting block, unfasten the two outer wire blocks marked “7” and “8”.
- Take the installation kit: put the wires from the kit on the relay.
- We add their other ends to the block of wires “7” and “8” according to the diagram.
- We stick the pads back into the mounting block and fasten it back to its original place
- Next, we attach the relay to the car body in any place you like: for example, next to the same block.
- We run long wires from the mounting block blocks (which we have already installed) to the fog lights and connect them. We also attach the PTF mass to the car body.
Installing a button in a panel
To install the button that comes with the mounting kit, you will need to partially disassemble the front panel.
Removing the center console
Fortunately, the factory prudently installed wiring for the PTF in all Samar configurations, so all we have to do is remove the center console and find a block in the wiring for connecting the button.
Next, find the wire block, install the button and assemble the panel.
Then you need to check the headlights for functionality.
Don't forget that they only work after the side lights are turned on!