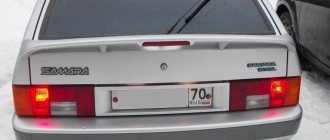
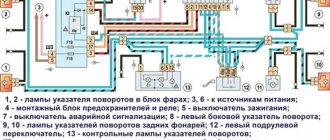
Recently I was dealing with side lights, I had to do a lot of work, but in the end I solved my problem. I'll help you too. First check the lamps, perhaps they are simply burnt out, which is why the side lights do not work (corny, but it happens so often!). Another possibility: the fuse has blown. It needs to be replaced if this is exactly what happened. You need to climb into the mounting block and find F10 there. When it burns out, both side lights do not light up, as well as the license plate lights.
Nothing complicated, I hope you can figure it out. Go ahead. We check the contacts. They could have oxidized, which is why the dimensions do not work. We carry out a visual inspection of all the pads, take them out and put them back in. This is exactly how I solved my problem. I cleaned the contacts and everything was fine. If cleaning does not help, then we check the button itself. It may not work, unscrew it and look. Has the wire fallen off? So it doesn't work!
The most serious reason is a short circuit. But even here you can cope on your own. We take a regular light bulb and connect two wires to it: plus and minus. Next, we take out the fuse and connect the wires from the lamp in place of its contacts. If it starts to burn, it means there is definitely a short circuit somewhere. The only way to find the short circuit is to turn off everything connected to the fuse in order.
Causes and actions in case of breakdown
Among the reasons for the breakdown of the rear parts of the lighting system on a VAZ 21099, 2108 or 2109, the most common are:
- Bulb burnout. It happens due to wear or power surges and is almost the most popular reason for replacing rear headlights.
- Oxidation of contacts. Occurs due to poor quality of terminal contact, electrolyte leakage, or cracks in the battery case.
- Fuse failure. This cause of failure is due to voltage surges.
- The reverse sensor is broken or its wiring is broken.
- Burnt out contacts on the headlight film.
- Lack of ground on the board.
The most common and easiest fault to solve is a lamp burnout. The product must be replaced with a new one by turning off the light sources, opening the trunk and disconnecting the column of wires.
To do this, you will most likely have to remove the trunk trim of the VAZ 2108 or 21099, which is located behind the lamp. After this, squeezing the latches (they are located on the sides), you need to take out the panel and unscrew the lamp, after pressing on it. To install a new rear lamp, reverse the process.
Characteristics of side lights VAZ-2114
VAZ-2114 belongs to the Samara modification of the second generation. The side lights in them are located, in accordance with technical regulations, at the edge of the front and rear parts of the body, next to the turn signals. These lamps are included in the headlight units.
- Unlike the front side lights, the rear ones are painted red.
- The button to turn on these headlights is located in the exterior lighting control unit. It is located in the center of the dashboard above the on-board computer. If the dimensions are turned on, the green light on the switch lights up.
In the engine compartment under the hood of the car there is a mounting block with fuses. If your lights only on the left or right side do not work, then most likely one of the fuses has failed. The easiest way to notice a malfunction is element F10, since it is responsible not only for the operation of the right side of the side lights, but also for the warning lamp to perform its duties.
If the lights refuse to work on the left side, then fuse F11 must be replaced.
Where does it short out most often?
I will try to make your task a little easier in finding the location of the short circuit, if, of course, this is appropriate in your case. But, if all the methods described above did not bring a positive result, then this is the only option left. The wires that go to the license plate lights, as well as to the trunk roof, most often fray and short out there. This wiring needs to be treated with electrical tape, and nothing else.
Another problem area is the wiring on the back of the fender under the carpet. There, too, you need to look at everything carefully, and, if necessary, wrap it with electrical tape. Yes, there are cases when both light bulbs burn out, but drivers refuse to believe it, checking everything but the lights themselves. Start with them. That's all, good luck!
Replacement process
The rear lights are attached to the body of a VAZ 21099, 2108 or 2109 car using 4 nuts. To dismantle the lighting system you will need:
The operating algorithm is as follows:
- To access the nuts, remove the 21099 luggage rack at the appropriate location (if the rack is installed).
- Disconnect the power plug that is attached to the board.
- Unscrew the 4 nuts using a wrench.
- When removing the last nut, hold the taillight outside to prevent it from falling and breaking.
- After removing all 4 nuts, remove the light.
When installing a new headlight on the rear of model 21099, do not forget to connect the wiring to ground, which is attached to one of the studs.
In such cases, the ride becomes quiet, calm and relaxed, but how everything changes when at least one light bulb burns out. This causes inconvenience and emergency situations, and you can also get a fine from a road service employee.
We recommend: Replacing hydraulic compressors on a 16-valve VAZ-2112 with your own hands
The dimensions on the VAZ 2109 do not light up, then look for the reason in the wiring. Even experienced drivers recommend carefully checking the functionality of all devices and components before leaving. The nine is no exception, in which optics can often fail for various reasons, including:
The rear lights (headlights) of the VAZ 2108, VAZ 2109, VAZ 21099 have the following bulbs: 1) Brake lights. 2) Dimensions. 3) Reverse. 4) Turns. 5) Fog lamp.
Rear light board for VAZ 2108, VAZ 2109, VAZ 21099
A wiring harness goes from the mounting block to the rear lights. The purpose of each individual wire in the harness can be understood by its color: 1) Brake lights - red 2) Dimensions - yellow 3) Reverse - green. 4) Turns - blue. 5) Fog light - orange-black.
We remove the connector from the rear light board of VAZ 2108, VAZ 2109, VAZ 21099
Naturally, you need to understand that if the car VAZ 2108, VAZ 2109, VAZ 21099 is old and there are a lot of people doing the wiring, then the color match of the wire to its purpose may be violated. That is, the red wire can be converted not to brake lights, but, for example, to dimensions. But in general this is a very important point: the developers of the VAZ 2108, VAZ 2109, VAZ 21099 specifically marked the functional purpose of the wires with a certain color to make it easier to use.
Flashlight board VAZ 2108, VAZ 2109, VAZ 21099
If some light signal in the taillight of a VAZ 2108, VAZ 2109, VAZ 21099 does not work, then before climbing into the mounting block and opening the electrical circuit, we check the following: 1) The reliability of fastening the mass of the taillight to the body of the VAZ 2108, VAZ 2109, VAZ 21099.2)
We check the reliability of fastening the wire connector to the headlight. 3) Integrity of the light bulb 4) Quality of contact between the light bulb and the flashlight board. It often happens that everything is intact, the light bulb and the mass are good, and 12 Volts come to the light bulb, but it does not light. The reason is poor contact between the light bulb and the board. In this case, you need to clean both the light bulb base and the area on the lantern with fine sandpaper.
As one smart person said: “Electrics is the science of contacts.” To disassemble the rear light of a VAZ 2108, VAZ 2109, VAZ 21099, first remove the protective plastic cover. Then disconnect the black wire of the flashlight from ground. Then we remove the connector from the flashlight board and remove the board itself with the bulbs from the headlight housing. If it is necessary to replace the headlight itself, then unscrew the remaining bolts securing the headlight to the car frame and remove it.
We recommend: We remove the vacuum brake booster on a VAZ-2110 with our own hands for replacement
Why doesn't the VAZ 2115 reverse? The reverse light doesn't light up - what to do?
biathlonmordovia.ru → Electrical appliances
Reverse sensor
(DZH) - is a device that activates the reversing lights (white) when you engage the appropriate gear and start moving in reverse. In this way, you notify motorists (pedestrians) standing behind you of your intentions, that is, that you are going to drive in the opposite direction.
Today we will talk not only about what this sensor is, but also how to check it if it malfunctions and replace it with your own hands, if necessary.
I would like to note right away that non-working reverse lights are not conclusive evidence that the reverse sensor is faulty; perhaps the reason is quite trivial, for example, a wiring has come loose or a light bulb has burned out. Therefore, in order not to make unnecessary movements, make sure that the reason is in this sensor, and not in the light bulb or wiring.
Additional reasons why the lights do not light up when reverse gear is engaged:
- , which is connected by a DZH chain and lanterns;
- Failure to fit the reverse sensor;
- The contacts of the flashlights have oxidized;
- There is no wiring contact between the fuse block and the plug.
Where is the reverse sensor located?
The DZH can be seen if you drive onto an overpass and climb under the car, there will be two sensors on the gearbox, one of them is the , the second is the reverse sensor
.
Symptoms of a faulty reverse sensor
You put the car in reverse, but the lights do not come on, although both the bulb and the wiring are in good condition.
How to check the reverse sensor on a VAZ 2114?
- Disconnect the power wires from the reverse sensor.
- Connect the wires directly to each other.
- Turn on and .
Conclusions:
- If the lights are on in this position, the sensor is faulty and must be replaced.
- If even in this position the lights do not light up, the reason is in the circuit, the sensor most likely has nothing to do with it.
- Using a tester or multimeter, measure the voltage on ground and the orange wire that comes from the DZH; if there is voltage, you need to check the board of white lights, as well as the contacts. There may be no contact between the fuse box and the sensor contacts.
Replacing the reverse sensor on the “fourteenth”
To replace the sensor you will need: a new reverse sensor, an overpass, transmission oil, as well as empty containers and rags. The fact is that when you unscrew the old ESD, oil will flow out of the hole.
- Drive the car into the pit and place it on.
- Remove the engine crankcase protection.
- Remove the contacts from the DZH
. - Carefully clean the work area from dirt and dust.
- Bring the container prepared for the oil to the reverse sensor and unscrew it.
- Try to quickly remove the old ESD and install a new one in its place, then quickly tighten it until it stops.
- Connect the power wires to the new sensor.
- Wipe off all remaining oil using a rag.
- (add oil if necessary) and make sure the new reverse sensor is working.
The fact that the car is moving backwards is signaled by white lamps, which are located at the rear of the car.
Dimension fuse is on
If the fuse is constantly on, then two options are possible:
- poor contact in the fuse box;
- Somewhere there is a short circuit (short circuit).
We check:
- We take a 12 volt light bulb and connect two wires to it, + and -, respectively.
- We take out the blown fuse and connect the wires from the light bulb to the places where it contacts the block. If the lamp is on, then there is a short circuit somewhere.
The only way to find the location of the short circuit is to turn it off in order and check in the same way everything that this fuse is responsible for.
The main diseases are:
- Wires that go to the trunk lid and to the license plate lighting. Most often, they are the ones who fray and short out.
- The next weak point, which is why the VAZ 2109 does not light up, then unhook the cable, which is located at the driver’s left foot, which is not on the engine shield, but on the back side of the wing, under the carpet. Having disconnected the cable, we just disconnect the circuit for the license plate illumination and the lampshade.
- If after this our light on the fuse box goes out, then we have found the place where it shorts. Next, you need to completely look at the wiring and treat it with electrical tape.
Wires and fuses - Electrical equipment
Switched circuits at different key positions
The electrical equipment is made according to a single-wire circuit - the negative terminals of sources and consumers of electricity are connected to the car body, which acts as a second wire.
Rice. 7.1. Electrical diagram of VAZ-2115-20 cars (left half): 1 – headlights; 2 – fog lights; 3 – air temperature sensor; 4 – electric motor of the engine cooling system fan; 5 – blocks connected to the wiring harness of the ignition system; 6 – engine compartment lamp switch; 7 – block for connection to a single-wire type audio signal; 8 – sound signal; 9 – washer fluid level sensor; 10 – front brake pad wear sensors; 11 – oil level sensor; 12 – generator; 13 – engine compartment lamp; 14 – coolant temperature indicator sensor; 15 – starter; 16 – battery; 17 – relay for turning on fog lights; 18 – coolant level sensor; 19 – brake fluid level sensor; 20 – reverse light switch; 21 – windshield wiper gearmotor; 22 – oil pressure warning lamp sensor; 23 – block for connecting to the rear window washer electric motor; 24 – windshield washer electric motor; 25 – instrument cluster; 26 – mounting block. Conventional numbering of plugs in blocks: A - block headlights; B — electric fuel pump block; C — blocks of the mounting block, ignition switch, windshield wiper gearmotor; D — interior lamp
The diagram of the electrical equipment of VAZ-2115-20 (without engine control system components) and 2115-01 is shown in Fig. 7.1,
Rice. 7.2. Electrical diagram of the VAZ-2115-01 car (left half): 1 – headlights; 2 – fog lights; 3 – air temperature sensor; 4 – generator; 5 – electric motor of the engine cooling system fan; 6 – fan motor activation sensor; 7 – engine compartment lamp switch; 8 – block for connecting to a single-wire audio signal; 9 – sound signal; 10 – oil level sensor; 11 – front brake pad wear sensors; 12 – washer fluid level sensor; 13 – spark plugs; 14 – ignition distributor sensor; 15 – switch; 16 – carburetor solenoid valve control unit; 17 – carburetor solenoid valve; 18 – carburetor limit switch; 19 – speed sensor; 20 – starter; 21 – battery; 22 – relay for turning on fog lights; 23 – coolant level sensor; 24 – brake fluid level sensor; 25 – reverse light switch; 26 – coolant temperature indicator sensor; 27 – engine compartment lamp; 28 – windshield wiper gearmotor; 29 – oil pressure warning lamp sensor; 30 – block for connecting to the rear window washer electric motor; 31 – windshield washer electric motor; 32 – ignition coil; 33 – instrument cluster; 34 – mounting block. Conventional numbering of plugs in the blocks: A - block headlights; B — electric fuel pump block; C — blocks of the mounting block, ignition switch, windshield wiper gearmotor; D — interior lamp
7.1a, 7.2 and 7.2a. For engine management system connections, see the separate Multiport Fuel Injection Engine Management System Service and Repair Manual.
Most power supply circuits for vehicle electrical equipment are protected by fuses. The battery charging circuit, the ignition and engine start circuit, the generator (with the exception of the excitation winding), the headlight switch relay winding and the door lock system relay are not protected by fuses.
Before replacing a blown fuse, find out the cause of its burning and eliminate it. When troubleshooting, it is recommended to look at the information listed in the table. 7.1 circuits that this fuse protects.
In table 7.1 shows the purpose of each fuse, but a particular vehicle may not have some circuits (or devices) listed in the table.
Table 7.1 Circuits protected by mounting block fuses
Rear fog light lamps and rear fog light indicator lamp. Electric motors for headlight cleaners (at the moment of switching on). Headlight washer motor.
Direction indicators, relay-interrupter for direction indicators and hazard warning lights (in emergency mode). Hazard warning lamp.
Interior lighting. Individual interior lighting lamp. Luggage compartment lighting. Ignition switch illumination lamp. "Check engine" indicator lamp. Brake light bulbs. Trip computer (or clock).
Socket for connecting a portable lamp. Relay for turning on the heated rear window (contacts). Rear window heating element.
Sound signal. Horn relay. Cooling fan electric motor.
Electric windows. Power window relay (contacts).
Heater electric motor. Windshield washer motor. Electric motors for headlight cleaners (in operating mode). Cigarette lighter. Glove box lighting lamp. Relay for turning on the heated rear window (winding).
Right fog lamp.
Left fog lamp.
Side lamps on the left side. Indicator lamp for turning on the side light. License plate lamps. Engine compartment lamp. Instrument lighting switch. Illumination lamps for switches, instruments, cigarette lighter, ashtray, heater control levers.
