Step-by-step instructions for removing the trim on the doors of a VAZ 2107
Elements of the interior trim wear out over time and lose their attractive appearance. The door trim of the VAZ 2107 especially suffers during operation. Door cards become frayed, deformed and begin to poorly stay in place. You can simply replace them with new “stock” ones, or you can modernize the interior by installing homemade door cards based on thicker plywood. This solution improves the durability of the upholstery and the acoustic characteristics of the interior. The base can be covered with eco-leather, or you can order a professional reupholstery of the car interior.
Need for replacement
The standard upholstery looks very cheap, which spoils the external design of the domestic car. "Sevens" after 2000 are equipped with the same type of trim as earlier versions of this model. The standard skin is thin fiberboard, which is covered with cheap black polymer.
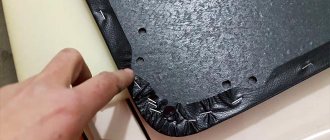
The standard upholstery is attached to pistons, which become unusable every time they are removed, resulting in the need to replace them. You can replace the standard cheap upholstery on a VAZ-2107 with more advanced materials, which will brighten up the interior of the car. We will find out further what it is to replace the door trim of a VAZ-2107 with your own hands.
Materials for upholstery
You can replace the standard upholstery of door cards with the following materials, which differ not only in price, but also in quality:
- dermantine;
- Genuine Leather;
- auto fabric;
- alcatara;
- almara.
You can use any of the materials listed, but the most affordable and easiest to work with are: dermantine, leather and vinyl. In addition to the main material, 4 mm thick plywood will be required to replace the sheathing. It is recommended to replace standard fiberboard, as it is quite flimsy and wears out quickly. You will also need latches for attaching the upholstery, foam rubber and glue.
Features of dismantling the casing
Homemade door cards for the VAZ-2107 are the optimal solution for upgrading the standard trim. To remove the standard cards on the “seven”, you will need to perform the following steps:
- The window lifter handle is removed, which requires pulling out the clamp in the form of a bracket.
- Remove the door handle by removing the plugs and unscrewing the bolts.
- Remove the trim from the door handle.
- Now you can dismantle the card, just pull it towards you.
After the standard card is removed, you can silence the doors. At the same time, you can perform audio preparation if you plan to install speakers in the front doors.
Door card manufacturing process
It is very easy to make cards on the VAZ-2107 door with your own hands, especially if you have a handy tool. Before starting work, you will need to have patience and time, since it can take up to 3-4 hours to make one upholstery.
The standard card is used as a template for making a new one. To do this, just attach the template to a sheet of plywood, then mark and cut out the base (it is better to use a jigsaw for cutting). On the prepared base, you should mark and cut holes for attaching handles and levers. When tuning the doors of the “seven”, you can simultaneously install an electric drive on the window lifts.
During the work process, special attention should be paid to the correct marking of the holes for attaching the card. If you make a mistake by a few millimeters, the product will not fit well on the door.
After the base is ready, you should use sandpaper to process the sawn edges. This is necessary to ensure that the base is as smooth as possible. We continue tuning the door trim of the "seven", for which we take a piece of foam rubber (it is best to use two-layer foam rubber, consisting of a base and fabric) and cut it out according to the card template.
It is important to know! If tuning involves installing speakers and a shelf on the door, then you should first make the frame of these products. You can read how to make podiums for the VAZ-2107 in the corresponding material.
The shelf can be made separately, then sheathed and installed on the door card. It is much easier to make such a shelf than to make a whole product along with the door card.
Foam rubber is glued to the plywood using special superglue. After the foam rubber has been glued to the door card, you can begin covering it. You can sheathe it either with a single piece of material or in sections, you just need to sew them together with a “French seam”, which is durable and attractive in appearance. The pattern is made so that there are 50 mm allowances on all sides. This is necessary in order to avoid the appearance of “bald” places along the edges if there is not enough material.
Salon VAZ 2107 - description
The “Seven” is equipped with a relatively comfortable interior, in comparison with other cars of the classic rear-wheel drive VAZ series. It has anatomical seats with high backs and headrests, an anti-glare dashboard and an electrically heated rear window.
The plastic from which the instrument panel and other interior elements are made is not of high quality and has a chemical smell that does not really erode, especially on new cars.
The salon is quite spacious. It is illuminated by a lamp located on the roof of the car and controlled using a manual switch. In addition, there are door switches that are installed in the door pillars. Note that the interior of the VAZ 2107 has many ergonomic flaws. For example, the ignition switch is located to the left of the steering wheel, which is inconvenient for a right-hander. There is also no rubber seal around the door perimeter, which is why the doors close with a specific knock.
As for the dashboard, it has a simple design and provides the motorist with only the necessary information, namely: engine and oil temperature, amount of fuel and revolutions, as well as the current speed of the car. The center console contains only the most basic components, in particular: air deflectors, heater control unit and cigarette lighter.
A distinctive feature of the VAZ 2107 is the presence of an analog clock. The buttons for activating the headlights, heated rear window and fan are located under the gearshift lever, which is not very common. The disadvantages of the Seven's interior also include the fact that the steering wheel is not adjustable at all, and the seats can only be moved on a slide.
Interior noise insulation
A significant drawback of the VAZ 2107 is the increased noise in the cabin when driving. To eliminate it, it is necessary to soundproof the interior. This is a somewhat costly procedure, although not complicated. Sound insulation materials can be divided into three groups: heat insulators, sound insulators and vibration dampers, but on the modern market there are universal products that combine all the properties.
Note that for ease of installation, virtually all materials are made on a self-adhesive basis. Some of them must be heated with a hairdryer during installation. The first to install is a vibration-insulating material (vibroplast), which dampens vibrations of the body, engine and suspension. Next comes a sound-absorbing layer (bitoplast), which prevents extraneous sounds from entering the cabin. In order not to separate into two layers, you can take a universal material.
In addition to soundproofing materials, you will need:
- Screwdrivers.
- Hair dryer.
- Degreaser.
- Roller.
- Scissors.
The importance of soundproofing doors
VAZ 2107 door soundproofing
An important and very necessary stage in the complete soundproofing of a car is, of course, the doors. It is from here that noise from the road and passing cars enters the cabin.
Note. Among the features of soundproofing doors on a VAZ 2107, one can highlight the fact that vibration and noise insulation are given equal importance.
Along with the fact that work is being carried out to reduce extraneous noise coming from outside, the acoustic component also deserves considerable attention. Here are a few advantages that are inevitable after performing the door shutter on a VAZ 2107:
- Doors will close much quieter and more clearly;
- By increasing the weight of the doors (this is inevitable), the sound quality of the speakers installed in the doors on acoustic podiums will improve.
Sound insulation of VAZ 2107 doors
Note. There is also a minus. This, as you guessed, is an increase in the mass of the doors. But nothing can be done here, although, on the other hand, if you don’t get too carried away with vibration isolation, the doors will not sag soon.
Front Panel
Console tuning is its optimization, which will result in the appearance of a number of advantages and useful little things in the car . The purpose of this modernization is to make the front panel more functional and original. You can replace the torpedo with a similar one from the VAZ-2115. But be prepared for the fact that during installation there may be a problem with gaps that need to be sealed with foam.
Instrument panel VAZ 2115
You can also install a front panel from a foreign car on the “seven”. The best option is a dashboard from a BMW E30. In addition, an analogue from TOYOTA Camry is often used. In this case, trim the element a little on the sides, install electric windows and select the correct cover for the steering wheel. As an option, you can sheathe a standard dashboard with carbon fiber or fabric, which will give it a bright and original appearance.
Seats
And although the seats of the “Seven” are considered the most valuable of the entire VAZ (classic) family, they have a significant drawback - the front seats are flimsy and break quite quickly. Over time, the back of the driver's seat begins to warp, and even if it is welded, this will not last long. In addition, the upholstery on the seat is worn out, which looks unattractive.
The simplest option for improving the seats is to purchase covers, but if the seats are very loose, you can replace them with new stock, “foreign”, sports or anatomical ones.
Seat tuning
Traditional seats of the VAZ 2106 salon original require reupholstery or complete replacement with foreign analogues. Here everything depends on your desires, preferences and financial capabilities.
As a rule, chairs are changed based on:
- heavy wear and poor appearance;
- damage to internal components;
- lack of convenience and comfort.
If the seats become unsuitable for further use, they can be restored. This procedure is different in that it does not require larger investments than installing new seats. However, it is not an easy job.
This is interesting: Replacing the front and rear side members of a VAZ 2109 - detailed instructions
Tuning worn out seats starts with:
- Measurements and patterns required.
- Having received certain dimensions, the driver begins sewing new covers.
- During all restoration work, worn-out material is dismantled, foam rubber is removed, and the springs are subject to careful inspection.
- Having acquired new foam rubber, car enthusiasts stuff their seats with it and put on new covers. Putting on the covers
We fix and tighten the covers
Additional work with seats:
- Taking a more serious approach, it is possible to adjust the frame base of the seats, giving them a sporty style.
- In this case, any chair can be changed to suit your own needs, taking into account various nuances.
- Also, it must be taken into account that if the driver does not visualize the end result, it is best not to try to create a chair from the very beginning.
- Regardless of what kind of seats the vehicle is equipped with, the main thing is to always take into account such an aspect as safety.
Video of VAZ seat reupholstery:
Seat belts
Seat belts (hereinafter referred to as SB) require replacement if they are worn out or the locking device is faulty. Also, the RBs must be replaced if they were stressed during an accident. The VAZ 2107 is equipped with seat belts with inertial reels. To replace the front seat RB, do the following:
- Remove the decorative trims of the lower and upper mountings of the RB to the central pillar by prying them off with a screwdriver.
Removing the decorative trims of the seat belt fastenings - Using a key set to “17”, unscrew the bolt of the upper mounting of the RB.
Unscrewing the upper seat belt mounting bolt - Using the same key, unscrew the lower fastening bolt and remove the belt and reel.
Removing the seat belt with reel - Next, unscrew the fastening bolt of the RB clamp to the floor tunnel and remove it.
Unscrewing the seat belt fastener bolt - Installing a new belt is done in reverse order.
Door trim
Decorative door panels and plastic elements on the VAZ 2107 are attached using disposable polymer clips. This is technologically advanced and cheap, but not reliable enough, so after a while the panels begin to creak.
Leather door trim for VAZ 2107
You can fix this problem yourself:
- First, the interior elements are dismantled (lock and window lifter handles, armrest and others). The door trim is removed using a screwdriver.
- Next, the door panel is removed and laid on a sheet of plywood 4 millimeters thick. The outline is drawn with a marker.
- The plywood blank is cut with a jigsaw, and the edges are sanded.
- The sheathing is made using a sewing machine.
- Foam rubber is glued to the plywood, on top of which the fabric is attached. Don't forget to make holes for the interior parts. The panel is attached to the door using decorative bolts.
Tuning door cards
The door map, similar to the seats for the six, does not look the best after prolonged use. The fastening elements of the upholstery fabric are made using plastic caps. The latter, after a certain time, begin to creak.
To improve the interior area of the doors, ordinary plywood is often used, which reaches a thickness of 4 mm. It acts as a frame. As for the finishing, a backing is placed, which consists of foam rubber. Its thickness is 10 mm.
When the driver plans to equip the doors with speakers, then along with the standard holes intended for handles and window lifters, it is necessary to make holes for the dynamic heads.
The stages of tuning door panels consist of:
- dismantling old cards;
- removing old upholstery;
Removing the old casing - dismantling old maps (you need to mark them on a sheet of plywood);
- transferring panel parameters to a sheet of plywood using a regular pencil;
Redrawing from an old map - cutting out workpieces using a jigsaw and processing protruding elements;
Cutting out new door cards - door card blanks;
- production and stitching of covers;
- door upholstery (stitched from a material such as, for example, leatherette);
- gluing the cover and fixing the finishing material. For these purposes, use a regular stapler and glue.
Gluing new skin
As for fastening the improved panels, it is made using special bushings that have internal threads. To do this, special holes are initially made on the cards in the required places. Then the fastener is inserted. With this installation of upholstery material, it is possible to get rid of knocks and squeaks while moving and while listening to music.
Door card repair video:
Materials for upholstery
When choosing fabric, you need to take into account quality, wear resistance, price, and color. The fibrous structure should stretch, this will allow the fabric to be securely fixed to the panel. Possible varieties:
- Genuine Leather. It looks beautiful, but is expensive. Creates sound insulation and withstands humid and harsh climates. The ease of care is dictated by the fact that the fabric does not absorb dirt and does not deteriorate when using aggressive detergents.
- Eco-leather or substitute. It has high wear resistance and is durable. The characteristics are identical to the natural base, only the substitute does not tolerate the effects of chemical detergents. With improper care, microcracks appear, which are then filled with dirt.
- Alcantra. Consists of thin and viscous fibers. The material has a high rate of moisture rejection, so it does not shrink. After the Alcantura is stretched on the panel, it will take the shape of the structure and will not sag over time. There is only one minus - the low level of sound insulation.
- Vinyl and leatherette. They provide strength and durability, and they are also very convenient for reupholstering. The material transmits sound well, so you will need to install an additional layer of insulation.
- Carpet. This is an artificial automotive fabric. This lining will last for many years. It withstands temperature changes, repels dirt, cleans quickly, and blocks the growth of fungus.
Some car enthusiasts are experimenting and upholstering door panels with velvet and even faux fur. Such fabric will partially create sound insulation, but will cause difficulties during cleaning.
Lock and door cylinder of VAZ 2106. Replacement
During the operation of the VAZ-2106, all elements are subject to wear and tear over time. At the same time, an important property of the car is its security from unauthorized access.
We must pay tribute to the developers of the VAZ-2106, the door handle and lock are made to the best of their ability. However, the locking mechanism can also break (most often on the front door) for various reasons (due to careless handling). And replacing them is a labor-intensive process.
You will need the following tools:
- crosshead screwdriver,
- socket wrench (or socket) 8,
- extension,
- ratchet or wrench (for the head).
The process of removing the door handle involves minor preparatory work:
- remove the trim from the door (on which the lock is supposed to be replaced). Only then do we carry out the following work step by step:
We remove the casing photo using a socket wrench from the inside and unscrew the left nut holding the handle (held by two nuts);
Unscrew the handle fasteners. Photo
- To unscrew the right handle nut, you must first open access to it. At the end of the door, unscrew the bolts holding the lock. Having loosened the lock, move it slightly to the side and unscrew the right nut, freeing the handle from the inside. However, it will be held in place by a rod attached to the lock cylinder;
- With a little effort, you need to pull the rod until it comes off the cylinder, after which the handle will easily detach from the door and is ready for replacement.
- Installing a new handle is carried out in the reverse order. The main thing is to carry out all work carefully and not damage the door glass.
Most often, the lock cylinder is the first to fail; it is reusable and constantly in use. To replace it you will need a flat screwdriver and a needle (or thin wire)
How to remove the front door trim on a VAZ 2106-2107
Quite often, due to problems with the locks and closing mechanism of the front doors, it is necessary to remove the trim. In fact, this work is very easy to do and will take a maximum of 5 minutes to complete. Do you need two screwdrivers to remove it?
- with flat blade
- cross (curly)
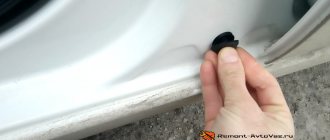
First, you need to use a flat screwdriver to pry off the plastic insert, which is a decorative plug for the internal door opening handle:
Then we remove it completely, since in the future it will interfere with removal:
Then you need to remove the window lift control handle, having first freed it from the plastic retainer:
Next, unscrew the three bolts securing the door handle, which are clearly shown in the picture:
And we remove it, since it is no longer attached to the door6
Now all that remains is to carefully pry the door trim from any angle with a thin screwdriver, and carefully, overcoming the resistance of the clamps, remove the trim - tear it off the clips.
Next, carefully pry it up along the entire perimeter in the same way or with a little effort we pull it towards ourselves, the upholstery should come out quite easily and simply:
As you can see, this procedure on VAZ 2106-2107 cars is performed quite simply and does not require much effort. Installation is carried out in reverse order. If anyone is interested in the price of new trims, then a set for all doors costs about 300 rubles.
For your information
The cable is tensioned according to the following procedure:
You should prefer the optimal tension force of the cable drive: the cable should not be overtightened, but should not dangle.
After installing a new window regulator, a squeaking sound may occur. To eliminate it you need to:
- loosen and remove the cable from under the rollers;
- cross the upper and lower branches of the cable coming out of the lift drum;
- repeat the procedure for installing and tensioning the cable.
How to remove the door trim of a VAZ 2107
Figure 1. Removing the door
1 - door hinge fastening screw; 2 - impact screwdriver; 3 - door stop; 4 - door hinge. The arrow shows the direction of impact on the screwdriver
Knock out the limiter fastening pin 3 (Figure 1) and disconnect the limiter from the car body pillar.
While holding the door in the open position, use an impact screwdriver to remove 2 screws 1 securing hinges 4 of the door to the body pillar.
The door installation must be done in reverse order. Before final tightening the hinge screws, adjust the gaps between the door and the car body.
Disassembling the front doors
Door disassembly is required in case of replacement of parts and assemblies.
Figure 2. View of the inside of the door of a VAZ-2105 car
1- door lock button; 2- decorative plug for the door handle fastening screw; 3 — handle of the door lock opening mechanism; 4 — window lifter handle.
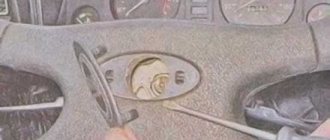
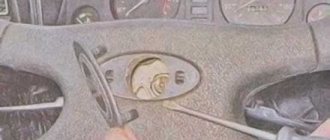
To remove the door trim, you must first remove the decorative plug 2 from the handle attached to the armrest. Under the plug there is a screw that needs to be removed. After this we dismantle the handle.
We remove the decorative rosette 1 from the inner door opening handle 3. To do this, you need to pry it off the trim with a screwdriver and remove it from the handle.
Figure 3. Door lock release handle
1 — decorative rosette; 3 — door opening handle
Now you need to remove the door lock button 3. To do this, use a sharp knife at point 2 to pry the button cover 1 and pull it out.
Figure 4. Door lock button
After dismantling the cover, you can pull out bracket 1 securing the button to rod 2 and remove button 3.
Figure 5. Door lock button
1 - bracket; 2 — rod of the door lock button; 3 — door lock button.
Now it's up to the window lifter handle.
Figure 6. Window lifter handle
1- window lifter handle; 2 - window handle trim, 3 - socket.
The window lifter handle consists of 3 parts. 1 - the window lifter handle itself, 2 - the trim of the window lifter handle, 3 - the socket. In order to disassemble and remove the handle, it is necessary to slightly recess the socket 3 under the trim 2 into the door trim and move the trim along the handle until it exits the annular recess on the axis. The direction is indicated in the figure by an arrow. Remove the window handle 1 and the socket from the axle.
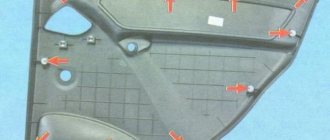
In my case, it was still necessary to remove the screws securing the door trim, which were installed by the previous owner. In the general case, it is necessary, overcoming the resistance of the spring plastic holders, to remove the door trim. The location of the plastic holders on the door trim is shown in the figure below.
How to remove the front door trim on a VAZ 2106-2107
Quite often, due to problems with the locks and closing mechanism of the front doors, it is necessary to remove the trim. In fact, this work is very easy to do and will take a maximum of 5 minutes to complete. Do you need two screwdrivers to remove it?
- with flat blade
- cross (curly)
First, you need to use a flat screwdriver to pry off the plastic insert, which is a decorative plug for the internal door opening handle:
Then we remove it completely, since in the future it will interfere with removal:
Then you need to remove the window lift control handle, having first freed it from the plastic retainer:
Next, unscrew the three bolts securing the door handle, which are clearly shown in the picture:
And we remove it, since it is no longer attached to the door6
Now all that remains is to carefully pry the door trim from any angle with a thin screwdriver, and carefully, overcoming the resistance of the clamps, remove the trim - tear it off the clips.
Next, carefully pry it up along the entire perimeter in the same way or with a little effort we pull it towards ourselves, the upholstery should come out quite easily and simply:
As you can see, this procedure on VAZ 2106-2107 cars is performed quite simply and does not require much effort. Installation is carried out in reverse order. If anyone is interested in the price of new trims, then a set for all doors costs about 300 rubles.
Features of dismantling
Before work on reinstalling the door trim, you need to prepare a tool. You will need:
- Plywood sheet up to 4 mm.
- Door latches and clips are sold as a set, matching the interior color.
- Foam rubber, sheet up to 10-15 mm thick.
- Material.
- Glue.
To cover doors 2107, you can use an old part; if the factory plywood is not deformed, this will make the work easier.
Dismantling the panel proceeds in steps:
- Pull out the bracket securing the window regulator.
- Remove the window lifter handle. If the mechanics were reinstalled on the power window, remove the clamp covering the standard hole.
- Remove the plugs on the door handle, unscrew the armrest bolts, and remove the element.
- Remove the trim panel from the door handle.
- Remove speakers and adjacent electrical appliances, if installed.
- Carefully pull the door card towards you and remove the panel.
Dismantling takes up to 10 minutes, it is important to unscrew the bolts sequentially; if the interior has been modernized, and the door has additional clips along the edge of the card, remove them first.
Old VAZ 2107 door cards are removed as follows:
- remove the window handle by pulling out the fixing bracket;
- Unscrew the bolts under the plugs and remove the door handle (armrest);
- remove the trim from the door opening handle;
- remove the speaker (if installed);
- remove the door card by pulling it towards you.
How to replace a door trim
The factory facing of Zhiguli is made of leatherette or leatherette. The first stage of work is the selection of material, only then begins the study of the instructions in order to understand how to disassemble the doors of a VAZ 2107 and replace the facing fabric. The canvas is measured, a list of necessary tools for dismantling, adhesive, and fasteners is compiled. Spare clips are also purchased, because when removing the old coating, the plastic elements break.
Materials for upholstery
You can replace the standard upholstery of door cards with the following materials, which differ not only in price, but also in quality:
This is interesting: Repair and replacement of the gear motor of the VAZ-2110 stove: practical recommendations
Factory finish
- dermantine;
- Genuine Leather;
- auto fabric;
- alcatara;
- almara.
You can use any of the materials listed, but the most affordable and easiest to work with are: dermantine, leather and vinyl. In addition to the main material, 4 mm thick plywood will be required to replace the sheathing. It is recommended to replace standard fiberboard, as it is quite flimsy and wears out quickly. You will also need latches for attaching the upholstery, foam rubber and glue.
Manufacturing of panels
Refinement of the VAZ 2107 interior begins with the dismantling of interior parts; the upholstery is removed from the internal surfaces of the body using a regular screwdriver. First, the window lifter and lock opening handle, as well as the large plastic handle, are removed from it. A flat screwdriver is inserted between the panel and the body and, acting as a lever, the resistance of the piston is overcome.
The door panel is removed and laid on a sheet of plywood, and its outline is traced using a pencil. To make a durable base for upholstery with your own hands, use a jigsaw; after the workpiece is cut, its edges are processed with sandpaper. The production of two-color sheathing is carried out using a sewing machine, the fabric is stitched, a backing is glued to the base, on top of which leatherette is fixed.
Features of dismantling
Before work on reinstalling the door trim, you need to prepare a tool. You will need:
- Plywood sheet up to 4 mm.
- Door latches and clips are sold as a set, matching the interior color.
- Foam rubber, sheet up to 10-15 mm thick.
- Material.
- Glue.
To cover doors 2107, you can use an old part; if the factory plywood is not deformed, this will make the work easier.
Dismantling the panel proceeds in steps:
- Pull out the bracket securing the window regulator.
- Remove the window lifter handle. If the mechanics were reinstalled on the power window, remove the clamp covering the standard hole.
- Remove the plugs on the door handle, unscrew the armrest bolts, and remove the element.
- Remove the trim panel from the door handle.
- Remove speakers and adjacent electrical appliances, if installed.
- Carefully pull the door card towards you and remove the panel.
Dismantling takes up to 10 minutes, it is important to unscrew the bolts sequentially; if the interior has been modernized, and the door has additional clips along the edge of the card, remove them first.
How to remove the front door of a VAZ 2107
To remove the front door, you will only need basic knowledge about the structure of VAZ 2107 doors, thanks to which most owners of the “Seven” cope with such repairs on their own.
So, to remove the front door from the car, you will need to purchase a special impact screwdriver. With this tool, you can easily loosen tightly tightened screws on the door. In addition, to remove the front door you will need a ten-size wrench. Finally, before starting work, you will need to find an assistant - the fact is that the VAZ 2107 door is quite heavy and you definitely won’t be able to hold it without help.
First of all, you will need to remove the door opening limiter, and to do this you will need to use a hammer to knock down the locking pin, after which you will need to pull it out of the seat using pliers.
After this, take an impact screwdriver and use it to loosen the screws securing the door hinges. This is done quite simply: the screwdriver itself is installed in the desired position, after which it will be necessary to hit it several times with a hammer. Sharp blows of the hammer are repeated until the screws are unscrewed.
It is important not to completely unscrew the screws before an assistant comes to help - he will have to hold the door and help remove it.
To install the door in place, repeat all of the above steps in reverse order. Please note that before installing the door, be sure to lubricate the threaded connections of the screws.
How to remove a door lock
To dismantle the door lock on the “seven”, use the same tools as when disassembling the door. The process itself consists of the following steps:
- Remove the door trim.
- Use a flat-head screwdriver to disconnect the lock power button rod.
Using a flat screwdriver, disconnect the lock power button rod - Using a Phillips screwdriver, unscrew the groove fastener from the end of the door, and then move it away along with the seal.
From the end of the door, unscrew the groove fastener and remove the part along with the seal - Unscrew the fasteners of the interior door handle.
- Unscrew the lock fastener.
The door lock is secured with three screws using a Phillips screwdriver. - We remove the mechanism along with the handle and rod.
After unscrewing the fasteners, remove the lock along with the rod and handle
How to remove a door handle
To replace the external door handle, you will need to prepare the following set of tools:
- socket wrench 8;
- flat screwdriver.
The dismantling procedure consists of the following steps:
- Raise the door glass all the way.
You will need to lift the glass to get to the door handle mount. - We dismantle the door trim.
- Disconnect the outer handle drive rod from the locking mechanism lever.
Disconnect the outer handle drive rod from the locking mechanism lever - Using a socket wrench, unscrew the handle fastener, which consists of two 8-mm nuts.
The outer handle is secured with two 8mm nuts. - We dismantle the outer handle, removing the part from the hole in the door along with the rod and seal.
After unscrewing the fasteners, remove your hand from the door along with the seal and rod
Dismantling the door trim of a VAZ 2107
Old VAZ 2107 door cards are removed as follows:
- remove the window handle by pulling out the fixing bracket;
- Unscrew the bolts under the plugs and remove the door handle (armrest);
- remove the trim from the door opening handle;
- remove the speaker (if installed);
- remove the door card by pulling it towards you.
This is interesting: Diagnostics of injectors - how to check it yourself: step-by-step instructions - The upholstery material should be laid face down on a flat surface;
- a door card blank is applied on top of the material;
- Initially, you should use a stapler to fix one side of the sheathing;
- after this, you can begin to stretch and fix the material on the opposite side;
- During the work, you need to ensure that there are no folds;
- The process ends with walking along the perimeter of the workpiece and fixing all the edges of the material.
Door card manufacturing process
It is very easy to make cards on the VAZ-2107 door with your own hands, especially if you have a handy tool. Before starting work, you will need to have patience and time, since it can take up to 3-4 hours to make one upholstery.
The standard card is used as a template for making a new one. To do this, just attach the template to a sheet of plywood, then mark and cut out the base (it is better to use a jigsaw for cutting). On the prepared base, you should mark and cut holes for attaching handles and levers. When tuning the doors of the “seven”, you can simultaneously install an electric drive on the window lifts.
During the work process, special attention should be paid to the correct marking of the holes for attaching the card. If you make a mistake by a few millimeters, the product will not fit well on the door.
After the base is ready, you should use sandpaper to process the sawn edges. This is necessary to ensure that the base is as smooth as possible. We continue tuning the door trim of the "seven", for which we take a piece of foam rubber (it is best to use two-layer foam rubber, consisting of a base and fabric) and cut it out according to the card template.
It is important to know! If tuning involves installing speakers and a shelf on the door, then you should first make the frame of these products. You can read how to make podiums for the VAZ-2107 in the corresponding material.
The shelf can be made separately, then sheathed and installed on the door card. It is much easier to make such a shelf than to make a whole product along with the door card.
Foam rubber is glued to the plywood using special superglue. After the foam rubber has been glued to the door card, you can begin covering it. You can sheathe it either with a single piece of material or in sections, you just need to sew them together with a “French seam”, which is durable and attractive in appearance. The pattern is made so that there are 50 mm allowances on all sides. This is necessary in order to avoid the appearance of “bald” places along the edges if there is not enough material.
The skin is stretched onto the card according to the following scheme:
After covering the card, you can trim off any excess material. To prevent the upholstery from tearing at the place where the brackets are attached during operation, it is recommended to leave a small margin on the back side. Tuning of this kind is quite simple, and is carried out by analogy for all remaining doors. Such a simple modification will significantly improve the appearance of the interior and transform the “Seven” for the better. Below is a photo of car doors with the trim altered. By analogy, you can do it for your car.
Necessary materials
To make your own VAZ 2107 door cards you will need:
- plywood 4 mm thick for making the base of the door card (if the base of the old door card is in good condition, you can use it, which will make the work easier);
- new latches for fastening the casing (old ones harden over time and do not perform their functions well);
- foam;
- leatherette;
- glue.
Installation of panels
On the VAZ 2107 door body, you install special bushings with internal threads yourself. Holes are pre-drilled on the panels in appropriate places, and decorative bolts are passed through them. When attaching the bushings, you must carefully follow the installation instructions to avoid turning the part. This mount allows you not only to visually tune the interior, but also to eliminate knocks and squeaks during the trip.
The door panels of the VAZ 2107 car are placed in place and attracted to the base using decorative bolts. This installation method is highly durable and provides optimal conditions for the operation of audio system speakers. Self-tuning by reupholstering the car interior with leatherette transforms the interior into a real work of art.
