Characteristics of door limit switches Grants
Apart from the driver's side, there are no door limit switches on the Lada Granta in other opening structures. There aren't even any buttons or standard wiring. The operation of these mechanisms determines the activation of the door open lamp, which lights up on the dashboard. Moreover, the interior light and car alarm react to the actions of the driver or passenger. The average cost of limit switches starts from 150 to 200 rubles. Article 1118-3710199 is the original number and its price is lower than its analogues. The Lada Granta has this device, but it all depends on the modification:
- The “Norma” package implies the installation of this device in all door structures.
- The “Standard” package does not imply the presence of limit switches on the seats. There they are replaced with plugs.
- The “Lux” package will delight the buyer with a full set of sensors, even a rear one.
The activation sensor transmits information using light indicators.
Review of Manufacturer Prices
| Name/article | Price, rub.) |
| Limit switch with cap 1118-3710199 | from 160 |
| 11190-3710200 | —/— |
| Rubber cap 11190-371020600 | from 35 |
| 104035756 | from 175 |
| Dello 3094705636N0 | —/— |
| Hans Pries 104035756 | —/— |
| 11190-371020000 | —/— |
*prices are current as of 10/07/18.
The service life of factory rubber caps is limited, only 1.5 - 2 years. The reason lies in the low quality of materials. In winter, drivers often encounter freezing of the limit switch and hardening of the rubber cap. As a result, lighting activation is delayed. The central lock often blocks the doors due to unstable operation of the limit switch. There are several ways to troubleshoot the problem, which we will discuss below.
Installation of limit switches on Lada Granta
An activation sensor in all doors will provide additional comfort. To carry out the installation procedure, you will need special equipment and available materials: lubricant, rubber tips, screwdriver, rag.
Step-by-step algorithm of actions:
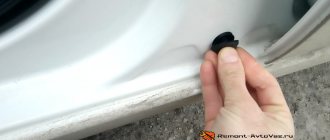
- Remove the rubber tip.
- Open the housing and remove the limit switch.
- Remove the block with wires and disconnect.
- Install a new sensor.
- Reassemble.
After the basic steps, you need to check the functionality of the device. To connect the limit switch to the power circuit, you will need to connect two terminals: first “+” and then “-”.
If you need to replace the trunk limit switch, then the instructions are identical, you just need to open the trunk lid.
Why connecting an alarm system to limit switches is an important process
In all modern cars, an important safety element is the security alarm system. The main role in it is played by transmitting devices. The correct operation depends on how correctly they are connected.
If connected correctly, the effect in the Lada Kalina car is as follows:
- The security alarm system reliably locks the doors, hood and trunk of the car.
- In case of unauthorized opening, thanks to a properly adjusted alarm system, the car will begin to emit characteristic loud signals.
- If the driver forgot to close the doors or trunk, the system will notify him about this.
Limit switches are installed in the security circuit in two ways:
- General diagram, elements work on the principle of one wire.
- Individual, a separate wire is connected to each end switch.
Finalization of the scheme
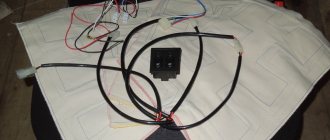
The installation or modification scheme will require special equipment to test the electrical circuit. The first place on the list of accessories is a tester and a soldering iron. You will also need a screwdriver, additional wires, electrical tape and a new sensor. When connected, the driver can use the button in the threshold or the door lock contacts.
To do this, you first need to open the sensor housing with a screwdriver and remove the element, remove the block with wires using a screwdriver. Then replace the wire and solder. Insulate the ends and assemble the structure in reverse order. The process is carried out in parallel so that the process involves elements that go to the working positions of the door.
To measure the circuit resistance with a tester, you need to alternately press and release the spherical protrusion.
What is better than a limit switch in the door or threshold of a Lada Granta?
Many people wonder why and how to connect the Lada Grant door limit switches if there are standard terminals on the thresholds. The problem with threshold elements is their freezing. In winter, the lighting will not turn on until the car is completely warmed up. And in a busy vehicle, the lights may turn on when turning.
The solution is to redirect the wires to the door. The operation is simple: the wires are long enough to reconnect. Next, installation is carried out in the door itself and you need to understand how to remove the Lada Granta door limit switch for proper connection. Usually there is a plastic plug in place of the rubber button. It is easily replaced with a rubberized part.
Read also: Ford Transit flatbed new
The purchase and installation procedure does not require a significant expenditure of money and time. But the motorist needs a wiring diagram for the door switches on the Lada Granta in order to do the job correctly. You can receive it along with purchased spare parts. You can also use the car's operating book.
Good day to all!
Like many non-luxury grant drivers, after the purchase I learned with horror that the car only has one door switch, on the driver’s side. Of course, when installing the signaling, 3 more missing limit switches were installed. But who knew that they were already installed in the locks. Even the alarm installer was not in the know. AVTOVAZ simply regretted running the wires into the doors to connect them. At first I thought that the limit switches were even better in rapids, but winter put everything in place. In winter, the rubber band on it becomes stiff and the end switch “sticks” when pressed. But that's not all. I noticed that when the car is loaded (5 people in the cabin), when making sharp turns, sometimes the light in the cabin comes on, so the body plays and the door moves back a little, releasing the limit switch. As a result, almost immediately I wanted to convert everything to limit switches in the locks. But it took me a long time to get ready, the car is almost two years old and I just got around to it. But the work took less than two hours, I did it alone. For now I limited myself to the rear doors. The front ones are completely noisy, I don’t want to open them. YES and they work better.
Installation: As it turned out, the terminal blocks do not have terminals for limit switches, so in addition to the wires, you also need to install terminals. In the vastness of the drive I found that the terminals from the ISO connector of the radio are ideal for this task. Thanks bimulyk
for that.
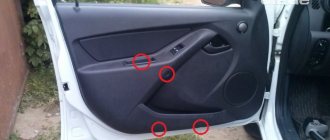
Next we need to remove the lock from the door! Maybe, of course, someone managed to do without it, but it didn’t work out for me. We unscrew the three bolts holding the lock and another one holding the glass guide, otherwise it will not allow you to remove the lock. Then remove the door handle and door lock button. We disconnect the rods from them and remove the lock.
Read also: Rear brake discs Hyundai Solaris
The connector on the lock is secured by a bracket, remove it and disconnect the connector. Because of this bracket we had to remove the lock.
Design solution to the problem
When replacing or connecting, you only need to restore the originally designed circuit. If no modifications are carried out, then the need to disassemble the locking mechanism and use insulating materials is immediately eliminated. Step-by-step instruction:
- Open the hood.
- Loosen the bolt connections and disassemble the device.
- Unscrew the terminals.
- Connect the wires from the battery.
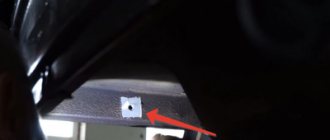
- Pull the limit switch out of the hole.
- Pull out the switch.
- Stretch the wires and connect them.
- Bring the ends out through the hole.
It is important that the wires are no shorter than ten centimeters.
- Strip the wires.
- Stretch the wires to the threshold to the installation site.
How to check limit switches
From time to time there is a need to check the serviceability of the limit switches. It is their fault that the alarm system starts to malfunction and the interior light does not turn on. It is recommended to check the functionality of the limit switches in a comprehensive manner, i.e. check the wiring first, and then the element.
The procedure for checking the serviceability of the wiring and door switch when the interior lighting is turned on and off incorrectly:
- We remove the limit switch.
- Using a voltmeter or multimeter set to voltmeter mode, we measure the voltage at the contacts of the wire block. If there is no voltage, then the lamp itself or the wires powering it are faulty. If it is there, but less than 12 volts, then the wire connecting the limit switch to ground is damaged.
- Switch the multimeter to ohmmeter mode.
- We connect it to the limit switch wires. In the initial (not pressed) state of the limit switch, the ohmmeter should show a resistance close to zero. If the device shows a different number, then the element is faulty. When the rod is pressed (contacts are open), if it is in good condition, the resistance reading on the device will tend to infinity.
Troubleshooting
Drivers may encounter various types of malfunctions. Even though the sensor is protected, it is not as reliable as the manufacturers claim. In addition to silicone lubricant, other measures can be used:
- Install the spring under the rubber cover. If this element is elastic, it will protect the mechanism even at very low temperatures.
- Remove the protective caps for the winter, but there is a danger that the element will quickly become clogged with dust and dirt.
- Treat with protective liquid.
Often drivers replace their original limit switch with a part from another manufacturer or install a boot. In this case, the body of the new element is inserted into the standard connector and secured with a self-tapping screw.
Reviews
| № | Positive |
| 1. | Kirill: I knew about the problem of freezing tips from the very beginning when I bought the machine. I immediately bought silicone grease and lubricated it on the inside once a quarter. It's been a year now that I haven't had any problems. |
| 2. | Vasily: after the first winter the sensor jammed several times. I took the cap off, cleaned it, and lubed it. Works properly, no comments. What happened is also my fault, since I did not carry out preventive measures in a timely manner. |
| 3. | Konstantin: I bought Granta at a dealership six months ago, the activation sensor works properly, the light comes on without delay, and an indicator lights up on the dashboard. |
| 4. | Ignat: a year has passed since the purchase, I have not made any investments, there are no comments on the mechanisms. Once there was a malfunction of the sensor. Moisture got inside, after drying the defect was eliminated. |
| 5. | Sergey: I agree with the majority of positive reviews, the limit switch works properly, the workmanship is good. Every month I lubricate the rubber tip with silicone. |
| 6. | Vladimir: This is the second year since I bought the car, I haven’t made any investments other than scheduled maintenance. I heard about the “disease” of the sensors on Grant, but I can’t confirm it. |
| 7. | Ivan: Once in the winter the limit switch jammed, I didn’t buy a new one, I cleaned the old one. It still works fine. |
| Negative | |
| 1. | Victor: I can’t speak positively about the activation sensor, since this is the second time in a year that I change it at a service station. The doors of the Lada Granta locked themselves twice. |
| 2. | Vyacheslav: after the winter the sensor jammed, the doors were locked, the keys remained in the cabin. I called a service station technician to open it. |
| 3. | Alexey: I cannot recommend the factory door activation sensors, as their quality is poor. Comrades advised installing from Opel, they say that the diameter is identical. |
New Lada: Lada Granta 8 valve engine, characteristics, dynamics, fuel consumption
Conclusion The limit switches on a car must always be in good working order. Provided proper maintenance and lubrication, the service life is at least two years. It is necessary to regularly analyze the condition of the limit switches in order to notice and prevent malfunctions in time.
| Video – Granta Liftback – Refinement of door switches | Video - Lada Granta - door switches freeze? 3 solutions to the problem. |
How to extend service life
Craftsmen are constantly coming up with new ways to extend the service life of factory elements. Some people put coins under the rubber band, fasten the parts with tape, or insert washers. To prevent the switch from freezing or becoming deformed, there are several effective techniques to consider:
- Spring insert.
- Replacing standard caps with elements from foreign manufacturers.
- Silicone Grease.
You should not assume that these actions will grant immortality to the limit switch, but these measures will significantly increase its service life.
Backlight
Many drivers install additional lighting in addition to the standard one. LED lighting, which is mounted on the bottom of the door, is popular.
For installation you need to prepare:
- LED strip of the required length, price from 500 rubles;
- electrical wires with bare and stripped ends;
- electrical tape;
- soldering iron;
- glue;
- multimeter
Connection order:
- Solder and insulate wires of pre-measured length to the “plus” and “minus” of the LED strip.
- Remove the door trim.
- Using a multimeter, find the positive wire of the cigarette lighter and connect it to the corresponding wire of the LED strip.
- Connect the negative wire of the limit switch to the corresponding wire of the LED strip.
- Check the functionality of the backlight by opening and closing the door.
- Attach the LED strip to the door using glue.
