Gap adjustment
Work is carried out only on a cold engine.
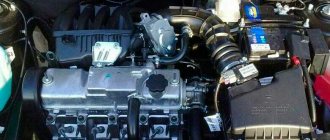
Remove the valve cover by unscrewing the bolts securing it. Remove the timing belt cover. Remove the spark plugs to make it easier to turn the engine.
Remove oil from the head. It is better to do this with a syringe so that no debris gets on the head.
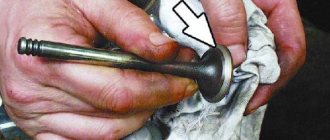
We inspect the camshaft cams. They should not be heavily worn out or damaged in any way.
Install the pusher tool onto the valve cover studs, tightening it with the nuts from the cover.
Using a wrench, turn the crankshaft clockwise until the marks located on the pulley and the timing belt cover match. After the marks match, turn the shaft approximately 3 more teeth of the camshaft pulley. At this moment, the piston in the first cylinder should be at TDC (top dead center).
Using feeler gauges 0.2 and 0.35, check the clearances of the first and third shaft cams. If the probes pass freely, then it is necessary to replace the washers (In order to remove the washers from the pushers, grooves are provided on the upper edges). To do this, turn the pushers with the groove towards you. Using the tool, press the valve down, holding the pusher with a screwdriver inserted into the groove so that it does not rotate.
Fix the pusher in the lower position. Using tweezers, pull out the washer. We select and insert a new one of the appropriate size, with the markings facing the pusher. The dimensions are written on the washer itself. We remove the latch. Check the gaps again.
Causes of pinched valves
Lada Kalina Station wagon SW Logbook Cleaning the throttle valve photo report
The first factor is most often observed on those cars whose owners have equipped their car with LPG (gas equipment).
Gap too small
As you know, the valve has a plate - its widest part, which is located directly in the combustion chambers. On the reverse side it is attached to the cylinder head. As the car's mileage increases, the chamfer on the surface of the plate and the mounting location begin to wear out. As a result, when the rod is raised, the pusher is pressed too tightly against the camshaft cam. This is how compression occurs.
Such a phenomenon does not bring anything good to the motor.
| Processes | Consequences |
| The valve will begin to heat up. | Thermal expansion is not compensated by the gap, and the plate will begin to fly out of the mounting location. |
| There is a decrease in compression. | The answer is a reduction in power. |
| Heat removal is not carried out in normal mode. | There is a negative impact on the operation of the catalyst. |
| During combustion of the air-fuel mixture, part of the burning composition goes into the exhaust manifold. | Thus, the plate and chamfer are destroyed faster. |
The intake elements, unlike the exhaust elements, have the opportunity to be cooled by a new portion of the fuel mixture. There is virtually no exhaust heat removal.
Increased clearances
Another situation is when the gaps between the valve and the piston are too large. With use, natural metal wear occurs on the camshaft journals and on the surface of the cams. Accordingly, an increase in gap values appears. If adjustment is not carried out according to the regulations, for obvious reasons the gap will increase even more, including from shock wave loads. You can find out about this by the characteristic clatter of the engine even after reaching the optimal operating temperature.
Gradually, the valve timing begins to be disrupted, and the power of the power plant decreases. This happens due to the delayed opening of the intake and exhaust elements. The air-fuel mixture arrives late, and the exhaust gases cannot escape completely, as a result the engine begins to operate unstably, noise increases, etc.
It is important to carry out adjustments in a timely manner and not neglect this procedure. The last resort in the most advanced cases is a major overhaul of the cylinder head.
The procedure for adjusting valves on a Lada Kalina engine with eight valves
The required gap between the shims and the camshaft should be 0.15-0.25mm for the intake group and 0.30-0.40mm for the exhaust group. Valve counting starts from the camshaft pulley.
First we adjust the pair: the first exhaust – the third inlet.
Then the fifth graduation - the second intake.
Then the eighth graduation - the sixth intake.
Latest: fourth graduation – seventh induction.
After adjustment, pour oil into the cylinder head and install a new gasket, replace the valve cover and timing belt cover.
Required tool:
- tweezers;
- set of probes;
- device for adjusting gaps;
- oil syringe;
As can be seen from the above, adjusting the valves of the Kalina Lada does not seem to be a difficult task. Following these instructions, any unprepared car enthusiast can perform it.
If the work is carried out correctly and the adjustment procedure is followed, the gas distribution mechanism of the car will work properly without causing any trouble.
The issue with adjusting thermal clearances is a classic one: everyone should be able to change the washers on the pushrods of an 8-valve valve. But there is “bad advice” that applies to the VAZ-21116 engine: they say that for exhaust valves it is better to make the gap equal to 0.40, and let the tolerance be 0.05 mm. In fact, the requirements have not changed since the 11183 engine: the average numbers should be 0.20 and 0.35. Following “bad advice”, you get one thing - the engine “knocks” when cold. And this is for a value of 0.40! You still need to be able to set it, but it may turn out to be 0.45... And then our adjustment will kill 4 of the 8 valves on the Lada Kalina. We are talking about the Kalina 2 family, where the only 8-valve engine was the 21116 engine.
The following is a video where valve knocking is recorded.
Signs of a burnt valve - review article
Valve burnout is a problem that owners of domestic cars most often encounter. But it would be unfair to blame exclusively the products of the Russian automobile industry, since they are also found in foreign cars, even if they are far from new. But any valve malfunction, including burnout, can lead to very serious consequences, so every car owner simply needs to be able to recognize the signs of a burnt-out valve in a timely manner in order to be able to promptly correct what can still be fixed without unpleasant surprises.
Causes of the malfunction.
The symptoms of a burnt valve are to some extent similar to malfunctions that are completely unrelated to the car’s engine. That is why insufficiently experienced car owners can spend a lot of time and effort to repair and fix something that, in principle, was not broken. As a rule, they are the last to realize that the valve has failed.
But despite all their apparent insignificance, the valves perform a very important function - they allow fuel to enter the combustion chamber and release burnt gases. That is, they are constantly in an aggressive environment - under the influence of gases and high temperatures.
It is natural that the metal from which the valve is made gradually deteriorates - the valve burns out.
Most often, the valve “flies” in very old cars, as well as in budget cars, when producing which the automaker chose price over quality. However, car owners themselves, without even realizing it, often provoke/accelerate the process of valve burnout, for example, by filling their car with fuel that is not suitable for it. But this, as they say, is a topic for a completely different article.
Symptoms of a burnt valve.
As noted earlier, the symptoms of a burnt valve are very similar to the symptoms of a malfunctioning ignition system, so many people begin to repair it first. But the engine, despite all the repair work, continues to act up and malfunction. That’s when a frantic search begins for other possible causes in the engine and other systems, although it’s all about a banal valve.
The most important symptom of the indicated problem is engine tripping, when one or more cylinders stop functioning. This happens because a burnt-out valve, when fuel burns, begins to let gases through, which do not push the piston down, but directly exit into the manifold.
You can diagnose this malfunction without disassembling the engine by following a certain algorithm of actions:
- we check the ignition - the integrity of the wires, the functionality of the distributor, the ignition timing;
- we determine the problem cylinder - we pull off the high-voltage caps from the spark plugs, the engine will start to stall if the cylinder is working, or if the cylinder is faulty, the engine operation will remain unchanged;
- Let's measure the compression: it will most likely be slightly lower than the required 11 points, by the way, this may be an indicator of not only a valve malfunction, but also a piston group malfunction.
Now a few words about how, without disassembling the engine, you can determine what exactly you are dealing with - a malfunction of the valve or piston group.
- Turn on the ignition and remove the breather hose. Warm air should come out of it, or at least a little smoke. The smoke is dense, gray, smelling of exhaust - a sign of a malfunction of the piston group.
- Remove the spark plug from the problem cylinder. If the piston is damaged, the spark plug will be in oil, and if the valve is burnt out, it will be in normal condition.
- Remove the cylinder head and replace the damaged element. If the valve is changed, then it must be ground in, and all valve stem seals must be replaced along with it.
https://youtube.com/watch?v=7EEiCJcTPfM
All steps for adjusting valves inside and out
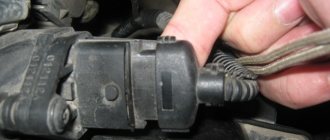
First, taking a Phillips screwdriver, loosen the clamps on the three supply hoses. These hoses are connected to the cylinder head cover. Each clamp is clamped with a Phillips screw (see photo).
We remove everything unnecessary
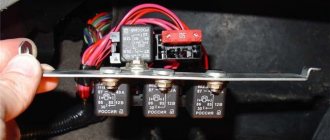
After disconnecting all the hoses, you can remove the receiver mounting bracket. You will need a 10mm socket wrench to unscrew the three nuts.
The second extra part is the bracket
If even the studs are turned out, it doesn’t matter, they can be screwed back in. Use the same “10” wrench to unscrew the nuts on the cover.
How to adjust the valves?
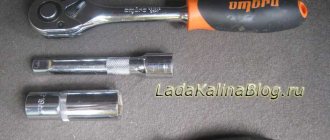
The main question is how to adjust the valves. To perform this procedure, the owner will need to acquire the following set of tools, accessories and consumables:
- screwdrivers and pliers with long jaws;
- heads for unscrewing bolts;
- ratchet;
- a set of probes;
- crank;
- a syringe to remove excess oil from the head baths;
- tweezers for removing washers;
- adjusting washers of different sizes (thickness) and a device for recessing the valves.
Before the valve adjustment begins, let the engine cool down (temperature no more than 20 degrees).
- Adjusting valves on an 8-valve VAZ 2114 engine
- Don't forget about safety and remove the terminals from the battery.
- Remove the valve cover with gasket.
- During the procedure, you will need to rotate the crankshaft of the Lada Kalina. To facilitate this action, it is recommended to unscrew the spark plugs, having first removed the tips of the high-voltage cables from them.
- Remove the timing cover.
- Use a syringe to remove the remaining oil from the baths.
- We install the device for recessing the valves on the mounting studs of the motor cover and secure it with standard nuts.
- By rotating the crankshaft (with a key on the pulley bolt or a wheel with 5th gear engaged in the box, after hanging the side of the car), we achieve the TDC position in the 1st cylinder (the rightmost one in the direction of the car).
- From this position, turn the camshaft to an angle of 40-50 degrees (three pulley teeth).
- Using a feeler gauge, we measure the size of the gap between the back surface of the cams and the washers of the 1st (exhaust) and 3rd (intake) valves (we count from the shaft drive gear). The feeler gauge should fit into the gap with a slight “tightness”.
- When the gap size differs from the required value, the pusher should be turned so that its groove is opposite the “adjuster”.
- Using the device, we recess the valve, securing the pusher from turning using a screwdriver (insert it into the groove). Using the latch, we lock the pusher in its lower position.
- We remove the washer using the previously indicated tweezers.
- Read the markings on the washer. It indicates thickness. If the inscription is erased, measure with a micrometer.
- We calculate the required thickness of the washer to be installed using the well-known formula, which, by the way, is different for intake and exhaust valves.
- We select a new washer from the set, with a thickness close to the value obtained in the calculation (deviation - plus 0.05 mm).
- We install the selected washer in the seat (in the pusher). In this case, the surface with the markings should be facing down.
- Having pressed the pusher with the device (drowning it deeper), we remove the latch.
- Now we move on to adjusting the next pair of valves. To do this, we rotate the crankshaft to an angle of 220-230 degrees and carry out the entire list of previously indicated adjustment actions with the valves: 5th (exhaust) and 2nd (intake).
The manipulation algorithm for the two remaining pairs of valves, depending on the angle of rotation of the crankshaft in the Lada Kalina car, is as follows:
- angle of 400-410 degrees: 8th valve (exhaust) and 6th (intake);
- rotation angle of 580-590 degrees: 4th (exhaust) and 7th (intake).
To be sure that the adjustment is correct, you can re-perform the entire shaft rotation cycle with a control measurement of the gap values. Note that their value for the exhaust group of valves is 0.3 mm, and for the intake valves – 0.2 mm.
Kalina control unit
Front bumper Kalina
Heater Kalina
Articles and regulations
When installing the cylinder head cover, it is recommended to replace the rubber gasket. Its article number is 21080-1003270-1 0. The last numbers may differ:
- 11 – BRT manufacturer (Balakovo);
- 12 – ELRING;
- 14 – CJSC VRT (Volzhsk).
All adjustment devices are universal. They don't have articles.
The pressure device can be replaced with a screwdriver. The latch is also a screwdriver, only a thin one. The interval between adjustments is 30 thousand km. Good luck!
All instructions in one video
For a long time now, readers have been asking for a detailed article on adjusting valves on Kalina with an 8-valve engine. Yesterday I decided to do this procedure on my car, although there was no reason for this, the engine ran quietly and there were no knocks in the valve cover area.
Below I will give a detailed list of the necessary tools and devices for carrying out this maintenance of the Lada Kalina.
- 10mm head with crank or ratchet
- Phillips and flat head screwdriver
- Device for adjusting valves for VAZ 2108 (so the cylinder heads are identical)
- Set of probes
- Tweezers or long-nose pliers
- Adjusting washers of the required size (purchased after measuring the gaps)
Below we will discuss the detailed procedure of work, with a description and photographs.
Engine types
The first Lada Kalina cars received a 1.6-liter power unit and a timing belt with 8 valves. On these models, periodic adjustment of valve clearances is necessary. Later, the manufacturer offered a car with a 1.4-liter engine capacity and 16 valves, the clearances of which practically do not need to be adjusted. The next design option is a car with a 1.6 liter engine and a timing belt with 8 valves, which need to be adjusted periodically. And the “hit” model is the Lada Kalina with 16 valves and a 1.6 liter power plant. Here, adjustment is required very rarely: but if the timing belt breaks, the valves will bend.
Main characteristics of the Kalina engine
The first engine model that was installed on the Lada Kalina were conventional 8-valve units numbered 11183, with a displacement of 1.6 liters. Engine power was 82 horsepower. 13.5 seconds were enough for him to accelerate the Lada Kalina to 100 km per hour. This engine pulls great, even at low speeds. During a long climb, the car does not slow down, but continues to pick it up. Fuel consumption is acceptable. At a speed of 80 km per hour it will be 5.5 liters per 100 km. The engine life is about 230,000 km, but looking at the statistical data, you can see that troubles can happen even at 35-45 thousand km.
The second production engine was 11194. The working volume of the power plant was reduced to 1.4 liters. But the number of valves has doubled, to 16 pieces. The engine power of the Lada Kalina has increased and amounted to 90 horses. Due to the reduction in volume, consumption also decreased. At the same 80 km per hour, less than 5 liters of fuel left the tank.
The acceleration dynamics have become much brighter. It took 12.5 seconds to accelerate to hundreds. The engine life has not changed significantly, about 200,000 km. Although there are examples that have traveled 500,000 km without major repairs, this is the exception rather than the rule.
21126 became the third model, with a displacement of 1.6 liters. Number of valves: 16 pieces. At the same time, engine power increased to 98 horsepower. Many owners carried out their own measurements, and the average figures indicated a power of 107 horsepower.
Perhaps this was a deliberate understatement of the specifications by the manufacturer in order to protect the buyer from excessively paying transport tax. It is known that after passing the 100 hp mark. With. transport tax increases 3 times.
Consumption remained at 5 liters per 100 km. And the acceleration dynamics dropped another half a second when accelerating to hundreds. The traction performance has worsened when compared with its 8-valve counterpart. When climbing, you will definitely have to switch to a lower gear. Resource is about 250,000 km.
Adjusting valve clearances
It is carried out only on a cold engine: the optimal ambient temperature is +20 degrees. Prepare in advance:
- narrow nose pliers;
- flat screwdriver;
- heads;
- oil removal syringe;
- tweezers;
- valve desiccant (device);
- probe (0.2 and 0.35 mm);
- adjusting washers.
Remove the bolts securing the valve cover, remove it and remove the spark plugs. At the same time, inspect the camshaft cams to make sure there is no wear. Next, use a syringe to remove the oil from the head. Attach a valve recess tool to the studs. Next steps:
- Rotate the crankshaft and ensure that the marks on the timing cover and the pulley match. Next, rotate the shaft another three pulley teeth.
- Use a 0.2 mm (intake) and 0.35 mm (exhaust) feeler gauge to check the clearances. For reference, to determine which are the intake and exhaust valves, count from left to right: exhaust-intake, intake-exhaust, and so on. The adjusting washers must be replaced when the dipstick passes easily. To do this, lower the valve down using the tool, while simultaneously holding the pusher from turning with a flat-head screwdriver.
- Secure the pusher at the bottom and use tweezers to remove the old washer and install a suitable new one.
- Remove the retainer and check the gap again: the feeler gauge should pass with little effort.
Adjustment order: 1 outlet - 2 inlet, 5 outlet - 2 inlet, 8 outlet - 6 inlet, 4 outlet - 7 inlet.
Setting the gap on the VAZ 2114
In our case, on a VAZ 2114 car, this procedure is performed in the second way, using adjusting washers and a special tool.
Firstly, you need to understand that correct adjustment on the VAZ 2114 can only be performed at an ambient temperature of 20 degrees Celsius, when the metal is at rest and is not subject to thermal expansion as on a warm engine. Secondly, for each specific car there is a table of the dimensions of the gaps with the camshaft cams raised.
For the fourteenth model the following dimensions are used:
- For intake valves - 0.2 mm with an indication error of 0.05 mm;
- For exhaust valves - 0.35 mm with an indication error of 0.05 mm.
Before making adjustments, cool the space under the hood; you can use an ordinary fan. After this, dismantle the valve cover, pipes, mounting clamps, and side protective casing of the timing belt. After unscrewing the nut securing the accelerator pedal cable, carefully disconnect it. To make work easier, remove the air filter housing assembly. Before dismantling, be sure to place wheel chocks under the wheels and engage neutral gear. The hand parking brake must also be set.