Tuning under the hood
Author: Roman03/01/201703/1/2017
A filter for the air entering the car interior through the ventilation system (or air conditioning system) has long been present in all modern cars. Unfortunately, the VAZ 2109 does not have a cabin filter. The air is taken directly by the heater fan from the air supply box, also called the “swamp,” and therefore fallen leaves and other debris flying from the road fill the heater. And smaller particles - poplar fluff and simple road dust - also fly straight into the cabin, which is why the instrument panel in the Nine is constantly dusty, and the passengers and driver breathe in all this. There’s no need to even talk about foreign odors like car exhaust.
- Why do you need an adapter, how to make it yourself and install it
Video about replacing the cabin filter and installing a new one in the adapter block
Why is replacement needed?
The main reason for replacing the cabin filter is dust. The most active period of pollution is summer and spring. The weather is dry, and therefore a very large amount of dust forms on the roads and on the street.
Obviously, the replacement is carried out in order to increase the efficiency of cleaning the air that we breathe while inside the car. If you ignore the need to change the filter element, you will soon begin to inhale large amounts of dust and microparticles that can cause diseases of varying degrees of complexity.
Young children can develop serious allergies if they constantly drive a car with an old cabin air filter. Therefore, this is primarily a health issue.
Price issue
This entails the need for certain costs to purchase two filters per year. But there is no need to worry, since the price of a regular filter component is only 150 rubles. A higher quality carbon filter costs a little more - 300 rubles. It's a small price to pay to stay healthy and comfortable inside your car.
Signs for replacement
If the filter becomes dirty or clogged, it will no longer be able to protect against dust, dirt, and unpleasant odors inside the car. Plus, a worn filter element negatively affects the heater fan motor; it wears out faster.
All this indicates the need for timely replacement of the device. If this is not done, you risk developing an allergy, as well as soon spending money on repairing other components that directly depend on the condition of the cabin filter.
| Symptoms of a problem | Peculiarities |
| Reduced air flow | This can be discovered in practice. If the air flow has become noticeably less, this will cause poor cooling in the summer and ineffective heating in the winter. Most often, the windshield begins to fog up in winter. |
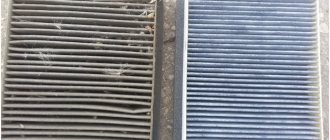
| Color | Some filters have snow-white filter elements, so from the outside it is not difficult to determine that the device is dirty and needs to be replaced. But most modern products are impregnated with activated carbon, which is why they are characterized by a gray color. Therefore, focusing solely on the color of the filter elements is not always relevant. |
| Lifetime | The filter does not have a specific resource as such. It all depends on the operating conditions and the characteristics of the roads you travel on. But in practice, it is recommended to change the device as it becomes dirty or at least 2-3 times a year |
If, after replacing the filter, unpleasant odors still continue to appear inside the cabin, you can use chemical compounds that are poured into the system and forcefully remove dirt. If this does not help, you will have to completely disassemble the system, manually clean it and put it back together.
Impregnated with activated carbon
Adapter
Alas, the quality and efficiency of the standard cabin filter provided for the VAZ 2114 leaves much to be desired.
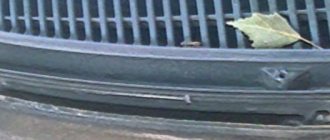
Essentially, it is a strip of filter material that is located between two plastic grilles. The effectiveness of this design is insignificant, which forces car owners to take certain measures.
The best measure is to install a filter adapter. Making it yourself is not difficult, although there are other ways to obtain this design.
Adapter drawing example
Thanks to the adapter, it becomes possible to install a truly effective air purifier for the cabin, which retains the smallest particles and does not allow the driver and passengers to breathe dust.
Externally, the adapter is an improved housing for the interior ventilation system with a filter built into it. The design consists of two elements - the rear and the front. A filter is inserted into the rear component, and the joints between the adapter parts are sealed with rubber gaskets. This ensures the necessary tightness. The design nuances will allow you to avoid moisture penetration even when washing the car.
When planning the installation of the adapter, experts strongly recommend using a pleated cabin filter borrowed from the VAZ 2110.
The simplicity of the adapter design makes it possible to replace the filter with your own hands in the shortest possible time. And during installation you do not have to remove the heater. So this is an ideal solution to significantly improve the ventilation system of your VAZ 2114.
Options for obtaining an adapter
If you have made the right decision that you want to get an adapter for your VAZ 2114, you need to decide how exactly you will get it.
There are three main options for this.
Option
Advantages
Flaws
Buy a device in the online store
You get a high quality device, made of thick metal and powder coated
The high cost of the product itself, plus equally expensive delivery
Order from those who make them with their own hands
The purchase will be much cheaper compared to an online store
If desired, you can make such a device yourself, spending only on consumables. Quality may be poor
Do it yourself
Significant financial savings, the ability to produce a truly high-quality adapter. You will know what it is made of and how
You will have to spend a lot of time and effort on manufacturing
You should start making your own adapter only if you are completely confident in your own abilities. Spend the money you save on purchasing a high-quality carbon filter from a VAZ 2110.
Making the adapter
The instructions for creating an adapter with your own hands are quite simple. Another question is how accurately you can implement your plans.
- Find diagrams to create an adapter. Now there are many of them on the Internet. Just keep in mind that you need an adapter specifically for the VAZ 2114.
- Make a layout out of paper so that you understand exactly where each part goes and how they are connected to each other.
- Stock up on the required amount of stainless or galvanized steel. Some people use plastic, but it is a little more difficult to work with, plus it can cause problems when getting bends.
- Cut out the necessary adapter elements from the material, guided by the drawing and layout.
- Use a vice and mallet to make bends. The walls will be thin, so do not use a metal hammer. It is better to take a wooden or rubber mallet.
- The parts are connected using M3 bolts or rivets.
- The advantage of rivets is that you do not need to drill holes in the metal. But they also have a drawback - a high probability of damage to a thin sheet of metal.
- At the last stage, carefully treat all joints, connections and holes with sealant. This will allow the structure not to make unnecessary noise while driving.
Finished design
The manufacturing process will take at least 6 hours. Plus, you will additionally have to spend time studying diagrams, drawings and creating a layout. So be patient.
Peculiarities
The cabin filter cleans the air entering the car from dirt, dust, and unpleasant odors. All modern technical equipment are equipped with it. But VAZ 2109 cars from the factory are deprived of such a “cleaner”. The air in these vehicles enters the heater fan through the air intake box. It is for this reason that the heater often does not work due to contamination with all kinds of debris, of which there is more than enough on the road. The smallest particles enter the car interior, forcing the driver and passengers to breathe dust.
Way to solve the problem
Of course, you can’t drive such a car for a long time, especially with the windows closed, as you can get pneumonia or other respiratory diseases. Nevertheless, resourceful developers still found a way out of such an unpleasant situation by inventing a cabin filter adapter, which is a grille on which filter elements are attached. The unit is installed on the fan casing in the place where the air intake occurs.
Advantages and disadvantages of the adapter
Since the factory did not initially intend to use such a component, it is therefore not at all surprising that after installing the adapter, the level of air entering the car interior will decrease significantly. The advantages include effective resistance to dirt and dust, as well as protection from dust accumulation on the upholstery, panels, and windows of the car. The main advantage of this filter material lies in the ability to ensure clean air in the cabin, allowing the driver and passengers to breathe deeply.
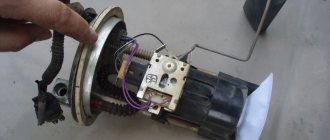
Installing the adapter and filter
Well, now you can proceed directly to installing the entire structure with a new effective carbon filter.
Installation with adapter
- Wait for the sealant on your adapter to dry completely.
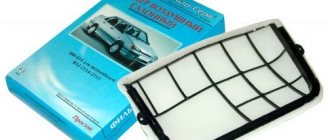
- Select a cabin filter that suits your requirements or financial capabilities.
- When choosing between a reusable and disposable filter, experts advise choosing the latter. Although reusable ones can be cleaned, disposable ones have a long service life, plus the cost is significantly lower. Buying reusable filters is an imaginary savings that negatively affects the quality of air purification.
- Remove the old filter. To do this, you need to lift the hood and disconnect the rubber seals from the clips.
- Using a screwdriver, remove the mounting screws and remove the plugs.
- Remove the frill.
- Remove the mesh from the plastic element.
- Take out the old filter.
- Clean the seat so that your insert fits firmly and securely.
- Treat the adapter with glass sealant, taking care to seal all cracks. Otherwise there will be no point in installing it.
- The installation sites, or rather the contact between the adapter and the body, must be treated with automotive sealant. Just don't use silicone compounds.
- Next, install the rubber seal over the adapter, which will protect the hood trim.
- Insert a brand new cabin filter into the stainless steel structure.
- Perform the reassembly procedure.
Installation
In fact, installing a cabin filter adapter on a VAZ 2109 is quite simple. The most important thing here is to get an adapter. Some people make it themselves, while others purchase it from auto stores or online. Decide for yourself what is more convenient for you to do.
- The adapter is installed in place of the standard stove motor casing. To mount the device, the existing holes for fasteners are suitable.
- The design of the adapter includes two components, which allows you to install the unit in confined spaces without much discomfort.
- It is not at all necessary to remove the cabin fan when installing the adapter.
- Lift the hood, unscrew the screws that hold the frill.
- Carefully remove the side of the frill from the visor.
- Remove the rubber seal. It is located on the partition separating the engine compartment from the air supply box.
- Remove all screws holding the factory heater fan shroud on.
- Remove the cover. You won't need it anymore.
- Install the back of the adapter structure first. The fasteners remain the same.
- Next, the front part of the device is installed.
- Using fastening brackets, the structure is connected together.
- Return the side of the frill to its place.
- Secure the adapter using self-tapping screws to the existing mounting holes.
- Place a rubber seal on the side.
- Insert into the installed filter adapter.
All that remains is to check how the new air purification system in the cabin will work. To do this, you need to drive several kilometers, feel new smells, or rather their absence in the car.
What is better: buy or make a VAZ 2114 cabin filter adapter yourself?
We don't feel sorry for ourselves. Because the engineer who designed us equipped a person with all possible and impossible means of protection from damage. Both internal and external. That's why the body digests almost everything that gets into it - phenol from furniture, pesticides from cucumbers and carcinogens from McDonald's. We care about our car much more than about ourselves. If we take air, for example, the average air filter prepares the air so well to enter the combustion chamber that the permissible rate of dust in the engine is no more than 1% of each kilogram. If we had such care, we would live forever. Only at the end of the last century did designers begin to show interest in cabin filters for mid-priced cars. Unfortunately, this did not affect VAZ cars, and the cabin filter appeared only on the VAZ 2110.
Step-by-step instructions for making a cabin adapter
- So, before you start working with metal, you should make templates for parts from paper. We print out drawings of the parts of the structure and glue them together. Here's what we got:
Printed from Compass 3D V12 1:1
- After this, we take the resulting stencils, metal scissors and cut out the galvanized parts.
- Next, we bend the parts in a large vice, using a wooden mallet so as not to spoil them.
- Then we drill holes with a drill, metal drill bit 3.
- We fasten the parts with M3 bolts.
- Next, you can install our craft. First, the part for the motor. Then on top is the part with the frame for the filter.
- To make installation easier, the plastic grille to protect against leaves was removed.
- We treat the adapter itself with glass sealant, carefully coating all the cracks and joints so as not to siphon, otherwise the whole point of the installation will be lost.
- We also treat the places where the adapter comes into contact with the car body with auto sealant (silicone will not work)
- The final touch is a rubber seal on the top of the adapter to protect the hood trim.
- Now you can install a cabin filter of the new tenth sample.
Bottom line: if you wish, you can also paint the resulting upgrade and begin to fully enjoy the clean air of the cabin!
Sources:
https://xn—-7sbgjfsnhxbk7a.xn--p1ai/adapter-svoimi-rukami-dlya-salonnogo-filtra https://tuning-lada-2109.ru/salonnyj-filtr/ https://zapchasti.expert/vozdushnyj -filtr/salonnyy-filtr-vaz-2109.html https://luxvaz.ru/vaz-2114/203-salonnyy-filtr-i-adapter.html https://filtrzamena.ru/adapter-salonnogo-filtra-na -vaz-2114.html
Why filter cabin air?
MB W140 - the first mass-produced affordable car with cabin air treatment
In the early 2000s, Mosekomonitoring conducted a series of studies that related to the levels of carbon monoxide, nitrogen oxide and sulfur in traffic jams. It turned out that the consumption of this muck by car drivers and their passengers exceeds the permissible level by 14 times. Moreover, a pedestrian who is 5 meters from the car inhales polluted air with a concentration that is only twice the permissible level. It’s also not sugar, but this cannot be compared with the conditions in which the driver finds himself.
In Europe, similar measurements began to be taken 30 years earlier, and the first cabin filters from Bluher began to be installed on expensive cars as a series. The first examples of air purifiers were similar to power system air filters, only with greater air flow capacity. The fact is that the heater engine is not able to create such a high vacuum as in the intake tract of the power system. The resistance of the cabin filter must be ten times lower, otherwise the air simply will not be able to overcome the resistance.
Video tutorial on replacing cabin filter 2114
A serial affordable car with cabin air treatment appeared only in 1991 and it was the MB W140 S-Class. A primitive corrugation was installed on it, which could trap 96% of solid particles - dust, rubber, suspension from worn brake pads, plant pollen and other more or less large fractions, ranging in size from 6 microns. Only the filters could not cope with carbon monoxide, so to deactivate harmful substances, the corrugation was impregnated with activated carbon. It's there in Europe. Our air was no cleaner, and if you believe the studies we mentioned, the situation was completely critical.
Adapter and its advantages
To solve the problem of the lack of effective air purification in the cabin on VAZ-21099 cars, the most correct solution would be to install an adapter. Moreover, finding this adapter or adapter for a full-fledged filter element is not difficult. The easiest way to purchase it is through trusted suppliers. Such parts are not popular among scammers trying to counterfeit adapters. Therefore, the vast majority of proposals are of decent quality. A similar adapter is widely available on sale and costs about 2 thousand rubles. Yes, you can try to save money and try to make the design yourself. But there are a number of pitfalls that may not justify your investment in developing your own adapter. That is, it is objectively more correct and rational to buy a ready-made adapter from the manufacturer. This will allow you to operate your VAZ-21099 with a cabin filter of good quality and high efficiency.
The adapter will be mounted in place of the standard casing that covers the electric motor of the heater on the VAZ-21099. Moreover, standard holes are suitable for installation. You definitely won’t have to drill anything additional or dismantle half of the interior. The design of the adapter for the cabin filter is presented in the form of 2 parts. This was done for more convenient installation, since you have to work in a fairly limited space of the air supply box. The adapter box itself is made in the form of a fairly voluminous product, the basis of which is metal coated with powder paint. Although on sale you can also find analogues that are made of galvanized steel. There is no fundamental difference between them.
The adapter parts are divided into rear and front. It is into the latter that the cabin filter is inserted. Rubber seals are provided on the joint planes of the two parts of the adapter. They allow you to ensure the required degree of sealing of the housing during its assembly. Thus, the casing prevents water and moisture from penetrating inside, additionally protecting the electric fan of the stove itself. Similar seals are available on the lower plane of the adapter structure. The sides on the front prevent water from getting into the filter when the car is being washed or driving in heavy rain. The design is oriented in such a way that the filter is located forward in the direction of travel of the vehicle. This allows you to use corrugated or accordion-type cabin filters, just like those used on VAZ-2110 cars. In addition to the metal structure itself, you also receive all the necessary fasteners and instructions from the manufacturer.
The adapter can be considered a modernized heater fan casing. By installing the adapter, it becomes possible to use cabin filters intended for the tenth AvtoVAZ family, that is, for the VAZ-2110. The filters themselves are inexpensive, so the total cost of purchasing all components will be insignificant. By installing an adapter or adapter for a full-fledged cabin filter on your VAZ-21099 car, you get a number of advantages. Namely:
- There will always be clean and safe air in the cabin. This is due to the good performance of the filter itself, which can trap small debris, dust and smoke coming from the exhaust pipes and from under the wheels of vehicles in front.
- The efficiency of air passage through the filter increases with simultaneous highly effective cleaning. That is, the air flows will become more intense, in winter the interior will be able to warm up faster, and the efficiency of your electric heater fan will increase. This effect is due to the fact that the new cabin filter has minimal air resistance. This is explained by the material used and the thoughtful design of the consumable.
- Having an adapter in the engine compartment, it will take literally a few minutes to replace the filter itself located inside. This will make servicing the cabin air filtration system as simple as possible and accessible even to beginners.
- Basic installation. To install the adapter for the cabin filter in its new place, you will need to perform a minimum amount of dismantling work, followed by no less simple reassembly.
Cabin filter VAZ 2114
In the photo - VAZ 2114, on which a working cabin air purification system was installed for the first time
They began to install a more or less workable cabin air purification system only on the modification of the nine - VAZ 2114. It was not much different from homemade stocking filters, but the plant simply did not have anything to build on. There are no standards in the country, no regulatory data that relate to cabin filters, and work in this direction is not even being carried out. Except for the AvtoVAZ regulations on dust filters, which they themselves developed.
Even at the design stage 2108-2109, the designers did not include even a minimal protective element in the air supply system. The first front-wheel drive cars were released without any protection at all, and a few years later they began to install a filter that took into account the design features of the air supply system of cars 2108, 2109, 2113-2115. This means that no one was going to make any changes to the ventilation system, and they simply stuck a dust collection frame to it. This thing looks quite comical even against the background of a filter for an old vacuum cleaner - plastic frames, between which a strip of the so-called dust collector is inserted. Yes, leaves and flies could no longer get into the cabin, just like poplar fluff, but the bulk of dust microparticles, and especially chemically active pollutants, continued to enter the cabins, and drivers and passengers continued to receive a 14-fold overdose of carbon monoxide.
True, in 2003, the plant began to threaten with its intentions to install a cabin filter from 2110 on all older, but still produced models, but things did not go further than threats. The VAZ 2110, after all, has a full-fledged cabin filter that can fight not only leaves and fluff. This is already a cleaning station, which in terms of cleaning area is 6 times larger than a nine-piece cloth. Only this means that the filtration will be better, and the load on the heater motor is much less, because the throughput of the decimal filter is higher.
Installing a cabin filter on a VAZ 2109 and improving it
A filter for the air entering the car interior through the ventilation system (or air conditioning system) has long been present in all modern cars. Unfortunately, the VAZ 2109 does not have a cabin filter. The air is taken directly by the heater fan from the air supply box, also called the “swamp,” and therefore fallen leaves and other debris flying from the road fill the heater. And smaller particles - poplar fluff and simple road dust - also fly straight into the cabin, which is why the instrument panel in the Nine is constantly dusty, and the passengers and driver breathe in all this. There’s no need to even talk about foreign odors like car exhaust.
Cabin filter adapter VAZ 2114
Consequently, the answer to the question of complete air purification in the cabin of Zhiguli cars of the “pre-decade” period lies on the surface. There are dozens of advantages of a cabin filter:
- large cleaning area;
- low resistance;
- acceptable quality of air purification (particles from 2 microns are captured with a probability of 98%);
- possibility of installing a carbon filter-adsorber;
- easy replacement.
Experienced drivers advise installing a cabin filter from a VAZ 2110 using an adapter for a VAZ 2114
All that remains is to attach a cabin filter to front-wheel drive Samaras, but the factory stubbornly ignores this need. Therefore, the initiative was taken by home-made workers and small firms that produce cabin filter adapters for Samara. Adapter is too strong a name. This is a detachable box-shaped tin structure, which consists of two parts: a short air duct, which is adjacent to the air intake box, and the front part, into which the cabin filter cassette from tens is inserted.
A rubber seal is glued to the bottom of the adapter, and exactly the same seal is applied to the connector between the front and rear parts of the adapter. This simple method prevents water from entering the ventilation system. The design of the adapter is designed in such a way that the filter can be changed in a matter of seconds; you just need to open the hood. The ingress of water onto the filter element is completely eliminated thanks to the sides and the favorable location of the structure; in addition, the filter is corrugated towards the movement, so the flow of clean air enters the cabin without any special obstacles.
The design of the adapter is simple, and the drawing and dimensions are freely available if you can make the adapter yourself. The extent to which this makes sense can be judged by the mass of offices that allow you to order the design. The price of an adapter without a filter in 2016 does not exceed 1,300 rubles, with a dust filter - 1,440 rubles, and with a carbon cabin filter, the entire structure can be purchased for 1,540 rubles. Not too high a price for clean air in the cabin.
Oil additives for high mileage engines
Manufacturers of high-quality tool sets in a case for cars
Chargers: features of selection for car batteries
Changing the cabin filter of Lada Granta with your own hands
The cabin filter on the Lada Granta belongs to the heating and ventilation system in the car. Now we will talk about the features of replacing this filter, paying additional attention to the configuration with an air conditioner. In fact, the procedure is not too different from that carried out on a Lada Priora with air conditioning.
| TOP 15 most useful products for Lada Granta - OUR EXPERIENCE! |
- 1 The process of replacing the cabin filter 1.1 When it is necessary to replace the cabin filter
The process of replacing the cabin filter
- To get started, use a Phillips screwdriver to remove the five screws from the decorative cover under the hood. They are located between the engine compartment and the windshield. Remove the decorative cover. We have already written in more detail about the location of the filter in the answer to a user’s question.
Bolts are indicated by arrows (T20)
1 bolt of protective cover
2 bolt of protective cover
Bend the right latch and pull it towards you
Cleaning the seat
New cabin filter with foam facing down
When installing a new filter, it may need to be bent, which can be done easily or with a little force, depending on the specific filter model. It is also important to remember which side the filter should be installed.
You can make sure that the installation is correct by looking at the side mark, which is an inscription with an arrow.
Cabin filter adapter for filter from 2110
31 Oct 2014, 10:38
I found a cool topic, I was already busy “swallowing dust” in the interior of my own car, and there is a solution that has already existed for a long time. Cabin filter adapter for the entire family of “Samara” and “Samara 2” (VAZ-2108 - 2115) of all years of manufacture, allows you to install a modern cabin filter in your car, which will trap dust and eliminate its deposits on the inner surface of the windshield, control panel and upholstery. The product is a modernized protective casing for the interior air blower fan with the ability to install a cabin filter from cars of the tenth family into it. At the design stage, the nine designers at AvtoVAZ did not include in the car design the possibility of installing a cabin filter, and the first Samaras came off the assembly line without cabin filters. And only later was a filter created taking into account the design features of the car. Of course, no changes were made to the design of the machine (this is very expensive). Therefore, the configuration of the cabin filter was dictated by the structure of the ventilation duct in which the cabin fan is located (between the cabin and the engine compartment). Therefore, the filter turned out to be appropriate - a strip of filter material between two plastic grates. Such a filter is capable of retaining only large dust, poplar fluff and leaves. Do not be deluded by the appearance of the filter after 10,000 km of operation. The overwhelming majority of suspended particles freely penetrate into the car interior through the interfiber space of the synthetic padding filter strip.
What is the difference between cabin filters of the ninth and tenth Zhiguli families? Already from the appearance it is clear that the working surface area of the filter from the tenth family is much larger than that of the Samarovo one. Namely 6 times. According to filter manufacturers, the efficiency of the filter material in screening out dust particles up to 1 micron in size is 95%. Particles 2 microns in size are retained with a 98% probability. Thus, by installing an adapter in your car, you can enjoy all the advantages of a modern cabin filter without significant loss of air flow. What is a cabin filter adapter, or, more simply put, an adapter? This is a detachable metal structure, coated with powder paint, consisting of two parts - back and front, into which the filter is inserted. A rubber seal runs along the joining plane of both parts of the adapter, designed to seal the structure and prevent water from entering the interior blower fan. The same seal is glued to the bottom plane of the adapter. The sides on the front completely prevent water from entering the filter during rain or car washing. The orientation of this design in the car is with the filter forward in the direction of travel of the car, which allows the installation of a pleated (accordion-shaped) cabin filter from a VAZ-2110. In this case, the removal and installation of the filter for its periodic cleaning and replacement is carried out in a matter of seconds. The universal mount allows you to install the adapter on cars with different modifications of the standard casing. The heater fan does not need to be removed during installation. Attachments 18.jpg (92.69 KB) 17.jpg (66.41 KB) 16.jpg (83.28 KB)
- Violent
- Messages: 453
- Registered: 25 Oct 2014, 06:05
- From: Khadyzhensk
- Your car: Priora station wagon
How to solve a problem
Obviously, polluted air inside the VAZ 2109 is a serious problem for car owners. In such a situation, it is impossible to leave everything as it is. Measures must be taken to eliminate this deficiency.
An adapter was developed especially for nines - this is an analogue of a cabin filter, presented in the form of a plastic grille with filter elements attached to it. Installation is carried out on the heater fan casing in the area where air is taken in.
Many people believe that installing an adapter is a complete replacement for a standard cabin filter. But how can you completely replace something that is not in the car?! This is a kind of modification that will lead to a narrowing of the air flows coming from the stove deflectors. This measure will protect against large debris, that is, we get an anti-dust component.
The positive qualities of the adapter include its accessibility, effective resistance to dust, and protection against the accumulation of deposits on the dashboard, upholstery, and glass.
Re: Cabin filter adapter for filter from 2110
01 Nov 2014, 12:19
VAZdriver wrote: the rest are not relatives?
The rest of the relatives have different surnames, and Zhiguli is a proper name.
- Fidel
- Messages: 159
- Registered: 22 Oct 2014, 21:37
- Your car: VAZ-2111, station wagon