Manuals→VAZ→2170 (Priora)
Heated rear window and rear view mirrors - general information, checking proper functioning, repairs
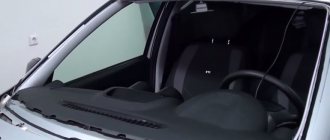
general information
| The heated exterior mirrors are switched on simultaneously with the heated rear window of the vehicle. |
When the rear window/mirror heating switch is turned on, the electromagnetic relay of the power supply circuit to the corresponding heating elements is shorted to ground. The heating on indicator lamp is usually built into the switch button, but can also be located on the instrument panel. The heater relay is located in the interior fuse/relay mounting block. The working element of the rear window heater is a horizontal grid of conductive threads glued to the inner surface of the glass. Checking the terminal arrangement in the contact connector of the rear window/mirror heating switch
Checking the proper functioning of the rear window/mirror heating relay
Check the proper functioning of the heating switch by carefully prying it up and releasing it from the instrument panel. Disconnect the electrical wiring from the switch and check the correct distribution of conductivity between the terminals of the contact connector of the switch in both positions (see table).
| Switch position | Terminals between which conductivity must take place |
| Off | 1 and 4; 2 and 3 |
| On | 1 and 4; 2 and 3; 6, 7 and 8 |
| Terminals 1-4 and 2-3 serve to organize the backlight, which is why conduction between them occurs constantly. |
| EXECUTION ORDER |
| 3. In order to measure the voltage during the tests described below, wrap the positive probe of the voltmeter with metal foil, which can be easily pressed directly with your finger onto the conductive filament of the heating element grid. Connect the negative probe of the meter to the ground terminal of the grid. |
| 4. Measure the voltage in the central part of each of the grid threads. A reading of 5 ÷ 6 V indicates that the thread is in good condition. A zero reading indicates a break between the center of the thread and the positive side of the element. The reading is doubled (10 ÷ 12 V) when there is a break between the center of the thread and the negative side of the element. Check each of the lattice threads one by one. |
| 5. If there are no breaks, connect the negative probe to the chassis ground and repeat the check - the readings should not change, otherwise there is a violation of the quality of the grid grounding. |
| 6. To localize the break, press the negative probe of the voltmeter to the negative terminal of the heating element grid. Using a positive probe wrapped in foil, begin to probe the conductive threads of the grid, moving from the side of the power supply to ground. At the break point, the meter reading should drop from a few volts to zero. |
Refurbishment
| EXECUTION ORDER |
| 4. Place two strips of tape along the section of thread to be repaired. Mix the epoxy paste and hardener thoroughly (follow the instructions included in the kit). Apply the resulting composition to the damaged area (with an overlap of approximately 20 mm to the edges of the undamaged thread). |
| 5. Final polymerization of the compound occurs after 24 hours, after which the protective strips of tape can be removed from the glass. |
Heated mirrors of Priora
provides heating of the rear view mirror of the Lada Priora car.
LADA Priora, Lada Priora is a family of Russian passenger cars produced by AvtoVAZ OJSC and classified according to the European classification.
You can order heated mirrors for a Priora car through the representative office in St. Petersburg, tel. 8(812)4524540 by submitting an application by email.
- Design features of the windshield wiper and washer system of the Lada Granta
To obtain the mirror heating circuit for the Priora GEN-147 on a scale of 1:1, print the file GEN-147;
. Attach it to your rearview mirror and determine how suitable this heater is for you.
Representative office phone numbers or +7 931 354 20 56. You can also buy these heaters in stores in St. Petersburg. Find out the store addresses and the cost of the mirror heater in advance from the official dealer by calling 8 (812) 449 09 38.
The parcel is sent by Russian airmail on the next (working) day after payment for the order. Delivery time is from 5 to 7 days to any point, depending on the location of the post office of the customer for heated mirrors.
Where are the fuses on the Priora?
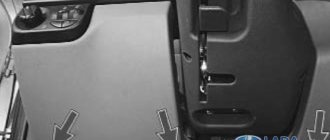
- The main mounting block of the Priora is closed with a lid and located at the driver’s left foot. To open it, you need to turn three latches 90° and unclip the lid.
- The fuse box is under the hood, which is located near the expansion tank.
- Another mounting block, which is located near the left foot of the front passenger. To gain access to the fuses and relays, unscrew several screws with a Phillips screwdriver.
Below is a description of each fuse and relay block in order.
Fuse box in the passenger compartment of VAZ-2170, -2171, -2172
The fuse box in Priora is located at the bottom of the dashboard, on the left side of the steering wheel. To get to it, you need to open the cover, which is held on by three latches. Rotate each locking knob 90 degrees and pull the lid down and it will snap open.
Fuses in the interior mounting block
F1 (25 A) - radiator cooling fan . If your fan does not work, check its motor by applying 12 V directly to it from the battery. If the engine is working properly, then most likely the problem is in the wiring or connectors. Check the serviceability of relay K1.
The fan in the Priora usually turns on at a temperature of 105-110 degrees. Do not allow the engine to overheat, watch the arrow of the temperature sensor.
If the fan runs constantly and does not turn off, check the coolant temperature sensor located on the thermostat. If you remove the connector from the working sensor, the fan should turn on. Check the wiring to this temperature sensor, as well as the contacts of relay K1, move this relay, clean the contacts. If this is the case, replace it with a new relay.
F2 (25 A) - heated rear window . Check together with fuse F11 and relay K2. If the rear window does not fog up, the heating element threads may have broken. Inspect all the threads and if you find a break, seal it with special glue or varnish, which can be bought at car dealerships for 200-300 rubles. Check the connection contacts at the terminals to the heating elements at the edges of the glass, as well as the switch on the dashboard and the wiring from it to the rear window.
F3 (10 A) - high beam, right headlight . F4 (10 A) - high beam, left headlight . If the headlights do not shine on high beam, check the K7 relay and the headlight bulbs. The steering column switch, wiring or connectors may also be faulty.
F5 (10 A) - sound signal.
If the signal does not work when you press the steering wheel button, check relay K8. The signal itself is located under the radiator grille; you can get to it by removing the plastic casing from above. Check it by connecting the voltage to 12 V. If it doesn’t work, try turning the adjusting screw, or replace it with a new one.
F6 (7.5 A) - low beam, left headlight . F7 (7.5 A) - low beam, right headlight . When replacing lamps, be careful; there are separate lamps for the low and high beams, so they can be easily confused. It is better not to install lamps in high-power headlights; the reflectors may melt and the desired effect will not be achieved. Most low beam headlight problems that cannot be corrected by conventional means can be related to the light control module (LCM). The low beam relay is only available in cars equipped with a light sensor, it is located in the place of relay K1; on most cars this relay is not in the mounting block; the low beam circuit goes through the MUS block. It happens that the tracks in the block burn out; if there are problems, it is better to replace it with a new one. If the windshield wipers turn on spontaneously when the low beam is not working correctly, the problem is most likely in the windshield wiper control unit, located in the center of the dashboard, the topmost block, next to the radio, is best reached from the glove compartment, or by hand through the removed console covers at the feet.
F8 (10 A) - alarm signal . If the alarm does not work, also check relay K9.
Old style mirrors have 2 connectors with wires:
Block No. 1: mirror control:
| Mirror block | car block |
| Red | Red-blue |
| Blue | Blue-black |
| Green | Green-black |
Block No. 2: heated mirrors:
| Mirror block | car block |
| Gray (+) | Blue-red (left mirror), Black-red (right mirror) |
| Black (-) | Black (for heating) |
Sample application for obtaining GEN-147
GEN-147 - two sets
My address: index - 344113, Rostov region, Rostov-on-Don, Koroleva Ave., 11, apt. 23
Efremov Dmitry Sergeevich
Mobile phone: 8-904-147-92-75
Send your application to the email address: [email protected]
The payment method and order amount will be indicated in the response letter.
Technical characteristics of heated mirrors GEN-147 Priora
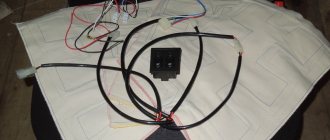
You can install heated mirrors on the Lada Priora in our service. Installing heated mirrors on Lada Priora takes 6-8 hours. The mirror housing is completely disassembled, and the lower and side parts of the dashboard and center console are partially disassembled. The heating wires are extended to the mirrors and to the power supply, and all this is output to the rear window heating button through a relay.
What you need
To make a heater you only need:
- Nichrome wire;
- Double-sided and regular tape;
- Wires;
- Sealant;
- Soldering iron;
- Multimeter;
A wire with a cross section of 0.4-05 mm and a length of 1-1.3 m is suitable for the heater. For normal functioning of the heating system, the resistance of the piece of wire must be 12 Ohms. This is exactly what a multimeter is for. That is, we took a section of 1.5 meters and measured the resistance. If it exceeds the specified value, cut off 10 cm and measure again. Thus, we select the desired segment.
Product delivery options
Note! Below are the shipping methods available specifically for this product. Payment options may vary depending on the shipping method. Detailed information can be found on the “Delivery and Payment” page.
Parcel by Russian Post
Available payment methods:
- Cash on delivery (payment upon receipt)
- Using cards Sberbank, VTB, Post Bank, Tinkoff
- Yandex money
- QIWI
- ROBOKASSA
Shipping throughout Russia. Delivery time is from 5 to 12 days.
Parcel by Russian Post 1st class
Available payment methods:
- Cash on delivery (payment upon receipt)
- Using cards Sberbank, VTB, Post Bank, Tinkoff
- Yandex money
- QIWI
- ROBOKASSA
Shipping throughout Russia. Delivery time – from 2 to 5 days. More expensive than regular delivery by Russian Post, approximately 50%. Parcel weight up to 2.5 kg
Express Parcel EMS
Available payment methods:
- Cash on delivery (payment upon receipt)
- Using cards Sberbank, VTB, Post Bank, Tinkoff
- Yandex money
- QIWI
- ROBOKASSA
Shipping throughout Russia. Delivery time – from 3 to 7 days. More expensive than regular delivery by Russian Post, approximately 100%.
Transport companies
Available payment methods:
- Using cards Sberbank, VTB, Post Bank, Tinkoff
- Yandex money
- QIWI
- ROBOKASSA
Delivery is possible to any locality where there is a representative office of the transport company. Delivery time – from 2 to 10 days. Sending large parcels is approximately 50% more profitable than by Russian Post.
Courier delivery in Togliatti
Available payment methods:
- Cash upon receipt
- Using cards Sberbank, VTB, Post Bank, Tinkoff
- Yandex money
- QIWI
- ROBOKASSA
Delivery time from 1 to 12 hours.
Pickup from our warehouse
Available payment methods:
- Cash upon receipt
- Credit, installments
- Using cards Sberbank, VTB, Post Bank, Tinkoff
- Yandex money
- QIWI
- ROBOKASSA
Pickup times must coincide with store opening hours.
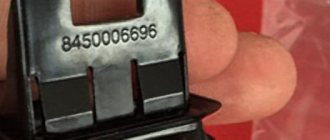
Standard side mirrors - article number and price
For the Lada Priora car, standard parts with electric drive have catalog number 2170-8201017. Price – about 3,100 rubles per set.
Compared to the SE version, they have one design disadvantage. The surface area does not completely cover the mirror, which can also be “usefully” occupied. This shortcoming was corrected with the SE, where the mirror elements were actually made larger.
Heated mirrors on the Priora received a larger mirror element. Thanks to this, the driver does not have to lower them when reversing – even this difficult-to-reach area is visible. For the SE version, repeaters were added to the mirrors. Priora with electric drive, repeater and heating (catalog number 2170-8201021, price - about 3,800 rubles per set) was much more expensive than conventional versions.
Please note that kits are often sold unpainted or painted to match the body color. If necessary, paint the body of the mirror device before installation. Painting it yourself will turn out much better. Some stores offer painting only the upper parts of the body, but you can choose any painting method yourself. Speaking about the rear-view mirror of a Priora car, you can notice that it is ordinary, as simple as two rubles, attached to a holder that is secured under the trim.
DIY tuning | Topic Author: Avishalom
Angel Eyes in detail at the link https:// yandex.ru/clck/jsredir? from=yandex.ru;search%2F;web;;..
Repair (Abhivadana) Installation of floor (leg) lighting in Kalina Getting into the Kalina salon will be much more convenient if additional lighting is implemented. Let's dwell on interior tuning, and in particular, how to install lighting for the feet of front and rear passengers in the Lada Kalina. Installing driver and passenger footwell lighting
You will need: LED strip (total length 3 meters). Price 600 rub. wires (several meters). tricks (2 pieces). Driver's floor lighting. We fix the LED strip with double-sided tape, or use a plastic cable channel that is secured with self-tapping screws. The mounting location is the steering column casing and the bottom of the dashboard. Illumination of the floor of the driver of the viburnumIllumination of the floor of the driver of the viburnum
Front passenger floor lighting. By analogy, we attach the LED strip under the glove compartment. Illumination of the floor of the front passenger of the viburnumIllumination of the floor of the front passenger of the viburnum
By the way, for illumination you can also use the glove box lighting, which is most conveniently installed on the side trim of the dashboard. To make the lighting bright, install an LED light bulb instead of a regular one. Installation of floor (leg) lighting in KalinaInstallation of floor (leg) lighting in KalinaInstallation of floor (leg) lighting in Kalina
Rear passenger footwell lighting. Here it is most convenient to glue the light source to the corners, which in turn are fixed to the air ducts. Note that it is not at all necessary to remove the seats for this; it is enough to simply move them forward as much as possible. Foot lighting for rear passengers in Kalina Foot lighting for rear passengers in Kalina Foot lighting for rear passengers in Kalina Connecting floor lighting in Kalina
Ground connection (select the one you need): From any nearest point on the body, if you want the backlight to turn on manually, through a toggle switch. To the door switches, if you want the backlight to turn on when the door opens. In order not to pull the wire out of the door (as we did when installing heated mirrors), you can hook it to the blue and white wire under the threshold of the left door. And under the threshold of the right door - red-brown.
, ,
:
, :
, , :
Ergon
:
:
:
Additional mounting block Priora
- F1 (15 A) – main relay and starter interlock circuit fuse;
- F2 (7.5 A) – fuse for the power supply circuit of the ECU (controller);
- F3 (15 A) – Priora fuel pump fuse;
- K1 – main relay;
- K2 is the place where the Priora fuel pump relay is located.
Attention!
The relay and fuse diagram may differ depending on the configuration and production date of the vehicle. Current diagrams of the mounting block are presented in the operating manual for the date of manufacture of the vehicle (download from the official website).
Let us remind you that on our website you can find detailed instructions for repairing the Lada Priora with your own hands.
Many car owners, if the heated mirrors do not work, ignore the problem and do not take any steps to repair it. It is believed that this option can be avoided by following the rearview mirror or wiping the surface manually. But this approach is a mistake, because the presence of heating helps in the following cases:
- Formation of a crust of ice on the surface (at sub-zero temperatures).
- In rainy weather, when the mirror fogs up or becomes covered with a layer of small drops.
The reason for inaction is inability and ignorance of the causes of the malfunction, as well as the principles of repairing heated mirrors. What to do if the device does not work? What tool might be needed? Below watch the video “Repairing a heated rear view mirror”
The first stage of repair work is preparing the necessary tools. Here you will need a multimeter or a 12-volt car light bulb to check the voltage. You will also need a screwdriver, a soldering iron, replacement fuses and electrical tape.
How to check the fuse?
If the heated mirrors do not work, start by checking the power supply circuit. Often, the cause of the malfunction is trivial - burnout of the fuse insert. This is where you need to start. The fuse through which the heated rear window and mirrors are powered is usually located in a special block (under the dashboard on the right side). To find out the exact location of the device, read the car manual.
If you still can't find the right fuse, check everything. The serviceability of the fuse insert is checked using a tester. To do this, touch the input and output of the fuse with the probes of the multimeter. First switch the switch to resistance measurement mode. If during testing the device shows about “zero” Ohm, then the product is working properly. Otherwise, we can talk about a blown fuse.
If you don't have a multimeter, use an alternative method. If the housing is transparent, check the integrity of the filament with light (its damage is easy to see). For fuses with an opaque casing, this option will not work.
How to check the button and wiring
If the above check did not help identify the defect, inspect the power button. It happens that it fails and causes a breakdown. If the mirror heating does not work, pay attention to the LED built into the button. Its glow usually indicates that the button is working.
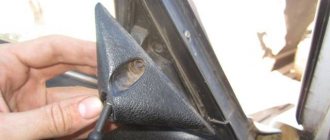
The next step is to check the integrity of the wiring, for which you will have to remove the desired side mirror. After dismantling, a group of contacts connected to the heating is revealed. Proceed like this:
- Discard the contacts (as a rule, they are easy to remove - just pull them slightly).
- Turn on the heating button and check that its LED lights up.
- Measure the voltage (normal level is 12-14 V).
➤ How to turn on heated mirrors on a Lada Vesta - detailed instructions
While others clean the windshield in thirty-degree frost, the Lada Vesta is warmed up by the standard heating system. We will learn how to activate it, the principle of operation and what malfunctions often occur during a detailed analysis.
Procedure for activating the heating mode
- Engage neutral gear.
- Insert the key and start the engine.
- After 1-2 minutes of idling, press the “Defrost MAX” button.
- Wait until the ice on the glass thaws.
- If necessary, additionally activate the stove heater.
- When finished, deactivate the mode.
How to use it correctly
Considering that the heating function is new and has a number of shortcomings, activate the mechanism if the temperature outside is not lower than 10-15°C. At a lower degree, performance is not guaranteed.
As soon as the melting process has begun, do not rush to activate the windshield wipers, as the remaining ice can easily damage the brush and rubber coating. To effectively clean the glass surface from snow, allow more time for heating.
How to turn on the heated windshield
The design of the system is in many ways identical to foreign analogues, namely: second generation Renault Logan, Renault Duster, Ford, Renault Clio.
The mode is activated by pressing one mechanical button, which is installed in the center of the dashboard at the bottom. One function key is responsible for heating the front, rear, and side windows.
In the maximum configuration, Lada Vesta is equipped with a “Defrost MAX” button. When pressed, it starts the maximum speed mode of the stove heater, heating, and air conditioning system. This is extremely necessary to prevent fogging and reduced visibility.
Recently, we have heard frequent complaints from motorists that when the button is activated, the windshield heating does not work. Do not rush to go to a workshop for diagnostics. Common reasons:
- Ambient temperature. As soon as the temperature drops below -15°C, the system becomes unstable. This is a defect at the software level, not just your car model.
- Damage to the protective layer and insulation also negatively affects the functioning of the system. Check the wiring first with a multimeter, most likely there is a loose contact on the board.
- When the temperature readings are down to -15°C, the delayed start mode is 3-4 minutes, warming up lasts 15 – 20 minutes. If the thermometer readings are lower, then the time increases to 5 - 8 and 20 - 30 minutes, respectively.
- Burnt fuse. Check its integrity in the mounting block, serial number No. F35, F38.
- Burnout of individual filament circuits: it is impossible to restore the functionality of the unit, only replacing it with a new one.
- Code violations in the stock firmware of the electronic engine control unit (ECU). Contact official dealers to update the data.
Conclusion
A standard option in luxury trim levels provides incredible assistance to the car enthusiast. In a few minutes, the mirrors will be cleared of snow, crust, and deposits.
Unfortunately, such an option is not provided in budget modifications of the Lada Vesta. Owners install equipment at their own expense in certified centers and service stations. Decide individually how important the “warming” function is for you.
Reviews
| № | Positive |
| 1. | Stepan , 44 years old (www.otzovik.com): the heated mirrors on the Lada Vesta work as normal. There is a delay during activation, but it does not exceed 1 – 2 minutes. |
| 2. | Fedor , 40 years old (www.zr.ru): up to 15 degrees with a minus mark, the heater copes at all “100”. When the temperature is low, I additionally activate the stove heater. |
| 3. | Vladimir , 22 years old (www.autobann.su): heated side mirrors do not cover the entire perimeter of the glass, layers remain at the edges. I use a plastic spatula. |
| 4. | Sergey , 33 years old (www.lada-vesta.net): the “Defrost MAX” system is effective only at a temperature of minus 10 - 15°, no more. In severe frosts, I additionally activate the stove heater; the system does not independently cope with the assigned task. |
| 5. | Semyon , 43 years old (www.otzovik.com): delay when turning on 2 - 3 minutes. This is an average, it is different for everyone, I have already inquired from the official dealer. |
| 6. | Svyatoslav , 44 years old (www.zr.ru): my positive review of the heating system, it is quite effective and functional, unlike previous modifications. |
| 7. | Mikhailovich , 20 years old (www.autobann.su): I won’t praise the heating, it doesn’t work at full capacity, it allows for “gaps”. In severe frost I activate the heater fan. |
| 8. | Anatoly , 43 years old (www.lada-vesta.net): a full cycle of warming up the windshield and rear window takes 10 - 15 minutes. I was interested in my comrades, they have a similar period of time. |
| 9. | Gennadievich , 39 years old (www.otzovik.com): a good system, but the heating of the rear window is insufficient; in severe frost, gaps are visible on the glass. |
| 10. | Dmitrievich , 43 years old (www.zr.ru): in two years of operation, I once replaced the fuse responsible for the operation of the stove heater and windshield wipers. |
| 11. | Konstantin , 35 years old (www.autobann.su): the heating system is good, I don’t use it often. The heating on the side windows is insufficient. |
| Negative | |
| 12. | Victor , 44 years old (www.zr.ru): I won’t praise “heating”, since it is effective only down to -5 – 7°C. In severe frost, the filament does not heat, the power is insufficient. |
| 13. | Alexey , 37 years old (www.otzovik.com): after the winter, the system began to work unstably, with periodic failures. I contacted the workshop and they said that the equipment needed to be replaced. |
| 14. | Stepan Ignatievich , 46 years old (www.autobann.su): unlike the Lada Vesta, the heating system is better implemented in the second generation Renault Logan. |
Types of heating
Wire-based heating
It is necessary to purchase tungsten filaments. They must be laid between two layers of insulating material. This creates a spiral. It is necessary to make two conclusions (for plus and minus). When choosing this heating option, you need to have a good understanding of mechanics. The spiral must be insulated; there should be no gaps between the two layers of insulating material.
On printed conductors
This is an easy option for installing heated mirrors since every car market has heated units. They consist of two layers of polymer material, between which conductors are located. Such parts are made for a specific model. They can be found according to the desired size; for this you need to know the parameters of the car.
To install the heating, you will need to disassemble the mirror housing. This is necessary in order to get to the other side. The inner part must be degreased and the board glued to it.
We recommend: Oil leakage from under the crankshaft oil seal: causes and troubleshooting
The heaters have two terminals on the sides (wires are connected to them), they must be soldered and insulated. The wires are connected to the wiring, and the heating regulator is displayed on the panel.
Important! Efficiency will be higher if the internal cavity of the housing is covered with foil or heat-insulating material.
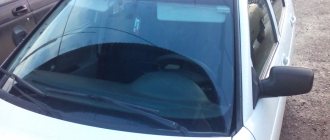
Lada Granta White Ice › Logbook › Heated mirrors, installation.
Winter came to our city SUDDENLY
))), however, as in all of Russia, the consequences are traffic jams on the main highways of the country, uncleared roads, congestion, ice, a lot of accidents, people all over the country without heat... It’s terrible in general. And on top of everything else, the mirrors on the car freeze and there is zero visibility. So I, like our entire vast Motherland, did not prepare properly in advance. But I had some free time at work and, gathering my willpower, I solved the problem with fogging and freezing mirrors on the scale of one Lada Granta. So, ladies and gentlemen, step-by-step instructions (with pictures) for installing heated mirror elements on an A.M. Granta White Ice
Tools, components and prices (option from Britbandit).
The fuse box in Priora is located at the bottom of the dashboard, on the left side of the steering wheel. To get to it, you need to open the cover, which is held on by three latches. Rotate each locking knob 90 degrees and pull the lid down and it will snap open.
Fuses in the interior mounting block
F1 (25 A) - radiator cooling fan . If your fan does not work, check its motor by applying 12 V directly to it from the battery. If the engine is working properly, then most likely the problem is in the wiring or connectors. Check the serviceability of relay K1.
The fan in the Priora usually turns on at a temperature of 105-110 degrees. Do not allow the engine to overheat, watch the arrow of the temperature sensor.
If the fan runs constantly and does not turn off, check the coolant temperature sensor located on the thermostat. If you remove the connector from the working sensor, the fan should turn on. Check the wiring to this temperature sensor, as well as the contacts of relay K1, move this relay, clean the contacts. If this is the case, replace it with a new relay.
READ How to install free avg antivirus on your computer
F2 (25 A) - heated rear window . Check together with fuse F11 and relay K2. If the rear window does not fog up, the heating element threads may have broken. Inspect all the threads and if you find a break, seal it with special glue or varnish, which can be bought at car dealerships for 200-300 rubles. Check the connection contacts at the terminals to the heating elements at the edges of the glass, as well as the switch on the dashboard and the wiring from it to the rear window.
F3 (10 A) - high beam, right headlight . F4 (10 A) - high beam, left headlight . If the headlights do not shine on high beam, check the K7 relay and the headlight bulbs. The steering column switch, wiring or connectors may also be faulty.
F5 (10 A) - sound signal.
Installation of finished components
The installation is clear even to a car driver who has recently driven the car.
Procedure:
- Find a device to close and open the circuit (relay). Open the hood of the vehicle, find the black box and relay. There are indications on the box which relay is for what. You need to find one for the mirrors and remove it. Next, replace the relay with the mirror element, connect the wire, and close the hood.
- Remove old mirrors. Open the doors, unscrew the screws. Find mounting locations for rearview mirrors. Remove old components and disconnect wires.
- Supply purchased components.
We recommend: Valve desiccant - how to make a special tool with your own hands?
Mirrors are connected in the following sequence:
- the green wire must be connected to the black-green one;
- red joins blue-red;
- The blue wire needs to be connected to the black-blue one;
- brown wire - to red-blue (second block);
- The black wires are connected together, this is the “minus” for the repeaters and heating.
Try not to work with mirrors in winter. If the thermometer drops below zero, you need to be more careful with the mirror. When you disconnect the part, heat it up using a hair dryer or heat gun. Otherwise, the surface may crack or become chipped. I'll have to throw out the mirror. Prepare in advance for replacement. Get the tools that will be useful during the work process.
vote
Article rating