Heated mirrors of Priora
provides heating of the rear view mirror of the Lada Priora car.
LADA Priora, Lada Priora is a family of Russian passenger cars produced by AvtoVAZ OJSC and classified according to the European classification.
You can order heated mirrors for a Priora car through the representative office in St. Petersburg, tel. 8(812)4524540 by submitting an application by email.
To obtain the mirror heating circuit for the Priora GEN-147 on a scale of 1:1, print the file GEN-147;
. Attach it to your rearview mirror and determine how suitable this heater is for you.
Representative office phone numbers or +7 931 354 20 56. You can also buy these heaters in stores in St. Petersburg. Find out the store addresses and the cost of the mirror heater in advance from the official dealer by calling 8 (812) 449 09 38.
The parcel is sent by Russian airmail on the next (working) day after payment for the order. Delivery time is from 5 to 7 days to any point, depending on the location of the post office of the customer for heated mirrors.
Where are the fuses on the Priora?
- The main mounting block of the Priora is closed with a lid and located at the driver’s left foot. To open it, you need to turn three latches 90° and unclip the lid.
- The fuse box is under the hood, which is located near the expansion tank.
- Another mounting block, which is located near the left foot of the front passenger. To gain access to the fuses and relays, unscrew several screws with a Phillips screwdriver.
Below is a description of each fuse and relay block in order.
Where is the fuse for the heated mirrors of the Priora?
A variety of seemingly complex breakdowns in the electrical equipment of your car can be hidden simply under the cover of the fuse box. These include stuck or non-operating relays, blown fuses or tracks. We recommend starting any work to eliminate breakdowns in the Priora’s electrical system from here.
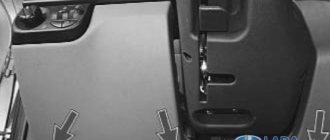
The Priora mounting block is located in the instrument panel on the left driver's side at the bottom and is closed with a lid - in the photo its location is highlighted with a blue frame:
To gain access directly to the fuses and relays themselves, you need to unscrew the three latches that hold the cover, highlighted in red in the photo:
Removing the cover, we see the block itself:
Before replacing a blown fuse, find out the cause of its blown and eliminate it. When troubleshooting, it is recommended to look at the circuits that are protected by this fuse.
Sample application for obtaining GEN-147
GEN-147 - two sets
My address: index - 344113, Rostov region, Rostov-on-Don, Koroleva Ave., 11, apt. 23
Efremov Dmitry Sergeevich
Mobile phone: 8-904-147-92-75
Send your application to the email address: [email protected]
The payment method and order amount will be indicated in the response letter.
Technical characteristics of heated mirrors GEN-147 Priora
You can install heated mirrors on the Lada Priora in our service. Installing heated mirrors on Lada Priora takes 6-8 hours. The mirror housing is completely disassembled, and the lower and side parts of the dashboard and center console are partially disassembled. The heating wires are extended to the mirrors and to the power supply, and all this is output to the rear window heating button through a relay.
How to turn on heated mirrors on a Priora
Heated mirrors of the Priora
provide heating of the rear view mirror of the Lada Priora car.
LADA Priora, Lada Priora is a family of Russian passenger cars produced by AvtoVAZ OJSC and classified according to the European classification.
You can order heated mirrors for a Priora car through the representative office in St. Petersburg, tel. 8(812)4524540 by submitting an application by email.
To obtain the mirror heating circuit for the Priora GEN-147 on a scale of 1:1, print the file GEN-147;
. Attach it to your rearview mirror and determine how suitable this heater is for you.
Representative office phone numbers or +7 931 354 20 56. You can also buy these heaters in stores in St. Petersburg. Find out the store addresses and the cost of the mirror heater in advance from the official dealer by calling 8 (812) 449 09 38.
The parcel is sent by Russian airmail on the next (working) day after payment for the order. Delivery time is from 5 to 7 days to any point, depending on the location of the post office of the customer for heated mirrors.
What you need
To make a heater you only need:
- Nichrome wire;
- Double-sided and regular tape;
- Wires;
- Sealant;
- Soldering iron;
- Multimeter;
A wire with a cross section of 0.4-05 mm and a length of 1-1.3 m is suitable for the heater. For normal functioning of the heating system, the resistance of the piece of wire must be 12 Ohms. This is exactly what a multimeter is for. That is, we took a section of 1.5 meters and measured the resistance. If it exceeds the specified value, cut off 10 cm and measure again. Thus, we select the desired segment.
Standard side mirrors - article number and price
For the Lada Priora car, standard parts with electric drive have catalog number 2170-8201017. Price – about 3,100 rubles per set.
Compared to the SE version, they have one design disadvantage. The surface area does not completely cover the mirror, which can also be “usefully” occupied. This shortcoming was corrected with the SE, where the mirror elements were actually made larger.
Heated mirrors on the Priora received a larger mirror element. Thanks to this, the driver does not have to lower them when reversing – even this difficult-to-reach area is visible. For the SE version, repeaters were added to the mirrors. Priora with electric drive, repeater and heating (catalog number 2170-8201021, price - about 3,800 rubles per set) was much more expensive than conventional versions.
Please note that kits are often sold unpainted or painted to match the body color. If necessary, paint the body of the mirror device before installation. Painting it yourself will turn out much better. Some stores offer painting only the upper parts of the body, but you can choose any painting method yourself. Speaking about the rear-view mirror of a Priora car, you can notice that it is ordinary, as simple as two rubles, attached to a holder that is secured under the trim.
Mirrors for Priora with and without turn signals: article number, price, installation
› Priorization
Good visibility is important for safe driving. While driving, the driver always has to “keep his finger on the pulse” so as not to get into an unpleasant situation (accident). The side mirrors on the Priora are initially made quite well - the viewing angle is enough to sit still when reversing or changing lanes.
This is not a joke, it’s really like a Kruzak review. After the Priorovskie cars I get into other cars and I miss my familiar overview. Mirrors on Priora come with turn signals (repeaters); this is the Special Edition version of Lada (luxury) Priora cars. The price of these is naturally more expensive, but not by much 900 rubles. They can be installed on a regular Priora.
Turn signals in mirrors are a newfangled theme and they look beautiful and are also practical.
The side mirrors of the Priora 1 car have been improved along with the restyling of the car. In the SE luxury version, which is essentially the most expensive and complete package of the car, these devices have changed, the car has become even more convenient “for the driver”. Some people buy such SE mirrors on a Priora 2 and install them even if they originally bought a car with a more economical package.
All that remains is to properly disassemble the mirror and make friends with the wires. Indeed, to install the modernized version you will have to put a lot of effort into finding reasons. You can do simple tuning, if you want to change the appearance to a more curly one - just put covers on the mirrors. It seems like a small change, but the car looks more solid with them.
Who hasn’t felt the thrill of using a car after ten, or a classic, freezing the car in winter - heating seems to be a common thing, but this was not the case on the VAZ. The heated mirrors of the Priora car are implemented using spirals. Often turning on heating in wet weather, a mark forms on them. Despite this, after 6 years of use, they have not faded.
Standard side mirrors - article number and price
For the Lada Priora car, standard parts with electric drive have catalog number 2170-8201017. Price – about 3,100 rubles per set.
Compared to the SE version, they have one design disadvantage. The surface area does not completely cover the mirror, which can also be “usefully” occupied. This shortcoming was corrected with the SE, where the mirror elements were actually made larger.
Heated mirrors on the Priora received a larger mirror element. Thanks to this, the driver does not have to lower them when reversing – even this difficult-to-reach area is visible. For the SE version, repeaters were added to the mirrors. Priora with electric drive, repeater and heating (catalog number 2170-8201021, price - about 3,800 rubles per set) was much more expensive than conventional versions.
, ,
:
, :
, , :
Ergon
:
:
:
Additional mounting block Priora
- F1 (15 A) – main relay and starter interlock circuit fuse;
- F2 (7.5 A) – fuse for the power supply circuit of the ECU (controller);
- F3 (15 A) – Priora fuel pump fuse;
- K1 – main relay;
- K2 is the place where the Priora fuel pump relay is located.
Attention!
The relay and fuse diagram may differ depending on the configuration and production date of the vehicle. Current diagrams of the mounting block are presented in the operating manual for the date of manufacture of the vehicle (download from the official website).
Let us remind you that on our website you can find detailed instructions for repairing the Lada Priora with your own hands.
Many car owners, if the heated mirrors do not work, ignore the problem and do not take any steps to repair it. It is believed that this option can be avoided by following the rearview mirror or wiping the surface manually. But this approach is a mistake, because the presence of heating helps in the following cases:
- Formation of a crust of ice on the surface (at sub-zero temperatures).
- In rainy weather, when the mirror fogs up or becomes covered with a layer of small drops.
The reason for inaction is inability and ignorance of the causes of the malfunction, as well as the principles of repairing heated mirrors. What to do if the device does not work? What tool might be needed? Below watch the video “Repairing a heated rear view mirror”
The first stage of repair work is preparing the necessary tools. Here you will need a multimeter or a 12-volt car light bulb to check the voltage. You will also need a screwdriver, a soldering iron, replacement fuses and electrical tape.
How to check the fuse?
If the heated mirrors do not work, start by checking the power supply circuit. Often, the cause of the malfunction is trivial - burnout of the fuse insert. This is where you need to start. The fuse through which the heated rear window and mirrors are powered is usually located in a special block (under the dashboard on the right side). To find out the exact location of the device, read the car manual.
If you still can't find the right fuse, check everything. The serviceability of the fuse insert is checked using a tester. To do this, touch the input and output of the fuse with the probes of the multimeter. First switch the switch to resistance measurement mode. If during testing the device shows about “zero” Ohm, then the product is working properly. Otherwise, we can talk about a blown fuse.
If you don't have a multimeter, use an alternative method. If the housing is transparent, check the integrity of the filament with light (its damage is easy to see). For fuses with an opaque casing, this option will not work.
How to check the button and wiring
If the above check did not help identify the defect, inspect the power button. It happens that it fails and causes a breakdown. If the mirror heating does not work, pay attention to the LED built into the button. Its glow usually indicates that the button is working.
The next step is to check the integrity of the wiring, for which you will have to remove the desired side mirror. After dismantling, a group of contacts connected to the heating is revealed. Proceed like this:
- Discard the contacts (as a rule, they are easy to remove - just pull them slightly).
- Turn on the heating button and check that its LED lights up.
- Measure the voltage (normal level is 12-14 V).
Causes of heating malfunction, first stages of diagnosis
To understand the causes and troubleshoot the heated rear mirror system, you need to prepare a tool. To work, you may need a multimeter, a car light bulb, a soldering iron, a screwdriver, a fuse, electrical tape - it all depends on the type of problem.
It is easier to identify a defect by studying the main components of the heating circuit:
- button – provides launch;
- wiring – designed to transmit voltage;
- fuse – necessary for power transmission;
- heating - a system of threads that are located on the back side.
Each of the elements can fail, which will affect the performance of the device.
The inspection should start with the fuse, which is usually located in a special block, a shield on the right side under the torpedo. Determining the location of the part is necessary for checking with a tester. To find out exactly which fuse is responsible for heating the mirrors, you need to study the manual. Otherwise, you will have to check all the fuses on the panel.
Fuse testing:
- Having selected the resistance mode, you need to touch the tester probes to the terminals of the device. A good indicator is 0 OM; if the measurement result differs significantly from the norm, burnout is determined.
- Checking the light allows you to assess the integrity of the filament. If damaged, deformation will occur, which is easy to notice. If the casing is not transparent, you cannot do without a multimeter.
If a defect is detected, the device will need to be replaced. If the cause of the problem is the fuse, the rear window often does not warm up either, since one unit is used.
It is noteworthy that new foreign cars may not have a fuse, which simplifies the diagnostic process. Then you need to start assessing the performance of other components.
The filaments glued to the glass have some resistance; when an electric current is applied to them, they begin to heat up due to the resistance, thereby heating the glass and melting the ice on it. On one side, a plus “+” is supplied to the filament, and the other end of the filament is connected to a minus “-”.
Lada Priora in any configuration is equipped with a heated rear window and heated mirrors. The heated mirrors turn on when the heated rear window is turned on. The design of heating mirrors is based on the same system as with heating glass; filaments are glued to the mirrors, which warm the mirror and help it to sweat.
Types of heating
Wire-based heating
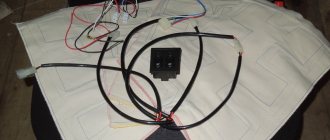
It is necessary to purchase tungsten filaments. They must be laid between two layers of insulating material. This creates a spiral. It is necessary to make two conclusions (for plus and minus). When choosing this heating option, you need to have a good understanding of mechanics. The spiral must be insulated; there should be no gaps between the two layers of insulating material.
On printed conductors
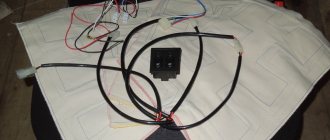
This is an easy option for installing heated mirrors since every car market has heated units. They consist of two layers of polymer material, between which conductors are located. Such parts are made for a specific model. They can be found according to the desired size; for this you need to know the parameters of the car.
To install the heating, you will need to disassemble the mirror housing. This is necessary in order to get to the other side. The inner part must be degreased and the board glued to it.
We recommend: Oil leakage from under the crankshaft oil seal: causes and troubleshooting
The heaters have two terminals on the sides (wires are connected to them), they must be soldered and insulated. The wires are connected to the wiring, and the heating regulator is displayed on the panel.
Important! Efficiency will be higher if the internal cavity of the housing is covered with foil or heat-insulating material.
Installation of finished components
The installation is clear even to a car driver who has recently driven the car.
Procedure:
- Find a device to close and open the circuit (relay). Open the hood of the vehicle, find the black box and relay. There are indications on the box which relay is for what. You need to find one for the mirrors and remove it. Next, replace the relay with the mirror element, connect the wire, and close the hood.
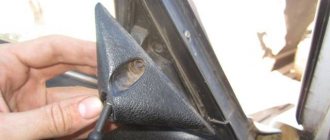
- Remove old mirrors. Open the doors, unscrew the screws. Find mounting locations for rearview mirrors. Remove old components and disconnect wires.
- Supply purchased components.
We recommend: Valve desiccant - how to make a special tool with your own hands?
