In frosty weather, it’s not very pleasant to sit on an icy car seat to start the engine - so heated seats come to the rescue. Inventive owners of the Lada Priora almost immediately began installing heated seats in their Prioras. Of course, the seat does not warm up instantly, but it noticeably saves you from frostbite. While the heater is not heating up (since the engine has not yet warmed up!) is it necessary to sit in complete cold? Factory seat heating is installed only in luxury versions of the Priora car. Installing it is not very difficult, the main thing is to connect everything correctly. Heated seats, like “Emelya”, do not need to be installed, the seat upholstery is not removed, because it is just a cover for the seats - it is inserted into the cigarette lighter - although for some reason, over time, they burn out the cigarette lighter fuse.
You can install heated seats on a Priora yourself; it will cost relatively little (compared to the fact that your health can suffer greatly from warming up a frozen car). The heated seat control unit can be installed in the Priora where it is convenient: the main thing to remember is that this is not the most necessary button when driving a car, it should not interfere with pressing other levers and buttons. Read the article to the end and your car will be warm even at minus 45.
Installation of standard seat heating on Lada Priora
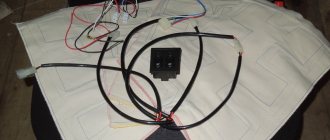
The standard seat heating kit for Priora should include:
- Heating elements (4 in total, two for each seat);
- Block for the control unit with wires;
- Priora seat heating unit.
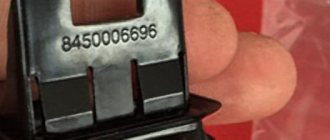
At the same time, the article number for heated seats for the Lada Priora must contain the numbers 2170 - this, as any Priora owner knows, is the model number. It is worth distinguishing the standard heating kit for Priora 2 by catalog number - in comparison with the kit for Priora 1, they are different. The entire installation of seat heating on a Priora is best described with a detailed step-by-step algorithm, which has been tested by time and other car enthusiasts:
- We remove the front seats. Remove the factory covers from the seats, which are secured with a metal spoke and three plastic latches. You can disassemble the seats without dismantling them, removing only the covers, but then the process will become a little more complicated - it will be inconvenient to deal with wiring and laying out heating elements;
- We attach heating elements to the seats - one on the lower part, the second on the backs, in the lumbar area. Some people recommend attaching it with double-sided tape, but over time it can come off. It would be safer to sew the heating element to the pillow so that it does not move out of its place;
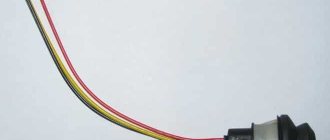
- Pull the wires from the heating elements through the hole in the mount under the pillow (run the wires from the lumbar heating elements to the place where the seat upholstery is attached). The piece of wire that passes through the hole can be protected from chafing using some kind of plastic tube. The power plugs for all four elements are out, all that remains is to connect them;
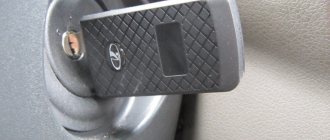
- Disassemble the central tunnel. Buttons for heated seats will be in place of the plug near the handbrake;
- The wiring is connected strictly according to the connection diagram for heated seats. Before doing this, it is recommended to disconnect the battery from the network. We install a terminal block to the heating control unit. The (-) black wire is attached under the bolt near the handbrake. A gray-red wire (for aesthetes, it is responsible for illuminating the buttons) is connected to the lighting of the cigarette lighter rim. The red 12V wire is pulled to the mounting block. You can't do without a fuse here. Then everything goes strictly “by the numbers”. Connect pin 87 to the red wire, pin 86 to the black wire. Connect the blue-black 12 V wire to pin 85, the pink wire to pin 30. You can connect to the mounting block via cut-in clamps to hold the wires tighter;
- Reassemble the tunnel and install covers on the seats.
The standard seat heating on the Priora is guaranteed to last for several seasons if it is connected correctly. And if immediately after installation the heating does not work, it means the wiring connection was incorrect.
wiring diagram for heated seats - looks like this
Additional block
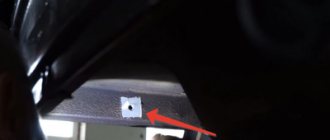
Additional relays are mounted on a bar and located under the dashboard, near the front passenger's feet. To get to them, you need to remove the right tunnel lining. Next to the additional relays is the electronic engine control unit (ECU).
If its connector interferes with access to the relay, disconnect it by first removing the negative terminal from the battery.
Circuit breakers
F1 (15 A) – main relay circuit, starter interlock.
F2 (7.5 A) – power circuit of the electronic control unit (ECU).
F3 (15 A) – electric fuel pump . If the fuel pump has stopped pumping (this can be determined by the absence of a sound when the ignition is turned on), check together with relay K2. There may also be problems with the immobilizer, it blocks the pump, see information about F20. If the wiring, this fuse and the relay are good, most likely the fuel pump itself has failed. To remove it, you need to disconnect the battery, remove the rear seat cushion, unscrew the cover, ring and fuel hoses, then carefully remove the entire fuel pump.
K1 – main relay.
K2 – electric fuel pump relay . See above about F3.
Priora - analogues of heated seats
No matter how strange it may be, in stores you can’t often find analogues of the standard kit for Priora. Most often they are cheaper, but the heating elements have to be adjusted to size, and sometimes they are even trickier with the wiring. All that remains is the factory heated seats - although it costs more than its analogue, it will definitely fit on the seat, and everything will be more or less clear with the wiring.
Well, in general, here are the analogies:
- Emelya;
- Heated car cover “Heat”.
Dismantling works
To install heating elements, you first need to carry out a dismantling procedure. It includes the following activities.
- Unscrew the plastic fasteners that connect the seats to the body of your car.
- Remove the skids. Two pieces are located in front, and two more are located in the back.
- Remove the chairs from the interior, otherwise it will be extremely uncomfortable to work.
- Separate the back from the chair. To do this, there are bolts on the sides, which can be removed with a 10 mm wrench.
- On the back there is a plug for the headrests, which can be removed.
- The upholstery is removed from the hooks below. To do this, the hooks are slightly unbent.
- Now you can completely remove all the trim.
- Carry out a similar procedure with the second seat if you plan to install heating on it too.
Read more: How to remove a bearing from a differential
While you are installing the heating, throw the upholstery into the washing machine. This will not harm her, and the interior will look newer and nicer.
How to remove the front seats
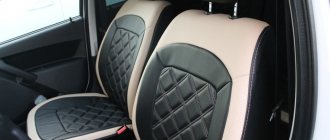
Instructions for dismantling the front seats will be needed not only for installing heating. The front seats in the Priora are installed simply, and to install and disassemble them you will need several tools and strength. By the way, on the Priora 2 seats in the “Lux” configuration have become softer and more comfortable, but the adjustment is still the same - you cannot adjust the height.
There are not many instructions on how to remove the front seat, everything is simple:
First you will have to move the seats all the way back and remove the torsion bars. You will need a size 8 wrench (for five bolts securing the slide) and a size 13 wrench (for four bolts on the bracket fastenings). First you need to unscrew the bolts on the bracket, then tilt the back of the chair back as far as possible and unscrew the two bolts on the slide. After this, tilt the backrest as far forward as possible and unscrew two more bolts. The seat can be removed from the passenger compartment.
Repair
Before you begin repairing heated seats, you should be aware of the reasons that can cause this malfunction. In general, there can be only three reasons causing heating burnout:
- faulty fuse;
- breakage of the heating tape inside the structure;
- control panel or switch located on the seat.
Unfortunately, in some car models, heated seats are extremely unreliable. This usually applies to budget cars - just step on the seat with your knee and a break occurs. Of course, expensive cars like Jaguar or Lexus are free from such defects, but low-budget Citroens and Renaults often have unreliable heating bands.
Checking the fuses
The normal functioning of heated seats depends on how the vehicle's on-board network works. Therefore, before diagnosing the device itself, you need to check the fuse.
The standard F33 is rated at 15 amps. This device is mounted in a block, which in most cases is installed at the bottom of the panel where the driver’s seat is. If the bulbs do not work, you will need to replace them.
Where to start restoration work
So, be prepared for the fact that the chair will have to be taken out of the car and disassembled. Of course, there are cases when everything can be solved without complete disassembly, but if, for example, the cable fails, this procedure cannot be avoided.
We will repair heated seats that do not work using the example of a Citroën C4 Picasso.
To check the switch you need to remove it. Theoretically, this can be done without removing the chair. But in practice this is rarely possible to implement. The thing is that approaching the switch in many models is extremely difficult. Therefore, if you remove this spare part right in the cabin, you risk damaging the casing and the device itself.
To remove a heated seat switch that is not working, first remove the connector. In most car models, it is enough to wiggle the element a little and pull it down. But be careful, some car brands install unique types of mounts.
To release the stoppers you need to reach inside the casing with a screwdriver. Then apply some force to make the part come out. There will be three contacts here. You need to measure the resistance on the two side ones. The middle contact is responsible for the light bulb.
If the resistance is the same in all positions of the adjustment wheel, check the contacts. Perhaps they got grease on them. In this case, clean them and everything should work fine.
Checking the integrity of the heating tape
Very often, the reason why the heated driver's seat does not work is due to a break in the heating element. You can check the functionality of this part of the structure without removing the chair, but this will require thin and skillful fingers; the algorithm itself consists of the following stages:
- Recline your back as much as possible.
- You need to stick your hand into the gap between the back and the seat.
- Try to find the upholstery fasteners in the back by touch. There are usually these to the left and right of center and one more at the bottom.
- Remove the backrest trim fasteners.
Read more: Parking near the bus stop
After you complete these simple manipulations, you will need to remove two connectors for heated seats, which does not work. You can remove all three if you wish. Just press the latches first. To do this, just pull down.
Pull out the connectors and check them. In this context, the strength of the resistance itself is not so important. It is enough that it simply exists. During testing you will need to check the following pins:
- two contacts on the back;
- four per pillow;
- two extreme and two middle.
Once you have discovered the place where the break occurred, you will be able to repair the heating that is not working.
How to remove the back sofa
Removing the rear row of seats is rarely done - only for cleaning or upholstery with new covers. However, also read the instructions for removing the rear sofa and keep it in mind “just in case.”
- Unclip the seat cushions on both sides (they are angular) and remove them from the passenger compartment.
- Find the locking strap above one of the backrests and pull it up. Do the same with the other back.
- Unscrew the bolts securing the armrest and remove it;
- Unscrew the bolts securing the hinges to the body.
The restyled and pre-restyled Priora, according to many car reviewers, are almost no different. But, if you dig deeper, you can find one big difference even in heating kits. In the kit for the pre-restyling version, the toggle switch works only in two modes: ON/OFF. And in the restyled version, the entire kit is designed to ensure that the heating operates in four modes: OFF, minimum, medium, maximum.
That is, the kit for the restyled version adds something that not all foreign cars have: the ability to change the degree and temperature of the seat heating. On the Priora, which was produced from 2007 to 2012, the heating elements immediately turned on to maximum.
The standard set for the Priora Restyling is also suitable for owners of the first model, because the design has not changed at all. The heating elements themselves will fit perfectly on the seats, and the wiring will be connected the same way – “according to the standard”.
You cannot neglect comfort in the car, otherwise every winter trip will become real torture. If the stove will not heat the air while the engine is warming up, then you can find other options to warm up. To do this you will have to spend half a day, but the efforts of this day will “pay off” when it is minus 25 outside.
Fuse
We place our main hopes on it, since replacing it will not be difficult. First, you need to be firmly convinced that this is where the problem lies. To know the truth, just look at him. Most often, in modern cars, fuses are made of transparent plastic. Looking through it, you will see a thin wire, which melts when broken and this is clearly visible to the naked eye. It will be enough to select a suitable fuse and replace the burnt one with it.
Causes of malfunction
Heating of car seats is carried out from electric heaters, which are built into its structure (in technical foam rubber).
The nickel heating element with a cross section of 1.5 mm is not covered with reinforcing braiding (it has only one), which under some circumstances leads to its malfunction.
Common causes of failure of the seat heating system:
- Excessive load on the side surfaces of the seats (lower part), leading to deformation and rupture of the heating element.
- Damage to the wiring from the outer frame of the seat. This is due to defects in the design of the seats by the manufacturer.
- The heating system fuse has blown. The cause of the malfunction may be a voltage drop in the network.
- Output from standing temperature sensor relay. A possible reason is a manufacturing defect.
- Malfunction of the heating system power supply. The problem may occur due to a manufacturing defect.