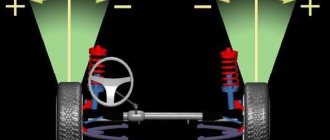
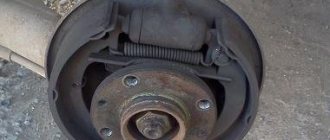
It is not difficult to do a wheel alignment on a VAZ-2107 with your own hands, but you will have to adhere to a number of requirements and recommendations. Otherwise, the rubber will not last long. Camber is a term that defines the angle at which a car's wheel is mounted relative to the vertical. In cases where the top edge of the wheel protrudes outward, this is positive camber. If she looks inward, then negative. When adjusting on computerized stands, the angles are indicated with the prefixes “+” and “-”.
Basic adjustments
If the wheel camber is adjusted incorrectly on one side, then the car will drift sideways when driving. While driving in a straight line, take your hands off the steering wheel and watch where the car will “pull”. But before doing this, be sure to make sure that the tires have the same normal pressure. In case of problems, you need to do the wheel alignment yourself on the VAZ-2107.
Toe-in refers to how the front wheels are positioned relative to each other when driving on the road. But during adjustment, the angle relative to the normal position is measured. On sevens, the toe angle is positive; for front-wheel drive models it should be negative. This is necessary so that after starting off and while driving, the front wheels become level.
If you incorrectly set the wheel alignment yourself, the VAZ-2107 will very quickly “eat” the tires. Therefore, it is extremely important to monitor the angles of the front wheels, because the cost of the cheapest tire is approximately 2,000 rubles. And the adjustment procedure takes no more than an hour. After successful repairs, you will receive the car in perfect condition. The car will drive smoothly and will no longer pull to the side, which will increase safety and convenience.
Making a twist on the classics
Hi all! Today we’ll look at ways to increase the eversion angle on the classics.
And so let's get straight to the point. There are a great many ways to increase the steering angle of the wheels, but there are still two main ones. A system like Wisefab and our favorite style “collective farm tuning” or as the clear guys call it custom tuning. With Wisefab everything is more or less clear, I saved some money, bought it, fitted it, and now the inversion is already 65+ degrees. More details about Wisefab are discussed here: Eversion on a Nissan Silvia.
Let's move on to our favorite topic: do-it-yourself tuning or custom tuning of vases.
To begin with, we cut the limiters on the levers and on the steering gear. On the levers:
On the steering gear:
Go ahead. To create the required negative camber, there were not enough standard bolts; to replace them, buy bolts from a VAZ 2108 generator, 4 pcs., and used washers to make the negative camber. It looks something like this:
bipod
The goal is to move the steering tip closer to the eversion axis (the upper and lower ball joints facing each other are the steering axis). And don’t be afraid to weld, the bipod is made of such metal that it will not fall apart, and the welding site will NEVER fall apart if it’s simply welded, most likely all the levers will bend (checked) and the spars will go away before the bipod bursts.
Approximate cutting location:
What happened and what should happen:
When to adjust camber and toe
Before adjusting the installation angles, be sure to make sure that you have the following set of tools:
- Calipers.
- Open end and box type wrenches.
- Ticks.
- Strong thread.
- Metal hooks or pushpins.
- Wooden blocks - 2.2 cm and 6 mm thick.
This is the minimum set that will be required. The presence of WD-40 penetrating lubricant will not hurt, since the nuts and bolts are close to the road surface and dust and dirt constantly accumulate on them. Rust may occur, so you need to thoroughly clean the threaded connections before starting repair work on the car. All dirt accumulations must also be removed from the inside of the wheels.
When to make adjustments
Make sure that you really need to adjust the wheel alignment yourself on the VAZ-2107. You definitely need to make adjustments if the following symptoms are present:
- The trajectory of movement changes, despite the fact that you hold the steering wheel straight. The car is still gradually moving to the side. But this needs to be checked when driving on a flat road, with the same tire pressure.
- If there are visible deviations in the alignment of the front wheels. If such symptoms are present, the tires will wear unevenly and gasoline consumption will increase. Suspension and steering components often fail.
- If you were involved in an accident in which components of the car's suspension or steering were damaged, you must do a wheel alignment on the VAZ-2107 yourself. Photos of the stages of the procedure are provided for clarity and understanding of the processes.
- When repairing suspension or steering components, be sure to check the wheel alignment.
How to adjust wheel alignment
Of course, every driver knows that the most effective check of wheel alignment can only be carried out by qualified specialists in a special workshop at a specific stand. But if the driver does not want to spend extra money or other parts are expected to be replaced soon, after which the wheel alignment will be adjusted, then the wheel angle can be adjusted without using the services of specialists.
When performing all the necessary procedures, it is worth paying attention to the suspension parts; if the driver notices a malfunction or play in the elements, after replacing which it is necessary to adjust the wheel alignment (see the list of parts above), then setting the wheel angle will not be able to solve the problem.
For rear-wheel drive cars, the wheels must be turned towards each other, i.e. it is necessary to ensure positive toe-in; for front-wheel drive vehicles, the opposite is true.
Prerequisites
The most accurate verification is possible only in workshops at stands. But in the absence of such attributes, you can use the proven “old-fashioned” method. It is advisable to install the car on an inspection hole, since you will have to unscrew the nuts and bolts of the suspension, and without it it will be problematic to do this.
When carrying out work, carefully inspect the entire suspension, the condition of the silent blocks and ball joints, and the tie rod ends. If there is play in them, then setting the wheel angles will not bring any result, and all the work will be done in vain, the car will change its trajectory spontaneously.
Preparatory work
Do-it-yourself wheel alignment on the VAZ-2107 is not carried out on the rear wheels, since the hubs are installed in one position and cannot be shifted to the side. The procedure is done only on the front axle of the car. Moreover, this does not depend on whether the car has rear or front wheel drive. Before starting work, do the following:
- To make the adjustment as accurate as possible, you need to load the machine. The load must weigh 320 kg and be distributed evenly across all four wheels. You can seat four people with approximately the same body weight in a car and throw a bag of cement into the trunk.
- A prerequisite is a full tank of gasoline. The capacity of the fuel tank in the VAZ-2107 is 39 liters. Make sure the gasoline level is close to the maximum mark.
- Tire pressure must be kept at a normal level - equalize it if necessary. Depending on the type of rubber, the pressure can fluctuate in the range of 1.8-2.5 Atm.
That's all, now you can do the wheel alignment on the VAZ-2107 with your own hands, the preparation for the procedure is completed.
Controlling the camber angle on the front wheels
It should be noted that it is quite problematic to set the camber angles yourself, since there are many difficulties. But you can check how much the angle deviates from the normal position without much difficulty. To do this, you need to follow the following algorithm:
- Place the car on a level surface and secure its position by placing chocks under the rear wheels.
- Sit in the car and turn the steering wheel until it is level. The wheels must be parallel to the car body.
- Press the shock absorbers 2-3 times until the car's suspension is in its normal position. The force should be approximately 40-50 kg. The operation is carried out on all four shock absorbers.
- Take the thread and fix it on the top of the car's fender so that it passes clearly through the center of the wheel. To achieve a vertical position, tie a weight to the lower end. Measure from the top and bottom edges of the wheel to the thread. The difference in values is the wheel camber.
For example, the difference is 2 mm. This means the camber angle is 20 minutes (not degrees). Normally, the angle should be 4 degrees and 30 minutes. An upward deviation of no more than 20 minutes is permissible. But this is the case when the car is loaded with a mass of 320 kg. If there is no load, the angle should not deviate by more than 20 minutes. from 0 degrees and 5 minutes.
Theoretical part
First, let’s get a little grounded in theory in order to accurately understand all the actions that will be described. Let's look at the definitions:
Wheel angle
Or in other words – wheel alignment. These are design parameters that determine the current position of the wheels when the car is moving in a straight line and when cornering. Ideally, a car on a flat surface should always move in a given steering position.
If this parameter deviates, directional instability appears; the driver constantly has to pull the steering wheel to the side in order to maintain the desired direction.
Interesting! Due to driving with such wheel alignment settings, tires begin to wear out faster, suspension parts suffer, and fuel consumption increases significantly, since a moving car constantly experiences some kind of resistance.
Angle of longitudinal inclination of the axis of rotation
It is also called caster - a given angle between the axis of rotation of the wheels and the vertical level, when viewed from the side. This angle is set using adjustment washers, which are placed on the bolts securing the lower arm axle. This ensures stabilization of the wheel position when the car moves in a straight line.
Camber angle
The deviation of the plane of rotation of the wheel from the vertical line, which passes exactly through the center of the contact area of the tire with the road surface. This angle is also set by adjusting washers on both bolts of the lower arm axle.
The number of washers should always be the same, as should their thickness. This allows you to achieve the correct position of the wheels when the suspension is operating.
Wheel alignment
This is the difference in distance between the points in front and behind the inner parts of the wheel rims.
Adjustment and checking of wheel angles should be carried out in workshops where everything necessary for this is available. You can also correct a lot of things manually, not counting the caster angle of the steering axis.
Interesting! The most accurate data when setting the wheel angle can be obtained when working with a loaded car of 320 kg - this is the approximate weight of four people in the cabin, 50 kg of cargo in the luggage compartment. In this case, the fuel tank must be filled to full.
Ideally, the value of all the listed angles after undergoing maintenance should correspond to the following values (the value for an unloaded vehicle is indicated in brackets):
- Pitch angle – 4°±30′ (3°±30′);
- Wheel camber - 4°30'+20' (0°5'+20');
- Toe - 2 - 4 (3 - 5) mm.
It is these values that we will focus on when working.
Checking wheel alignment
As can be seen from the above, you can quickly do a wheel alignment on a VAZ-2107 with your own hands. The procedure for carrying out the work is simple, just have a little patience, mastery will come with time.
Preparation for adjusting wheel alignment is the same as in the case of camber, the only differences are in the subsequent actions:
- Align the wheels, place the machine on a level surface and place additional cargo on it. Only after the preparatory work has been completed can adjustments begin.
- To check the alignment, you need to use a strong thread with hooks tied at the ends.
- Fix the hooks on the front and rear wheels so that the thread passes clearly through the centers of both axles.
- The rear wheels have a 44 mm narrower track than the front ones. Therefore, a block with a thickness of 22 mm must be attached to the front of the rear wheel. The thread is laid on top of this beam.
- Turn the steering wheel so that the thread touches both sides of the front wheel tire.
- Fasten the thread on the opposite side and install 22 and 6 mm thick bars under the back of the wheel.
Tools you may need for adjustments
To engage in the appropriate adjustment procedure, you must first acquire the most necessary tools that will help you get the job done quickly and efficiently. When adjusting along the thread you will need:
- calipers;
- set of wrenches;
- a short length thread for adjusting camber and a thread for adjusting toe with or without two hooks at the end, but then the thread will have to be tied somehow to the wheel;
- bars 6 and 22 mm thick.
When adjusting along a ruler you need:
- special line;
- ordinary ruler.
Wheel alignment adjustment
If the wheel alignment is incorrect, adjustment will be required. To do this, follow these steps:
- Loosen the tension on the tie rod end coupling clamps.
- Using Cobra-type pliers, you need to rotate the coupling. Before starting the adjustment, be sure to clean all threaded connections from dirt and dust and treat them with penetrating lubricant.
- Rotate the clutch until the gap between the thread and the front wheel tire is normalized.
- After completing the work, be sure to tighten the threaded connections.
- The adjustment on the second wheel is carried out in the same way.
- The total toe-in of the wheels should be no more than 2 mm.
