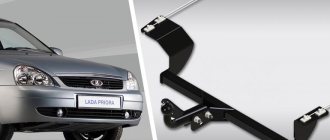
A towbar is a towing product designed to connect a trailer to a vehicle. Installing a new towbar on Kalina NA has a number of features. The Kalina hatchback car has a trailer that is not capable of withstanding heavy loads. Therefore, installing a towbar for this vehicle is necessary if it is planned to be used for transporting goods. It will help to use a removable trailer and make the car more versatile.
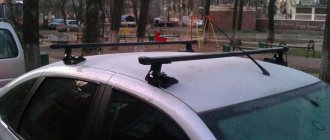
Types of device for station wagon and hatchback
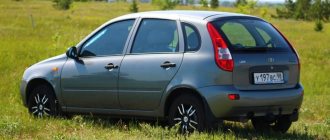
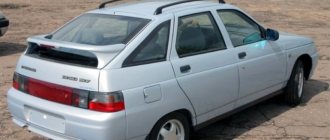
Installing a towbar on a Kalina hatchback is difficult because the design does not provide for the possibility of its use. The Kalina hatchback body does not have holes intended for mounting a tow bar, so only some models can be used.
There are three categories of towbars:
- removable - easy to install and remove, regardless of conditions;
- welded - has a higher strength index, but it cannot be removed after installation;
- flanged - characterized by simple installation; in this case, it is not necessary to violate the bumper design.
The choice of device for Kalina station wagon depends on the generation. Most towing and coupling products for the first generation are not suitable for second-generation cars. It is also not recommended to use a towing device designed for the Grant sedan. The station wagon has a wide trunk, so there is a need for a tow bar in some cases. It is recommended to use removable type devices for station wagons and sedan. The standard equipment of this type consists of:
- seven-pin socket;
- protective cap;
- electrical wiring;
- installation materials;
- technical data sheet of the product.
If one of the components is missing, the package is incomplete and the equipment may not work. Therefore, when buying a new product, you need to make sure that its elements are in place.
The advantages of the removable type are associated with:
- easy transportation;
- simple installation work;
- convenient storage conditions.
You can buy a removable tow bar at almost any auto store. But some models may have different prices. This feature is explained by the design differences of products for connecting trailers. Therefore, you should choose a device for a specific vehicle.
Some towbars used on second-generation station wagons are suitable for the hatchback. The most acceptable options are welded towing products. They are intended for unibody bodies available in the Tolyatti and other hatchback variants.
A few words about lighting technology
Trailed towable devices, i.e. car trailers, require brake lights. The same applies to side lights and turn signals. In addition, if the trailer weighs more than 750 kg, it is equipped with a reversing light.
There is no separate terminal block that allows you to connect all the “electrics” of the trailer in Grant/Kalina-2. Of course, the towbar will be equipped with a socket, such as shown below. But connecting this outlet by running the cables inside the body will not be so easy.
Standard towbar socket, 7 pins
An experienced installer, when making connections, will be able to implement the diagram shown here:
It is advisable to connect trailer lamps via a relay
The wires can be passed through one of the holes provided in the floor of the body. These holes themselves are protected by plugs.
Trunk floor diagram, station wagon/hatchback
There is nothing more to add here. We wish you success.
Anyone who connects the tow bar without the participation of a car dealer may lose the warranty on the electrical system. Any intervention in the electrical circuit will void the warranty if it is carried out without the consent of the dealer. Make a choice.
Step-by-step installation process on a station wagon
On the Kalina station wagon, it is possible to use a towing device on the Kalina. Therefore, it already has holes with screws for attaching the device. The standard size of the screws is M10. Installation requires two people. The first one should hold the tow bar, and the second one should attach it.
If the tow bar for Kalina has not been used before, you will need to use a screwdriver to look for threaded holes. There are a total of six bolts used to secure the device. After they are found, you need to act according to a clear system:
- holes for fastenings are cleaned;
- a towbar is brought to them (it must be placed so that it cannot harm the muffler);
- standard bolts are screwed in (you need to start from the first side hole);
- checking the correctness of fastening;
- the screws are tightened.
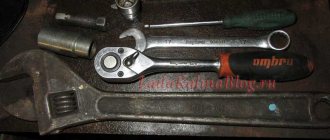
For installation, it is recommended to use a spanner type with a cardan mechanism. Additionally, it may be necessary to connect an outlet for the trailer electronics to operate. But you shouldn't do this yourself. DIY installation will take up to twenty minutes.
Lada Kalina Cross › Logbook › installation of a trailer hitch socket (towbar) Kalina Cross
When I decided to install a towbar, I scoured the RuNet about installing a trailer hitch on the Crosses after 2021, I was interested in how the towbar is attached to the left side member. Relocating the muffler bracket greatly complicated this task and I came across one option that I “suspected”. The point is that you buy a “Bosal / VFM” towbar for Cross until 2021 with identical “feathers” on both sides, saw off the interfering bracket, install the towbar in its standard places and weld the bracket to the towbar.
Full size
Attaching the trailer hitch to the left side member
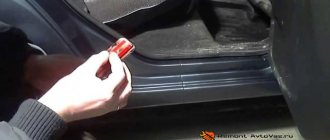
Next, it was necessary to connect the electrics, when I did this I encountered difficulties in finding places to lay the wires, the Internet left me without an answer, so here I decided to post step-by-step instructions for those who decide to install the tow bar themselves and connect the electrics.
Tow bar - Bosal, Avtos wiring. To connect to the standard harness of the car, I used sleeves with heat-shrinkable tubes, but I strongly recommend going to a car disassembly and biting off the “male-male” chips from the rear light harnesses from Kalina (I couldn’t find such chips in stores) - this will save you a lot of nerves if I need to tell you in the comments and draw a connection diagram using chips. On the next machines I will 100% do exactly this.
First you need to connect the wires to the outlet according to the pinout of your trailer. I have a “Krepysh” trailer, I found a connection diagram on the manufacturer’s website. Pinout of the trailer Krepysh Having clamped the wires with screws, I filled them with tin for reliability. Now we assemble the socket and screw it to the tow bar. By the way, the original socket bracket is very flimsy, I will cut another one from 2mm metal.
Now remove the protective plastic from the bottom of the trunk opening and lift the mat. There will be 5 squares covering the holes. I peeled off the outer ones and passed a piece of wire about a meter long through there (I found it in the garage, the cross-section is exactly the same as all car wiring)
Full size
Hole inside the body, the end of the wire is secured against accidental pulling out
Next we climb under the bumper and see wavy holes. Our wire should be visible in one of them (use a flashlight to see it). Now, using tweezers or a crochet hook, we take it out.
Mounting the device on a hatchback
Attaching a towbar to a hatchback is more difficult, since the body is not designed for its use.
Before you start attaching the parts, they need to be wiped free of dust and grease. After applying the markings, the fastening process begins:
- holes are drilled for fasteners (at least five special holes will be required);
- parts are treated with an anti-corrosion agent;
- using bolts and self-tapping screws, the socket with contacts is installed;
- the socket is connected according to the instructions;
- wires are being connected.
Sometimes work may be required to remove the bumper.
LADA KALINA, GRANTA (1119, 2192)
Figure 2-14 shows the main version of the trailer hitch installed on the LADA KALINA (hatchback).
Figure 2-14 – Design and delivery set of trailer hitch LADA KALINA, GRANTA (1119, 2192): 1 – left trailer hitch bracket; 2 – rod; 3 – right trailer hitch bracket; 4 – socket box; 5 – hook
Remove the rear bumper in accordance with the requirements of section 1 TI 3100.25100.20470 for car 1119 and section 2 TI 3100.25100.20568 for car 2192.
On the inside of the cross member 2, see Figure 2-11, the floor of the rear, right 1 and left 3 rear side members, clean the embedded threaded holes 4 from the PShM layer, two on each body element, including on the left side member (flat-head screwdriver) .
Install bracket 1 on the left side member, see Figure 2-14, on the right side side member bracket 3 and secure the brackets with the bolts supplied, without tightening.
Install the rear rod 2 on the floor cross member and secure it with the bolts supplied, without tightening.
Connect the brackets to the rod using the bolts supplied, without tightening.
Tighten the bolts securing the rod to the rear floor cross member, then the brackets to the body side members and to the rod (replaceable head 17, 19, knob).
Install hook 5 and socket 4 on the rod (spanner 19, replaceable head 19, knob).
Install and connect the electrical equipment of the trailer hitch.
Install the rear bumper.
DIY tow bar
To create a homemade towbar you will need:
- metal corners;
- metal pipe;
- working welding machine.
The part in which the corners and the pipe will be connected is indicated. After this, one corner is attached by welding to the rear channel, and the other to the trailer. The operating period of a homemade device is from 5 to 10 years, depending on the strength of the material used. But this option is suitable for those who know how to install a tow bar on Kalina with their own hands.
How to wire and connect a headlight
To connect the PTF you will need various tools:
- installation kit for connecting fog lights on Grant. It includes a button, a relay, wiring in the cabin, wiring under the hood;
- corrugation (for example, 9 mm for the interior and 16 mm for the hood);
- insulating tape;
- drill;
- set of drills;
- 10 mm head;
- 13 mm wrench.
The fog light connection plan looks like this:
- Take out the battery.
- Unscrew the screws securing the platform underneath. For wiring under the hood, remove the platform under the battery
- Moving the panel to the side, loosen the bracket nut, removing the fuel pipes.
- The wire begins to be laid from the right headlight through the mudguard, then under the compressor, generator and cooling system fan. Start routing the wire from the right mudguard along the front of the hood
- The wire from the second headlight is routed through the left mudguard.
- Both wires are connected in the engine compartment. Then they are placed in corrugation. Connector for the second headlight (black wire on the right side of the picture)
- Pass the corrugation under the ABS block next to the headlight hydraulic corrector tubes, inserting it into the cabin through the rubber bands of these tubes. You can enter the cabin through a separate hole (to do this you need to cut a hole) or through an elastic band near the hydraulic corrector tubes
The wiring under the hood is complete.
Now you can install the battery in its original place and attach the bumper. The diagrams below indicate where the ground terminals can be secured on the right side.
- Right headlight: one of the ends, as is customary in electrics, is attached to ground
- The terminals are attached in the same way on the left side.
- The left headlight is attached to ground in a similar way.
Electrical connection
The towbar socket is secured using a special bracket. The bracket itself is secured using self-tapping screws and bolts. Lada Kalina wiring includes a standard kit. This kit includes harnesses to connect the outlet. The wires have different colors. Thanks to this, the lights are connected without errors. The equipment is sold together with an electrical diagram indicating how to connect the wires.
For both versions of the Lada Kalina there are the same number of contacts and wires. There is a standard place and connectors for the wires. If the insulation of the wires has been damaged, you must insulate them yourself.
The holes for the wires have plugs. Modern cars are equipped with sensors that monitor the operating condition of the tow bar. You can buy sensors separately if the standard machine design does not have them.
LADA KALINA, GRANTA (1117, 1118, 2194)
Figure 2-13 shows the main version of the trailer hitch installed on the LADA KALINA, LADA GRANTA.
Figure 2-13 – Design and delivery set of trailer hitch LADA KALINA, GRANTA (1117, 1118, 2194): 1 – rod assembly with brackets; 2 – socket box; 3 – hook
Remove the rear bumper in accordance with the requirements of section 1 TI 3100.25100.20475 for car 1117, section 2 TI 3100.25100.20469 for car 1118 and TI 3100.25100.20568 for car 2194.
The installation of the trailer hitch on the LADA KALINA vehicle must be carried out in accordance with the requirements for installation on the LADA GRANTA vehicle specified above.
Note: The design of the rear suspension of the main muffler of cars allows the trailer hitch bar bracket to be attached to the left side member of the body in two places if there is an additional mounting hole on the bar bracket.
Install and connect the electrical equipment of the trailer hitch.
Install the rear bumper.
Tips for using a towbar
If you do not take into account the rules for using a towbar, it can quickly fail. The device has a limited service life and capabilities, which can be increased by following a number of actions:
- it is necessary to familiarize yourself with the technical characteristics of the tow bar in advance so as not to overload it when using towed products;
- the weight of objects in the trailer should be evenly distributed - if this is not done, the controllability of the machine will be impaired (insufficient weight can cause similar problems);
- It is recommended to use safety chains - they will prevent damage to the tow bar and other vehicle components in the event of an unexpected situation with the trailer;
- it is necessary to periodically lubricate the towbar - in order for the lubricant to remain for a long period, you need to use caps and plugs (the features of these components are aimed at improving the performance of the equipment);
- It is recommended to periodically check the diameter of the towbar ball - if due to wear it has become less than 49 millimeters, the ball requires replacement (only original parts can be used);
- Every thousand kilometers you need to check how well the fasteners are tightened.
Low quality towing products should not be used. The lower the quality of the device, the higher the likelihood of an unforeseen situation. Therefore, saving on the purchase of a tow bar is not recommended.
A Question of Choice
Today, the problem when choosing a towbar for a Priora, as well as for other cars, is not a shortage of auto parts, but an excess of them. For Lada, which is the hero of discussion today, experienced motorists distinguish three brands. This:
- AutoS. A Russian company that has earned a calling not only at home, but also abroad, for the quality of its products. Offers a clutch for Lada Priora at a low price, but meets the standards and does not cause problems during installation.
- Leader Plus. Also a Russian manufacturer, producing copies for domestic cars and not only. Drivers highlight only the advantages, because the towbar costs little, but it has no problems with installation on the car.
- Trailer. The quality of this Russian company is also maintained at a high level, as is the opposite price level for Russian cars. The towbar on the Priora from the Trailer fully justifies the stated parameters.
And although there are other manufacturers of couplings, it is not known whether they offer models adapted for Priora. This can only be found out by contacting the company, the official website, or when searching for a car accessory in a store. As for foreign products, these are not worth taking for Russian cars. It's expensive and unjustified. Find out which companies produce the best towbars from this article.
Towbar on Priora station wagon
Special attention should be paid to the type of ball design, because there are three options:
- Quick release tow bar.
- Conditionally removable.
- Welded.
Today it is more profitable to use the first option, since it is the most practical. But this type of coupling is expensive. If you want to save money, then you shouldn’t bother with it. And as a last resort, buy the second option. Read more about towing devices in this article.