You may need to break in the engine after replacing the piston rings.
Without this procedure, repairs will simply be useless; you will simply waste time and money. You need to understand that running in is not a whim of mechanics and engineers. This action has a practical meaning and also allows you to significantly increase the service life of the overhauled engine. If you make mistakes during the process, you can get a number of serious problems. It’s more difficult for those who run-in after self-repair. Garage motorists rarely know how to perform the procedure correctly, so situations often occur when the driver has to repeat it soon after repairs. Let's take a closer look at the features of this process, as well as how not to make mistakes when carrying it out. Running in the engine after replacing the piston rings is not a very complicated process, but you need to know how to do this work correctly. You should not listen to folk craftsmen who claim that you can do without this action. Only proper running-in will avoid problems in the future. You also need to take into account that the period and features do not depend on how much the specialist sanded off during grinding. This indicator does not affect the process.
How long does it take to break in new rings?
Well, the time has come to replace the rings, as well as the valves, mileage over 200 thousand, oil from max to min. fell quickly, over 1000 km (then it almost stood still, but there is already a little gasoline in the oil, etc., so it seems that the level does not decrease, and there is gasoline + oil + carbon deposits instead of oil), when warmed up, unevenness was felt work (slight floating vibration, as if the speed is floating). The compression also had a range: 1 - 12, 2 - 11.2, 3 - 12, 4 - 10.3
(in reality, most likely even lower, because the oil ate well - it was most likely oil compression in some cylinders, and these values are overestimated).
It was decided to change the rings and rebuild the cylinder head - valves + guides + caps. After disassembly, it was discovered that there were 2 pistons repaired, 82.8 mm (the square was knocked out), the cylinders were free of scuffing and everything was very tight, it didn’t move anywhere, the rings weren’t visible if you looked from above. All pistons + combustion chambers + ring grooves on the piston were covered in a heavy layer of carbon deposits. washed with Sanita anti-grease gel (smear it on for 20 minutes and wash it off, and so on several times), the grooves for the rings were cleaned down to metal with fragments of old rings. All the rings were on the verge of falling, heavily worn (by eye the thickness of the new and old ones was significantly different). All new rings had to be ground down with a needle file, because... the gap was less than 0.25mm at the joint when installed in the cylinder. The piston with new rings did not fit into the 3rd cylinder - a belt of rust formed on top where the rings do not go, which was carefully sanded and lubricated with oil, and only after that it was possible to drive the 3rd piston.
After reassembling the cylinder head (replacing valves, guides, cutting in seats, lapping (crappy, as it turned out),
trimming of exhaust valves, because
the saddles are not the first freshness (the old ones were also trimmed), after assembly the compression showed only: without oil: 1 - 7 2 - 8.7 3 - 5.9 4 - 7.5 with oil: 1 - 8 2 - 9, 8 3 — 6.4 4 — 9.3
From which the conclusion was drawn that the grinding was bad, because
compression with oil did not rise much anywhere, and the leaking valves do not allow it to rise, which was confirmed after disassembling and pouring kerosene into the channels, everything was leaking
)).
Be sure to check the valves with kerosene, or for even scratches on the seat chamfer around the entire circle,
because
the valve is completely rubbing in, but the seat may not be rubbing in yet and it will be a bummer
.
If the valves get a little wet (do not leak), especially if this does not happen immediately, then this is normal lapping, otherwise some comrades think that the valves should be left with kerosene for days, but the valve is not a pipeline
, and the compression stroke there lasts tenths/hundredths split seconds, so
don’t rub until you’re fanatical, just sag the saddles.
.
After assembly with standard ground-in valves, the compression became:
:
1 - 9.5 2 - 10.5 3 - 7.7 - with oil 10.6 (unpolished rings where the belt was slightly sanded) 4 - 9.7
After 10 km!:
Started the car, drove only >10 km Price tag: 6,000 ₽ Mileage: 207000 km
Good afternoon. The engine began to actively take oil. I decided to change the rings. After opening it, it turned out that the decision was correct - the rings were indeed a pipe. But after replacing the rings, oil consumption increased even more. I've already driven 600 km, and oil is flying into the pipe. They explained to me that I need to wait 1500-2000 km until the rings wear in, and during this time fill in 15W40 mineral oil.
I would like to hear the public's opinion on this issue. Thank you.
Replacing piston rings is a procedure that will have to be encountered if the driver has been using the car for a long time. On average, the service life of the rings is 80-120 thousand kilometers, depending on the driving style, as well as the quality of the rings themselves and the assembly of the car engine.
After replacing the piston rings, many drivers forget about the need to break in the car. This is an extremely important procedure that should not be neglected if you want to ensure that engine repair and piston ring replacement are not in vain. In this article we will look at how to break in a car engine after replacing the piston rings.
#1 Pepper
- Group: FB Veterans
- Posts: 293
- Registration: 22 September 07
In my case, replacing the rings (compression + valve stem seals) and valve stem seals. It seems like it wouldn’t hurt to give the little guy a run-in? The question is: how many kilometers can you drive in the “vomit-fry-fry-vomit-fry” mode?
- Up of the page up there ^
#2 Lonely Wolf
- Group: Members
- Posts: 49
- Registration: 28 September 09
- Up of the page up there ^
#3 Shell-68
- Group: FB Veterans
- Posts: 4,864
- Registration: 08 April 08
- Up of the page up there ^
#4 Lonely Wolf
- Group: Members
- Posts: 49
- Registration: 28 September 09
- Up of the page up there ^
#5 joni
- Group: FB Veterans
- Posts: 2,120
- Registration: 20 July 07
- Up of the page up there ^
#6 ODAN
- Group: Members
- Posts: 191
- Registration: 28 January 10
Lonely Wolf (22.3.2010, 20:06) wrote:
- Up of the page up there ^
#7 Lonely Wolf
- Group: Members
- Posts: 49
- Registration: 28 September 09
ODAN (22.3.2010, 23:08) wrote:
- Up of the page up there ^
#8 Pepper
- Group: FB Veterans
- Posts: 293
- Registration: 22 September 07
funny..About the hoods.. Perhaps everything there from the factory comes with such tolerances that you really need to fuck it up if something falls off right away.. This option doesn’t work for me.. The replacement process is too gimmicky (rings take a long time to get to Russia)
I'm still waiting for adequate advice. Vomiting, I don’t know how much, and then frying it is not a break-in and I’m fucked, sorry.. In general, there are probably no questions with the break-in mode. Question about mileage...
see also
Comments 27
if the pistons are old (that is, there has been no major repairs), then 500 km is enough, and then at least until the cutoff!
and I still couldn’t get through the break-in after replacing the rings... T__T
and how does it feel without running in? how far have you run?
who the hell knows) I’ll never get around to measuring the compression) 7-8 thousand
how does it feel? and how long did it take for it to start to pile on?
I didn’t have enough patience) and the carbs at that time were not yet properly tuned, they drove normally only after 3k revolutions
okay) I just changed the rings and head on mine, in about 20 minutes I’ll do the first launch and, as luck would have it, I have to go straight to the highway and head to another city. I’m wondering how long I’ll last)))
Well, I think 90 is not too hard to go without overtaking and it will be fine
I will try. ok let's go finish it
I replaced the rings on mine, drove about 500 km, changed the oil, now I drive in normal mode, rev the engine to 3.5 in every gear, at first there were overtones after 3000, now everything has returned to normal, the sounds are gone, the car drives boldly, cheerfully...
Types of engine break-in
The further operation of the vehicle depends on correctly performed running-in. Depending on the situation, running-in can be of several types:
- After partial engine overhaul;
- After major renovation;
- After replacing components.
After a major overhaul of the engine, running-in is carried out in order to grind in all engine components. It is better to carry out such running-in at a service center where special equipment is available. As for other cases, the running-in must be performed directly on the road, that is, while the car is moving.
How to perform break-in after replacing piston rings?
Before running in, the car must be prepared. To do this, perform the following steps:
- Infects a car battery;
- Before leaving on the road, start the engine and warm it up to 80 degrees;
- After warming up, the engine is turned off and cooled to 40 degrees;
- Next, warm up again to 80 degrees and repeat the procedure at least 8 times;
- After preparation, inspect the machine and unit for faults;
- They drive onto a highway with little traffic and no bumps.
Basically, the rules for engine break-in are described in the technical operation book. Before you break in the engine yourself, be sure to read the manufacturer's recommendations.
How to break in the engine after replacing the piston rings will be discussed in detail using the Priora as an example in this video:
How to do it correctly?
Before starting the process, you need to carry out a number of actions that are mandatory for any type of work. They are standard and apply in any case. At the very beginning, the following procedures are done:
- Be sure to fully charge the battery;
- Before leaving, you need to carry out the next cycle. We start the engine, heat it to 80°C, then turn it off. As soon as it cools down to 40°C, warm it up again. In total you will need to do 7-10 cycles. During which thermal expansion of parts will occur, as well as their initial preparation;
- After all the above steps, be sure to inspect the engine for leaks of oil, antifreeze and other technical fluids. If we find such a phenomenon, we will definitely eliminate it;
- Regardless of the reason for which the procedure is performed, movement with height differences should be avoided;
- At the last stages of lapping, strictly follow the manufacturer’s recommendations regarding optimal engine operation during travel.
These rules apply to all types of engine running-in, regardless of what you did in the car.
The next 700-800 kilometers
You can drive in the same mode, but not at once. That is, you can freely use the car for business trips, but just do not load it. The last 500 kilometers adhere to the manufacturer's recommended operating mode, but at the same time avoid stressing the engine. After this, the oil and filter must be changed. Then you can safely operate the car in your usual mode.
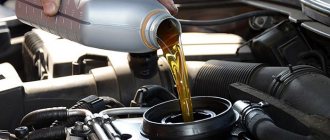
Changing the oil after engine overhaul
It should be understood that the obligatory result of grinding in parts (especially in the first hundreds of kilometers) in the engine is metal shavings. These chips enter the engine oil and accumulate in the oil filter. It is quite obvious that these chips need to be removed from the internal combustion engine.
This can be done by draining the lubricant and replacing the filter. This replacement needs to be done after 800-1000 km. By the way, you only need to fill it with suitable high-quality motor oil immediately after repairing the engine, before the first start, during the first replacement and further during operation.
Signs of piston ring wear
Blue or black smoke from the exhaust pipe indicates that wear has reached a critical stage. This indicates that excess oil entered the combustion chamber past the oil scraper ring and burned there along with the fuel. Black smoke coming out of the crankcase ventilation tube indicates that the compression rings, due to wear, allow gases to escape from the combustion chamber into its cavity.
Critical wear is accompanied by a decrease in compression (the ability to maintain pressure) in the engine cylinders. This means that some of the gases formed during the combustion of the fuel mixture, which was supposed to push the piston, broke into the crankcase without performing useful work. This is what will lead to a drop in pressure in the cylinder, therefore, the engine will lose some power. Increased oil consumption is observed.
Compression is checked with a special device - a compression meter. When the nominal pressure values are unknown (there are no operating instructions), it is first measured in a dry cylinder, then a little engine oil is poured through the spark plug hole, and the measurement is made again. If the compression increases, then the rings need to be replaced. Similar signs can be observed in the case of their “occurrence”.
“Sticking” occurs when carbon deposits formed in the piston grooves prevent the piston rings from springing, resulting in a decrease in the tightness of their contact with the cylinder surface.
This problem, if the case is not very advanced, can be corrected with the help of special fuel additives. For an engine with a carburetor system, you can try cleaning it with a carbon remover spray that is injected directly into the carburetor. If removing carbon deposits from the combustion chamber has no effect, then there is only one way out - replacing the piston rings and cleaning the grooves.
This is interesting: Clutch drives: what does it mean, why and what to do
Features of removal and installation
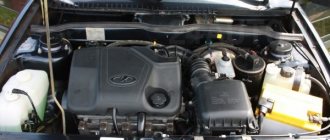
First rule. When performing work, it is imperative to maintain cleanliness. Before dismantling the power unit, you should go to the car wash and remove all remaining dried dirt and dust using a high-pressure washer. Using a special cleaning agent, the engine housing is washed. You cannot wash a hot engine, since a sudden temperature change has a negative effect on the engine. Be sure to disconnect the battery. As soon as the body is processed, you need to wait a while until the motor dries out. Using compressed air from the compressor, remove all drops of water, and also treat the wire connections.
Second rule. Keep track of how the parts were before disassembly. It is best to use a digital camera or a smartphone with a good camera. Use your camera to take step-by-step photographs of the parts being disassembled.
Disassembly
First you need to dismantle the power unit. It is noteworthy that in some scooter models - for example, Honda Dio before 1994, you can completely replace the piston without removing the entire engine. Disassembly order:
- Unscrew and remove all parts that interfere with dismantling - throttle cables, rear brake cables, fuel and oil supply hoses, electrical blocks, shock absorber, and so on.
- In most models, the engine is secured with just one bolt to the frame. Unscrew it and roll out the engine.
- Remove the muffler, air filter, cylinder and generator casing. Using a compressor and brush, completely remove any dust from the cylinder. If necessary, wash the cylinder again. The part must be perfectly clean.
- Unscrew the spark plug and unscrew the nuts/bolts that secure the cylinder head. Before performing work, be sure to wash all the places where the crankcase is connected to the cylinder. Even if the engine was washed anyway, there will always be sand and dirt under the fins. When removing the cylinder, residual dirt may penetrate inside the crank chamber.
- Unscrew the head and then proceed to dismantle the cylinder. In some cases, it happens that the cylinder is stuck and does not want to be removed easily. Here you need to pick it up using a pry bar. If you find that the cylinder gaskets are coming off in chunks and are stuck to a metal surface, you should carefully and carefully remove them. It is important to achieve maximum surface evenness. If there is no replacement gasket, you need to buy a new one or a paronite sheet and cut a new gasket out of it. It also happens that during the repair process the owner damaged the aluminum gasket located between the cylinder and the crankcase. You can do it yourself and make a new gasket using a cola can. But before that you need to completely remove all traces of paint.
- A clean cloth should be placed between the crankcase walls and the connecting rod to prevent foreign objects from getting into the crankcase. If this requirement is not met, the new cylinder-piston group will most likely fail in the future, and the crankshaft will also break.
- To squeeze out the pin, you must first remove the stopper from the piston pin. Always remember that the finger fits quite tightly, so you will have to make a lot of effort to remove it. While pushing out the pin, make sure there is no lateral load on the connecting rod. Otherwise, you will have to purchase a new one, since the old part in this condition is not subject to further use. The operation must be performed so that the piston rests against an object sideways. You can support it on the wall by laying a piece of wooden beam.
- Remove the piston and get rid of the cage bearing. The old gasket should also be removed.
After completing all the work to dismantle and restore the cylinder-piston group, it is necessary to perform the installation in the reverse order.
Which parts of the piston group wear out faster?
The piston rings, skirt and pin holes are primarily subject to wear.
As a result of friction against the inner surface of the cylinder, the rings wear out along the outer diameter, and due to friction against the ends of the piston grooves, along the height.
The first piston ring and the first piston groove wear out the fastest, since this joint operates under the most severe temperature, abrasive and load conditions, often with insufficient lubrication. Rings usually wear out faster than grooves. They lose their elasticity and gradually collapse.
In the piston grooves, the lower end wears the most, since this surface is almost constantly in contact with the rings and is subject to increased pressure from them.
The ends of the piston pin work inside the bosses, and its middle part works in the upper head of the connecting rod. The degree of wear of these elements is determined by the size of the actual gap between them and the pin. To do this, measure their diameter at the points where they interface with the holes. If the results are outside the acceptable limits, the piston and pin must be replaced.
The holes in the piston bosses wear unevenly, so over time they take on an oval shape. If their size does not exceed the established norm, the shape is corrected with a reamer to the size of a repair pin of a larger diameter. The diameter of the connecting rod upper head bushing is also increased.
The wear of the skirt is evidenced by numerous scuffs on its side surfaces, an increased gap between the lower part of the throne and the cylinder walls (more than 0.5% of the liner diameter).
The gap size is measured using a feeler gauge or indicator bore gauge in different parts of the cylinder - in the less worn lower part and the more worn middle part. This is done by retreating 5-10 mm from the lower edge of the front or rear side of the piston skirt.
The piston must be replaced if the following phenomena are observed:
- Large gap between piston and cylinder liner
- Numerous scuffs on the piston skirt
- Damage (scratches, cracks) on the bottom and hot zone of the piston caused by disruption of the combustion process of the fuel-air mixture
- Uneven wear and deformation of the grooves for the piston rings (as a result, the rings vibrate intensely, increased oil consumption and blow-by gases are observed)
Engine repair is a rather complex and time-consuming process. There are not many master mechanics who can perform it efficiently, while complying with all factory tolerances and requirements. Only extensive experience in engine restoration can help eliminate the possibility of engine-fatal errors and save your time and money. If all operations are performed correctly, the repaired engine will be no different from the new one.
Removing the engine
The engine should be thoroughly cleaned before operation if possible. Due to the accumulated dirt and grease, removing bolts and disconnecting components will be a messy and unpleasant job.
Visual inspection
Verifying the engine number is necessary to ensure that you are working with exactly the engine described in the documentation. Carry out a visual inspection of the engine. Check for fluid leaks before draining them and mark the leak locations. Check for any signs of overheating, cracks or exhaust blow-by on the block. Also check to see if there is a thick layer of sealant squeezed out from previous work. Inspect the external components on the engine. Inspect the belts for signs of wear by rotating the pulley and listening for any unusual noise. Inspect the flywheel for wear.
3. We disassemble and evaluate the feasibility of engine repair
The exhaust manifold is removed if it has not been removed previously. Exhaust manifold bolts or studs can be severely damaged by corrosion, you need to be careful not to damage them. The use of special lubricants is advisable when loosening threaded connections. Heat may be required for very tight bolts.
The remaining parts of the engine are removed. The oil pan, valve covers, and then the cylinder heads are dismantled. You can now get a first idea of cylinder wall wear by looking at the cylinder walls. There is a point at the top of the cylinder where the piston rings stop as they move the piston upward. The top does not wear, so this indicates the original bore diameter. It is necessary to check the minimum tolerances with the documentation to ensure that the engine can be restored.
Next, remove the pistons and connecting rods assemblies. Parts must be marked so that they can be returned to the same cylinder from which they were removed.
The crankshaft is removed and inspected. After removal, use plastigauge plates to measure the gaps between the liners and the crankshaft. Inspect the shaft for cracks and any signs of overheating. Measure the journal diameter, radius, taper and runout of the crankshaft. Compare this with the dimensions and tolerances specified in the repair manual. You should also inspect the necks
First launch after major overhaul
The first 2,000 km are considered the most important here. At this time, operation should be gentle. The rules that must be followed are:
- Do not drive at very high or low speeds.
- The speed should not be constant, and the revolutions should not be the same.
- It is better to refrain from transporting trailers; it is unacceptable to transport too heavy loads.
- It is forbidden to perform sharp braking and brake the engine.
When grinding in engine parts after a major overhaul, it is unacceptable to subject it to heavy loads - the load should increase gradually. It is also extremely undesirable to force the engine to idle for a long time, naturally, excluding the warm-up mode. Idling is a serious load on the internal combustion engine.
Before driving, the engine warms up for some time. You should not be zealous here, since the power unit will reach operating temperature while driving. On the first trip after repair, it is better not to take passengers with you, so as not to create additional burden. It is better to choose the route in advance, excluding bumps and steep climbs.
You should not drive too fast - 60 km/h will be enough. Driving in high gears and under tension is unacceptable. Loads should be dosed: deceleration-acceleration. The gear must be selected correctly so that the power unit operates at medium speeds. These actions will give the piston rings the opportunity to get used to them, because even the highest quality grinding does not smooth out irregularities as much as rolling in does.
Tips for breaking in a two-stroke scooter:
To reduce the break-in time and the number of problems, I advise you to do this: 1. Buy synthetic oil (good, for example, Motul 2T800) 1 liter.
2. Drain the factory oil from the oil tank, pour 750 grams of synthetic oil into it.
3. We buy gasoline A95 Euro. We pour 10 liters and add 150 grams of synthetic oil. Shake thoroughly and leave for an hour to dissolve.
4. Drain the factory gasoline from the gas tank and pour in our mixture of gasoline and oil.
Before installing new rings
Before you start work, you need to get everything you need. The operation will require wrenches, sockets, preferably with a ratchet, a torque wrench and a piston ring puller.
When choosing a new set at an auto parts store, you should pay attention to both the appearance of the packaging and the rings themselves.
The packaging must contain complete information about them, namely: who the manufacturer is, what they are made of, etc. The rings must also have markings indicating the top side, they themselves must not have any flaws, in addition, there must be There should be instructions that describe the correct installation of the piston rings.
If the seller claims that small defects will rub off, he is openly lying, trying to sell substandard goods, it is better to refuse such a purchase, since the money will be wasted.
Thermal clearance requirements
Functional requirements for thermal clearance include:
- Heat removal from the piston at the moment of ignition of the mixture. Otherwise, the piston will burn out under the temperature of the combustion chamber.
- Function of sealing the piston space. The resulting pressure should evenly press the rings against the cylinder walls. Achieving such touch requires setting the correct distance.
- Requirements for oil scraper discs responsible for supplying the required amount of lubricant. Compliance with this rule keeps oil and gasoline consumption at the level of factory standards.
Options
Set gaps on rings
The value comes from the fact that exhaust gases act on the rings from the inside of the groove, pressing them against the wall. The coordinated functioning of compression and oil scraper rings allows for complete combustion of the mixture. This depends on how they are placed in the piston groove.
Therefore, a small value between the ends after warming up will lead to scuffing of the cylinder mirror.
The first ring on top (compression), as loaded from alloy cast iron, is sprayed with chromium. The porous coating of this metal is capable of holding the required mass of engine oil.
Plasma coating of a layer of molybdenum on the rings promotes wear resistance and low friction with the cylinder.
Memo
The lock on the separator is painted blue
When choosing a repair size, you need to be guided by the product designation, including the engine model, kit number, product size. Additionally, the markings, which are located in a certain place of the product (close to the end), are checked. Expansion springs with a ground surface are carefully considered.
If the engine smokes after replacing the rings
Using the Skoda Octavia 2010 as an example, we can consider the case of smoke. Even if you select original rings for the vehicle, problems may occur. Situations occur under various circumstances:
- during heavy loads;
- sudden rise;
- traction force;
- acceleration
If you look at the original Skoda rings, you can see that they were made with small holes. Some rush to turn to a turner to have the elements knocked out on a workbench - to make grooves.
In fact, it is necessary to understand the essence of the problem and inspect the rings. In ideal condition, they should be rigid and fit tightly to the cylinder.
- nozzle replacement;
- change of linings;
- checking the video.
When replacing rings, specialists often make mistakes:
- constriction;
- use of non-original spare parts;
- chain change;
- pulley clamp;
- crankshaft rotation;
- low quality tool.
If you turn to a non-professional, the driver will definitely be faced with ordinary rings, but they do not always fit in shape, and there are often problems with strength. Inexperienced specialists try to tighten the knots as much as possible. And since a regular thread is used, it is easy to tear off.
How long to run an engine after a major overhaul?
How long it takes to run-in after an engine overhaul depends on the test method. An incorrectly carried out test leads to jamming of the motor on the first day. To avoid breakdowns, you need to act carefully and follow the prescribed inspection regime.
On average, the grinding-in of internal combustion engine parts lasts 3000 - 8000 km. You can determine the readiness of the engine by its responsiveness and torque: after pressing the gas pedal, the car cheerfully takes off and confidently accelerates at full speed.