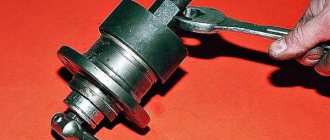
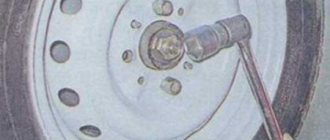
The question of how to unscrew the hub nut of a VAZ 2110 rarely arises, but most often the word “difficult” is heard in the answers, and this is not by chance. It turns out that sometimes you have to make titanic physical efforts to perform the necessary manipulations. To solve the problem of how to unscrew the VAZ 2110 hub nut, some car enthusiasts have thought of using bold and unusual dismantling methods. And it turns out there are a great many extraordinary approaches to repair!
VAZ 2110
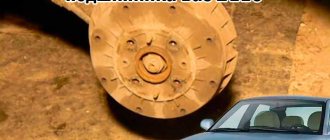
Where is the hub nut seat?
If repair work is carried out in exceptional cases, then the question of how to unscrew the VAZ 2110 hub nut most often arises among newcomers to the automotive world, and they will also have to figure out where this part is located and why it gets damaged. Let us note that it is really rare that during the process of repairing the chassis of a car, craftsmen pay attention to the condition of the wheel bearing, because many believe that the product does not require special repairs and monitoring. And such a forgotten and abandoned element, at the moment of deciding how to unscrew the hub nut of a VAZ 2110, is responsible for all its grievances and does not want to voluntarily unscrew, it seems that all the fasteners are tightly stuck. And then every second person thinks where to get the incredible physical strength to turn the required nut. It is also very important to use the right tools. The choice will fall on false or weak helpers, then there are two options - they will either be broken or useless. So what is better to choose in terms of tools?
Hub nut seat
Stage-by-stage work
Replacing the front wheel bearing, as mentioned earlier, should be carried out in stages:
- The VAZ-2110 needs to be put in 1st gear;
- stops are placed under the wheels of vehicles so that the car remains in a constant position;
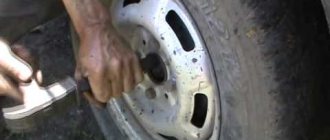
- Use a wrench to unscrew the wheel fastenings in the form of bolts and nuts. If the VAZ-2110 has alloy wheels, then the wheels must be removed completely. It is recommended to use the help of an assistant when turning the nuts that act as a lock for the front car hub, since unscrewing the part is much easier if you hold the brake pedal;
- use a reliable screwdriver to press out the calipers;
- using a 17 key, unscrew the calipers, which are fixed to the steering knuckles. To avoid damaging the caliper when unscrewing, this element should be tied to the brake hose;
- By using the car key, the VAZ-2110 brake discs are unscrewed from the hub itself.
How to unscrew the VAZ 2110 hub nut and what tools are needed
- You will definitely need a socket wrench with an existing 3/4 inch driver. Tested by many car enthusiasts who have learned in practice how to unscrew the hub nut of a VAZ 2110.
Socket wrench with existing wrench - A set of powerful screwdrivers, they are necessary for “tapping”, “implementing” into narrow parts of fastener seats and for working with a nut.
Screwdrivers - An iron pipe that can act as a support and a simple lever. As they say, during the repair process you will have to remember your physics lessons.
Iron pipe - Buy WD-40 lubricant, it can make the master’s work at least a little easier and give at least a little hope that everything will pass quickly and how to unscrew the VAZ 2110 hub nut will become clear after a successfully completed work process.
WD-40 lubricant - To complete the process and its completion, it is recommended to also prepare sandpaper, a powerful hammer, perhaps kerosene, water and other liquids will help make unscrewing easier.
Sandpaper
Signs of need for replacement and diagnosis
In addition to the hum in the area of the front wheel, other signs may indicate the need to replace the bearing on the VAZ 2110. Even inexperienced drivers will notice deviations from the norm while the car is moving. The change in the trajectory of traffic around turns will be clearly visible. Due to the uneven ride, the front of the car will sway from side to side.
This is interesting: How to tighten or replace the alternator belt
To further check the condition of the wheel bearing, release the steering wheel on a level road . If the car skids to one side or the other, the part is worn out and requires replacement. You should not delay such repairs, since if the bearing is destroyed while driving at high speed, you will get an emergency situation and an uncontrolled skid, which can lead to an accident.
Advice: Bearing destruction is caused not only by a long period of operation of the machine, but also by poor quality of roads. At races, the likelihood of damage to a part increases significantly; a particularly dangerous situation arises when purchasing low-quality spare parts from China.
Reasons why you should start unscrewing the VAZ 2110 hub nut
The main reason is a malfunction of the car's chassis, and delays are not welcome. The problems that arise are caused by problems with the hub nut. If it is damaged, the car will move from side to side while driving, and the wheel will seem to hold weakly and become loose.
Imagine that suddenly a situation arose: on the road, without special conditions, you had to change a tire, everything was done in a hurry, so mistakes were made. What could this lead to? Threads are broken and bolts are loosened, that is, the fastenings become unusable, which means you need to think about how to tighten the VAZ 2110 hub nut and whether it’s worth buying a new one.
Wheel replacement
Initially, you will need to remove the bearing from the hub and take a good look at it. We check that if it calmly returns to its place and fits tightly, then the part does not need to be changed. But sometimes the situation is the opposite, all the components are worn out, so there is play, and it is undesirable at the location of the bearing, then the issue of how to tighten the VAZ 2110 hub nut cannot be solved; more decisive actions will have to be taken. Under no circumstances should you drive a car with a loose wheel.
Failures in the chassis of the car, design and fastening of the hub
Experienced motorists can easily diagnose problems with the car's chassis. These include:
- body swaying when turning or braking;
- uneven abrasion of the tire surface;
- easy compression of shock absorbers or leakage;
- constant deviation of the car to the side from straight-line movement;
- increased vibration;
- extraneous sounds when driving.
The causes of these phenomena are most often unacceptable wear of suspension parts, poor mounting of shock absorbers, and incorrect wheel alignment. Broken joints and deformation of at least one lever can also cause trouble. The front wheel hub of the VAZ 2110 is most susceptible to failure in front-wheel drive cars, to which this model belongs.
Most cars with front-wheel drive have independent telescopic front suspension and hydraulic shock absorbers with springs. Stabilizers are located on the lower wishbones. The hub itself is attached to the lower arm through a ball joint with a nut and to the shock absorber with bolts. It communicates with the steering rod through the steering knuckle.
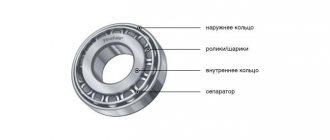
The part is cast from durable steel, and inside it there is a bearing, which is the most vulnerable element. Its failure is indicated by extraneous noise when moving. The brake disc and brake caliper with pads are also attached to the hub. Unlike the rear hub, the front hub is more complex, so repairing it requires more care and skill.
Nuances
In the process of reassembling the entire node, you must proceed as follows:
- Press in the bearings;
- Install retaining rings;
- Collect your fists;
- Mount new bearing components on them;
- Mount the assembly on the hub;
- Using a mandrel, you need to drive the hubs until they stop.
You can use a puller or press to press in bearing parts. But in no case should you use a hammer, since in this case cracking of the component will inevitably occur. The forces should be directed to the outer rings.
It should also be noted that double-row ball bearings are installed in the hubs, which do not require lubrication and adjustment measures.
Due to the lack of such care, the VAZ 2110 bearings will certainly be destroyed when removed from the hub, so this measure should only be resorted to for a complete replacement.
Causes and symptoms of failure
The causes of failure can be very diverse, but basically they are all related to loads, for example:
- Operating a vehicle on bad roads or off-road;
- Transportation of heavy loads;
- Aggressive car handling with sharp acceleration and braking.
But there are often cases when breakdowns occur due to low-quality spare parts. For example, the previous owner of the car decided to save money before selling it and installed not the original, but a Chinese analog wheel bearing, and they contain the following defects:
- Insufficient amount of lubricant inside the bearing. Because of this, in the future it simply dries out and begins to wear off.
- Faulty rollers or bearing balls. Parts may not be made according to the stated characteristics, but from softer metals, which is why deformation occurs under normal load.
Useful : Prices for front wheel bearings VAZ 2114 (9 manufacturers)
Checking the condition of the hub
The condition of the hub is checked for mechanical damage, cracks and wear. If defects are found, the hub will have to be replaced.
There are 2 main ways to check the hub, after which you should decide whether it needs to be changed or whether it is enough to change the bearing itself:
- Checking planes . We install the VAZ 2110 on a flat section of the road, grab the top of the wheel and swing it with strong jerks. If you hear metallic clicks, then the problem is in the bearing.
- Runout check . You need to remove the wheel, take a screwdriver and a wrench with a head. We rest the tip of the screwdriver on the caliper bracket, and use the wrench to turn the hub. If the sting leaves 2 arc scratches on the brake disc, then the hub needs to be replaced.
In VAZ 2110 cars with an anti-lock braking system, the condition of the sensor gear rotor is checked.
How to replace the front wheel bearing
Before starting repairs, it is better to put the car in 1st gear and install small supports under the wheels. For more comfortable work, you will need an inspection hole, since it is not easy to get to some of the mechanism’s fastenings. From the tool you need to prepare:
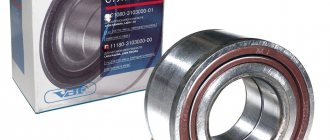
- A puller to remove the bearing itself from the assembly.
- A cut of a pipe of a certain diameter, with the help of which the hub will be knocked out.
- Socket wrenches for 17 and 19.
- 30mm head with a good wrench.
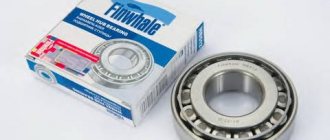
Don't forget to purchase new bearings from the store. It is better to give preference to original spare parts that meet all quality standards.
Methods and options
Let's start the preparatory work. They are necessary in any situation.
- Slightly press out the wheel bolts.
- Using a 30 mm wrench, unscrew the bearing nut. For alloy wheels you will need to remove the front wheel completely.
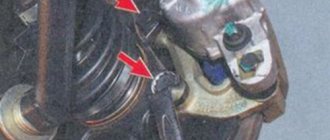
Press the wheel bolt to gain access to the caliper - We press the caliper using a screwdriver and unscrew it from the front knuckle.
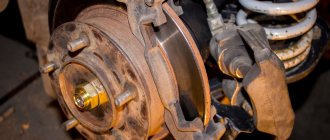
Using a screwdriver, press the caliper and remove it - Next, remove the brake disc from the hub.
Further replacement work can take place in several ways. Each of them has its own advantages and disadvantages. Choose the one that is best for you based on the availability of the necessary equipment and tools.
- Replacing the bearing without dismantling the steering knuckle. Its advantage is that we do not need to remove the camber adjustment bolt. But at the same time, the process itself will not be entirely convenient, and you cannot do without a good inspection hole. To knock out the hub and remove the bearing itself, you will also have to put in more effort. This method is often chosen by experienced mechanics to save some time. It requires good practical skills.
- The second method is more convenient and is suitable even for beginners. Unlike the first, the camber adjustment will be disrupted and additional adjustment will be required after replacing the front wheel bearing.
We make notches for further camber adjustment - The third method will take you the most time; it involves completely dismantling the front strut and replacing the bearing using a vice. To do this, you must first unpress the steering tip and remove the bolts securing the mechanism to the body.
This is interesting: Compensation under OSAGO
We will dwell in more detail on the second method, since it is best suited for novice car enthusiasts:
- remove the steering knuckle by first unscrewing the two bolts on the stand and the two bolts securing the lower ball joint;
Remove the steering knuckle by unscrewing the bolts - Using a pipe of the required diameter, we knock the hub itself out of the bearing;
We knock out the bearing with a pipe of suitable diameter - remove the bearing using a vice;
- We clean the seat from dirt and old grease;
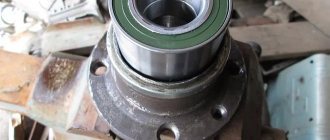
- press the bearing in and secure the retaining ring;
Press in the bearing and install the retaining ring - We fix the steering knuckle together with the new part on the hub;
- Further assembly is carried out in reverse order.
Tip: Don't forget to press down the flange of the nut after assembly is complete.
