How to remove the windshield on a VAZ 2109, glass removal and installation
How to remove and install rear window
Removing the rear window is similar to the front fragment, only removing the rubber seal should begin not from the middle, but from the edges in the upper part. After the tape is pulled out along the top layer, the auto glass is removed in or out. The rear window is installed on a VAZ model 2109 using a rope or cord. Algorithm of actions:
- The rope is inserted into the frame to the middle, into the groove, which will be closer to the outer glass part.
- On the other side, a similar operation is carried out. The rope cords must cross. Drowning into the groove until it stops.
- The auto glass is placed in the opening. The structure is slightly pressed: not inward, but downward.
The finish is the removal of the rope. It should not be pulled vertically, but horizontally. The seal is being installed. It should first be wetted so that it becomes soft. After drying, the material will harden and fix the edges of the glass.
Required Tools
First you need to select a new canvas. Craftsmen recommend choosing double glass with a polymer layer or single-layer tempered stalinite. Required equipment and related materials:
- nylon cord - about 5 meters;
- rubber hammer;
- slotted screwdriver;
- sealant;
- anti-corrosion agent and primer.
Preparation involves choosing a comfortable room for work; you also need to select equipment, purchase new glass and dismantle the old fragment.
You can put the old seal on the glass or purchase a new element to make the job easier.
Installing new glass
Let's figure out how to correctly insert the rear window on a VAZ- 2109 . You will need strong rope and a screwdriver. Insert the center of the cord into the middle of the upper half of the seal.
Subscribe to our feeds on social networks such as. VKontakte, Instagram. Yandex Zen, and Telegram: all the most interesting automotive events collected in one place.
Removing the seal
Before installing a new one, the old windshield of the VAZ 2109 must be carefully dismantled. To do the replacement yourself, you will need a slotted screwdriver with a slot width of 10–12 mm. If you plan to reuse the seal, make sure the screwdriver is relatively dull so as not to injure its blade. Before replacing the windshield, it is recommended to remove the windshield wipers. Even bent, they create interference.
READ Changing the oil in the Renault Symbol automatic transmission
Start dismantling the windshield on a VAZ 2109 from inside the cabin, from the middle of the top edge. In profile, the seal resembles the letter “H”. Between the lower halves of the legs of this letter is the edge of the windshield, and between the upper halves of the legs is the edge of the frame, smoothly turning into the roof of the body. You must carefully press the upper leg of the letter “H” closest to you and push it out of the body. Both legs of the upper part of the seal profile will be on the outside of the frame, and you will see the exposed metal of the edge of this frame.
After pushing out the first section of the seal, expand the area step by step. The most difficult step is the first, then the seal goes out almost without resistance. With a little luck, you can push the edge of the seal out without damage. Expand the removal area gradually in both directions from the center until the upper corners of the windshield are free.
If you are replacing the side glass of a VAZ 2109 located behind the rear door, start from the middle of the long side.
Replacing the rear side glass on a VAZ 2101-VAZ 2107
Welcome! The rear side window of a car - it can break in different situations, for example, it can break if you hit it with a ball or if you just slam the door hard, besides, there are a lot of thieves and different people walking along the streets of our cities, trying to take possession of anything strangers stealing it from the first car they come across, but in order to get into the car they basically break its windows, or if a more experienced person, then use a special hook and sleight of hand to open the car.
Note! In order to change the side window of a car door, you will need tools with which you will remove parts to get to it, these tools include: A set of wrenches and two different types of screwdrivers!
Note! We will give you advice for the future so that you then know what to do in that situation when a crack appears in the glass, namely, have you ever noticed that after a crack appears on the glass, over time it goes a little further until it reaches the end of the glass, so So that this doesn’t happen and you don’t have to immediately go to a service center or garage and replace the glass with a new one, you can extend the life of the old glass, to do this, using a cutter used to cut glass, make a strip across which the previously formed crack will rest against, and thereby She won’t go any further all over the glass!
How to replace the rear side glass on a VAZ 2101-VAZ 2107?
Removal: 1) At the beginning of the operation itself, you will need to get to the window lift mechanism, because in order to remove the glass itself from the car, you must first loosen the window lift cable and remove the glass groove, but in order to loosen the cable and remove the groove, you first need to get to them by removing To do this, cover the trim from the car door on which you are replacing the glass. (For information on how to remove the trim from the door, see the article using the example of removing the trim from the front door; you can see this example in the article called: “Replacing the front glass on a car”, see points 1-4)
Note! Before you start removing the trim, unscrew the button that locks the car door by hand or using a screwdriver (see photo 1), and when the button is unscrewed and removed, unscrew the screw that secures the window sill trim in the front part (see photo 2 ) if you have it of course!
2) Then, when the trim is removed from the door, you will need to remove the protective film, which you may or may not have at all, this film covers the entire window lifter mechanism from dirt getting on it, and this protective film is attached to the adhesive tape by peeling it off , you can easily remove the film from the car door.
3) Now proceed to removing the window sill, there are only four plastic holders that secure it, disconnect all these holders from the door using a screwdriver and then you can remove the window sill from the car door.
4) Next you will need to remove the rear glass groove, to do this, first disconnect the plastic clamp from it (It fits into the hole) that attaches the rod to the groove and after the clamp is disconnected (see photo 1), pick up a wrench and use it to completely unscrew the nut and bolt that secure the rear channel to the car door and then remove it (see photo 2).
5) After removing the groove, insert a handle with which you can lower and raise the window of the car, but only the trim and rosette of this handle do not need to be installed, just put one handle in its place and, holding the glass with your hand, lower it to the very bottom until it stops .
6) Next, unscrew the two screws that secure the pressure plate (Indicated by the red arrow), which in turn firmly fixes the cable and does not allow it to go anywhere.
7) When the screws securing the plate are unscrewed and the plate itself is removed, use a wrench to slightly loosen the nut that secures the tension roller (see photo 1), and after loosening the roller will move and thereby the cable itself will weaken a little; after the cable has loosened, you will need to remove it from the tension roller and from the lower roller which is indicated by the red arrow.
 Now use a screwdriver to pry up the chrome inner glass trim and then remove it so that it does not interfere with the removal of the glass; you need to remove it through the top of the car door.
9) And to finish removing the glass, first unscrew the screw that secures the fixed glass to the car door (see photo 1), then completely or just a little (at your discretion) remove the upper seal of the sliding window as shown in photo 2, then tilt the fixed glass forward and remove it and finally lift the sliding glass to the top and tilt it inward, also remove it from the car door (see photo 4).
Installation: Installation of the new glass and all previously removed parts is carried out in their place in the reverse order of removal, but there is only one But! Namely, after installing the new glass and assembling the entire mechanism (assembling the mechanism includes putting the cable on the tension roller, installing the rear groove, etc.), check how your glass works, how it rises, if necessary, adjust the position of the glass groove , and also tighten the cable by moving the tension roller tighter.
READ Replacement of Volkswagen T5 rear brake pads
Troubleshooting
If a key or silumin rod breaks, you should not immediately buy a new block with a handle. On sale you can find special repair kits for VAZ 2108-099 door handles, which contain these parts in 2 copies.
This way you will save money and easily change the key yourself by removing the handle using the following sequence of actions:
- Remove the decorative panel.
- Disconnect the rod connecting it to the locking device from the handle mechanism.
- With the glass fully up, unscrew the 2 fastenings of the handle to the door card.
- Remove the handle, replace the parts and put it back.
If the rod is disconnected, then you need to remove the inner lining and put it in place, as described above. Using the moment when the facing panel is removed, check what caused the disconnection of this rod so that history does not repeat itself when the door is slammed.
Malfunctions of the locking mechanism can only be eliminated by removing it. In a situation where the device has a lot of wear, as happens on the driver and front passenger doors, it is recommended to replace the lock with a new one.
After installing it in place, adjustment will be required to ensure precise alignment of the locking parts. To adjust, the lock will have to be fixed in different positions, achieving the optimal one.
Replacing the rear window on a VAZ-2109
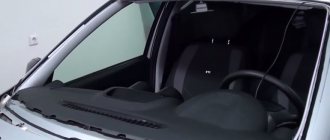
The rear window of a car is a real assistant for the person behind the wheel. It is through it that you can see everything that is happening from behind and correctly assess the situation. But glass is a very fragile material and if a stone or other heavy object hits it, it can crack or crumble into many tiny pieces. As a temporary solution, you can seal the opening with thick film. But this, of course, is not a solution. In the future, the rear window still needs to be replaced.
Many car enthusiasts put off this work until later, fearing serious costs. In fact, all that is needed is to find money to buy new glass and glue. The rest of the work can be done with your own hands within 1-2 hours.
Replacing the rear window on a VAZ-2109
After this, prepare the necessary tools. To work, you will need new glass (this is logical), special glue (the best option is a 2-component composition), a new rubber seal (you will have to throw away the old one), a string for cutting glass, special suction cups (necessary for holding and lifting the glass). In addition, you will need tape, a knife, sandpaper and solvent.
It is advisable to work in a well-lit room with sufficient space for maneuver. If the weather is good outside, you can set up right next to the garage. The help of a partner when replacing the rear window is very desirable. It is extremely difficult to cope with such work on your own.
So, after carrying out the preparatory activities, you can proceed directly to the work. Here you need to go through three stages:
- Remove old glass. This work is done in the following sequence:
When performing work, be very careful and try not to touch the car body (otherwise you will have to restore it as well).
- Prepare the opening for installing new glass
Once the old glass has been removed, do not rush to immediately “sculpt” a new one. It is advisable to perform several useful manipulations:
Before installing the lock, it is advisable to pull it a little. Otherwise, its length may not be enough. The wedge is installed as follows. Install the long section first, followed by the short section. If some part of the wedge remains unused, then it is better to cut it off. Otherwise, it will interfere with further work.
When might it be necessary to install new glass? There are two options here - the old glass is damaged or you decide to apply tint. In the first case, everything is clear - you can’t do without a replacement. If we are talking about tinting, then it is better to do this work without dismantling. As practice shows, it is almost impossible to remove the rear window without damage.
Before installation, prepare a thick piece of rope. The length should be such that the rope completely encircles all sides of the rear window. Pay special attention to the quality of the rope - it should be tight. If it breaks during work, it will be extremely difficult to remove the torn piece from the seal.
So, the sequence of actions is as follows:
The final shrinkage of the glass occurs within 3-4 days. This is facilitated by vibrations that are inevitable during movement.
That's all. With the help of such simple instructions, you can install the rear window on a VAZ- 2109 and save a considerable amount. Good luck.
Replacing the windshield on VAZ 2108, VAZ 2109, VAZ 21099
Welcome! Most people who periodically use their car have their windshield deformed from time to time, most often this happens from a stone hitting it, a bird flying past, or an accident. The windshield of a car plays a very important role; it creates additional rigidity for the car body, which has a very positive effect in the event of a collision.
Note! It is not recommended to leave a car without the glass removed for a very long time, because if the windshield is missing for a long time, the car body may become distorted; of course, you won’t see anything by eye, but this will make itself felt when installing a new glass!
What other glasses can be replaced using these instructions? Using this article, you can replace other fixed windows on a Samara family car in exactly the same way, since their replacement is carried out in the same way; fixed windows include:
Types of lambo doors
Lambo is a guillotine type door hinge design. The main feature of doors with this mechanism is that they open vertically. It's no secret that they were first installed on Lamborghini. Scissor doors are divided into several types:
- doors that open at 130°. The main advantage of this type is comfortable entry into the car. It is least suitable for the VAZ 2109, but with certain skills and a great desire nothing is impossible, so tuning masters have every chance of installing such doors on a domestic car;
- VLS is a classic design. Its principle of operation is that when opened, the doors initially swing open in a horizontal plane and then rise upward. This mechanism frees the frame and front door pillar;
- doors that are a hybrid of a conventional design and a guillotine one. They have the ability to open not only vertically, but also in a more familiar way (horizontally). They are the ones that are more suitable for the VAZ 2109 than others.
How to replace the windshield, also known as the windshield, on a VAZ 2108-VAZ 21099?
Note! The glass on the Samara family car is secured with a rubber seal and therefore it is much easier to remove, unlike more modern cars, for example the VAZ 2110, on which the windshield is directly glued into the body!
1) First, in order to successfully remove the old windshield, remove the wipers from the car. (How to remove wipers, read the article: “Replacing windshield wipers”)
2) Now use a screwdriver to unscrew the screws that secure the side pads on both sides.
4) Now tuck the edges of the rubber glass seal behind the body.
Note! After the edges are tucked in, press the upper corners of the glass from the interior and gently push it out. The blown-out windshield should be taken care of by an assistant standing outside!
Note! Before installing new glass, inspect the rubber seal for defects and, if possible, replace it with a new one. But installing a new seal on the glass will be much more difficult, because as a rule, the old seal is more elastic, and therefore can be installed on the glass much easier!
1) At the beginning of the operation, rinse the grooves of the rubber seal with water and then blow it with compressed air, thereby drying it completely from water.
2) After this, put the rubber seal on the windshield.
Note! After the seal is installed, lubricate the seal groove with WD-40 or something similar, or with soapy water!
3) Then use a strong cord or rope, and then, by hand or using a screwdriver, insert it all the way strictly into the first groove of the seal, which is located closer to the inside of the glass. (If you don’t understand which groove we’re talking about, then play the video below, and you’ll find out everything in detail)
Note! When the rope is completely recessed into the first groove, be sure to close it so that the ends of the rope overlap at the very bottom of the glass!
4) Next, install the glass together with the rubber seal in the opening in its place. When installing, make sure that the ends of the rope are inside the cabin.
5) Next, ask an assistant to lightly press the glass from the outside to the opening, while you gradually pull the rope out of the seal from the inside.
Note! When you begin to pull the rope, make sure that the edge of the seal is pulled over the edge of the opening. For greater confidence, you should press with your hand from the outside the place where you are pulling the rope from the inside!
Additional video materials: Removing the windshield from the car is not difficult, but installing new glass in this place will require some effort. Below we have prepared a video that describes in detail the entire process of installing new glass.
READ Honda Accord Rear Caliper Repair
Important! To avoid various injuries, it is best to remove the windshield together with an assistant!
Door opening method
If the VAZ-2109 door does not open from any side, then the cause of the breakdown is difficult to determine, since there is absolutely no access to the lock mechanism.
A somewhat simplified version of the breakdown occurs when the door does not slam shut completely and gets stuck in that position. Then it is possible to reach the latch from the outside with a sharp object.
To open a jammed door, you must first perform the following steps:
- When the sash is not completely slammed, try to get to the locking device using a steel flat ruler. It may be possible to open it in a similar way to conventional door locks with a latch.
- If the door is completely closed, try to move it to the slightly open position to gain access to the lock. To do this, try pressing the inside and outside handles together or alternately, while simultaneously pushing the door from the inside.
- Try opening the back door with a helper, who will press and release it to get it into position while you try to open the lock.
When simple means do not produce results, the door will have to be opened from inside the cabin, which will require removing its trim.
In practice, this is not easy to do, because the casing is pressed by the sash and it is difficult to pull it out without damage. But there is still no other way out: it is better to damage the inner panel than to mutilate the door itself.
To dismantle the decorative panel, you need to unscrew the armrest handle with a screwdriver, and then the storage shelf located at the bottom of the door card. Then the button that secures the lock from above is unscrewed and removed. Lastly, the window lifter handle and the opening handle frame are removed. Now you need to carefully separate the lining from the body using a pair of flathead screwdrivers and another suitable tool. You may be able to remove the trim without visible damage.
When the decorative panel is removed, access to the lock mechanism from the inside opens, although getting to it is inconvenient. Immediately check whether the rod running from the handle to the lock has fallen off. This is a fairly common malfunction that can be fixed with little effort. Put the rod in place and open the door.
If there are no visible reasons for the breakdown, simply try to open the door from the inside by working on the mechanism with various tools. If necessary, enlist the services of an assistant who will press or pull the door from the outside. Experience shows that such procedures for opening jammed doors can take a lot of time, so you will have to be patient.
How to insert a rear window
- Rear view glass for a car, screwdriver, rubber seal, elastic lock, 2 m cord.
The rear window for a car is selected strictly according to the modification of the car, since the shape of such glass is different for all cars. Before you begin, inspect the new rear view glass for chips, cracks, or other defects. First, you need to remove the old glass to replace it with a new one. Take a flat head screwdriver. This tip will help you pry off the seal on the inside and outside of the glass, which all VAZ cars are equipped with.
Using a screwdriver, first push out the outer seal around the entire perimeter, then the inner one. This way you will free the rear window from its rubber support. Then you need to squeeze it out. Push the glass with force from the inside; on the other side, someone should support it so that it does not fall and break.
If the glass does not squeeze out, it means that you have not bent the rubber seal on all sides well enough. Repeat the procedure of moving the seal away with a screwdriver again around the entire perimeter and try to squeeze out the glass again.
Apply new rubber seal around the entire perimeter of the rear window. Insert the elastic lock into the corresponding groove. To make it different from a regular seal, it is produced shiny. Now take a two-meter cord. It must be placed on the top and sides of the seal. Do not lay the cord below. Both ends of the cord of the same length should be in your hands.
Carefully take the new glass with both hands and insert it into the lower groove on the seal, as if rubbing it into it. Do not press hard, but confidently on the glass (it is better to do this with someone together), while pulling the cord at both ends, first on one side, then on the other. In this case, the cord will help the seal to disconnect. In the end, you will have a cord in your hands and the glass will accurately fit into its place in the grooves of the rubber seal.
- how to replace rear window in 2017
The most gentle options
You should use a rope if your car has mushroom-shaped internal locking buttons. A not too thick twine about a meter long will suit you. At worst, take a lace from your shoe. The main thing is that it reaches with a margin to the bottom of the window.
At one end of the twine, make a loose loop. Its size should be approximately twice the diameter of the lever.
Next, the driver's door needs to be pressed away from the body in the upper right corner. We push the prepared noose into the resulting gap and throw it on the button. It is unlikely that you will succeed the first time, but sooner or later, with due diligence and patience, everything will work out.
You can also use a piece of fairly stiff wire or an old electrode. A hook is made at one end of it. Further:
- move the glass seal on the driver's door directly opposite the lock button to the side;
- a hook is inserted inside;
- they put him under traction;
- they grab it and pull it up.
It is not difficult to open a closed car with a student's ruler. Very thin steel would be more suitable. The plastic one will most likely break and part of it will remain inside the door. It is inserted in the center of the glass - in this place there is a lock rod, which should be pressed. Before doing this, the door is pressed more tightly against the body of the car, leaning with the whole body - this way the bolt will move easier.
Replacing the rear window of a VAZ
If you have ever watched a specialist change the glass on a VAZ, no matter the rear or windshield, changing the rear window yourself will not be difficult. And if you’ve never seen it, that’s okay too.
By replacing the glass yourself, you will acquire a skill that will be useful in the future. For example, your friend will ask you to change the glass. And you will do this to him out of a friendly disposition. If a friend or stranger asks you, you can even earn money.
Removing and replacing the windshield on a VAZ 2109
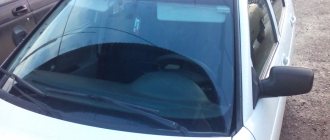
To change the windshield on a VAZ 2109 , you need to purchase a new transparent element, prepare equipment, study the instructions for dismantling the old blade and installing a new one. Replacement of this automobile element will be required after an accident, as well as in the presence of numerous microcracks or deformation of the body part. to insert glass with your own hands, if you take into account the main nuances of the process.
Removing the seal
Removal of the sealing element will be required when replacing the windshield frame or the most transparent part. Removal is carried out from the passenger compartment, strictly according to the instructions:
- The windshield wipers are removed.
- Use a slotted screwdriver with a width of 10–12 mm to pry off the seal. The tool should be used carefully so as not to damage the rubberized material if you plan to use it in the future. You should start from the middle of the top edge. By pressing the top part with a screwdriver, the glass can be easily removed.
- When part of the sealing fragment is removed, the auto glass will already be movable. It is necessary to expand the area between the metal and the seal.
When you manage to remove most of the rubber, it will be possible to pull out the glass structure.
Possible problems
Sometimes, after installing a new lock on a VAZ 2109, the door may not close. The reason is due to errors made during assembly. Most often, people forget to put on the lock rod. In this situation, the lock simply will not open. Remove the lock and install the rod in place. The lock may also need to be adjusted. This is done using a latch. It is loosened and the lock is moved in the desired direction, achieving optimal performance. Sometimes you have to lengthen or shorten the pull. Your task is to choose its length most optimally. Conclusion
. If all stages of the work are carried out carefully and correctly, then you will not experience any difficulties. Replacing the door lock cylinder on a VAZ 2109 in this case will happen quite quickly. Once you have done this work, you will be able to repeat it much faster. The best option is to install new parts. Otherwise, you will soon have to disassemble the door again.
Replacement principle
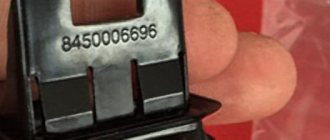
When replacing the windshield on a VAZ 2109 , it is necessary to take into account its dimensions. When purchasing, it is important to compare the auto glass article number with the data indicated on the factory element. The size of the frontal fragment is standard, as on all VAZ models. Rules and nuances of replacement:
- The rubber seal should fit tightly in all corners, and the structure itself should fit into the side, top and bottom sides of the frame.
- Installation of glass requires the installation of an internal lock. The locking mechanism is an important element during installation; it is shaped like a wedge. It needs to be installed in the center, but the wires should be routed around the entire perimeter.
- Careful removal of the structure is required first. It is important not to damage the frame.
- If the size is slightly off, it can be easily corrected with a rubber mallet.
- Anti-corrosion treatment of the element and frame is also necessary. It is recommended to use a rust modifier and primer. After drying, sealant is applied to the frame, then sealing material is installed. The external and internal grooves of the frame are lubricated.
The length of the nylon cord is equal to the size of the car glass. It is better to purchase this material with a diameter of at least 4 mm. The quality of the cord is checked by touch; it must have a slippery surface. The nylon fits into the grooves of the seal.
Removing old glass
To understand how to remove a VAZ windshield, you should refer to such a device as glass holders. A device with vacuum suction cups will allow you to carry out the process in an accelerated mode. This tool is installed on the sides of the glass. After fixation, a jerk is made upward. You can't do this without an assistant. If the glass holder is not found, a screwdriver will help.
Using a slotted screwdriver, the remaining sealant is pushed out. An assistant must hold the glass to prevent it from falling out of the frame. If the work is carried out alone, then you can play it safe by laying soft material on the hood of the car. Then the glass is pushed out of the cabin.
Preparing the installation kit
Before installation, a number of preliminary works need to be done.
| Stages | Actions |
| First of all, try on the new windshield. | If the fit is not tight, eliminate minor discrepancies in the geometry with light blows of a rubber hammer. If you use a regular steel hammer for straightening, be very careful; strike through a piece of thick rubber or elastic polymer material. |
| After eliminating geometric discrepancies, the frame should be inspected for corrosion. | Treat areas with traces of corrosion with a rust modifier and prime. |
| Prepare the sealant. | Apply a thin layer of sealant to the well-cleaned and dried surface of the internal (glass) groove. Do not use quick-drying sealants. Throughout the entire process of installation and shrinkage, which lasts two to three days, the sealant must maintain viscosity. |
| Install the seal on the new glass. | Generously lubricate the outer (frame) groove with liquid sealant. Use the groove closest to the car interior; this is where the edge of the frame should fit. |
To install glass with a seal into the frame, you will need 4.5 meters of durable nylon cord. The length is determined by the size of the windshield. You need to add 50–70 cm to the perimeter of the frame. The size of the rear window and the size of the side glass are taken into account in the same way. The cord should have a slippery surface and a diameter of 4 mm.
It should be placed in the outer groove of the seal, starting from the middle of the cord and from the center of the top of the frame groove. The cord should be laid symmetrically to the right and left from the center of the upper groove, down along the left and right edges of the element and along the lower edge of the part from the edges to the center. In the middle of the lower groove, the mounting cord should overlap, one end over the other.
The cord should have free ends that should not be tucked into the groove; they are needed during installation.
Required Tools
First you need to select a new canvas. Craftsmen recommend choosing double glass with a polymer layer or single-layer tempered stalinite. Required equipment and related materials:
- nylon cord - about 5 meters;
- rubber hammer;
- slotted screwdriver;
- sealant;
- anti-corrosion agent and primer.
Preparation involves choosing a comfortable room for work; you also need to select equipment, purchase new glass and dismantle the old fragment.
You can put the old seal on the glass or purchase a new element to make the job easier.
Sources:
https://vaz-russia.com/remont/zamena-zadnego-bokovogo-stekla-na-vaz-2101-vaz-2107.html https://ru.megasos.com/wiki/zamena-zadnego-stekla-na -vaz-2109 https://vaz-russia.com/remont-vaz-2108/zamena-lobovogo-stekla-na-vaz-2108-vaz-2109-vaz-21099.html https://autofluids.ru/remont -i-servis/kak-vstavit-zadnee-steklo.html https://infokuzov.ru/remont/steklo-lobovoe-vaz-2109