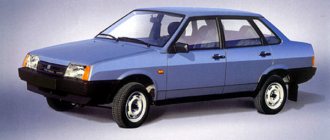
The braking system on the VAZ-2107 car is presented in the form of disc (front) and drum (rear) brakes. The design of the front and rear brakes has significant differences, so it is appropriate to consider the principle of replacing the rear brake pads on a VAZ-2107.
In principle, the rear pads have a longer lifespan than the front ones, but in any case the time comes when replacement is necessary. Often the service life of the rear pads is about 40-50 thousand km, but it all depends on the nature of the vehicle’s operation. In this material we will pay attention to how the rear brake pads of a VAZ 2107 are replaced, and what, in general, these products represent.
Appearance
Reasons for replacing pads
Braking is carried out using a special lining on the block. And when its thickness becomes less than 1.5 mm, it is necessary to replace the brake pads, the lining of which on the VAZ-2107 wears out quite quickly.
If you have any doubts about the performance of the rear brakes, it is worth checking the thickness of the lining.
The main sign of wear of this element is a squeaking noise coming from the rear of the car when you press the brake. Over time, the sound will increase in intensity to a metallic grinding sound until the gasket wears down so much that the brake stops working.
It happens that the brake pad is pulled out as soon as they suspect something is wrong, and often cracks or irregularities are found on it, which causes the element to move away from the body, which indicates the need for replacement.
It happens that the purchase of a low-quality pad is accompanied by the same signs of imperfection.
When product replacement is required
Both the front and rear wheels are characterized by the use of 4 brake pads to ensure effective braking. These products differ only in design, although the principle of operation is similar.
The rear pads of the VAZ 2107 are presented in the form of an arched steel structure, on the outer part of which a friction layer is applied. It is due to the friction of this layer against the inside of the drum that the car stops. If you do not replace the brake elements in a timely manner, this will be fraught with the development of unpredictable consequences, because the most important thing for any car is the serviceability of the braking system.
It is necessary to change the rear brake pads on a VAZ-2107 when the friction lining wears down to a thickness of less than 1.5 mm. It will not be possible to determine this fact without removing the wheel and dismantling the drum. But this is one of the main ways to determine whether the brake system is faulty. There is a second option, which is more convenient and does not require dismantling the rear wheel.
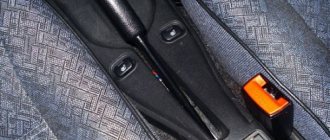
To do this, you need to listen for signs of squeaking of the rear wheels, as well as grinding and lack of braking effect, but this can lead to damage to the drum itself. You can squeeze the handbrake while standing on a slope and check that it is working properly. Of course, the cable on the handbrake may become loose, but if you tighten it and still have no effect, then it’s time to start replacing the pads.
If the rear brakes are not functioning, then it is time to change the pads. It is recommended to change them as a set on both rear wheels, since they are often worn out at the same time. What is the process of replacing rear brake pads on a VAZ-2107 will be determined further.
Features of replacing rear pads
At the beginning of the work, it should be noted that the handbrake must initially be lowered to its lowest position. This will allow you to dismantle the brake drum and thereby get to the worn parts. To begin replacing the brake pads of a VAZ 2107, it is necessary to remove the rear wheel:
- There is a drum behind the wheel, which also needs to be removed. There are no problems with this, so we move on.
- After removing the drum, it is necessary to inspect the worn pads. If the thickness of the friction lining exceeds 1.5 mm, then there is no need to replace the products. Before carrying out further work, it is necessary to clean the mechanism from dirt and dust. To do this, you can use a brush or cloth.
- If the products need to be replaced, then you need to take a screwdriver and then remove first the upper, then the lower connecting springs. If you can’t dismantle it with a screwdriver, then you should use pliers. The photo below shows the springs that should be removed.
- Next, you need to remove the clamps, which consist of a rod, a washer and a spring. These washers must be rotated 90 degrees to remove them through the slots. This is what the washers that hold the pads look like.
- Similar procedures are carried out with the second block.
- After removing the springs and clamps, the pads are removed independently.
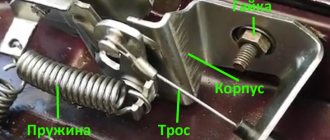
- The parking brake locking pin is straightened. The photo below shows the location of the locking pin. Now you need to unscrew the parking brake lever. This can be done using pliers. After this, the washer is removed, then the lever.
- During the dismantling process, you will have a question, what to do with the parking brake tip? It must be disconnected from the product and then left hanging.
- If necessary, it is recommended to replace all parking brake parts that were removed from the old product with new ones.
We recommend: Car wheel balancing
The rear brake pads on the VAZ 2107 should be installed in the reverse order of removal. Before installation, remember to bring the brake cylinder pistons as close as possible. Despite their simple design, installing them is much more difficult than the front ones. But having completed the procedure once, all subsequent repairs will be much easier for you.
The cost of new pads starts from 800 rubles per set, but it is important to purchase high-quality products, and not Chinese “consumer goods”. Not only the service life of the products, but also the braking of the car will depend on this. This completes the replacement procedure; if you have any questions, be sure to ask them.
The life and health of the driver and passengers depend on the condition of the braking system. Owners of "sevens" often independently monitor the condition and replace the brake pads of the car. This is a simple operation that does not require special tools or high qualifications. It is enough to have basic plumbing skills and know how to change brake pads on a VAZ 2107 .
We install new ones
Before installing new pads, it is necessary to release the parking brake cable, as it may not allow the drum to fit onto the new pads. Assembly occurs in reverse order. The springs can cause difficulties, but if you act slowly, everything should work out. This is where the file mentioned earlier comes in very handy. Thanks to the pointed shank, you can easily hook the spring loops into the mounting holes.
During the assembly process, it may turn out that, despite the parking brake cable being completely released and the working brake cylinder being fully compressed, it is not possible to put the drum on the newly installed pads. The reason for this phenomenon may be the thickness of the linings, which often slightly exceeds the permissible limit. In this case, it is recommended to change them one at a time - first replace the more worn one with a new one, after a while we replace the second one.
Replacing the front pads of a VAZ 2107
To replace the pads you must perform the following steps:
- Jack up the car and remove the wheel.
- Treat the pad guide pins with WD-40.
- Remove the cotter pins from the fingers using pliers.
- Using a hammer and a bit (or a thin screwdriver), knock out the pins and remove the springs that press the pads.
- Separate the pads using a strong screwdriver or pry bar.
- Remove the old front pads of the VAZ 2107.
- Check the thickness and condition of the brake disc. If it is deformed or less than 9mm thick, replace it.
- Press in the brake cylinder pistons completely. This can be done by inserting the old pads into place and spreading them all the way using a pry bar.
Tip: Before completely recessing the pistons, you should check the brake fluid level. As the pistons retract, the fluid level rises. To prevent brake fluid from spilling out and getting on body parts and damaging the paintwork, you can take a little of it from the reservoir using a syringe or syringe.
- Insert new front brake pads on the VAZ 2107.
- Insert the pins of the front pads and secure them with cotter pins.
- Install the pad springs.
- Press the brake pedal several times so that the pistons come out of the brake cylinders and compress the pads.
- Install the wheel and lower the jack.
After replacing the VAZ 2107 pads on one wheel, you need to replace them on the second.
At the end of the operation, you should check the brake fluid level and add it if necessary.
↑ Disassembly and assembly of the front brake
- Disconnect tube 5 and remove dust caps 2 from the cylinders.
- Then, pumping a stream of compressed air through the brake fluid inlet, push the pistons 1 out of the cylinders on the caliper 4 and remove the O-rings 3 from the cylinders.
Assemble the front brake in the reverse order of disassembly. Lubricate the sealing rings, pistons and cylinder mirror with brake fluid during assembly.
After installation, restore the brake fluid level and bleed the hydraulic drive system.
Article number and approximate price for original front pads for VAZ 2107
The original front brake pads of the VAZ 2107 have catalog number 2101-3501090. The price of consumables is 260-380 rubles. The manufacturer of native products is the enterprise OJSC TIIR.
ATTENTION! A completely simple way to reduce fuel consumption has been found! Don't believe me? An auto mechanic with 15 years of experience also didn’t believe it until he tried it. And now he saves 35,000 rubles a year on gasoline! Read more"
Front pads VAZ 2107
When product replacement is required
Both the front and rear wheels are characterized by the use of 4 brake pads to ensure effective braking. These products differ only in design, although the principle of operation is similar.
The rear pads of the VAZ 2107 are presented in the form of an arched steel structure, on the outer part of which a friction layer is applied. It is due to the friction of this layer against the inside of the drum that the car stops. If you do not replace the brake elements in a timely manner, this will be fraught with the development of unpredictable consequences, because the most important thing for any car is the serviceability of the braking system.
It is necessary to change the rear brake pads on a VAZ-2107 when the friction lining wears down to a thickness of less than 1.5 mm. It will not be possible to determine this fact without removing the wheel and dismantling the drum. But this is one of the main ways to determine whether the brake system is faulty. There is a second option, which is more convenient and does not require dismantling the rear wheel. To do this, you need to listen for signs of squeaking of the rear wheels, as well as grinding and lack of braking effect, but this can lead to damage to the drum itself. You can squeeze the handbrake while standing on a slope and check that it is working correctly. Of course, the cable on the handbrake may become loose, but if you tighten it and still have no effect, then it’s time to start replacing the pads. If the rear brakes are not functioning, then it is time to change the pads. It is recommended to change them as a set on both rear wheels, since they are often worn out at the same time. What is the process of replacing rear brake pads on a VAZ-2107 will be determined further.
We recommend: How to change the Chevrolet Lacetti fuel filter with your own hands?
Features of replacing rear pads
At the beginning of the work, it should be noted that the handbrake must initially be lowered to its lowest position. This will allow you to dismantle the brake drum and thereby get to the worn parts. To begin replacing the brake pads of a VAZ 2107, it is necessary to remove the rear wheel:
How often should you change front pads?
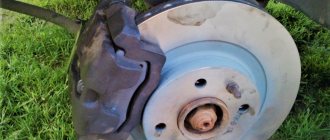
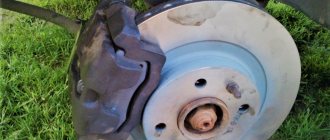
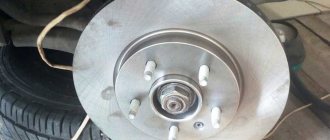
Let's start with the fact that on the VAZ 2107 the front brakes are represented by a disc system, which in some ways is much better than a drum one, but that’s not about that now. There are 2 pads on each caliper at the front, which are responsible for effective braking of the car. The front brake pads of the VAZ 2107 have the following appearance, shown in the photo above.
Essentially, the products are a steel plate onto which a special friction layer is applied. It is this friction layer that is the basis for car braking. When this layer wears off, which depends not only on the frequency of use of the brake pedal, but also on the nature of driving, then the car owner urgently needs to replace the brake pads on the VAZ 2107. If this is not done in a timely manner, then you understand what the outcome may be.
How often it is necessary to change the parts in question depends on the following factors:
- condition of the brake system;
- character and driving habits;
- product manufacturer;
- regular maintenance.
But our mentality is such that we don’t pay attention to how often we need to change the pads, and we do it when it’s pressing. The reasons that indicate that the car requires repair work on the brake system are due to the following symptoms:
- the appearance of extraneous sounds when you press the brake pedal: creaking or grinding;
- to brake, you need to apply force;
- When braking, the car begins to skid.
Replacing brake pads on a VAZ-2107
There are several very important points that must be taken into account when replacing rear brake pads. For example, before starting work, you must lower the handbrake to the lower position. Both in the case of the front and rear, it is impossible to replace only a pair of pads, but all 4.
If you replace only one side, it may turn out that the new pads are much harder than the old ones or, on the contrary, they will brake better due to the complete absence of carbon deposits. Therefore, one side - with old pads - will skid during heavy braking.
Dismantling:
- First of all, remove the wheels and drums.
- Most likely, the brake system will be dirty, so it needs to be thoroughly cleaned. After this, you may not even need to change the pads themselves if the thickness of the gasket exceeds 1.5 mm. Using a brush you can quickly and efficiently clean the system. But never use strong solvents or other chemicals when cleaning.
- Remove the horizontal spring located on top. To do this, use a screwdriver or pliers to help yourself unfasten the element from one end, and then easily release the second.
- Once you remove the spring, you will notice a pair of bolts that support the piece that holds the pads in place. This is called a bowl. Press it down and turn it clockwise 90°, after which you can remove it. Before completely removing the bowl, feel for the rod on the back side and hold it, otherwise it will get lost.
- Remove the other compression spring that became visible after getting rid of the bowl. After this, remove the rod behind it. These elements prevent the block from being removed.
- The released block can now be removed. But both pads are attached to each other by a spring, which should be taken into account when removing them one by one.
- The opened spacer bar can be easily removed simply by hand. If you don't get rid of it, it will interfere.
- After you remove the front pad, only now can you remove the second (rear) pad using the same principle. During the process, you will be disturbed by the tip of the standing cable, which engages with the element being removed. It can be detached and just left hanging.
- The time has come to confirm or refute your assumption about the breakdown of the brake pads. Check whether they need replacing: use a caliper to measure the thickness of the lining in several places, which should be at least 1.5 mm. The replacement method, if necessary, will be described below.
- Using thin pliers, unpin the parking brake lever pin. Remove the released washer and remove the lever. As a result, the finger itself will be freed. The parking brake is commonly called a “handbrake”. All the parts you removed will then be installed on the new handbrake in the reverse order of dismantling. For the handbrake to work, it will need to be raised.
Installing new brakes:
- Check the tightness of the nuts securing the brake shield to the beam. If they need to be tightened, the tightening torque is 41.6-51.4 N*m (4.2-5.2 kgf*m).
- Clean the seating surface with sandpaper, it is located at the flange and brake drum.
- Remove the collar that has appeared on the drum during use. Start the car and engage first gear, which will cause the rear drums to move. Use a file to remove the bead. Then turn off the engine and remove the drum.
- Install the pads in reverse order of removal.
If you are doing everything for the first time and are still poorly oriented in the details of your car, use the detailed video instructions.
What is needed to replace brake pads
To change the brake pads of a VAZ 2107, you will need the following tools and accessories:
- jack;
- wheel wrench;
- set of wrenches;
- hammer;
- bit or thin screwdriver;
- metal brush;
- rag (rags);
- a powerful flat-head screwdriver or pry bar;
- pliers;
- screwdriver;
- WD-40;
- new pads.
Important: VAZ 2107 pads must be changed only as a set: both left and right at the same time.
The front brakes of the “seven” are disc type, the rear brakes are drum. Accordingly, the design of the pads and the procedure for replacing them are different.
Step-by-step replacement of rear pads on a VAZ 2107
You can replace the rear drum pads using the algorithm below.
- Raise the rear of the car using a jack and remove the wheel.
- Remove the drum.
- Disconnect the lower spring. To do this, you need to pry it off with a screwdriver.
- Using pliers, rotate the cotter pins until they align with the slots located on the washer.
- Turn the cotter pin on the other side as well.
- Straighten and remove the cotter pin that secures the handbrake lever.
- Remove the upper spring using a screwdriver.
- The above actions will cause the pads to fall down. After this, you need to disconnect the lever from them.
- Inspect the springs. If necessary, purchase a repair kit for the VAZ 2107 drum brake and replace the failed elements.
- Reassemble everything in the reverse order of removal.
The safety of the VAZ 2107 car depends on the braking system. Therefore, if any difficulties or questions arise when replacing the pads, it is recommended to watch the corresponding thematic video. This will help you avoid maintenance errors.
Required Tools
- Pliers, screwdriver, hammer
- A set of keys for “12”, “13”, “7”. Can be caps, can be carob
It is recommended to use a special wrench to install the tension spring. I don’t have one; instead I use pliers, which is not always convenient. In such cases, I often remember the designer’s relatives on my mother’s side - the spring doesn’t want to hold on to the pliers and tends to break.
Therefore, it is better to buy such a thing (it is shown in the screenshot below), borrow it from a neighbor in the garage, or make it yourself. In the video at the end of the article, a car mechanic will show you how to easily put on the lower spring using one screwdriver, take note.
