A car's paintwork doesn't last forever. Unfortunately, even the highest quality layer of paint develops problems over time, begins to crack and sometimes cannot withstand the stress of washing a car. Many car owners begin to notice chips of paint appearing on the bumper after washing. The problem is that plastic is a flexible material, and most paintwork requires a rigid surface to function properly. Therefore, an unpleasant chip often forms on plastic bumpers. In the future, this chip will only grow. Its appearance indicates that it is time to repaint the bumper. Half measures are not suitable in this case for a number of reasons, which we will discuss below in the publication. It is worth noting that low-quality paint can chip already in the second month after applying the paintwork.
However, other factors also influence the integrity of the coating. For example, the professionalism of the person who did the painting. This is an important criterion for the quality of paintwork, which is often unavailable even at expensive service stations. The problem is that modern specialists do not always have sufficient experience to correctly apply all types of paint on the surface of a car. It is especially important to take these features into account when painting the bumper. Often the entire car is left unprotected simply due to the lack of quality processes when painting the car. There are many rules for working with plastic parts, and following these rules turns out to be the most important thing when performing painting work. Let's look at the causes of problems with chips on the bumper, as well as the possibilities of eliminating unpleasant consequences.
The main reasons for the appearance of chips on the bumper in a car
Plastic parts cannot be painted as well as metal body parts. When painting at a factory, there are a number of technologies that should be followed before applying the paint directly. If the paintwork was restored at private stations, problems cannot be avoided. Specialists will certainly not be able to perform all tasks exclusively the way they are done at the factory. Therefore, there are several main reasons for the appearance of chips on a plastic bumper:
- too much wear of the factory paint, the car is quite old, which causes big problems with body parts, including plastic ones;
- physical damage to the integrity of the paint due to stones, troubles during parking, minor accidents, and then the resulting chip grows at car washes and simply when driving;
- poor-quality painting is one of the main factors in paint chipping on plastic parts; the technology for applying materials to plastic is not followed;
- the chip appeared at the car wash due to the unprofessional actions of the employees, the washer pointed the gun at the bumper and then pressed the power button, the pressure knocked off a piece of paint;
- Deformations of the plastic appeared after prolonged exposure to the sun, the wavy surface caused cracking of the paintwork and the appearance of chips.
Such troubles can happen to any car. So you should use the best quality troubleshooting solutions. Many resort to the cheapest methods of repairing such unpleasant breakdowns, and often find themselves back with nothing. So you shouldn’t skimp on body repairs, otherwise you may end up with the same problems again just a few days after the important work is completed.
Spray can and painting with a match - basic methods for solving the problem
On a white car, black chips on the bumper look simply terrible. They are perfectly visible in any lighting and significantly spoil the impression of the car. We must admit that any motorist will want to get rid of such chips and problems. But most likely, a trip to a painter and ordering bumper painting services will not happen right away. You can temporarily perform the following simple procedures using virtually improvised means and good paint:
- buy a minimum amount of paint that fully matches the color of the bumper being painted, make sure that the painting material is of normal quality;
- then, using a match, apply a drop of paint to the cleaned surface of the chip - this method is suitable only for those cases where the chips do not exceed the size of the cut of the match;
- you can buy a can of paint that matches the color of your car, this can is much more difficult to use, you need to prepare the surface for application;
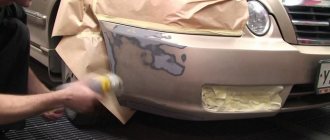
- the chip is cleaned, a small area around it is scraped off and cleaned, covered with special masking tape, and then painted using a spray can;
- you need to carefully move the balloon at the same distance from the bumper, without touching other parts of the car, and also apply several layers of paint to be sure of the repair.
It must be remembered that painting with a match or a balloon is only a temporary solution to the problem. Most likely, the problems will appear again in a few weeks. Everything also depends on the resource of all problems. If the chip appears at the car wash, you will have to repaint the bumper - it is simply painted very poorly. If a stone has flown into the bumper, you can simply repair the resulting chip and continue to use the car.
Why shouldn't you touch up chipped paint on your bumper?
You can only touch up a chip if you know for sure that it is mechanical damage. Otherwise, such actions will not lead to a good result. The problem is that the appearance of chips is a problem with paintwork that needs to be solved efficiently and radically. If you simply touch up the problem area, you will not solve the problem in this way. But if the damage is mechanical, it is worth remembering the bumper touch-up technology:
- very small chips can be painted over with a match, a sponge or a small artistic brush; this is done quite simply, but often the quality suffers;
- if the chip is larger, you will have to use a sponge or other objects with a larger area of contact with the metal, this is an important point for every car;
- very large damages are limited with masking tape, cleaned and washed, then painting is done using a spray gun or a can;
- if there is direct damage to the bumper, they need to be eliminated; you can align the part using heat and physical influence with little force for alignment;
- If, after the damage, a hole or torn tear has formed, the repair should be entrusted to specialists, and it is best to simply buy a new bumper.
There is no point in painting over chips that appear without good reason. After some time, the paint will chip again and the result of such an action will not be the most pleasant sight. It is worth remembering that repairing body parts has its own characteristics and important features. And these features must be observed to obtain the desired result. Get important ideas for performing decent repairs on plastic body parts.
Polishing the bumper with a grinder
When the paintwork is completely covered with a network of small and deep scratches, only machine polishing will help remove them. The technology is also applicable in cases where there has been light contact with another car, causing abrasion to form on the body kit. It is better to carry out the procedure indoors so that during processing dust does not get into the defect area, acting as an abrasive. Reason two: it is not allowed to polish a surface heated by the sun.
To complete the work you will need:
- grinding machine with polishing wheels;
- sandpaper No. 2000 with fine grain;
- There are two types of polishing paste - starting and finishing, it is better to take the latter to match the color of the car;
- degreasing liquid (nefras, white spirit);
- tube - corrector with paint matched to the color of the car;
- rags, antistatic wipes;
- protective glasses.
Nefras is one of the best degreasers
Advice. Buying a grinder is an expensive pleasure; it is not advisable to purchase it for 1-2 treatments, unless you are going to do professional polishing. It's easier to rent equipment. As a last resort, you can use an electric drill with appropriate attachments.
After initial sanding, the scratches look like this:
Removing multiple deep scratches begins with removing the bumper and thoroughly washing and drying it. If there is foreign paint left on the surface from contact with another car, remove it with gasoline or white spirit. An important point: you can repair the bumper and remove traces of contact with another car only after you have fully documented the accident and recorded it with the insurance company, otherwise you may be left without payment.
How to prepare a bumper for full painting?
The best solution to this problem will be to fully paint the bumper using high-quality materials and technologies. If the chips appeared on their own, they may just appear again, so there is no point in painting over them. It is worthwhile to completely paint the bumper using fairly simple but effective technologies. Among the important actions, it is worth highlighting the stages of plastic preparation:
- it is best to remove the bumper from the car to avoid troubles when painting it, and then take the part to the garage, where this part of the car will be painted;
- the first stages of the preparation process can be performed on the street - this is washing off the old paint, removing the layer of old paintwork completely down to the black plastic of the body base;
- the next step will be matting the plastic if it has a glossy surface, often new bumpers are not matted before painting, and they soon show chips;
- then the surface of the part is degreased with a solvent and installed directly on the place where painting will take place in a garage or other room;
- after the solvent has dried, a layer of primer is applied, which may have several balls; this process must be carried out professionally and very carefully.
If the primer is not applied, the paint will not be able to adhere to the plastic. In this case, there will be problems with the integrity of the paintwork. However, these problems can be solved quite easily by first applying a primer before painting. The quality of the primer should be quite high, since this material protects the paintwork from destruction. Therefore, this process should be treated with an understanding of its importance.
Required tools and materials
Before gluing the bumper, you need to prepare tools and materials; the process must be continuous; you should not be distracted by searching for the necessary devices. The list includes:
- Keys, screwdrivers to remove the element;
- Grinder, electric drill;
- Sandpaper, required with grit from P180 to 320;
- Rag;
- White spirit or organic thinner;
- Epoxy with a special curing agent to work with fiberglass material;
- Suitable adhesive solution;
- Protective gloves and glasses;
- Spatulas may be required.
Before gluing the bumper, you need to prepare tools and materials.
Directly painting the bumper - important conditions and features
Already when performing painting work at the priming stage, a number of difficulties arise. Streaks of material, drops and dust do not give rest to the performer of the process. If you are painting a part in a residential garage, there is no guarantee that the process will be reasonably successful. Dust will still settle on the paint. However, drips and drips can be avoided. To do this, it is necessary to fulfill the following important conditions for painting work:
- paint should be selected based on quality, and not low price; it is better to choose a good material with a high cost that will not let you down in the future;
- painting is carried out in several layers - specialists apply up to six layers of material for more reliable coating service, as well as for the absence of chips;
- it is important to ensure a completely uniform execution of the painting job; the gun must be moved smoothly over the part at a distance of about 12-15 centimeters;
- after painting, you should leave the part in the prepared room for several hours, then check the quality of the paintwork; if necessary, some places can still be washed off with a solvent;
- The last stage will be to completely dry the paint within 24 hours and install the element in the same place; this will allow you to obtain the required quality of the part without any difficulties.
With such features, the bumper will always be in perfect appearance and will remind you of the important visual features of the car. However, there are types of plastic that are incredibly difficult to paint. A material that is too thin is overly elastic and causes paint to simply not adhere to it. Often such bumpers are covered with film or other colored materials to achieve success. We invite you to watch the bumper painting process in the following video:
Using wax crayons
This method is effective for repairing shallow single scratches that have not affected the paint layer. To remove such defects, you need to prepare the following materials:
- white spirit or galosh gasoline (nefras);
- wax pencil;
- wax-based polish;
- soft rags.
This is what the Fix it Pro wax marker looks like with attachments
Reference. The retail chain offers a wide selection of cosmetics for car body treatment from various manufacturers. Fix it Pro and ASTROhim COLOR WAX wax markers made in the USA have proven themselves well in practice, and among polishes you should choose Turtle Wax COLOR MAGIC PLUS liquid.
Polishing liquid Turtle Wax COLOR MAGIC PLUS with wax
The procedure for removing minor damage does not require any special conditions other than positive temperature in the room or street where it will be carried out. Before doing this, it is important to thoroughly wash and dry the bumper, and then proceed in this order:
- Degrease the scratch with a rag soaked in white spirit and let it dry.
- Open the cap of the pencil and carefully fill the groove with wax. When applying, do not press hard on the marker, and remove excess wax protruding along the edges with a dry cloth.
- After reading the instructions for using the polish on the packaging, soak a rag in it and polish the area of the defect. If necessary, repeat the operation several times.
Before repairing, the body kit must be washed thoroughly
Attention! Do not use acetone or solvents based on it for degreasing; they are not capable of decomposing fats, but they have a detrimental effect on the protective layer of varnish.
The scratch is filled with wax using a pencil
As you can see, the procedure is quite simple and does not require much time; removing one scratch will take no more than 15 minutes. But you must understand that such measures are temporary, since the wax coating is short-lived and is gradually removed when washing the car. Therefore, processing with a wax pencil is practiced in order to delay the moment of machine polishing or painting.
Reference. Cosmetic repairs using wax-based products are relevant during the pre-sale preparation of a car, because it allows you to improve the appearance without significant financial costs. The Fix it Pro marker costs about 7 USD. e., and Turtle Wax COLOR MAGIC PLUS polish - about 12 cu. That is, but in terms of consumption they last for a long time.
Let's sum it up
Painting plastic parts is not that easy. Local bumper repair turns out to be quite a complex process with a lot of unknowns. Therefore, in most situations it is better to trust full-fledged high-quality painting. Especially if the chips are large and did not appear from an accident. If the chip is caused by stones flying out from under the wheels of oncoming cars, you will have to do a high-quality painting of the chip itself and look at the behavior of this place. Often, owners immediately decide to repaint the entire bumper if we are talking about the unpleasant appearance of the product.
Local body repairs are always visible to the naked eye, and this really irritates many car owners. Therefore, motorists often prefer to completely repair the bumper. But keep in mind that ordering such a service from specialists can be expensive. It is also possible to repair the paint on the bumper yourself, but to do this you need to have a compressor, a paint gun and a place where you can apply the paint material. So it is not always economically profitable. Have you ever encountered unpleasant chips on your car bumper?
Local repair of a chip or scratch in a paint shop
There are many issues that need to be resolved quickly and efficiently. Therefore, motorists are not always very critical of car painting problems. But there are other car owners - for them, every little thing in the car is incredibly important and is simply an irreparable loss. Such people are ready to completely repaint the part to repair a chip on the bumper. But sometimes you can get by with the following local repairs:
- At the service, a specialist determines which paint elements are affected around the chip, and removes unnecessary layers that may cause problems in the future;
- Next, the bumper is prepared for painting, possible irregularities are leveled out, sufficiently high-quality preparation is carried out for applying the paint and its high-quality service;
- if necessary, the surface is primed with a special primer for plastic in order to obtain more or less high quality paintwork;
- after this, the paint is applied directly, ideally selected for the task, and after drying, the surface is polished and prepared;
- In this way, all places that have already shown or may show in the near future serious problems during the operation of transport are processed.
It must be admitted that local repairs are almost always visible. That is, you can distinguish one paint from another. The fact is that no computer can choose paint 100% correctly and perfectly. So the difference in tone, shine, freshness and smoothness will still be noticeable. However, you can undertake a more expensive, but more confident procedure - complete painting of the part.
Methods for removing scratches
There are many methods to correct the defect if you scratched the bumper. The most basic of them are aimed at masking damage to the top layer when the paintwork is not touched. These include polishing pastes with different sizes of abrasive, as well as wax products like pencils that fill cracks with a special substance.
Painting is a way to completely damage the production paint layer. When spot painting, it is enough to remove a layer of paint from one area, sand it well and then apply a new layer of a suitable color. If scratches are noticeable over the entire area of the part, the entire bumper must be repaired, with the old paint completely removed.
The deepest scratches without breaks require surface restoration, for which several layers of putty are used. Instructions for using all these methods are provided below.
Wax pencil
For those who have only slightly scratched the bumper, purchasing a wax pencil will be enough. Before using it, you must clean the bumper using special products, and then degrease it with a solvent.
It is best to use a wax marker at moderate temperatures in a warm, windless room. The wax is applied in several layers, and between approaches it is necessary to take breaks so that the layers have time to dry. Apply first with transverse movements, and then with longitudinal ones. It is advisable that the product does not fall outside the damaged area, and if this does happen, then you need to remove the wax using an ordinary napkin. After applying the last layer, the area to be treated should be lightly polished. In addition to filling scratches, such a pencil creates additional protection for the surface - but for this it is better to choose wax of increased hardness.
Before use, do not forget to shake the pencil slightly, and then close it with a cap so that the product does not dry out.
Coloring
Coloring is, of course, a much more detailed and complex process that requires special tools and materials. Any painting begins with cleaning the bumper, and it does not matter whether you are going to remove it or carry out all the work right on the spot. As in the previous case, the part must be washed, dried and degreased. To polish and remove the old coating, you will need a sanding machine, as well as sandpaper of varying degrees of grit.
- First you need to thoroughly machine the bumper around the entire perimeter; for hard-to-reach places you will need sandpaper, which we use by hand. Then a primer is applied to the surface in two layers, and the bumper is left to dry.
- When the composition has hardened, the bumper is cleaned again and then you can begin painting. In order for the color to adhere well, the part can be slightly heated beforehand.
- The paint is applied using a sprayer or a special gun. It will take about 3 layers, then the surface is varnished.
- For more complex damage, it is advisable to use putty along with the primer.
Filling deep scratches
Using putty requires additional time and manipulation. It is applied after the bumper has been cleaned, degreased and sanded using sandpaper or a machine.
- The putty is applied in a small layer to the scratch so that it fills all the damage. Then you should sand the area. This must be done very carefully so that the surface does not become thin.
- When the first layer becomes smooth and even, you need to repeat the procedure, this time smoothing the surface at a slower speed. Remember to use fine-grit sandpaper for difficult areas, as no power tool can replace hand work.
- After the surface has acquired its previous shape, a primer is applied on top in two layers and all the above-described manipulations with paint and varnish are performed.
- Then it will take at least a day to dry and it will be better if the part dries naturally to prevent it from deforming.
We recommend: The main symptoms of a malfunction of the VAZ-2110 TPS: how to check them
Now you are not afraid of scratching your bumper, since in reality the repair is a fairly simple process that can be done without the intervention of a specialist. The most important thing is to strictly follow the instructions and correctly calculate your skills.
Repairing deep damage to the body
A scratch that penetrates the car to the metal carries the risk of corrosion and is subject to immediate restoration. The principle of eliminating damage is to remove rust and fill it with special paint-cementing compounds. Removing deep scratches on a car without painting is carried out according to the following scheme:
- The surface of the car is washed, degreased, and dried.
- If the damage has become corroded, oxidized metal particles are removed: the recess is treated with a rust converter. If the scratch is fresh, it is filled with primer for better paint adhesion.
Deep damage along the entire side of the machine
- After the treated surface has completely dried, the car's scratches are painted - paint specially designed for local repairs (for example, Touch-Up, produced in the form of a pencil) is applied inside the recess. Some car owners, in order to remove scratches from the car body, use special kits from car manufacturers, consisting of paint and varnish that are ideal for the car’s paintwork.
- When the paint and then the varnish have dried, the area is treated with abrasive polishes - coarse and fine abrasive. If possible, the surface is sequentially sanded with both compounds, but you can get by with just one.
- The last step in removing a scratch on a car is rubbing it with a restoring polish, which adds shine to the surface.
Removing chips on a car without painting is carried out according to the same scheme.
