Click on the picture and it will enlarge
1. Rear wheel hub; 2. Rear suspension arm; 3. Suspension arm mounting bracket; 4. Rubber bushing for the lever hinge; 5. Lever joint spacer; 6. Rear suspension arm mounting bolt; 7. Body bracket; 8. Support washer for fastening the shock absorber rod; 9. Upper suspension spring support; 10. Spacer sleeve; 11. Suspension spring insulating gasket; 12. Rear suspension spring; 13. Shock absorber rod mounting pads; 14. Compression stroke buffer; 15. Shock absorber rod; 16. Shock absorber protective cover; 17. Lower support cup of the suspension spring; 18. Shock absorber; 19. Lever connector; 20. Hub axle: 21. Cap; 22. Wheel hub nut; 23. O-ring; 24. Bearing washer; 25. Wheel bearing; 26. Brake shield; 27. Retaining ring; 28. Mud deflector; 29. Suspension arm flange; 30. Shock absorber bushing; 31. Lever bracket with eye for mounting the shock absorber; 32. Rubber-metal hinge of the suspension arm;
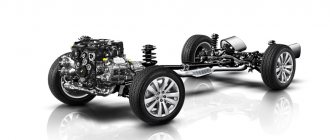
The car has a torsion bar suspension for the rear wheels. The guiding device of the suspension is two trailing arms 2, connected to each other by an elastic connector 19. Since the connector is significantly shifted forward from the wheel axis, the kinematic properties of the suspension correspond to an independent suspension on trailing arms. The independence of the movement of each wheel is ensured by twisting the amplifier, which has a U-shaped cross-section, which has high bending rigidity and low torsional rigidity.
Trailing arms 2 are made of pipe. They are welded to connector 19 through lever amplifiers and, together with the connector, form a single beam, hingedly suspended through brackets 3 to the body. Each suspension arm at the front has a bushing into which a rubber-metal hinge 32 is pressed, consisting of rubber 4 and metal 5 bushings. A bolt 6 passes through the spacer sleeve 5, connecting the suspension arm with a stamped bracket 3, which is attached to the body bracket 7 with welded bolts, nuts and washers. A self-locking nut is screwed onto the lever mounting bolt. Welded to the rear of the levers are brackets 31 with eyes for attaching shock absorbers and flanges 29 for bolting the rear wheel hub axle 20 and the rear wheel brake shield.
The elastic elements of the suspension consist of a spring 12 and a compression stroke buffer 14. The spring is made of spring steel of round section. It is installed on shock absorber 18 and rests with its lower part on cup 17, and with its upper part on support 9, welded to the inner arch of the body. The lower spring support cup is welded to the shock absorber. An insulating rubber gasket 11 is installed between the spring and the upper support.
The rear suspension springs, like the front ones, under a control load, are divided into two classes along their length - A and B. Class A springs are marked with yellow paint on the outside of the middle coils, class B springs are marked with green paint.
The compression stroke buffer 14 is made of polyurethane. It is mounted on the shock absorber rod inside the suspension spring. From above, the buffer rests against the cover of the protective casing 16, and when put into operation, against the buffer support, which is pressed onto the upper part of the shock absorber reservoir. On the outer surface of the buffer there are annular grooves that determine the location of its deformation. The protective casing 16 protects the shock absorber rod 15 and the compression stroke buffer 14 from contamination and mechanical damage. The casing is made of rubber and has a corrugated shape to change the length as the suspension travels. In the upper part of the casing there is an annular groove made from the inside into which the flanged part of the steel cover fits. The lower part of the casing, due to its elasticity, is pressed against the support cup of the suspension spring.
The axle 20 of the rear wheel is attached to the flange of the suspension arm with four bolts. At the same time as the axle, the same bolts fasten the shield 26 of the rear wheel brake mechanism. Hub 1 of the rear wheel rotates on an axle on a double-row ball bearing. The hub is fastened to the axle with a nut 22 with a thrust washer 24. The nut is fixed on the axle by crimping its collar into the groove of the axle. Bearing 25 in the hub is fixed with a retaining ring 27. The bearing is a closed type, with embedded “perpetual” lubrication. On the inside, the hub is sealed with two mud rings 28, one of which is welded to the wheel hub, the other to the axle flange. A labyrinthine seal forms between them. From the outside, the hub cavity is closed with a cap 21. An O-ring 23 is installed between the hub and the cap. The wheel hub bearing is not lubricated or adjusted during vehicle operation. The wheel disc is attached to the wheel hub with four bolts.
Diagram and designations
The rear suspension components are slightly smaller compared to the front. Because of this, the design can be called simpler. But this does not in any way reduce the degree of responsibility of you, as the driver, for the good condition of the unit.
Rear suspension diagram
Having familiarized yourself with the node diagram, you can move on to the elements that are indicated on it.
| Item number | What is |
| 1. | Wheel hub |
| 2. | suspension arm |
| 3. | Lever fixation bracket |
| 4. | Lever joint bushing (rubber) |
| 5. | Lever joint bushing (spacer) |
| 6. | Suspension arm fixing bolt |
| 7. | Car body bracket |
| 8. | Support washer for fastening the strut rod (shock absorber) |
| 9. | Upper spring support |
| 10. | Spacer |
| 11. | Rear suspension spring insulation gasket |
| 12. | Spring |
| 13. | Strut rod mounting pads |
| 14. | Compression Progress Buffer |
| 15. | Shock absorber rod |
| 16. | Shock absorber protection cover |
| 17. | Lower spring support cup |
| 18. | Shock absorber |
| 19. | Rear suspension arm connector |
| 20. | Hub axle |
| 21. | Cap |
| 22. | Rear wheel hub fixing nut |
| 23. | Sealing ring |
| 24. | Wheel bearing washer |
| 25. | Wheel bearing |
| 26. | Brake shield |
| 27. | Retaining ring |
| 28. | Dirt-reflecting element |
| 29. | Rear suspension arm flange |
| 30. | Rear suspension shock absorber bushing |
| 31. | Lever bracket with lugs for shock absorber mounting |
| 32. | Rear suspension arm joint, rubber-metal type |
Device Features
Having understood the diagram, you should separately talk about what the design of the rear suspension of the domestically produced VAZ 2109 is. Knowing all the features and nuances of the suspension elements used, you will know how to carry out further repairs, preventive maintenance, and what parts to buy for replacement old.
- The VAZ 2109 uses a torsion-link rear suspension design. The guiding device here is a pair of longitudinal arms, which are connected to each other using an elastic connector. Since the connector is shifted forward relative to the wheel axis, the kinematic properties of the rear suspension of the nine correspond to the features of an independent suspension on trailing arms.
- The independent movement of each wheel is ensured by twisting the amplifier with a U-shaped cross-section. This section is characterized by low torsional rigidity and high bending rigidity. This makes the structure quite reliable and durable.
- The trailing arms are made of pipes. They are welded to the connector through the rear suspension arm reinforcements, which makes it possible to create a single beam. It is hingedly suspended through a bracket on the car body.
- Each of the rear suspension arms in front is equipped with a bushing into which rubber-metal joints are pressed. They consist of a pair of bushings - rubber and metal.
- Through the spacer sleeve there is a bolt that connects the suspension arm and the stamped bracket, which is mounted to the body bracket using bolts, nuts and washers. A self-locking nut is screwed onto the mounting bolt.
- Brackets with lugs are welded to the back of the levers, which are used for mounting shock absorbers, and flanges are necessary for attaching the rear wheel hub and brake shield using bolts.
- The elastic components of the rear suspension include springs and a compression stroke buffer.
- The spring is made of spring steel with a round cross-section. It is installed on the shock absorber and rested with its lower part on the cup. The upper part rests on a support, which is welded to the inner arch of the car body. The lower spring support cup is welded to the shock absorber. A rubber insulation gasket is installed between the upper support and the spring.
- Rear suspension springs are divided into two classes, depending on the control load along the length - A and B. Class A is marked in yellow, applied to the outer side of the middle coils. Class B has a green designation.
- The compression stroke buffer is made of polyurethane. It is mounted on the shock absorber rod inside the spring. From above, the buffer rests against the cover of the protection casing, but when it is put into operation, it rests on a support.
- The buffer support is pressed onto the top of the shock absorber reservoir.
- The buffer has annular grooves on the outer surface that determine the location of deformation.
- The protection casing provides protection from mechanical damage and contamination of the rod and compression stroke buffer. The casing is made of corrugated rubber, which allows you to change the length when the suspension is operating. There is a ring groove at the top inside the casing. They serve to enter the spent part of the steel cover. At the bottom, the casing is quite elastic, which allows it to be pressed against the spring support cup.
- The rear wheel axle is mounted to the lever flange using 4 mounting bolts. The same bolts are used to secure the brake shield.
- The hub rotates on an axis on a double-row ball bearing. The hub is mounted to the axle using a nut and thrust washer. The nut is installed on the axle by crimping its collar into the groove of the axle.
- The bearing is mounted in the hub using a retaining ring. The bearing is closed and contains almost permanent lubrication.
- The inside of the hub is sealed with a pair of dirt-reflecting rings. One of the rings is welded to the hub, and the second to the axle flange. A labyrinthine seal is formed between them.
- The outer cavity of the hub is closed by a cap. There is an O-ring between the cap and the hub.
- During operation of the VAZ 2109, the hub bearing is not adjustable and is not lubricated. The wheel disc is mounted to the hub using 4 mounting bolts.
- The shock absorbers on the rear suspension of the nine are hydraulic telescopic double-acting.
- The lower eye shock absorber is installed on the lower arm bracket using a bolt and a self-locking nut.
- The upper fastener of the shock absorber is pin-type - the rod is mounted to the upper spring support through a pair of rubber pads and a support washer. There is a spacer between the protection casing cover and the washer.
The design of the rear suspension cannot be called simple, since there are many elements that interact with each other. If this effective interaction is lost, the car begins to behave unstable and requires repair or replacement of certain components.
It is not difficult to understand the diagram and structure of the rear suspension of the VAZ 2109 car. This will allow you to significantly save on repairs, avoiding visits to service stations, and also develop your own skills in independently repairing your own car.
Description of design
The rear suspension is with 12 coil springs and 10 double-acting hydraulic telescopic shock absorbers.
The main load-bearing element of the suspension is a beam consisting of trailing arms 14 and a connector 13, welded together through reinforcements. At the rear, brackets 15 with eyes for attaching shock absorbers 10 and flanges for attaching the rear wheel axles and brake shields are welded to the suspension arms. At the front, the levers 14 are equipped with welded bushings with silent blocks 3 pressed into them. A bolt passes through the central bushing of the silent block, connecting the lever to the bracket 2. Three welded bolts are provided to secure the bracket to the body spar.
The suspension spring 12 rests with its lower end on a cup welded to the shock absorber reservoir, and with its upper end, through a rubber gasket 11, on a support welded from the inside to the body arch.
The lower eye of the shock absorber is bolted to bracket 15 of the suspension arm, and its rod is secured to the upper support of the suspension spring through two rubber pads 8 (one at the bottom of the support, the other at the top) and a support washer 7 (under the nut).
The rear suspension springs are divided into two stiffness classes according to their length in the free state and under load: A (more rigid, “high”) and B (less rigid, “low”). Springs of the same class must be installed on the front and rear suspensions. But in exceptional cases, if class A springs are installed in the front suspension, class B springs can be installed in the rear suspension (but not vice versa!). The quality of the springs can be fully assessed by the performance of the suspension on the car. If the suspension often “breaks through” to the bump stops on uneven roads or sags under load, stiffer springs should be installed. When replacing springs, do not forget to check the serviceability of the shock absorbers - after all, it is the shock absorber-spring pair that largely determines the characteristics of the suspension.
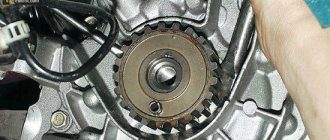
The hub has a double-row angular contact ball bearing, similar to the front wheel hub bearing, but smaller in size. The bearing fit on the axle is transitional (with slight interference or clearance). During operation, the bearing does not require adjustment or replenishment of lubricant. It is not allowed to eliminate the resulting play by tightening the nut; the bearing should be replaced. When dismantling the hub, the bearing is destroyed, so it is not recommended to disassemble the hub if the bearing is in good condition.
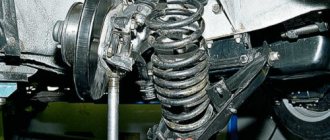
The need to replace the rear struts on VAZ 2108, 2109, 21099 vehicles arises when the following malfunctions occur: the strut shock absorber has leaked and/or started knocking, the strut spring has broken or sagged.
Necessary tools and equipment
— Open-end wrench at “6”
— Curved socket wrench “17”
Or a special device for unscrewing the rear suspension shock absorbers of VAZ 2108, 2109, 21099 cars.
— Two spanners on “19”
— Assistant (preferably, but not required)
Preparatory work
The work of replacing the rear struts can be carried out both in a pit and on a flat area. It is advisable to replace shock absorbers and strut springs in pairs rather than individually.
— We hang and remove the rear wheels of the car
To do this, loosen the wheel bolts, jack up the car on both sides, place stands under the sills, and remove the wheels.
— We clean the lower fastenings of the struts to the rear beam from dirt
You can treat it with WD-40 and tap the fastening bolts.
The procedure for replacing rear struts on VAZ 2108, 2109, 21099 vehicles and their modifications
— Unscrew the shock absorber rod nut
We remove the rubber plug of the support cup in the trunk of the car and unscrew the nut with a curved spanner set to “17”, holding the rod from turning with an open-end wrench set to “8”.
Remove the nut, under it the spring and support washers, and the upper rubber cushion.
Read also: Car fire insurance
To unscrew the nut, instead of keys, you can use a special device.
— Unscrew the bolt securing the shock absorber to the beam
Using a wrench or socket set to “19”, unscrew the bolt and hold the nut with another wrench set to “19”. Remove the bolt from the mount.
Problems may arise with unscrewing and removing the bolt, since it is constantly exposed to an aggressive environment and very often becomes very sour. If you managed to unscrew its nut, you can try to knock it out using a mandrel and a hammer. In some cases, heating the bolt with a blowtorch or gas torch helps. In especially severe cases, cut off the bolt with a grinder.
— We remove the rack
Make sure that the upper rubber gasket of the strut spring is removed. If it is not there, then remove it from the support cup from below.
That's it, the rear pillar has been removed.
We repeat the removal procedure for the second rack.
Features of installing a rear pillar on a VAZ 2108, 2109, 21099 car
— We attach the upper rubber gasket to the spring with electrical tape or tape. for ease and accuracy of installation, install the spring on the stand
— Pull out the shock absorber rod until it stops; a spacer sleeve and a lower rubber cushion should be put on the rod
— Insert the shock absorber rod into the hole in the body cup
An assistant puts on the upper rubber cushion, support and spring washers and tightens the nut.
If there is no assistant, then first we attach the shock absorber to the beam, then, placing a stop on the beam, we slowly lower the car body with a jack, periodically checking that its rod fits into the hole. You can pre-tie a wire to the rod and thread it through the hole in the cup. By pulling it out you can direct the movement of the rod.
When installing the shock absorber, it is necessary to rotate it so that the rising part of the spring cup is directed towards the wheel.
— We secure the lower part of the shock absorber, do not tighten the nut completely
— Install the rear wheels and lower the car to the ground
— Press the rear of the car several times to self-install the suspension elements
— Tighten the rod fastening nut and the lower mounting bolt of the strut shock absorber
Notes and additions
— The rear struts of VAZ 21088, 2109, 21099 cars fail less often than the front struts. Therefore, the need to replace them arises no earlier than 100 - 120 thousand kilometers.
More articles on the suspension of VAZ 2108, 2109, 21099 cars
Rear suspension of VAZ 2109
A fairly large number of VAZ-2109 owners prefer to repair their car themselves, since the design of the “nine” is distinguished by its simplicity. But before you start working, you must first find the cause of the problem, and, of course, know the sequence of actions.
VAZ-2109 - what the rear suspension consists of
All of the above fully applies to the chassis. Neither the front nor the rear suspensions are complex in design. Accordingly, repairs and troubleshooting should not cause any problems. In this article we will look at the design features of the rear suspension of the VAZ-2109. First, let's list its elements:
- hub;
- spring and its cups - lower and upper;
- lever mounting bracket;
- shock absorbers and their cushions;
- silent blocks;
- compression progress buffer;
- lever connector;
- rubber gasket;
- beam arm and connector;
- stock;
- spacer;
- support washer.
Generally speaking, the rear suspension of the “nine” is independent, torsion bar. Due to the not very high quality of domestic roads, especially in the outback, it is the chassis that bears the most serious load. Every hole or pothole that a wheel hits is a very noticeable blow to the suspension. You can understand that there are some problems here by hearing. In this case, you will hear an extraneous knock. It can be either deaf or voiced. Experienced professionals use it to make a “diagnosis”, and with very high accuracy. Accordingly, as soon as you hear that something is knocking in the suspension, you should immediately start looking for the problem.
By the way, many car owners strive to improve this component of the car. As a rule, the most common tuning is spacers, which increase the already fairly decent ground clearance. Stock springs and shock absorbers are also often replaced. There are some nuances here. If you change springs, make sure that they have the same stiffness front and rear. However, in this case there is still one exception. The springs at the front may be softer than at the rear, but not vice versa.
When doing such work, you should remember that we are talking about your safety. Accordingly, all installed parts must be of high quality. Products from well-known brands cannot be cheap - otherwise they are fakes, the installation of which can easily result in loss of control of the car while driving.
Another point - when tuning the rear suspension, you don’t need to make it too hard or too soft. In both the first and second cases, this will only bring discomfort to driving. Also, don't lift up the rear too much. It is quite possible that someone really likes this appearance. However, such a design change significantly worsens handling.
How to dismantle a diode bridge
So:
- The negative terminal of the battery is removed, the wires that are connected to the plastic casing of the generator are disconnected (see Repairing the VAZ 2109 generator easily and simply).
- The wire block “D” is disconnected.
- The rubber protective cap is removed from the tips of the positive wires, after which the fastening nut is unscrewed. The wires are removed from the generator.
- Now you need to remove the plastic casing of the generator directly. First you need to unfasten the three spring clips, which are located around the perimeter of the block itself.
- The voltage regulator is unscrewed using a Phillips screwdriver.
- It is removed in assembled condition along with the brushes (see VAZ 2109: replacing the generator brushes yourself).
- Using a size 8 wrench, unscrew the three bolts securing the bridge.
- The leads leading to the stator winding are bent to the side for convenience. Use a Phillips screwdriver to unscrew the capacitor clamps.
- To remove the diode bridge using a 10-size wrench, you need to unscrew two nuts from the contact bolt. You also need to remove the bushings from this bolt, after which the bolt itself is removed from the bridge.
Now you can safely begin replacing the damaged part.
Rear suspension 2108/2109
I decided to work on the rear suspension, because... I’ve never done it, but I want to learn, so I have some questions...
1. Does it make sense to install polyurethane
silent blocks in the beam, in the shock absorber, “donuts”? Because the rear suspension is rebuilt once every hundred years, maybe it’s worth installing polyurethane) 2. Have you heard that the original “donuts” are not a fountain, they are much more effective than the SS-20 or Acomi? 3. Does the bump stop really give something, if not underestimated? Who installed/would install which ones?) 4. Is it worth installing sound insulators? I doubt their effectiveness)
Shocks are ok! Stock. Well, so that everything works out on a budget)
Well, tell us different secrets, who did it, what did they install?..
Assembly
When the parts on the Lada 2107 are replaced, the gearbox must be put in place and make sure that the bridge no longer hums. Assembly of the VAZ 2107 bridge is carried out in the same sequence as disassembly, only in reverse.
We put the new unit in its place and screw it on. Afterwards, we fix the axle shafts to the bridge and install the shank flange into the driveshaft. Next, we fasten the wheels and check how successful the replacement was.
To do this, you need to check whether the bridge is humming at high and low speeds. Carry out three procedures: put the gas in neutral, accelerate and turn off the gear and engine, make a smooth acceleration. If the gearbox 2107 is still humming, then you did something wrong, or, most likely, the reason is not in the gearbox. Well, if the bridge no longer hums, then everything has been done correctly, and you can safely continue to operate the car.
Sources
- https://remontauto-vaz.ru/page/ustrojstvo-i-zamena-reduktora-zadnego-mosta-na-avtomobiljah-vaz-klassika
- https://vashalada.ru/mashiny/vaz-2107/zamena-reduktora-zadnego-mosta-vaz-2107.html
Causes of failure
There are two main reasons why rear shock absorbers begin to misbehave:
- When driving, the rear wheel can gradually wear out the locker, made of plastic. It serves to protect the rack. Over time, the wheel gets closer and closer to the stand;
- If the breakage occurs along the lower silent block, the culprit is the bolt holding it in place. It was simply not tightened to the required load.
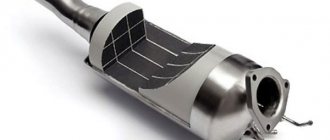
Worn out old shock absorbers
the strut, pay special attention to this bolt. If you make the same mistake again, you will soon have to make repairs again.
Symptoms of a problem
Pay attention to the telltale signs that tell you that you need to take action to correct problems with your rear struts.
Sign
Peculiarities
Cracks, various kinds of defects, and flaws may appear on this element. This indicates wear, so the shock absorber should be replaced.
The gaskets and boot have lost their elasticity
While these elements are working, they are clearly limp in appearance. This is a serious signal that the rubber components will soon break and this will lead to sad, expensive consequences.