October 13, 2020 Lada.Online 6 740 2
The Lada 4×4 uses the oldest steering column switches. At the beginning of the year, the SUV received a slight restyling, but this update did not affect the outdated levers. Let's figure out how you can replace the standard steering column switches of the Niva 2121 with modern and functional switches from a foreign car.
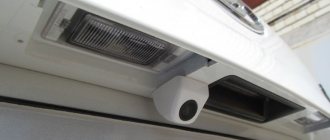
Toyota steering column paddles
Required
: steering wheel paddle shifters from Toyota (in this example from Camry).
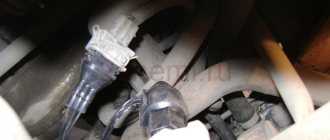
Connection diagram
:
Explanations from the author (niva630)
:
- I made an adapter for attaching the levers to the steering column (diagram below).
- I installed two relays for turns, since in Toyota switches everything is controlled by one plus, but in Lada 4x4 5 volts go through the steering column to the breaker relay.
- The Toyota switch did not have a function for switching the rear window wipers; I had to connect this function to a separate button.
- After checking everything works fine. Removed unnecessary buttons from the panel. The light is controlled from a switch.
Steering column switches from Chevrolet Lacetti
The author of the revision is artemartemof.
Required
:
- Switches from Chevrolet Lacetti.
- The central part of the VAZ 2108.
- Wires.
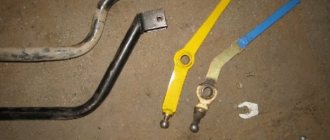
- VAZ 2108 steering contact ring.
- Cooling system pipe.
Installation
Remove the steering wheel, plastic steering column cover and standard steering column switches.
- To insert the Lacetti steering column paddles into the central part of the 2108, you need to saw off the latches on the steering column paddles.
- In order for the turn signals to snap off when you turn the steering wheel, you need to file the antenna on the steering columns a little.
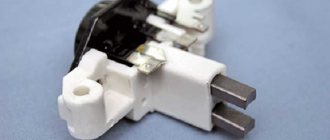
- We cut off the small chip and crimp it with terminals.
To make the steering wheel compatible with the new steering columns, you need to modify it a little. The central part of the steering columns will be from a VAZ 2108, which means that the slip ring on the steering wheel will need to be from a VAZ 2108. Unscrew the 3 screws, take out the standard ring, bend the antennae and separate the copper ring from the plastic part. Now you need to combine ring 2108 with the plastic part of the Niva.
Next you need to drill a hole in the steering wheel, into which a flag will fit, with the help of which the turn signals will fold out. Install the ring.
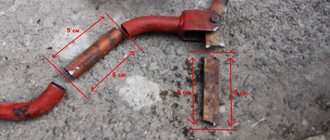
Now you need to secure the switches to the Niva’s steering column. First you need to saw off part of the plastic plumbing pipe.
Install this piece onto the steering shaft. We clamp the pipe with a clamp and put on the central part 2108. Try on the steering wheel. The slip ring 2108 connects perfectly to the central part of the steering columns. The Lacetti steering columns in the central part of 2108 are secured with small screws. They do not go inside the steering columns, but simply clamp them on both sides.
Connection diagram
Left steering column switch:
Right steering column switch:
The standard wiper motor has only 2 operating modes, so it was decided to install a motor from a VAZ 2110. It is worth noting that contact 15 with the relay and contact A8 of the steering columns are powered by the pink wire that was in the windshield washer chip.
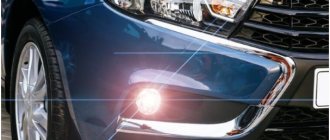
Result in the photo
:
Are you satisfied with the standard steering column switches on the Lada 4×4? Will you exchange them for others?
Installation of steering column switches Shniva, lock VAZ2110
Installation of steering column switches Shniva, lock VAZ2110
Post by Parshmak1 » Sep 20, 2011, 12:22 pm
Hello. Below I describe the installation of a Kalina-type steering wheel, Chevrolet Niva steering column switches, and a VAZ2110 wiper motor.
List of what you need to buy: 1. Steering wheel code 2104-3402010-10. This is not a Kalina steering wheel. It only looks the same as it stands on the viburnum. The slots for the seat on the steering shaft are for the classic VAZ 01-07. Kalina's steering wheel has different slots. 2. VAZ 2110 ignition switch with LED. Code 21100-3704010-20 I recommend installing a DAAZ lock. There were several other options for locks on the market from different cooperatives, including Chinese ones. The quality is strikingly different. 3. Lower steering column casing VAZ 118 code 11180-3403072-00 and upper code 11180-3403065-00 I.e. casing from Kalina. 4. VAZ 2110 wiper motor. Motors come in 2 types. One type does not at all coincide with the native one in terms of fastenings. You need to take a motor that fits like the Niva or the classic 01-07. On the engine that I bought, there is an inscription on a black plastic casing - 842-3730 manufactured under license 5. Chevrolet Niva steering column switches. Central part code 21230-3709320-00-0. The central part should be from Chevrolet. The eight or nine central part has different contacts and will not fit our steering wheel. Left switch code 21230-3709330-00-0. Right switch code 21230-3709340-00-0 6. Plastic mother chip for the left and right steering column switches – 2 pcs. They are different, when you take them, make sure that they fit normally onto the switch contacts. 7. Relay for wipers VAZ 2110. You can take both new and old samples. All contacts there are the same. 8. You need to buy wires of different colors to suit your taste, in total you need 5 meters of wire. There are 30 connecting copper chips for mothers. 9. Two steel bearings measuring 37X20X9 mm. Catalog number 1000904 or 6904-2 RS closed type. (For those who want to change them.) 10. Plastic six-pin male chip (for the 10-kilometre wiper motor) 11. Plastic eight-pin male chip (for the ignition switch)
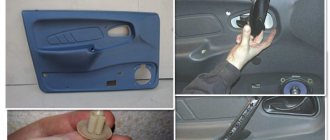
Preparing for installation. 1. Steering wheel.
It is necessary to remove the squeegee from the steering wheel by pulling it towards you, first from the top, then from the bottom.
On the back of the steering wheel you can see black plastic with a copper ring. This plastic snaps onto the steering wheel. We remove the plastic mask, because we don’t need it.
2. Remove the old wiper motor and install a new one in its place. 3. Remove the old steering wheel, dashboard, steering column switches.
Then there are two options: easy and not so easy. 1. The easy way is described here by Mr. Jade: https://www.niva4x4.ru/viewtopic.php?t=6. c&start=15
I see no point in repeating myself. In this case, the steering wheel lock will not work.
2. Since we are not looking for easy ways, we will go with the second option. The goal is for the steering wheel to work, so that the steering shaft bearings are made of steel and not rubber, and so that the steering wheel does not wobble. Remove the old ignition switch.
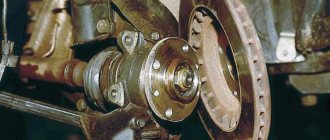
Stage 1. Preparing the tube (sorry, but I don’t know what it’s called correctly) of the steering column. 1. Remove the old rubber bearings. The photo shows that the edges of the tube are bent so that the rubber bearings do not fall out. We bend the edges and knock out the shaft with bearings.
2. We cut a hole for the future lock 2110. It is necessary to cut a hole measuring 20X25 mm with a grinder, retreating 20 mm from the edge of the tube. Cut the hole on the right side as I indicated in the photo. On the steering column (on the left side) there is a rectangular cutout for the tongue of the old ignition switch. This cutout should be your guide. Those. cut a new hole strictly on the reverse side of this rectangular cutout. Otherwise, the ignition switch will be crooked) I hope I explained it clearly.
3. Insert the lower steel bearing (bearing size 37X20X9 mm). To do this, you need to make cuts on the bearing seat. Hammer the steel bearing into place and bend the edges so that the bearing does not fall out.
Stage 2. Preparing the steering shaft. If you look at the photo, you can see that a sleeve with a slot is pressed onto the steering shaft. The lock tongue fits into this slot and locks the shaft.
Since we are installing lock 2110 and it is not in the same place as the old one, it is necessary to move the bushing to another place. The sleeve is welded to the shaft on one side only. We take a grinder and trim the weld.
After this, we move the bushing to the place we need, that is, so that the bushing is exactly where we cut the hole for the new lock, and scald it. How to understand where this place is? If you remember, we already have the lower bearing in the tube. Insert the steering shaft into it and check that the bushing (which we cut and moved) lines up with the new lock hole. If the bushing does not match, adjust its position and weld it.