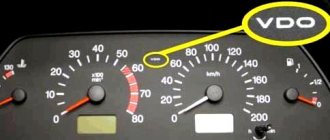
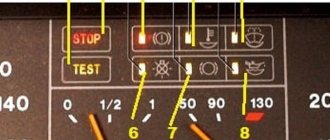
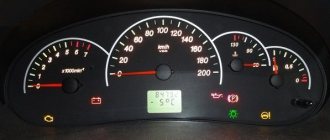
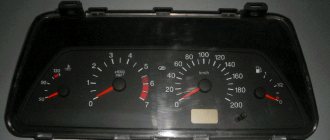
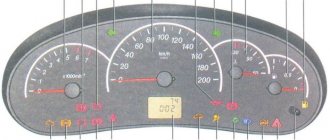
The dashboard or “dashboard”, as it is called among motorists, serves to display and display information about the technical condition of the car online.
In the event of equipment breakdown, light indicators notify the driver for prompt decision-making.
The instrument panel rarely fails and has an unlimited service life. But in the event of an accident, mechanical damage to the housing, it still needs to be replaced. Less often, it is removed to be covered with felt to prevent squeaking.
The main steps when removing the Lada Vesta panel:
- Stop the engine and squeeze the parking brake lever.
- Open the driver's door wide.
- Set the steering wheel to the “center” position.
- Unscrew the two frame fixing screws.
- Remove the plastic base (wells).
- Remove two screws from the base.
- Remove the instrument panel.
- Disconnect the block with wires.
- After maintenance, reassemble in reverse order.
How to disassemble the dashboard of Lada Vesta
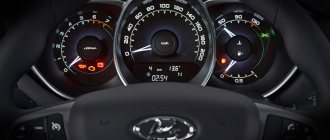
The instrument panel on Vesta has a modern design.
The main readings are located in three large wells and are illuminated using SMD diodes. If necessary, this backlight can be replaced, but to do this you will have to first disassemble the Vesta instrument cluster. We looked at how to remove the dashboard earlier. After this, you will no longer need tools, because... Absolutely everything is held on by latches and clamps. There is not a single fastening screw. To remove the glass you will have to unclip several fasteners around the perimeter of the instrument panel:
Next, we dismantle the mask (covering in the form of wells), freeing the latches from engagement:
Probably the most difficult thing in the whole process is to remove the arrows of the instrument cluster. They should be unscrewed counterclockwise, and with good force, towards yourself. Very carefully, you can easily break the gear stop!
Now you can remove the back cover. We unclip the latches shown in the photo. If necessary, you can remove the covers from the arrow control mechanisms:
Now you can remove the circuit board, which is held by clips, from the device body:
Remove the instrument panel trim by picking it up from one of the edges:
We dismantle the standard on-board computer after disconnecting its connector:
SMD LEDs are used to illuminate the speedometer scales, tachometer, arrows, BC and other indications. Some of them are shown in the photo:
The instrument panel is assembled in the reverse order. At the end, we check the work using an autotest. It is also recommended to glue the wells so that there are no squeaks in the future.
Source: https://xn--80aal0a.xn--80asehdb/do-my-self/repair/repair-lada-vesta/1574-kak-razobrat-panel-priborov-lada-vesta.html
Reviews
| № | Positive |
| 1. | Ivan , 38 years old (drive2.ru), Sverdlovsk: I heard the first creaks of wells after winter, apparently the plastic was a little deformed. I visited the service station, the technician inspected it and found no deformation of the plastic; he just tightened two screws - the retainer. The creaking has disappeared, the second year without any complaints. |
| 2. | Vladlen , 43 years old (prom.ua), Samara: I bought the car second-hand, got it from the previous owner in good technical condition. The interior does not creak, the plastic is original, without additional noise reduction. |
| 3. | Peter , 46 years old (autotoday.com), Krasnodar: in three years of using the car, I tightened the fasteners of the well and torpedoes twice. I didn’t glue the noise suppression, the plastic is factory. I am satisfied with the quality of production and assembly of the Lada Vesta, there are no complaints. |
| 4. | Gennady , 37 years old (rozetka.ua), Rostov-on-Don: my Lada is already in its second year, during which time I have not made any capital investments, with the exception of expenses for scheduled maintenance. For my part, I take care of the equipment and treat it with care. |
| 5. | Dmitry , 44 years old, Kursk (avtoflit.com): there were no complaints about the salon until I had an accident. After replacing the torpedo, squeaks began, no matter what I did, it didn’t help, apparently the geometry of the body was broken. |
| 6. | Vyacheslav , 41 years old, Saratov (autotoday.com): I take care of equipment, treat it with care, and carry out technical inspections in a timely manner. The suspension and the plastic in the cabin don’t creak or knock. |
| 7. | Alexander , 45 years old, Stavropol (drive2.ru): in general, there are no complaints about the interior, it is well assembled. After the purchase, I immediately retightened the plastic and made it noiseless with Madeleine. |
| Negative | |
| 8. | Victor , 37 years old (prom.ua), Uralsk: third-party sounds in the cabin began to be heard immediately after purchasing the car from the dealer. Apparently the plastic is defective. I contacted the service station, they said that it was not a warranty case, they couldn’t help, they said, do the noise reduction yourself. |
| 9. | Fedor , 43 years old, Moscow (avtoflit.com): after a year of operation of the Lada Vesta, the shield (wells) began to creak. The foam padding did not eliminate the squeak. Friends recommended Madeleine. It's expensive, but it's 100% effective. |
| 10. | Kirill , 33 years old, St. Petersburg (drive2.ru): in winter the interior is quiet, but in summer you can hear the grinding of plastic in the tidy area. Apparently, when heated under the sun's rays, the material expands. The workshop said that this is not a warranty case; I will remove the dashboard and cover it with foam rubber myself. |
| 11. | Vasily , 44 years old, Pskov (autotoday.com): extremely dissatisfied with the build quality of the interior of the Lada Vesta. After the first winter, problems began - creaking plastic. The car is not bad, but they clearly saved on the material. Minor defects need to be corrected by the owners themselves, which requires certain costs, time, and effort. Official dealerships refuse to fix the problem due to a non-warranty issue. |
How to disassemble the dashboard of Lada Vesta
The instrument panel on Vesta has a modern design. The main readings are located in three large wells and are illuminated using SMD diodes. If necessary, this backlight can be replaced, but to do this you will have to first disassemble the Vesta instrument cluster.
We looked at how to remove the dashboard earlier. After this, you will no longer need tools, because... Absolutely everything is held on by latches and clamps. There is not a single fastening screw. To remove the glass you will have to unclip several fasteners around the perimeter of the instrument panel:
Next, we dismantle the mask (covering in the form of wells), freeing the latches from engagement:
Probably the most difficult thing in the whole process is to remove the arrows of the instrument cluster. They should be unscrewed counterclockwise, and with good force, towards yourself. Very carefully, you can easily break the gear stop!
Now you can remove the back cover. We unclip the latches shown in the photo. If necessary, you can remove the covers from the arrow control mechanisms:
Now you can remove the circuit board, which is held by clips, from the device body:
Remove the instrument panel trim by picking it up from one of the edges:
We dismantle the standard on-board computer after disconnecting its connector:
SMD LEDs are used to illuminate the speedometer scales, tachometer, arrows, BC and other indications. Some of them are shown in the photo:
The instrument panel is assembled in the reverse order. At the end, we check the work using an autotest. It is also recommended to glue the wells so that there are no squeaks in the future.
Source: https://xn--80aal0a.xn--80asehdb/do-my-self/repair/repair-lada-vesta/1574-kak-razobrat-panel-priborov-lada-vesta.html
Interior in various trim levels
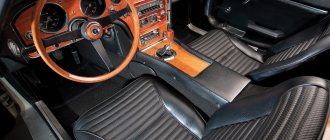
Different versions of the car will have both fabric trim and leather interior. In some photos caught in the frame, the interior equipment resembles black leather, with carbon inserts; in other versions, the seat upholstery looks like fabric with sidewalls made of leatherette or its analogues. The Lada Vesta instrument panel in the photo fits perfectly into the interior and looks quite impressive in this solution. The pricing policy, previously announced by the manufacturer, brings the car to a very competitive level. The initial cost with a robotic gearbox will be 600,000 rubles.
It is too early to talk about more specific advantages and disadvantages of the new product, since there are not even final results of city testing. We can only hope that cooperation with European colleagues helped the domestic automaker move forward.
Prerequisites
The car constantly throws up problems that have to be solved either using independent knowledge, ingenuity and tips from experienced car owners, or by contacting a service center. In the latter case, the result will be more expensive, but not always of better quality.
Even if you are not going to do this right now, it still doesn’t hurt to know how to properly disassemble the panel on a VAZ 2110, and even more so if you are one step away from this work.
Instrument panel VAZ 2110
Difficulties
However, the technology of painting or pasting is a separate issue. Many people are baffled by the process of dismantling the interior plastic. And since the “hot hand” of Vesta’s owners most often comes under the influence of air deflectors, radio surrounds and inserts in door cards, these are the points that need to be considered in more detail.
Interior plastics are often modified
Indeed, dismantling said interior plastic is much more difficult than it initially seems. However, some sedan owners found the key to this task, as for example, Semyon Lipatkov did this on his Lada Vesta “Der Puma”, whom Drive participants know under the nickname lipatkov.
When you need it
It should be noted that the instrument panel on the VAZ 2110 is not particularly durable, so it can simply be damaged. Or it has become worn, frayed, scratched.
But often the reason is different: I would like the design to be more beautiful, and not everyone is satisfied with the “standard” lighting. And there are more modern ones, LED, stylish. But in order to change anything or even replace it, you must first disassemble the old instrument panel.
This material will help you change the dashboard lighting on a VAZ 2110: https://vazweb.ru/desyatka/salon/podsvetka-paneli-priborov.html
Secret menu MMC Lada Vesta
Few people know that Vesta’s standard multimedia system has a secret service menu. It contains the following functions:
- Software - software version, firmware, etc.
- System status - system status.
- Data save - saving data.
- Key test - key test.
- Fan test - fan test.
- Decoction test
- Initialize - initialization.
- RVC test
- Diagnostic - diagnostics.
- Screen Adjust - screen adjustment, calibration.
- GPS test - GPS test (satellites).
- Activation Mac - Mac activation.
- Screen test - test the screen (you can make it dark so it doesn’t glare).
- Backlight test - backlight test.
- Can test - Can test.
We told you how to get to this menu here.
Disassembly procedure
Many people are interested in whether it is possible to remove the dashboard of a VAZ 2110 without “demolishing” the floor of the cabin? It's probably possible, but it would be very inconvenient.
Therefore, we act according to this plan:
- Let's prepare a marker and self-adhesive labels (which are usually glued to the product). They can be bought at points where all sorts of small things are sold such as napkins, bags, etc., as well as in stationery stores;
- We remove the front seats from the interior;
- We unscrew the screws on the sides, remove the tunnel (first its upper part, then the lower);
- We disassemble the steering column casing, remove it and the steering wheel. To do this, you need to unscrew 3 self-tapping screws and 4 screws. Please note that the VAZ 2110 steering wheel sits quite tightly on the splines, so you need to remove it by rocking and tugging, but being careful of a sharp blow to the face, if you suddenly overdo it and it will fly out;
- Next are the steering column switches. They also need to be removed;
- Don’t forget to mark everything and write down on a piece of paper what we are filming;
- We unscrew the glove compartment (in “understandable” language - the glove compartment) and also take it out;
- Next comes the disassembly of the mounting block and its cover. To do this, disconnect all connectors and relays;
- Now we have almost opened the instrument panel on the VAZ 2110. All that remains is to remove the strut covers, unscrew the headlight hydraulic adjustment and push it inward;
- Now the main task is to unscrew the screws securing the instrument panel to the body. To remove it completely, you need to unscrew the two studs located under the covers of the tunnels for supplying air to the side windows.
After all these manipulations, the panel hangs, and is held in place only by the steering shaft and the lower air duct.
An article discussing the process of replacing the panel overlay is located here: https://vazweb.ru/desyatka/salon/nakladka-na-panel.html
Firmware for VESTA instrument panel, VestaLargusX-RAY engine
Firmware for VESTA instrument panel, VestaLargusX-RAY engine, post pinned
Review of the instrument panel of the Lada Granta
ICE firmware 1.6 Vesta, X-RAY, Largus with M86 block Firmware available from “Motor-Master” (Dynamic and Super Dynamic) and “Chelyaba”. Different versions - Euro2/5, with fan turned on at 95-97°, with quick start, normal heating. With preservation of the firmware number and checksum of the drain. Show in full…
Firmware for LADA VESTA dashboards, WITHOUT REMOVING the panel, saving the VIN. For panels with white scales PO - 26, 28, 35, 36
— Software firmware — Activation of cruise control and speed limiter — Disabling the seat belt warning light For panels with orange scales Software — 11, 19, 22, 27, 126, 226, 301, 501 — Software firmware — Display of REAL engine temperature — Activation of cruise control and speed limiter - Disabling the seat belt warning light
Register the VIN number in the tidy For those who independently flashed the tidy with ready-made firmware and did not register the VIN
Mileage adjustment. Reduce the mileage on the dashboard, register the real mileage after an unsuccessful winding and mileage “999999”
Enabling additional functions on LADA VESTA 1. Enabling the cornering lights using PTF for the Luxury package 2. Disabling the automatic activation of the rear wiper for SW and SW Cross 3. Enabling the sound signal when the standard alarm is turned on/off 4. Disable the hill start assist system ( HSA) 5. Follow Me Home (“take me home”) for the Luxury package 6. Turning off the DRL when the turn signal is ON, from the turn signal ON side, for the Luxury package
On the first Lada Vesta cars, the instrument panel was not backlit in the daytime, which made reading the readings in bright light difficult. In addition, after installing cruise control yourself, there will be no corresponding indication on the panel. All these shortcomings can be corrected by updating the dashboard firmware.
What to do with the wires?
You will probably be amazed at the number of wires located in the panel space, intended to power various devices in your VAZ 2110. It would be more convenient to remove everything together with a lump of wires. But take your time. It is unlikely that you are going to change anything on a completely new car, so in the future you will spend a long time figuring out which wire comes from what, and how to connect it. So that it turns out that disassembly went quite smoothly, but reassembly led to a slight stupor.
Disassembled instrument panel of VAZ 2110
So try to disconnect all the connectors and wires that you can. Now you can finally remove the panel and remove it from the car. For fresh traces, do not forget to separate (you can tie in a pile) the entire wiring harness that belongs directly to the instrument panel, and mark the rest with self-adhesives. This will help you a lot when you start installing new equipment.
Source: https://vazweb.ru/desyatka/salon/kak-razobrat-panel.html
What does the dashboard consist of?
The Priora instrument panel contains all the necessary parts that no modern car can do without:
- regulator of external lighting and internal panel lighting;
- switch for turning, side and headlights;
- signal regulator;
- car instrument cluster;
- windshield wiper and washer regulator.
This is how the dashboard works
In addition, the panel contains an ignition switch connected to the anti-theft system. It contains 3 positions. Among the secondary mechanisms, we can note the presence of regulators for the rear window heating system, alarm and interior cooling. It is also worth mentioning the glove compartment, built-in clock and radio input jack.
Sometimes a certain panel element becomes unusable and you have to look for ways to replace it. In this case, you will need to disassemble the interior. Below is how to disassemble the instrument panel.
Burnt out warning lights
In most cases, the absence of a signal from the control lamps is due to the fact that the light bulbs themselves have burned out. To make sure the lamps are working, pay attention to their condition when you turn the ignition switch. Before starting the engine, the control unit turns on the warning lamps for a while. Particular attention should be paid to lamps with a red tint:
- indicator lamp for handbrake and brake system malfunction.
- power steering fault warning lamp
- indicator lamp for lack of battery charge
- critical oil pressure indicator light
- security system malfunction warning lamp
All these lamps are red because they are associated with a serious malfunction, ignoring which can lead to not the most pleasant consequences: in the best case, the car will stall, in the worst case, the engine will require major repairs (for example, emergency oil pressure).
How to disassemble the instrument panel?
It often becomes necessary to dismantle the car interior in order to replace a part, for example, backlight bulbs. To do this, first of all, you need to understand how to disassemble the instrument panel. Removing the panel is quite simple. Select the required screwdriver and carefully unscrew the attached hardware.
Disassembling the panel begins with removing the hands on the dial, which can be disconnected with a knife. The main thing is to be careful and not damage the speedometer parts. It is advisable to use cardboard as a holder for glass elements. Replacing the backlight is done by scraping out the cover of the gasket in the speedometer. If you do not need to change the backlight of the sensors, you can simply clean them and leave them brighter.
But in most cases, the driver wants to change the color of some elements in the speedometer and make it much more useful. For example, the backlight of the instrument panel will be able to display the maximum permissible speed or extremely high engine overheating with indicators of a different color. To do this you will need a thin multi-colored cellophane bag.
You need to use a small piece of brightly colored cellophane to cover the indicator you are interested in on the inside of the dial. Dashboard lighting is limited to more than just highlighting indicators. Many motorists try to ensure that the lighting of their devices is uniform.
To achieve brighter and more even illumination, it is necessary to cover the panel with a special LED strip, which must be connected to the stock backlight wires in accordance with all the rules of current resistance. The set of instruments on the Priora can be easily supplemented with the latest method of illuminating the needles.
You can use CMD diodes, which can be easily fused into the glass panel using a soldering iron. To do this, we disassemble the dial and begin soldering directly under the base of the hands. The contact wires must be connected from the reverse side. If the instrument panel in Priora is broken, qualified assistance may be needed to repair it.
But you can easily do it yourself. To do this, you will need a panel pinout, that is, a diagram indicating the correspondence of the contacts with certain car devices. It looks like this:
- 1 — power steering;
- 4 - hand brake;
- 7 — external lighting regulator;
- 8 — right turn signal;
- 9 — left turn signal;
- 12,13 — immobilizer antenna sockets (A and B);
- 14 — mileage reset regulator;
- 15 — brake fluid regulator;
- 18 — instrument panel backlight control;
- 20 — battery terminal 30;
- 21 — battery terminal 15;
- 23,24 — forward and backward buttons on the steering column;
- 25,26 — outside temperature regulators (- / +);
- 27 — fuel tank regulator;
- 31 - panel diagnostic service.
Pinout numbers that were not specified are backup pins.
A little about SMD LEDs
| Brightness level | Data | Light flow |
| very bright | SMD 5050 | 15 Lumens |
| bright | SMD 3825 | 7- 9 Lumens |
| medium brightness | SMD 3528 | 5 Lumen |
| —/— | SMD 3028 | —/— |
| not bright | SMD 3020 | 4 Lumen |
| —/— | SMD 3014 | 3 Lumen |
The symbols next to the SMD indicate the dimensions. For example, SMD 3427: 3.4 x 2.7 mm.

