All stages of preparation
It is clear that it is best to clean the disc “to the metal” before painting. In this case, only sandpaper (ISO P400-P1500) and, perhaps, a drill with a metal brush are used.
This is how you remove a layer of old paint
The problem is that such cleaning will take more than one day. But the result will please you with its appearance:
Fully cleaned steel disc
In order not to waste time, the surface is only cleaned of rust, then sanded and degreased. The “old paint” remains. This option is also considered acceptable. Let us list the stages of preparation “step by step”:
- Thoroughly rinse the disc with water. To simplify the task, use a brush;
- Mechanical rust removal;
- If necessary, you can use a rust converter: apply the product, leave it for 2 hours, then grind the surface and clean it. You cannot use water!
- Degreasing (white spirit or solvent 646 is suitable);
- Applying putty if the wheel has obvious defects.
- Apply two layers of primer with an interval of 20 minutes.
The last step is to use a universal acrylic primer. These products are sold in aerosol packaging.
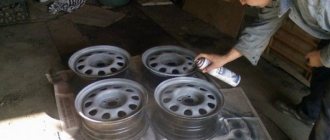
Application of primer
Note that phosphoric acid can act as a rust converter. And if the finishing layer is applied, it takes a day to dry the soil.
It is important to know: once a mark has been made on the metal with sandpaper, water should not touch the surface in principle. Use organic solvents for cleaning.
The priming itself is a dress rehearsal for the painting process. To simplify these “processes”, the disk can be installed on an inverted bucket. The rim is then painted by turning the disc with the desired side facing you. As you can see, everything is simple.
You may have to work with sandpaper after applying the primer. Sanding with P1500 sandpaper is carried out before painting, which is mandatory.
Preparatory stage
Some craftsmen claim that painting wheels can be done without removing the wheels from the car. However, you should not be led by laziness - after all, only after completely disassembling the wheel can you carry out an inspection and identify possible damage. And complete protection against corrosion is possible only in this case.
Don’t forget that up to 70% of the quality of the final result depends on how well the preparatory work was done. It is for this reason that the preparatory stage must be treated very responsibly.
Painting process
So we got to the most important thing. Let's look at how to properly paint stamped wheels so that you don't have to redo everything from scratch later. In principle, there is nothing complicated in this process:
Applying paint to the rim
Of course, not everyone has a spray gun, nor does everyone have special equipment. Therefore, an upside down bucket, unnecessary tires, etc. will help again. The main thing is to be smart, as the author of this photo did:
Homemade equipment for disks
Also, it is advisable to follow these tips:
- When using an aerosol, the can must be shaken periodically;
- The temperature of the aerosol package should not be too low: 30-35 degrees is the norm;
- Keep the aerosol at a distance of 20 cm from the surface (no less);
- When painting, you should not stay in one place for a long time, otherwise streaks will form.
The paint is applied in two or three layers, maintaining an interval of 10 minutes. An hour after painting, the surface is treated with varnish. You can use the finished product within a day. But it’s better to wait 60-80 hours – during this time the varnish gains maximum strength.
Stamping processing process
The stamped disc must be thoroughly washed to remove foreign contaminants and dried. The next step is to clean off the rust and smooth out the welds, if any. To speed up this procedure, you can use an electric drill with special attachments.
Hard-to-reach places can be sanded yourself using sandpaper. Accumulated dust must be washed off periodically to clean untreated areas. In addition, immediately before priming and painting, you must carefully blow out the dust. Otherwise, it will spoil the surface of the stamped disc after painting. If the rust is deeply ingrained, you will have to use a special converter.
Selection of materials, tips
Typically, acrylic paint, glossy or matte, is used to paint metal. The primer for this paint is also acrylic (universal). There are also nitro paints. All of the above materials are packaged in an aerosol. But, as is easy to understand, not every primer is suitable for nitro enamels. Be aware that nitrogen based primers and paints are prohibited for use in most countries.
Here are some tips that are known even to beginners:
- The higher the air temperature, the faster drying occurs;
- The color of the primer should approximately match the color of the paint;
- The aerosol must be shaken before use. The packaging temperature, moreover, should not be lower than 25 degrees. This advice applies to any aerosol: with paint, primer or varnish.
It was said how to paint stamped wheels if you know that the work will be done with your own hands. And therefore, such an option as using powder paints was not considered. Good luck.
According to reviews, 4 discs require: 2 cans of dye (450 ml), one can of primer (450 ml), one can of varnish.
Preparation
The ideal option is to break up the tires. But this requires additional expenditure of time and money. In addition, not every motorist has a set of spare wheels. Therefore, work is often carried out on site. But painting stamped rims on the car itself is not the right solution. This will cause a lot of leaks. In addition, paint pollen can get on the arches and other body elements.
After removing the wheels from the car, we clean them of the previous paint. If you just need to change the color while the paintwork is completely intact, you can apply the composition without stripping. As practice shows, acrylic enamel adheres well to such a surface. But in this case, you shouldn’t apply primer - it simply won’t dry out. We perform priming only on bare metal. You can clean it either with a drill attachment or by hand with coarse sandpaper. If there is rust, treat the area with a converter. Next, we degrease the surface. An anti-silicone product containing white spirit is suitable for this. The composition perfectly removes dirt, greasy deposits, as well as some acrylic paints.
Hub like a lathe
There is a method that allows you to quickly paint the rim:
- Let's say there is rust on the surface of the rim. To find out about this, you will have to disassemble the disk (Fig. 1);
- Next, the disk is mounted on the hub, the engine is started and the gear is engaged (Fig. 2);
- If you are using a left-hand hub, turn the steering wheel to the left, and vice versa;
- Using cloth-based sandpaper, sanding is carried out (Fig. 3). It is better to fix the sandpaper on a block;
- Just as “preparation” was done in step 4, painting can be done (Fig. 4).
All steps are illustrated in the photo:
Looking at the edge of the rim
Using the hub like a lathe
Rust removal
Painting procedure
Use this method at your own risk.
Tools and consumables
For work we will need:
- an electric drill and a set of grinding attachments installed in it;
- aerosol can or paint;
- in the latter case, you will also have to acquire a spray gun, as well as a compressor unit;
To paint wheels with paint you need a spray gun and a compressor unit
- primer and solvent;
- protective clothing and respirator;
- construction hair dryer;
- sandpaper;
- rags.
Basic materials and equipment
- Spray gun with compressor;
- Drill with a special attachment;
- Sandpaper;
- Primer for discs;
- Paint (in the absence of a spray gun, aerosol at the rate of 2-3 cans per wheel);
- Solvent;
- Masking tape;
- Rags.
DIY painting is done using a spray gun and a compressor. In their absence, you can use regular cans. In addition to paint, you need to prepare a primer, sandpaper and, preferably, have a drill with a special attachment for metal brushes.
How to make a border
You can buy contour tape to paint it in two colors. The standard two-tone color option is the border near the rim. The result of all work will look like this:
Stamped discs with border
The border color is the first layer of paint. Or rather, two or three layers. When doing two-tone painting, keep the following in mind:
- Allow the paint to dry before applying the tape. Which takes 15-20 minutes;
- Do not use regular tape with contour tape. It will come off along with the paint;
- In the example shown above, painting could be done like this: 2-3 layers of red enamel, drying, one “outer” layer.
The last layer must be dried finally. Then varnish treatment is performed. Know that the width of the contour tape is always 6 mm. But this is not a problem, since polyethylene can be glued under the tape.
Painting technology
Before painting yourself, you need to clarify how much base material (paint) is needed. You should buy enamel with a reserve so that there are no problems with matching the tone, otherwise the discs will be different in color.
Necessary materials and equipment
In order for the job to be done efficiently, you should not skimp on paint. It is also important to check the expiration date of enamel and other materials. The technician will need automotive primer and varnish, acetone or another solvent, and car putty (if there are defects).
Tools and consumables you need:
- fine grain sandpaper;
- gloves;
- respirator;
- Sander;
- construction hairdryer
When purchasing paint, it is better to immediately purchase primer and putty of the same brand to improve compatibility and, accordingly, the final result. An electric drill with a special attachment (for removing old coating and traces of corrosion) is suitable as a replacement for a grinding machine. A construction hair dryer, if necessary, is replaced with a heat gun. These tools are needed to dry the paint as quickly as possible, but many types of enamels dry well at room temperature. If you purchased paint in a can, no tools are required. When using other forms, you need to buy a roller, brush and spray gun.
Preparing for work
Before work, remove tires, plastic caps and plugs that will interfere with quality painting. Further preparation includes the following steps:
- thoroughly rinse the products from dirt using ordinary household chemicals or special automotive products, as well as a brush with plastic bristles;
- sand the disc to remove minimal chips and scratches (first you can use coarser sandpaper, then fine sandpaper);
- if there are deep chips, use putty;
- degrease the discs with acetone or another solvent;
- wrap the wheel nipples with masking tape if the rims have not been removed;
- You can start priming.
Dyeing process
The primer is applied to car wheels in 2-3 layers with an interval of 15 minutes. This time is required for the soil to dry (you cannot apply a second layer to a wet disc!). Next, you can make the first layer with a spray gun, holding the nozzle at a distance of 40 cm from the product (it is also acceptable to apply paint with a roller and brush). It is important to apply only thin layers so that the paintwork does not leak. After each layer has dried (from 15 minutes), the next one is applied, up to 2-4 layers in total. To complete the work, the discs need to be varnished. This is done 30 minutes after the paint has completely dried. Usually 2 layers of varnish are enough for the outside and 1-2 for the inside.
Using paint in spray cans
The most convenient is the use of paint in the form of ready-made auto enamel, which is sold in cylinders. There is no need to dilute it, add a hardener or solvent, which some products in jars require. You just need to first test the paint on an unnecessary surface in order to get used to it and then apply layers evenly, without drips. The most economical paint consumption is with a round spray nozzle; more material will be required if the nozzle is vertical.
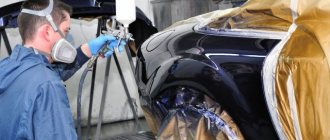
Before starting work, it is important to cover all unpainted parts of the car with masking tape or film, because it is impossible to completely control the spraying of the aerosol. The contents of the container should be shaken well; during long-term work, the procedure should be carried out every 10-20 minutes. The room temperature should not be lower than +10...+15 degrees (optimally +20 degrees).
To make it easier to apply paint, the discs should be removed from the machine and hung on a hook in the wall. Preparation does not differ from that described above for other types of paint. If there is rust, you should buy a converter, cover the damaged areas with it, and leave for 2 hours. You can then remove rust from the wheels with high efficiency.
After priming you need to:
- shake the paint, spray the first layer from a distance of 40 cm;
- wait 10 minutes, apply a second layer;
- ensure that all hard-to-reach places and complex elements are well painted;
- after complete drying, spray varnish from a can;
- between each layer, except the final one, remove all irregularities with fine sandpaper or abrasive paste;
- If necessary, treat the disc with car polish.
Security measures
During preparation and work, the following measures should be followed:
- Wear safety glasses to prevent paint from getting into your eyes;
- use thick clothing and gloves to protect your skin;
- Paint only indoors with good ventilation or in the fresh air;
- prevent paint from igniting by preventing nearby sources of fire.
Preparing stamped discs for DIY painting
Painting stamped wheels involves a preparatory stage. The surface must be cleaned of dirt, possibly rust or old coatings. To do this, use an electric drill with an attachment, as well as sandpaper. During the cleaning process, the disc is wetted several times with water. Upon completion of this stage, the disc is washed again, degreased and dried. Only after this can you proceed to further actions.
After removing the tire from it, the disk must be thoroughly washed. Regular detergents can be used for this purpose. If there are places with complex contamination, then chemicals are used to clean them. Next you need to take the following steps:
- Carry out a thorough inspection for damage. If deep cracks are detected, they are processed using a file. Detected dents are straightened.
- If, as a result of the inspection, pockets of corrosion were found, they should be eliminated. For this purpose, grinding or chemical treatment can be used.
It is advisable to dwell on the last point in more detail. In order for the fight against rust to be successful, it is necessary to prepare the following materials:
- A set of sandpaper from P60 to P120. The number of sandpaper used depends on the depth of damage to the metal surface.
- A rust converting chemical, plus some solvent.
- A lot of rags.
Processing should begin with grinding work.
For grinding, you can use a drill with a wire brush attachment.
You can sand with sandpaper either by hand or using an attachment for an electric drill. It looks like a metal brush. The goal of this stage is to make the entire surface of the discs absolutely flat.
You can start painting only after the primer layer has completely dried. To ensure that the paint applies evenly, it is recommended to heat the surface to be painted with a hair dryer. For best quality, you need to apply several layers of paint, and each of them needs a certain time to dry completely.
Apply paint to the stamped disc
At the final stage, the painted surface is coated with varnish. It should also be applied in several layers - their number should not be less than two. The time required for the varnish to dry completely is usually indicated on its packaging.
