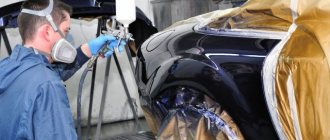
For some, cars are a means of transportation, while for others, they are a means of self-expression. The reasons why you decide to reupholster the ceiling can be different: the desire to change the interior to your liking, a coating that has become unusable, persistent dirt, an accident and expelled airbags, loss of shape, peeling of fabric. Before deciding to reupholster the interior, it is advisable to understand in detail the issues of technology and choice of materials. At first glance, there is nothing complicated about reupholstery, but there are a number of features that need to be taken into account. If you decide to entrust this operation to a professional, then knowledge of the nuances will help you control the work of the master.
Procedure for reupholstering the interior
In order to change the car ceiling upholstery, you need to carry out a number of operations:
- dismantling the ceiling from the car;
- cleaning the ceiling from the old layer of upholstery;
- Troubleshooting the ceiling frame, do-it-yourself repairs;
- selection of material and color, purchase of the required quantity;
- preparation of the ceiling frame, repair and degreasing;
- pasting the ceiling with material;
- installation of the ceiling in place;
- assessment of the master's work.
Removing the ceiling and installing it in place must be carried out in full accordance with the above algorithm, otherwise a high-quality result will not be achieved
Do-it-yourself ceiling cladding
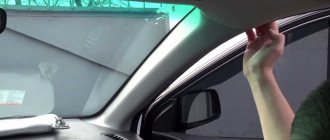
Having decided on the material for reupholstering the car ceiling, proceed to the procedure itself. The first and most difficult thing you need to do is remove the ceiling. Many drivers mistakenly believe that this requires removing the windshield. However, this is not so: it is enough to remove the front passenger seat and reach the ceiling through the rear door of the car.
The video shows the removal and reupholstery of the ceiling on a Passat B3:
It is necessary to remove the old coating and glue residues from the ceiling. To do this, use a solvent and a hard sponge. Then we recommend going over the surface with sandpaper. This will eliminate all irregularities. In addition, the new coating will adhere better to rough surfaces. Glue the auto velor onto the ceiling matrix using “88” glue. It perfectly bonds non-porous materials.
In essence, do-it-yourself reupholstery comes down to simply gluing the material onto the matrix. It's no more difficult than wallpapering. However, your main task is to glue the fabric evenly, without a single fold. Therefore, it is better to perform this procedure together with an assistant.
To begin, apply a thin strip of glue in the center of the matrix. Its length should be about ten centimeters. Then attach the central part of the fabric scrap to the strip. Using the same method, glue each side of the fabric in turn from the center of the matrix (apply glue every ten centimeters of the ceiling).
The task of your assistant is to pull the auto velor on the sides of the glued center. At this time, you yourself must smooth the material from the center to its edges. Carry out these steps while wearing cellophane or cotton gloves. If you choose cotton mittens, they should be white. Otherwise, stains may remain on light-colored fabric, so proceed as carefully as possible.
When gluing ten centimeters on each side, watch the bends of the matrix. You must glue the material as tightly as possible to the surface of the ceiling. Wrap and glue the edges of the car velor. Carefully trim off excess pieces of fabric. Then carefully make small holes for the fasteners and then proceed to install the ceiling matrix into the interior.
Removing the ceiling
Disassembling the ceiling in the cabin is not an activity for temperamental car enthusiasts. Patience and care are required to avoid damaging the fragile roof frame, wires and fasteners.
The procedure will differ depending on the make of the car. The exact location of fasteners, wires and the method of dismantling the ceiling are indicated in the repair and operating manual for a specific car model, but there are a number of rules and general recommendations. Compliance with them will reduce the risk of damage during dismantling.
Video: example of ceiling removal
Dismantling proceeds in the following order:
- We examine the ceiling. What we pay attention to: the presence of backlight bulbs, whether the pillar panels interfere with the dismantling of the ceiling, whether there are visible clips and how they are arranged, how the side ceiling handles are attached.
- In most cases, you will need to remove the panels that cover the posts. It is also advisable to drag the panels to match the color of the ceiling - it will look original. To remove the struts, you will need to unscrew the seat belt fastenings, move away the rubber seals, and find the hidden screws. To prevent “crickets” from occurring, the panels are mounted on self-latching connectors. Therefore, you will have to carefully, without fanaticism, pry them off with a screwdriver so that the connectors come out of their sockets.
- If the car has a hatch, you need to disassemble the seals around it, as well as remove the panel that covers the hatch. We will also drag this panel.
- We remove the interior lighting, if any - the heater or audio system control panels, visors and ceiling handles. It is important to identify the location of hidden screws and not damage the plastic parts.
- We find hidden elements of ceiling fasteners, they can be screw, “ruffy”, and also spacer. Depending on the type of clips, we select a tool for dismantling - a screwdriver, pliers, scissors or a knife. In most cases, the clips break when pulled out, so you should find out if there are similar ones in available auto stores.
- The order of removing fasteners is from the edges to the middle. If dismantled in the reverse order, there is a risk of breaking the ceiling frame. Get an assistant to hold the hanging edge of the ceiling.
- An important step is to remove the roof from the interior. In station wagons and hatchbacks this is not a problem - it is accessible through the rear door. In coupes or sedans, difficulties arise. You may have to remove the front seats or one door. If you cannot reach the roof through the door, you will have to remove the windshield - and this is an additional cost.
Depending on the type of car clips, we choose the method of removing them.
Before starting work, we determine the place where the removed elements and fasteners will be stored. If all the parts are in a pile, it will be difficult to install them in place.
Cleaning the ceiling frame
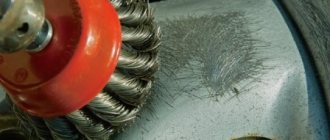
The old fabric and foam backing should be removed. The most common method is mechanical. A sharp knife, spatula, and coarse sandpaper will come in handy. If the fabric cannot be removed, try soaking it in 646 solvent. To avoid damaging the frame, it is better to conduct a test test in inconspicuous areas.
The ceiling frame must be carefully cleaned of old foam rubber and glue residues
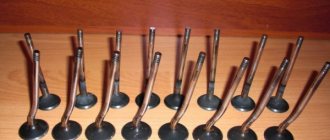
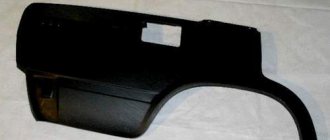
Frame defects
Cracks, wrinkles, frayed edges, breaks from airbags - the frame should be inspected, all difficult places should be marked with a marker. Based on the existing damage, a decision is made to replace or repair the frame.
It is recommended to repair using epoxy resin and fiberglass. The procedure is as follows:
- on the back side of the frame, the repair site is cleaned with coarse sandpaper;
- a layer of epoxy resin is applied, a fiberglass patch is placed on top and pressed into the resin;
- repeat the operation 1-2 times until a strong layer is obtained;
- On the front side, the damage is cleaned and puttied.
If the frame is badly damaged, it will be cheaper and easier to replace it.
Video: reupholstering the ceiling with airbags firing
Choosing a new fabric
Most often, automotive velor is used to reupholster the ceiling, since the material is durable, attractive in appearance, and low in price.
When choosing the color of the material, you should focus on the overall color of the interior. Experienced car owners advise using dark shades, as they are less dirty and more practical.
Anyone who is thinking about how to upholster the ceiling in a car should pay attention to the following types of fabrics:
- Alcantara. Non-woven ultramicrofiber, its characteristics resemble natural leather. Alcantara is resistant to mechanical damage, easy to maintain, and also highly elastic, which facilitates the process of gluing the ceiling of a car.
- Leatherette. A cheap analogue of genuine leather, which gives the interior a respectable appearance. There are many types of leatherette, differing in thickness and texture. Its disadvantages include susceptibility to scratches and fragility.
- Carpet. This material is often used for upholstery of car speakers and subwoofers due to its good acoustic characteristics. Carpet is resistant to mechanical damage, durable, and has an attractive appearance. If desired, you can glue the ceiling lining made of waterproof carpet - it is more resistant to mechanical damage and moisture, is easy to clean, but is more expensive.
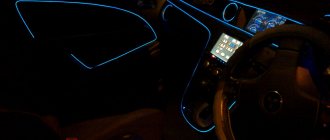
- Flock. In appearance it resembles velor, but is cheaper. It consists of the smallest particles of polyamide, wool and cotton, which are sprayed onto the interior surfaces - ceiling, doors. The technology of applying the material allows you to cover any surface, even the most difficult to reach, with a perfectly even layer. The disadvantages of flock are the possibility of cleaning only using a dry method and the labor-intensive process of removing the material.
Selection of material for reupholstery
The material for upholstering the car interior ceiling has the following properties:
- elasticity;
- strength;
- environmental friendliness;
- non-flammability;
- durability;
- cleanable;
- have a wide range of colors that are resistant to fading.
Video: expert advice when choosing fabric
The market offers a variety of interior reupholstery options. Most Popular:
- automotive leather;
- eco leather;
- Alcantara;
- flock;
- carpet
Automotive leather is considered the most exclusive and expensive upholstery option. It is made from natural raw materials - cattle leather. Automotive leather is thinner than shoe leather, but thicker and stronger than haberdashery or furniture leather. During processing, the leather is covered with a layer of polymer material, which adds practicality and durability to the leather. Natural leather has two disadvantages: it doesn’t stretch well and is expensive. Therefore, it is better for a novice master to postpone this option, since a mistake will be expensive.
Eco-leather is cheaper, but looks the same as the real thing. Therefore, if you want to sheathe the ceiling, it is better to use it rather than natural leather. Eco-leather is made from fabric on which a layer of PVC or polyurethane is applied. When choosing, you should pay attention to polyurethane leatherette, which does not wear out and stretches well.
Alcantara is a popular material that is used instead of leather in car interior trim. This material is an artificial microfiber fabric that looks like suede. Alcantara was invented in Japan specifically for finishing the interiors of yachts and cars. The composition includes polyester, polyurethane and cotton. Thin interwoven fibers allow the material to stretch perfectly in all directions and also to adhere well. There is even an option on sale with an adhesive layer already applied. Alcantara is easy to clean, and over time retains its original appearance and does not wrinkle during use. In many respects, this is an ideal option for finishing a car interior. The downside is the price, which rivals that of real leather.
Another modern technological material is flock. This fabric is produced by spraying small fibers onto a base. A special glue holds the fibers together. A special feature of this material is its maintainability - if you have a special flock sprayer, you can repair a scratch or burn, or even paint a picture with multi-colored pile. The disadvantages of flock are that it does not tolerate exposure to solvents or alcohol cleaners.
Carpet is the most affordable and popular material for car ceiling upholstery. This is a non-woven material that resembles loose felt in appearance. Initially, the casings of audio speakers or podiums for speakers were covered with carpet. Due to its low cost and excellent performance properties, this material has gained popularity among car enthusiasts. Dense and thick carpet is used for car mats, and thin carpet is used as upholstery.
Carpet is widespread and can be purchased at any specialized store.
Photo gallery: materials for ceiling cladding
Stitches on the leather add relief and charm to the car ceiling
Eco-leather will help create an expensive appearance in the cabin
Carpet for budget cars: simple, but tasteful
Semi-matte splendor - Alcantara in the car interior
The flocker will help you create any three-dimensional patterns on the ceiling
There are other options for finishing the ceiling in a car - velor, traditional fabric. However, they are used less and less, since the above materials are more suitable for use in a car.
Purchase of materials
We’ve decided on the type of fabric - it’s time to go to the store to buy. But first we need to measure the dimensions of the ceiling and determine the need to paste the racks. When purchasing fabric, you should take into account a 5-10 cm allowance on each side of the part, as well as the fact that the fabric should be glued to the part without joints, in one piece.
Having purchased the fabric, we select the appropriate glue. There are different types of glue; before gluing, be sure to do a compatibility test of the fabric, roof frame and glue.
The following options are possible:
- glue No. 88 “Moment” is an excellent glue, it applies well and holds the fabric tightly. A day after pasting, you can smell the solvent, but after a while it becomes safe for health;
- special glue that can be applied using a spray gun. Unlike Moment, it has a liquid consistency. If you have a spray gun and a compressor, this is an ideal option, since it is easier to apply a thin, uniform layer with a sprayer;
- Spray fabric adhesive is a popular option. It is more expensive than the first one, but much more convenient, the layer turns out even. High-quality glue in a can is an excellent option for a novice craftsman;
- hot melt adhesive in spray form. It is applied to the fabric and frame and dries. After this, the fabric is laid on the frame, heated with a hairdryer and rolled with spatulas or rollers. After cooling, the fabric holds up well. This method is practiced by professionals, as it allows you to achieve excellent results with minimal effort and time. Hot melt adhesive is usually more expensive and requires a hair dryer with temperature control.
Video: expert recommendations for choosing glue
Materials
First of all, you need to choose the material for the roof. There are several options: fabric, Alcantara, leather of artificial and natural origin. In any case, reupholstering the ceiling in a car requires approximately 5 square meters. m.
Leather
This material is considered the most suitable for re-upholstering the ceiling in a car with your own hands. Its advantages include high strength, resistance to abrasion and the effects of water, fire, detergents, moisture, temperature changes and the resulting durability, as well as ease of maintenance. The main disadvantage is considered to be the high cost. Artificial leather is an analogue of natural leather, therefore it is similar to it in many respects, as well as in appearance. At the same time, this material has the advantage of lower cost.
Alcantara
It is a synthetic fabric consisting of ultra-fine fibers. This material is considered an artificial analogue of suede: it is characterized by high durability, pleasant appearance and texture, and a wide range of colors. A special property of Alcantara is air permeability.
Flock
This fabric is not as widespread as a material for ceiling cladding with your own hands compared to the options discussed above. This may be partly due to the slightly more complex technology of reupholstering the ceiling in a car. The advantages of flock include resistance to wear, ease of maintenance, attractive appearance, noise-absorbing properties, variety of textures and colors.
Carpet
This fabric is one of the most affordable among synthetic ones. Its advantages include wear resistance, resistance to mold and fading, noise and heat insulation properties.
As for the color of the ceiling, black is the most common. This is explained by the fact that, firstly, many contaminants are barely noticeable on such a ceiling, for example, such as black deposits from smoke, secondly, many cars have a black or dark interior, with which the black ceiling is combined, and thirdly, black material easier to clean. Light-colored fabric is not as practical to use as black material, but is also suitable for finishing the roof.
Fabric of bright colors is used much less often in the car. Firstly, such material will not match the interior trim unless it is covered with fabric of the same color. Secondly, the bright lining of the car’s ceiling and other interior elements tires the eyes. Therefore, it is best to cover the ceiling in a car with fabric in black or pastel shades.
Work procedure and valuable tips
The ceiling frame has already been cleared of the remnants of old fabric and foam rubber. You can sand it with 80-120 sandpaper for better adhesion. Before gluing, you need to remove any remaining dust and grease from your hands - we use degreasers, but it is not recommended to apply a lot - if the composition saturates the top layer of the frame, it can cause delamination of the material. Therefore, we are testing this method in a hidden area.
Pasting the frame with material
The ceiling has been laid on the table, fabric has been purchased, and a jar of glue has been opened. Let's get started!
Safety precautions require the use of safety glasses, a respirator and rubber gloves. It should be noted that glue that gets on the front surface of the ceiling will spoil the appearance and will not be cleaned off, so we apply the glue with rubber gloves and smooth the fabric without them.
Using a brush, apply a thin layer of glue to the frame area. We wait for a while according to the instructions, lay the fabric and press it in order, paying more attention to bends and indentations. A small roller, a plastic spatula, fingers and a cloth will help you press the fabric. It is important that the layer of glue is small and uniform; it is not advisable to rub the same place with your fingers - it can leave a stain.
You should not cover the entire frame with glue - there is a risk of not having time to press the fabric. Therefore, we apply in strips of 30–40 centimeters, this slowness will allow us to avoid mistakes.
The fabric at the edges can be cut along the edge with a sharp knife, or it can be folded onto the back side of the frame by 1-2 centimeters, cutting it with “teeth”. In this case, the fabric will hold up better. However, it is worth considering that installing the ceiling will be more difficult - it will become wider by the thickness of the fabric.
Video: plywood ceiling of a car in a workshop
What mistakes can a novice master make:
- applying a large amount of glue. It can saturate the fabric and protrude from the front side, ruining the appearance;
- violation of instructions for using glue. The glue has not set sufficiently or has dried out. In this case, the fabric will lag behind;
- poor fabric pressure, air bubbles;
- glue or dirt getting on the surface of the fabric;
- lack of material for pasting. Fabric laid crookedly at the beginning of work may “go” to the side at the end;
- poor quality finishing of frame edges.
The ceiling is glued - we give it a soak, the time of which depends on the instructions for using the glue. After this, we proceed to installing the ceiling.
Ceiling installation
To mount the ceiling, you must first carefully place it inside the car. Practice shows that it is easier to remove the ceiling from a car than to install it in place. Therefore, you should use the services of an assistant and wear clean gloves. We put the ceiling in place and fasten it. An assistant must support the sagging parts of the ceiling, preventing the frame from breaking or bending. If this is not done, wrinkles or folds will appear that will spoil the appearance of the finish.
It is better to select the fasteners in advance to match the color of the trim so that it does not stand out. It is also better to replace clips that are broken during disassembly. When tightening the screws, you should be extremely careful; a broken screwdriver will scratch the plastic or fabric.
Evaluation of work and rewarding of the master
The critical stage is acceptance of the completed work. A new ceiling in a car always looks nice, but don’t relax - we must look at all the shortcomings, loose spots, and dirty spots. We correct them if possible.
If you did the work yourself, be sure to reward yourself with a good emotion; if the work was done by a professional, in addition to money, you can leave a good review of his work, tell your friends about the talented master.
Installation of a car ceiling needs to be done only by two people: then the work will be done carefully
Car ceiling reupholstery
After the material and glue have been selected and purchased, it is necessary to dismantle the ceiling and remove it from the car interior. In a hatchback this is somewhat easier to do due to the presence of a fifth (or third) door, whereas in a sedan you may need to remove the front passenger seat.
First of all, all additional elements are removed, such as visors, handles, lampshades, and plugs. After the ceiling is removed from the car's interior, you need to carefully remove the old material from the base, as well as any remaining glue and foam rubber, if it was there.
Then the new material is carefully glued to the base. It is better to glue together. You need to start from the center to the edges. The glue (you can use “Moment”) is applied evenly, the assistant must stretch the fabric (or skin), and the adhesive carefully smoothes it out. It is better to do this with gloves (cellophane or rubber), otherwise hand marks may remain.
Particular attention should be paid to bends and recesses; the fabric in these places should be glued as securely as possible. The edges of the material need to be wrapped and glued to the back of the ceiling. After this, you need to cut out holes for bolts and additional elements, if possible in such a way that the edges of the material are also wrapped and glued to the back.
After the glue has dried, you can begin installing the car ceiling in the reverse order. Despite the apparent complexity, reupholstering the ceiling in a car with your own hands is quite within the capabilities of even an amateur, especially if you watch the instructional video. The main thing is a little patience and diligence.
What else is worth reading
Chemical composition of gasoline
What is the difference between a tiptronic and an automatic?
Passenger cars with high ground clearance
Turbojam
Kit car
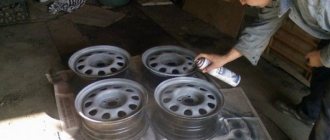
Car ceiling painting
If the ceiling in your car has acquired an unpleasant color over time or after cleaning, do not rush to re-tighten it. Perhaps painting will help you.
For a high-quality result, it is best to remove the ceiling. If you don’t have the time or desire to remove it, you can simply paste over and cover the parts that cannot be painted.
You can choose aerosol paint for suede or fabric, or water-based paint, which is applied with a sponge, roller or brush. Plain enamel cannot be used for cars, as it is not intended for painting.
It is best to paint in dry weather; be sure to use personal protective equipment when carrying out work. To make it convenient to paint from bottom to top, it is better to use a spray gun; a spray can may not cope with this task.
The surface must be clean and dry before painting. the paint is applied alternately, in several layers. The quality of painting depends on the skills of the artist.
A well-painted surface looks no worse than a repainted one, and the cost of paint is much less. Therefore, in some cases it is more profitable to try painting the upholstery than reupholstering.
Painting the ceiling with a spray gun will allow you to achieve an impeccable result.
Rules for choosing material for plywood car ceiling
Before studying the question of how to glue the ceiling in a car, you should first purchase suitable fabric for upholstery. Car owners can choose from a wide range of materials shown in the table.
| Textile | Advantages | Flaws | Notes |
| velours | affordable price, soft and pleasant to the touch, large selection of textures | short-lived - lasts only 2-4 seasons, easily torn and scratched | velor is easy to care for - no need to buy expensive products |
| flock | low cost, original in texture and colors, good sound insulation | difficult to work with and requires several stages of surface treatment | during processing, flock acquires an exclusive and expensive look |
| eco leather | high levels of moisture and heat protection, easy to care for, lasts up to 7 seasons of active use | absorbs all odors, including unpleasant ones, low safety margin | high-quality eco-leather is difficult to distinguish from natural leather, so the interior can be given an expensive look |
| leather | long service life - up to 10–12 years, durable and environmentally friendly | the most expensive interior trim option | In order not to damage the expensive material, it is better to entrust the reupholstery of the ceiling with genuine leather to professionals |
| Alcantra | elastic and stable during use, soft and silky structure, wide selection of shades | high price | Alcantra is a synthetic material made from thin microfibers - this gives the upholstery a high margin of strength |
| carpet | most affordable, pleasant fleecy surface, does not fade, easy to care for | quickly accumulates dust and rolls off | synthetic fabric with decorative pile surface |
To reupholster the ceiling, you need to choose high-quality glue
How to fix a sagging ceiling without removing it (5 tips)
Car Maintenance Troubleshooting
Car headliner plays a more important role in your car than just making the interior look aesthetically pleasing. Headlinings provide insulation from heat and cold and also help dampen outside noise and therefore make the vehicle interior more comfortable.
But as the car is exposed to the elements, and this is largely due to the sun's heat, the adhesive used to attach the headliner to the roof of the car loses its strength and therefore causes sagging.
The good news is that sagging ceilings are almost inevitable and are fairly easy to fix. And here we provide you with various options to fix your sagging headliner without removing it.
Option 1: Use spray adhesive
Because the headliner gets stuck using some kind of adhesive or adhesive, the first and perhaps most effective way to fix the sagging is to use glue. And a cheap spray adhesive would be ideal as it is easy to apply and very effective.
Recommended Product: 3M 45 All-Purpose Spray Adhesive
Step by step instructions
Step 1: Inspect the headliner
Before you start gluing things back up, the first step should be to inspect the headliner to determine if it has other damage, such as tears, in addition to sagging. Inspecting the headliner also allows you to determine how to apply adhesive to ensure the headliner is held in place more evenly.
Step 2: Remove the center light in the cockpit
Before you can fix the sagging headliner, you'll need to remove the cabin's center light, as this will make it easier to level the headliner more evenly and give you more room to work with.
Plus, by removing the lights in the cabin, you won't have to worry about glue getting in the wrong places, and you'll have a place to remove the headliner to spray the glue.
But, if the headliner is sagging forward, you will need to remove the sun visor to expose the edges, allowing it to stretch more evenly when applying the adhesive.
Step 3: Lower the headliner.
In some cases, and this is especially true when the sagging of the headliner is greater, you may also need to pull down a little before applying the adhesive.
Pulling the headliner down may increase the sag a little at first, but it opens up a larger surface area onto which you can spray adhesive to ensure it's secured even tighter than before. But for some minor cases of sagging, this step is not necessary.
Step 4: Spray Glue
The next Step is spraying the glue and this is perhaps the most important step as it will determine whether it will stick well or not.
But the good news is that there is nothing difficult when it comes to spraying the glue. As with adhering fabric to any other surface, you should apply a thin layer of adhesive to the inside of the headliner and to the roof.
It's also important to make sure that in addition to applying the glue evenly, you also cover all areas, because any area that isn't glued down will end up sagging or forming unsightly bumps. Also be careful not to spray too much paint on one section, as this will also create an unsightly look.
Step 5: Let the glue dry
Most fabric glues will take a few minutes to dry and become tacky. And so, before you put the headliner on the roof, you need to give the adhesive enough time to dry or cure.
For most types, about 5 minutes is usually enough, but just in case, you should check the instructions.
Step 6: Click on the title so it sticks
Once the glue is dry enough, the next step is to push the headliner towards the roof to adhere it. While your hands can still work quite well, it's better to have something flat and blunt to help with this step as it will allow you to apply more pressure.
After attaching the ceiling to the roof, you still need to go through it a few times and press it against the roof every few minutes to make sure it sticks well and doesn't sag anymore.
Step 7: Place the light back.
The last step is to put back the cabinet center light and other things like the sun visor if you removed them. And once this is done, the task should be completed and you will have a completely new look and neat headliner.
What material should I use to reupholster the ceiling?
When reupholstering the ceiling with your own hands, it is best to use materials that are easy to work with - carpet and so-called self-adhesive Alcantara (which has nothing to do with the original Alcantara).
The most pliable material is carpet; it fits well on any surface.
Self-adhesive Alcantara, or as it is also called, Korean Alcantara, very well masks small defects in the form of small folds, which necessarily arise when re-upholstering the ceiling yourself; convenient for pasting recesses under visors and ceiling handles.
Carpet and pseudo-Alcantara can be used both for reupholstering straight, even ceilings and for ceilings of complex shapes. Only for ceilings of a straight, even shape, without bends or recesses, ceiling fabric, which is capricious in operation - stretches only in one direction, which creates difficulties when gluing the material, can also be suitable for re-upholstering the ceiling yourself.
Do-it-yourself ceiling reupholstery with Alcantara is discussed in a separate article.
Please note that the width of the material must be sufficient to cover the ceiling, taking into account the bends and shape of the ceiling! Otherwise, the reupholstery will have to be done from two canvases, which will need to be sewn and a decorative stitch must be applied or an invisible seam used. Moreover, the place of fastening the canvases for a straight and wide ceiling can be chosen to your taste, but for a ceiling of complex shape and curves, the place where the canvases are sewn together will affect the final result and the evenness of the laying of the material.
Re-upholstering the ceiling with your own hands consists of the following steps:
— ceiling preparation, ceiling repair if necessary;
— reupholstering of elements – canopies, racks.
Removing the ceiling
When dismantling the ceiling, care is required, due to the fact that it is quite easy to accidentally break off any element or even break the ceiling itself. The process of removing the ceiling for different models of cars can vary quite a lot. The first step is to remove the racks, visors, ceiling handles, disconnect the lighting wires and then remove the ceiling itself - and it can be held not only by the racks, but in some cars it can be additionally fixed with clips. To dismantle the ceiling of a particular car, we recommend searching for a video on the Internet to minimize the possibility of breakdown.
Ceiling preparation
Preparing the base of the ceiling consists of correcting existing defects - removing damage/creases in the ceiling or sagging old material. New material for re-upholstering the ceiling is glued onto the old material, so there is no need to remove it, except when the old ceiling material sags.
If there is damage to the ceiling, mainly resulting from the deployment of an airbag in an accident, or resulting from careless removal of the ceiling, it is necessary to restore the geometry of the ceiling, its original shape, using fiberglass and epoxy resin. The ceiling is brought back to its original shape and fixed in this position - pressing or clamping the deformed area with improvised means. Next, on the broken side of the ceiling, on the wrong side, we apply a piece of fiberglass of the required size and secure it with epoxy resin (the front side is the side of the ceiling facing the passenger compartment, and the wrong side of the ceiling is in direct contact with the roof of the car). It is best to use cobwebs as fiberglass, but not fiberglass. In addition, you should not be overzealous with the amount of fiberglass - this adds extra weight to the ceiling, and in some places the thickening of the ceiling will interfere with its fastening, and the ceiling will not be able to be pressed tightly to the body, which will create unnecessary gaps. Next, let the epoxy resin harden. Existing irregularities on the front part of the ceiling (arising from kinks or creases in the ceiling) must be puttied and sanded directly on the surface of the old material, carefully and very carefully, otherwise after gluing the new material all the irregularities will appear.