Replacing outer and inner CV joints on Lada Kalina
CV joint (constant velocity joint - approx.) or popularly just a “grenade”, is designed to transmit torque to the wheels of a car. CV joints can be internal or external, and the devices themselves are quite simple in technical terms and consist of a ball bearing that rotates transversely to its axis.
In the video, replacing CV joints on a Lada Kalina:
Failure of the CV joint on the Lada Kalina is a very common occurrence, and the main reason for its failure is torn anthers. Because, together with dust and water falling under them, the lubricant turns into thick mud, and it is no longer able to fully perform its functions.
Replacing the outer CV joint
In the process of replacing the outer CV joint
The work of replacing an outer or inner CV joint is not very difficult and can be done by any motorist who has at least once repaired a car with his own hands. And in order for the repair to be easier and faster, you need to prepare the following tools:
- Socket heads for “17” and “30”.
- Driver or ratchet.
- Extension for the wrench.
- Jack.
- Wheel chocks.
- Hammer.
- Vise.
Step-by-step disassembly procedure
After you are convinced of the malfunction of one or another CV joint, you can begin to work.
- First of all, we tear off the mounting bolts from the wheel and the hub nut, then we set the wheel chocks under the rear wheels. (To make it easier to tear off the nuts, it is better to use an extension for the wrench - approx.).
- We put the car on a jack and hang the wheel.
- We remove the wheel and, for greater reliability, place it under the car next to the jack.
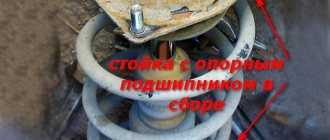
- Now that this picture appears before you, all that remains is to unscrew the 2 bolts that secure the ball joint to the steering knuckle.
Unscrew the bolts marked with a red marker on both sides.
CV joint VAZ. Lada grenade. Comparison of different manufacturers
They counterfeit everything related to the AvtoVAZ assembly line. Any part purchased at a car store can be a counterfeit...
BEWARE OF FAKE! CV joint LADA Image. features
CV Joint Review
(grenades) for VAZ 2108-2115.
Without causing strong blows, the CV joint will move out of place
If the internal CV joint is supposed to be replaced, then work 1 to 6 should be performed as well, after which, using a pry bar, we remove it from the gearbox and take out the entire assembly.
Replacing the outer CV joint on a viburnum
Replacing the outer CV joint on a Lada Kalina car is not a serious problem. A person who has at least a minimal understanding of car repairs with their own hands can cope with this operation.
To replace the outer CV joint on the Lada Kalina we will need:
- Ratchet or crank
- Extension for extending a wrench or ratchet (a piece of pipe of suitable diameter will do)
- Head 17
- Head 30
- Hammer
- Jack
- Replacing the inner CV joint on a viburnum
Signs of CV joint failure
The first signs of a faulty grenade are crunching sounds in the area of the front wheel on turned out wheels when starting to move. When the fault is severe, noise appears at less significant loads.
The anther begins to crawl
In order to prevent such damage in advance, you should periodically inspect the anthers from the outside for cracks and integrity in general.
On a note!
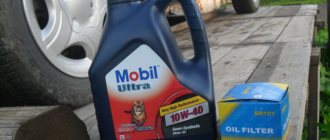
Constant velocity joints, which are sold in the store in sets, include grease, a boot and all the necessary clamps in their sets. Pay special attention to this fact so as not to overpay for additional spare parts and accessories.
I had to change more than one CV joint. Of course, I had to tinker with the first one for a couple of hours, since I didn’t really know all the subtleties, but I changed the subsequent ones almost with my eyes closed.
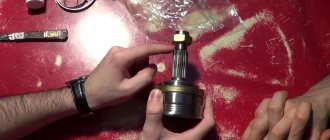
I bought a grenade for viburnum. The assembly includes the grenade itself, a finger guard and clamps. You can change it in an hour without rushing, it can be done faster. But why rush in such a matter?
"Lada Kalina" is a front-wheel drive car in which the engine and gearbox are located transversely relative to the body. The drive to the wheels is carried out through the main gear. Torque is transmitted through constant velocity joints (simply CV joints, or “grenade”). There are several of them - internal and external. Despite their reliability, these elements can fail. Well, let's look at how to replace a “grenade” on a Kalina, what tools are needed for this and what are the signs of a malfunction.
What functions does a lubricant perform?
Motorists know that lubricants used in car components and joints not only reduce friction and prevent premature wear of car parts. But they also reduce the load on the parts, as a result of which the parts rotate freely and the car continues to move without friction or load.
CV joint lubrication allows you to reduce fuel costs and losses in transmission operation. A very important property is to prevent the spread of corrosion. It is during corrosion that the operation of CV joints is accompanied by the appearance of an unpleasant knocking noise, which intensifies when the steering wheel is turned and torque is not transmitted effectively. To prevent CV joints from getting dirty, boots are used. It is important to prevent grease from getting on the boots; they are made of rubber or plastic, which is eaten away upon contact with grease.
Device
In terms of their design, the inner and outer CV joints are very similar.
- Half shaft.
- Clamp and boot.
- Clip.
- Hinge housing.
- Separator.
- Ball.
- Retaining and cone ring.
- Spring washer.
Thanks to this device, the elements are capable of transmitting torque to the wheels at an angle of up to 45 degrees (not only in the horizontal, but also in the vertical plane).
How to determine a breakdown?
The grenade is a ball bearing, the cages of which have transverse grooves. Due to this, the angle between the driven and driven axle shaft changes. Thus, the CV joint not only transmits torque, but also changes the angle between the axle shafts. In view of this, over time, it develops. In places where the parts do not fit tightly, backlash and extraneous noise are formed. In fact, this is accompanied by a characteristic crunch. It occurs due to large wear on the balls that move along the grooves. The crunch can appear both during straight-line movement and when turning. In the latter case, most likely, the external grenade of the Kalina requires replacement. This sign should not be ignored, since the bearing may fall apart at high speed.
Main symptoms of a malfunction
Sometimes drivers simply do not pay attention to the fact that when turning the steering wheel, some uncharacteristic sound appears, or the car behaves differently than usual. Such inaction leads to rapid failure of the entire drive system. While at the initial stage only some parts of the grenade can be replaced, which will not cost the car owner too much, if a new mechanism is installed, the costs will be more significant.
Here are signs that help you draw a conclusion about the nature of the car malfunction:
- a characteristic sound resembling a crunch. It can occur when you sharply turn the steering wheel, start, or change the dynamics of the car. The reason is wear of the balls and the appearance of gaps between their surface and the grooves;
- shaft play appeared. If you grab the axle shaft with your hand and move it from side to side, significant play will be felt in the CV joint area, which indicates wear of its internal parts;
- When starting and changing gears, the car jerks. But these are signs of a fairly serious malfunction, and it is better not to bring the car to such a state.
Let's get to work. Dismantling the CV joint
First of all, put the car on the handbrake (or install anti-rollbacks). Then we remove the wheel bolts and hub nut. The latter may not be supplied, so we use an extension cord. Next, place the car on a jack, lift its front part and remove the wheel. Then we find two bolts that secure the grenade to the steering knuckle.
Now we twist the steering wheel to its extreme position (so that the disc looks out of the wheel arch). Pull back the steering knuckle along with the shock absorber strut. Next, remove the outer part of the hub with the external “grenade”. If it is tight, you can use a hammer. But you need to hit through a wooden block, otherwise the part will be seriously damaged.
Next (if it is an external hinge) remove the old boot and clamp. Now you need to get the “grenade” itself out of the hub. To do this, you can use a puller or hit the CV joint with a hammer. In this case, you need to rotate its axle shafts.
If it is intended to replace the internal “grenade” on the Kalina, all operations are carried out in a similar way. The only thing is that the part is removed from the box using a pry bar, without hitting it with a hammer.
How to replace the CV joint boot on a Lada Kalina
We will replace the boot on the removed axle shaft, this will simplify and speed up the work process.
1. Place the car on a flat surface, tighten the handbrake and place wedges or something similar under the rear wheels to prevent the car from rolling.
2. Take the “balloon” and start removing the wheel. Don't rush to jack up the car; remove the bolts while the car is standing on four points. After this, you can jack up one side on which the work will be done. It is dangerous to work on a jack, so be on the safe side and place a block or metal jack under the car.
3. Using a flat-head screwdriver, pry up the protective cap and remove the wheel arch liners (if any).
4. Place a container under the drain hole of the gearbox, unscrew the plug and drain the transmission oil.
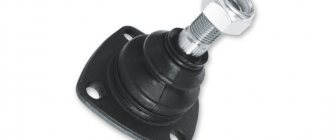
5. Next, you need to unscrew the two mounting bolts that secure the ball joint to the steering knuckle.
6. Now you need to unscrew the hub nut. To do this, you need to fix the hub; to do this, just press the brake pedal. If you have no one to help you, use some kind of device that will apply pressure on the brake instead of an assistant.
7. We take out the thrust washer, then turn the wheels to the extreme position (it all depends on which side the replacement is happening from) and squeeze the outer CV joint out of the hub. To prevent the drive shaft from falling, it is better to hang it with a piece of wire.
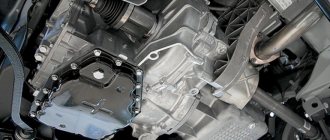
8. Using a pry bar, press the inner CV joint out of the box with one hand, and hold the drive shaft itself with the other hand.
Important note! If you need to remove both drive shafts, you should insert the old CV joint into the box before pressing the second shaft in its place. If you do not do this, the alignment of the side gears will be disrupted, after which you will not be able to install the drive shaft
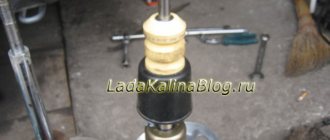
9. Take the drive shaft and fix it in a vice, then use a screwdriver to remove the old clamps and cut off the old boots (if they are damaged). If the anthers are in order and will be installed back, there is no need to cut them off.
10. Next, using a hammer and a soft metal or wood socket, knock the outer and inner CV joints off the drive shaft.
11. Using a washing liquid (kerosene, gasoline, etc.), rinse the “grenade” and check the condition of its parts. If during the inspection you did not find anything suspicious (violation of symmetry, play, crack development, etc.), you can begin installing new boots on the shaft.
12. We put on the boots carefully so as not to tear them, then we fill the outer CV joint housing with special lubricant, after which we install its drive shaft. Then we fill the hinge until it clicks.
13. Next, using pliers, squeeze the clamp on the boot on one side. Squeeze the boot slightly to release the air, then tighten the boot clamp on the other side.
14. Replace the retaining ring of the inner CV joint and lubricate its splines with graphite grease, then carefully install the hinge into the gearbox housing.
15. We fix the shaft in the side gear; to do this, take a wooden block, place it on the drive shaft and hit the block with a hammer along the axis of the drive shaft.
Further assembly is performed in reverse order.
How to extend the resource?
Typically, these bearings travel 250-300 thousand kilometers or more. They have a very durable construction. However, there are several factors that can significantly reduce their durability. This is the condition of the anther. It is because of this that water, dust, and sand get inside. As a result, the lubricant turns into a thick abrasive, which has a destructive effect on the bearing. How to prevent this? During operation, you should periodically check the condition of the boot on the CV joint. If it has cracks or tears, it needs to be replaced immediately.