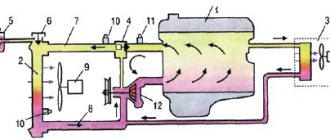
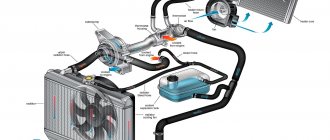
Simplified operation of the VAZ 2114 cooling system
Cooling diagram for VAZ 2114: 1 – element in the form of a plug for the expansion tank;
2 – expansion tank; 3 – hose for draining liquid from the pipe; 4 – hose passing between the radiator and the expansion tank; 5 – hose leading from the radiator; 6 – tank to the left of the radiator; 7 – aluminum tube; 8 – plug systems; 9 – tank to the right of the radiator; 10 – drain plug; 11 – middle of the radiator; 12 – casing for electric fan; 13 – plastic wings of the electric fan; 14 – electric motor; 15 – toothed pump pulley; 16 – pump impeller; 17 – camshaft drive belt; 18 – engine block; 19 – pump pipe; 20 – radiator hose with supply function; 21 – heater radiator hose with drain function; 22 – hose supplying coolant to the throttle pipe; 23 – exhaust pipe; 24 – hose for refilling; 25 – heater radiator hose with supply function; 26 – thermostat; 27 – coolant temperature sensor; 28 – coolant level indicator sensor. The coolant enters the water jacket of the engine block through the pipes. In the water jacket, the coolant circulates in a small circle until the engine (and therefore the coolant) reaches a temperature of 95 degrees Celsius.
At this moment, the thermostat opens and coolant is delivered through the pipes to the radiator. The radiator removes excess heat from the coolant. Excess hot coolant returns to the expansion tank.
The entire cooling system is under high pressure of 1.2-1.8 atmospheres, due to the operation of the pump and the increase in coolant volume due to heating.
From the above text we conclude: malfunctions of the cooling system are not easy to detect with small leaks, since the coolant evaporates almost immediately, having a high temperature, and work to find the location of the leak sometimes requires the intervention of a professional.
Attention!!!
All work on the cooling system must be carried out with the car turned off and the coolant cooled down.
Step 1. The pipe burst
Since the pipes are the “blood vessels” of the car, failure of any of them will result in loss of coolant.
This malfunction is clearly visible on a warm engine while driving. A large amount of steam appears from under the hood. The burst pipe is clearly visible.
But there are times when the coolant leak is small. Then, first of all, attention should be paid to the articulation of the pipes with the vehicle components.
When using coolant in the form of antifreeze or antifreeze, a characteristic oily coating remains in the leak areas.
Step 2. Radiator problem
A radiator malfunction is extremely difficult to detect. At the site of a coolant leak, a large amount of scale sometimes forms, making it difficult to see the location of the damage.
Pay attention to the tightness of the filler plug. If everything is OK with the tightness, then to check you will need a compressor with a pressure gauge or a pump.
Disconnect the upper pipe and connect the compressor. The pipe must be plugged. We create excess pressure and see where the leak appears. We dismantle the radiator. We take it to a specialized service center, where they will check it again under pressure, find a leak (there may be more than one) and weld it with a special compound.
Step 3. Gases in the expansion tank
This malfunction occurs due to the entry of exhaust gases (a specific smell is clearly felt in the car interior) into the cooling system under enormous pressure of 90-96 kPa.
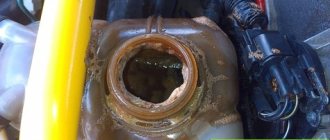
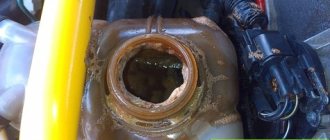
The reason is a faulty gasket between the valve head and the cylinder block. It is caused by coolant leaking from under the expansion tank cap.
The check is quite simple. We start the engine on a cold car, remove the cap from the expansion tank and sharply press the accelerator (in common parlance, the gas pedal).
If the coolant rises sharply, the gasket must be replaced. Stop operating the vehicle immediately until the problem is resolved.
Sometimes the expansion tank cap, due to spring wear, may not withstand coolant pressure.
We recommend reading: Antifreeze in oil
Step 4. Gray emulsion instead of oil
If you notice that your car has started to “trouble”, a large amount of steam comes out of the exhaust pipe, which smells like coolant. The amount of coolant is constantly decreasing and when checking the oil dipstick, it is clear that the oil has turned into a gray emulsion.
All this indicates a malfunction of the cooling jacket of the engine cylinder block. I categorically do not recommend operating the car in this condition! In addition to the problem with the cooling system, the lubrication of all moving parts of the engine is impaired, which can easily lead to its breakdown.
Step 5. Antifreeze in the cabin
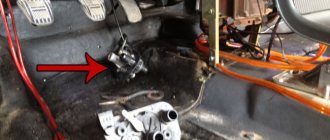
In addition to cooling the engine, the coolant is used to heat the vehicle interior. If the interior radiator or the pipes leading to it malfunction, a large amount of coolant leaks onto the floor.
The malfunction is very unpleasant, as it entails disassembling almost the entire front part of the car's interior.
Why does antifreeze leave the expansion tank on a VAZ-2114: reasons and repairs
When such an unpleasant situation as a coolant leak occurs, many owners of VAZ-2114 cars complain about this nuisance due to the great age of the car. However, of course, every car owner, when purchasing a car, inspected it and checked all components and parts for breakdowns, and would hardly have purchased such a car with leaks in the engine cooling system.
The video describes the process of finding the cause of an antifreeze leak on a VAZ car:
Fix it yourself or go to a service station?
Once again I want to draw your attention, this is very important! All work on replacing cooling system elements is carried out exclusively with the engine turned off and the coolant cooled down.
You can replace the pipes, thermostat, radiator filler cap, and expansion tank cap yourself. Remove the filler cap on the radiator. Unscrew the drain plug on the engine and drain the coolant into a clean container.
As for replacing the gasket between the valve head and the piston block, repairing a rotten engine cooling jacket and repairing radiators, these works are best done at specialized stations.
Since such repairs will require the use of specific tools and the necessary experience and knowledge.
Connecting pipes and clamps.
To connect all elements of the cooling system, rubber or silicone pipes are used, which are secured with metal clamps. Insufficient tightening of clamps, cracking and wear of pipes lead to antifreeze leaks. Some tips on how to avoid this:
- When performing routine vehicle maintenance, inspect the cooling system pipes for leaks, cracks and swelling;
- use hoses from trusted manufacturers (of rubber hoses, Balakovo hoses (BRT) are known, opinions vary on silicone hoses, but the main thing is not to take China);
- It is recommended to use clamps from NORMA. They provide reliable fixation, do not cut the hoses with their edges, and can also be tightened not only with a screwdriver, but also with a wrench, which is convenient for final crimping. Also, some car owners successfully use self-tightening (spring) clamps from foreign cars, selecting a set according to the diameters of the pipes.
- measure the force so as not to break off the fitting of the expansion tank or radiator, especially thin ones - steam exhaust ones;
- After replacing the pipes, you need to warm up the car, and then carefully tighten the clamps again to ensure a tight seal.
The cooling system of domestic cars requires constant monitoring and regular maintenance. If a minor malfunction of the cooling system is not corrected in time, it can ultimately lead to expensive engine repairs, so do not be lazy to periodically look under the hood.
Several important nuances when choosing cooling system components
The most important thing is to use special antifreeze or antifreeze liquids, which have a higher boiling point.
Choose pipes from well-known manufacturers, do not skimp on this. Especially when making replacements inside the car.
Replace the expansion tank cap only with the original one. Do not reduce the number of coils of the spring, they are designed for a certain pressure. It is important!
When replacing the radiator and thermostat, pay special attention to the volume and response temperature. This is critical for proper engine operation. Excessive or too low temperatures will lead to either overheating of the engine, or it will not heat up to operating temperature at all.
Air and liquid cooling systems
There are two types of engine cooling systems: air and liquid. In modern vehicles, as a rule, a liquid cooling system is used, while an air cooling system is used in motor vehicles and small generator sets.
Air cooling system
As the name suggests, this system uses air flow to remove excess heat from the engine. This design solution was widely used in the 60-70s of the twentieth century by such manufacturers as Fiat, Volkswagen and others, including the domestic Zaporozhets.
With an air cooling system, the thermal regime of the engine is determined by the temperature of the oil in the lubrication system, which should be in the range of 70-110 °C.
The main disadvantages of the air cooling system:
- significant power consumption for fan drive;
- increased noise level during operation;
- deterioration in filling the cylinders with the fuel-air mixture;
- air flows are directed unevenly - this can lead to local overheating;
- High thermal stress of individual parts can lead to overheating of the engine.
That is why modern manufacturers prefer a liquid cooling system.
Liquid cooling system
This cooling system is installed on modern cars with an internal combustion engine. Engine parts that are exposed to heat are cooled using liquid. In some cases, this may be water or antifreeze, but the most common solution is antifreeze.
To prevent problems, an ordinary car owner just needs to know a few key points.
Coolant replacement
First of all, you need to drain the old antifreeze through the drain hole in the radiator. In this case, it is necessary to protect the generator from liquid ingress. You can speed up the draining process by removing the lid from the tank.
Draining coolant VAZ 2114
Attention! If the drained antifreeze is green, then it cannot be used because it has lost its cooling properties.
Next you need:
- Remove the heating pipe for the throttle body.
- Fill the liquid slightly above the level indicated on the reservoir.
- Press the nozzle to pump out the air.
Thus, detecting a leak in a VAZ-2114 is quite simple. You just need to carefully inspect the cooling system. And fixing a leak will not be a problem for an experienced car owner.
