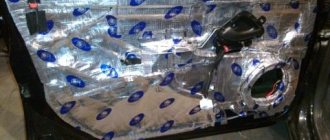
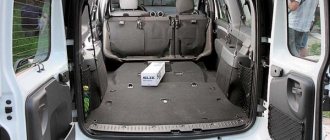
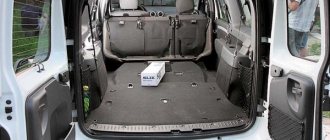
"Ten" is a fairly quiet and comfortable car. The reason lies in the fact that the VAZ-2110 is equipped with a body with good aerodynamics, and modern materials and designs are used in the interior. The standard sound-absorbing panel is also hidden under the hood - it isolates the shield from the engine compartment. And this is not all the standard sound insulation of the VAZ-2110.
But if the car has already managed to “run” several thousand kilometers, then the situation will be completely different. The dashboard squeaks begin to be heard, and it is worth noting that these sounds directly depend on the temperature. If at 20 degrees above zero squeaks are almost inaudible, then at -20 they can be heard from everywhere. In addition to the “moans” of plastic linings, covers, doors and roofs, high-frequency noises from the operation of the gearbox and engine are added.
In such a situation, the best solution is to soundproof the car. It is not difficult to complete - you only need special materials, tools and skillful hands.
Selection of materials
In order for the sound insulation of a VAZ to be effective, it is necessary to select suitable high-quality materials. They are different: some are characterized by rigidity, others by increased ductility. The material should be selected depending on the location of application.
Vibroplast is a single-layer bitumen material trimmed with foil. This material will require approximately five sheets. The hood, roof, trunk and interior floors, doors, wheel arches, front panel are finished with vibroplast.
Bitoplast is similar to impregnated foam rubber. To completely soundproof a car, a couple of 10mm sheets will be enough. Bitoplast is also used as a cushioning material during interior assembly.
Splen has not only noise- but also heat-insulating properties. To soundproof a car you will need about six sheets of this material. Its cost is low, and any place can be treated with splen without thinking about saving.
Modelen is a fabric with a 2 mm layer of mounting adhesive. About 0.5 m2 of such material needs to be prepared. Modelen is suitable as a gasket if it is impossible to use bitoplast.
Useful tips
- Be sure to vacuum the interior, the surfaces to be pasted must be cleaned of rust and dust, degreased and dried. Cleanliness of the areas to be pasted is the key to successful sound insulation sizing.
- Attention: you are working with flammable liquids and materials, follow fire safety rules, ensure ventilation in the work area and have a fire extinguisher on hand.
- All sound insulation elements should be glued only using their own mounting layer; the use of glue or additional fasteners is not recommended. Remove the protective layer (paper or film) and glue the material to the installation site.
- Smooth the coating from the center to the edges. Wear protective gloves when working.
- Degrease the surface before applying the second layer of insulation.
- Get spare plastic fasteners, if available.
Disassembling the interior
First of all, you need to remove the front and rear seats. After this, you can begin dismantling the console. You'll have to tinker here, although there shouldn't be any particular difficulties. There are few fasteners on the panel, so it can be easily removed.
However, it is recommended to remember the order in which the wires are connected - this will save time during assembly. It is best to mark the pads by drawing up a wiring diagram. To remove the dashboard, you will have to remove the steering wheel along with the steering column cover. The rugs also need to be removed.
The standard sound insulation of the VAZ-2110 under the seats is fiber-bitumen, of different structure, thickness and appearance. At the back, the insulation is thinner, more elastic and covered with a film. Under the driver's seat the insulation is thicker, stiffer and without film.
This circuit effectively absorbs the noise of a running engine. But when replacing, the standard insulation must be dismantled, and the work here is complicated due to the many plastic fasteners. Most likely, the thick layer of new insulation will prevent the fasteners from being reinstalled, so they will no longer be needed.
After the dismantling of the old insulation has been completed, the interior has been stripped down to bare metal, and wires are hanging everywhere, you can immediately begin soundproofing the VAZ-2110.
Cleaning and degreasing surfaces
Any work related to gluing something requires cleanliness of the surfaces being glued. As a rule, the inside of already disassembled elements is very dusty and dirty. To clean metal and plastic surfaces, you need to perform a number of preparatory measures.
And first of all, you will need a high-pressure washer: carefully, without damaging anything, run a stream of water over all surfaces on which you plan to glue the materials. Next, you need to thoroughly dry all surfaces - there should be no moisture.
Thanks for subscribing!
The next thing is to degrease the surface. White Spirit copes with this task perfectly. The better you do at degreasing and cleaning surfaces, the less likely it is that you will need to repeat the procedure in the near future. Once again, make sure there is no moisture and proceed directly to gluing the interior with soundproofing materials.
Finishing with insulating material
The front panel and the floor are covered with vibrating material - vibroplast. It is cut and packed tightly. To make installation convenient, heavy and inflexible material can be heated - ideally it should exactly follow the shape of the floor. Laying is carried out gradually with careful gluing into uneven areas. The entire surface is covered with vibroplast. The front panel can be insulated in several layers.
The splen is fixed on top of the vibroplast. Here you need to work carefully: the thickness of the splen sheet is 8 millimeters, and given that it does not want to deform, some elements will not be easy to install. A small amount of material is placed in the places where the sled is attached, and there is no need to attach splen under the central plastic tunnel at all. The front panel is pasted over quite simply; there is enough free space.
The rest of the car's sound insulation is carried out during assembly. The instrument panel is glued from the inside with 10- or 5-mm bitoplast. The joint of the air duct that leads to the legs is processed with modelling. Biplast is glued on top.
Other air ducts do not need insulation, but it is recommended to finish the joints with vibroplast. The joints of the central tunnel are covered with the same model, and biplast is also installed at the joints of the air ducts with the panel, but only after removing the factory seal.
After this, factory insulated carpets and floor upholstery are installed. The panel is installed in its place. When fixing the panel at the joints, it makes sense to fix the bitoplast to seal and provide insulation from extraneous sounds. Then you can install the remaining interior elements in place and connect the wires. When installing the panels, you can cover them from the inside with modelin or biplast.
Soundproofing a VAZ also involves gluing the trunk floor and rear wheel arches. Particular attention should be paid to arches; they use more insulation. Niches in the body - the bottom of the doors, pockets for storing tools, luggage spare tires - do not need to be taped: moisture often accumulates in such places, and the insulation can harm the body.
Fairing on the roof of a car: tuning or aerodynamics, what is it for?
- Since this is the engine compartment, it also includes the hood. It's better to start with him. First, the structure is removed and cleaned of dust, dirt and rust. Next it is degreased. This needs to be done with all body elements to which Shumka will be glued;
- Surfaces must be as dry as possible. Therefore, do not be lazy to wipe them with a rag, reaching to each cavity;
- Make patterns from cardboard, then cut out pieces of soundproofing material from them;
- First, a vibration-absorbing material is applied to the metal;
- The piece is cut out and applied to the surface, rolling it in parallel using a special roller. You can't just glue it by hand. The quality and effect will be lost;
Let's sum it up
If the sound insulation of the VAZ is carried out correctly, the noise level should decrease by 40-55%. The sound of the running engine will not be heard as much, and you can completely forget about the noise of the wheels - especially when driving at speed. In addition, drivers who are not too lazy to do additional sound insulation claim that the car’s dynamics then improve.
Soundproofing of the VAZ-2107 can be done in a similar way. It is worth noting that the work is really worth spending time and energy on. This is especially useful if the machine is used constantly. Many car enthusiasts also soundproof the Priora. But we will talk about this in a separate article.
By the way, if you need windshield wipers for your car, go to the online store pro-wipers.ru
Where to begin
First of all, many people ask questions about the advisability of the soundproofing procedure specifically on the engine side in the engine compartment.
There is an opinion that this is a completely useless event. And supposedly there is no meaning in it. But this is said mainly by those who have not felt the difference between cars with and without sound insulation, or who initially drive a car that has high-quality and efficient noise insulation from the factory. In the second case, I really don’t see the point in further insulating the engine compartment. But this occurs mainly on expensive and new cars. Owners of older and cheaper cars are less fortunate.
Cars that have been in use for more than one year, produced more than 10 years ago, usually have high noise and vibration from the engine. And even when running at idle.
And you shouldn’t blame only diesel engines. Gasoline engines also vibrate a lot and require additional noise.
The noise emanating from the engine irritates the driver, interferes with concentration, prevents him from fully enjoying music, and distracts him from driving. Noise is also a danger to the hearing organs.
It is equally important to get rid of vibrations. Soundproofing won't help here. But a special heat-resistant engine cushion will be an ideal solution to this situation. The pillow has the necessary combination of rigidity and elasticity, which gives it the ability to dampen vibrations. A mount is mounted under the engine. These elements take the brunt of the impact and the load. For added comfort, you can consider installing air bags in the springs, which also brings great benefits.
Purchasing materials for the engine compartment noise is not a problem. It is much more important to use their properties and capabilities correctly.
Hood insulation
Insulating the hood itself does not significantly reduce noise, and some car owners do not work on the hood at all. But together with the insulation of the motor shield, a significant reduction in noise is achieved. While insulating the hood as the easiest element to work with, it is easy to gain experience in handling sound-absorbing products.
The primary coating is a vibration damper of the Vizomat MP, Bimast Super brands, which have a foil-coated coating to reflect thermal radiation; a fairly high temperature regime is created under the hood of a running engine, so the vibration damper must be resistant to high temperatures. It is placed between the stiffening ribs on flat surfaces.
For the secondary layer , products coated with foil that reflects sound waves should be used. It is fixed over the entire surface of the hood, including the stiffening ribs.
For the third coating, a factory soundproofing layer is suitable.
FakeHeader
Comments 26
Is all this felt already shaped or is it just sheets?
The form is “relatively” ready. Those. In general, there is a general outline, but you have to customize it to the exact location...
If you do it, report back with the results) By the way, you are doing everything correctly, this felt is what you need for sound insulation, it’s about like covering a room with carpet, in any case it will be quieter than sticking a hundred layers of bitumen noise on the walls, right?)
Yep, that's how it is. But I’m still “stuck” with the repairs - I ended up in the hospital with a torn back, so I won’t be able to finish the car any time soon...
What happened? Work, I guess?
Yeah, echoes of past work... So I had to stop car repairs until my back was restored. The old lady is currently collecting dust in the garage...
Yep, that's how it is. But I’m still “stuck” with the repairs - I ended up in the hospital with a torn back, so I won’t be able to finish the car any time soon...
By the way, I need your answer) Isn’t this mastic smelly?
Relatively smelly... Doesn't smell any stronger than paint or solvent. Well, the smell is not so pungent, it resembles melted asphalt (there is also bitumen there). There is no smell after drying...
By the way, I need your answer) Isn’t this mastic smelly?
There is also the same bitumen noise protection. Her smell is stronger, but also not terrible...
Preliminary report on the “field tests” of the Shumka. I went to cook the front glasses on a half-disassembled car (in the cabin there is only one seat and a steering wheel with an instrument panel, the dashboard was removed, the front fenders were also removed). I had to drive through the whole city... Disgraceful))) At traffic lights, drivers of neighboring cars stared at me as if I were a monument, they even forgot to move on time when the green light came on))) The effect of the noise was quite pleasing. In the cabin, you can no longer hear the whistling alternator belt or the crackling sound of a worn timing belt (the noise of the gearbox is still the same, well, it has become a little weaker). The “fart” of the rotted and burnt-out muffler has gone back (you can’t hear it from below under the ass now, the noise now comes from the silent rear arches and trunk). The noise of the spikes on the asphalt from the front wheels is also practically inaudible; the shocks of the suspension when driving over large bumps in front became very muffled. The whole picture is spoiled by the rear part of the car (arches and trunk) - the noise of studded tires, the impacts of gravel on the bare metal of the rear arches, the farting of a leaky muffler through the trunk (I will never install a “collective farm” forward flow, especially since its effect is 100 times less than from spider 4-2-1 on standard exhaust). Due to the 5 mm PPE with foil, the car became noticeably warmer - at a temperature outside of -5 -8 degrees (when I was driving to the service station), I turned on the stove for 5 minutes before driving (while the garage was closed and I was standing smoking), as I drove off - I turned it off immediately, as it became very warm in the car. While I was driving, I didn’t turn on the heater, the heat heated up before the trip was enough + the sun through the window maintained the climate in the cabin well. In general, the result: I liked the effect of the budget Shumka - it became noticeably quieter in comparison with the standard factory Shumka, the effect of thermal insulation with a laminate substrate is also pleasing, although only the bottom and the engine shield have been treated so far. If you do the doors + roof + trunk in the same way = I’m sure blissful heat will reign in the winter (well, Africa doesn’t scare you in the summer - I’m already used to driving in Russian basins without air conditioner, well, “the heat doesn’t break my bones”), and it will be quite quiet and at the same time everything will work out It’s even quite cheap for the money... Of the minuses: the large thickness of the new Shumka (I’m getting tired of assembling the interior), fiddling with mastic is quite dirty and smelly work (the real owner of a Russian car is not afraid of dirt and smell). In general, I recommend it to everyone who needs an extra reason to get stuck in the garage with the benefit of their car, without spending a lot of money. )) The most expensive part is the felt carpet (including delivery it cost a little more than 1000 rubles) and mastic (3 cans of 2.2 kg for 240 rubles per can - for the floor and engine shield, plus some left over for the front arches).
Soundproofing of floors
The thickness of the material used to insulate the bottom must be at least 10 mm.
first on flat surfaces and the tunnel. “Vizomat” or “Bimast Bomb” is used as a coating. Vibration dampers should be installed especially carefully to ensure complete tightness.
To lay the second layer , use “Isoton” or “Accent” with a thickness of 10 mm, for the tunnel you can use “Bitoplast” with a thickness of 10 mm, to isolate the location of the spare wheel, “Spleen” with a thickness of 8 mm is used. After installation, all joints are carefully sealed.
Layer three is standard sound insulation; its installation provides maximum effect.
It is advisable to cover the outside of the bottom and wheel arches with “liquid rubber”. It is easy to apply, convenient to treat hard-to-reach areas, has a long service life and protects the coated areas from corrosion. Liquid sound insulation is lightweight and can be quickly applied with a spray bottle.

