17.01.2018
12551
Cars, Repair
What is a "lean mixture"? This is an air-fuel mixture containing a LOT of air and a LOT of gasoline. Based on this information, you need to start looking for the causes of error P0171.
Let's start with the first one - too much air. Injection vehicles are equipped with air flow meters (MAF or DAMV). It is installed immediately after the air filter and counts all the air that is sucked into the intake manifold to form the air-fuel mixture. Based on the readings of this sensor, the controller knows how much air has passed and how much gasoline it needs to supply for a given amount of air.
If excess air enters the intake manifold, not taken into account by the flow meter, then there will be more air and, as a result, we get a lean mixture . The most difficult thing is that it is quite difficult to find where exactly this unaccounted air is sucked in.
The main places for air leaks are the intake manifold gasket, throttle body gasket, corrugation from the filter to the throttle body, IAC, injector O-rings, vacuum brake booster, canister valve.
And now we’ll look at 3, in my opinion, the most effective methods for finding air leaks into the intake manifold.
1449644110_2279_4_13_01_kopirovat
Remove the fuel pump fuse from the mounting block.
Remove the fuel pump fuse from the mounting block.
Remove the fuel pump fuse from the mounting block.
We start the engine and let it idle until it stops due to fuel exhaustion. Then turn on the starter for 3-4 seconds. After this, the pressure in the fuel system will be released.
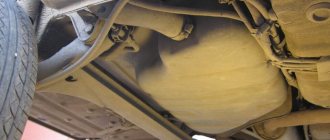
The fuel filter is mounted on the fuel tank next to the right side sill.
Reasons for appearance
As stated above, error P0171 occurs due to a lean mixture. This is the root cause. The problem is that the fuel mixture in a modern Euro-2 car can become lean due to a variety of different problems. It is not possible to list them all, so we will limit ourselves to the most famous:
- Dirt has entered the sensor that takes into account air flow, causing the measurement to be incorrect.
- There has been a leak in the EGR valve, which is responsible for recycling exhaust gases in the engine. The valve began to close poorly, as a result, excess air began to flow into the intake manifold.
- The EGR differential pressure sensor is faulty, resulting in more air flowing through the EGR valve than required.
- One or more vacuum leaks have occurred.
- There were problems with the fuel pump, due to which its power decreased significantly.
- The fuel injectors are clogged.
- The fuel pressure regulator has lost its seal.
- The air flow sensor is faulty.
- The oxygen metering sensor is faulty.
All these problems lead to the fact that the mixture becomes lean and the engine cannot operate stably even at idle. And since a lean mixture burns more slowly, the engine quickly overheats, and the car does not pick up speed well.
Selecting new filter elements
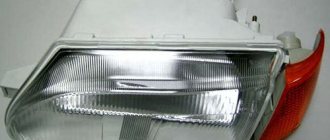
To purchase fuel purification system parts for VAZ 1117-19 models, you need to know what they look like:
- The coarse filter is a flat mesh bag made of chemically resistant plastic that captures large particles of 80-100 microns.
In the center of the element there is a plastic fitting that fits onto the counterpart of the gasoline pump. The mesh element is equipped with a pipe that fits onto the fuel pump fitting - The fine filter is made in the form of a cylinder with two fittings at the ends.
The body is made of metal or special plastic - polyamide, and there is filter paper inside it. It traps particles measuring 15-50 microns. The pipes are equipped with clamps for fastening fuel hoses. The element is equipped with clamps for fastening fuel line connections
All modifications of the Lada Kalina, including the second generation, are equipped with absolutely identical filter elements - a “barrel” and a mesh catcher. The dimensions of the spare parts are also identical.
There are no tricks in choosing a coarse mesh - the parts are made according to a single sample and cost from 30 to 45 rubles. The only caution: in order not to purchase a low-quality product or a fake, contact well-established stores. Although the fuel pump mesh costs a penny, it plays an important role in the fuel system: it catches large debris that can quickly clog the filter paper of the next cleaning element.
In operation, the plastic case is not inferior to the metal one in terms of reliability.
The material from which secondary filters are made does not play a big role. What is important is the contents of the “barrel”, which cannot be seen or touched. Therefore, there are only 3 selection criteria:
- correspondence between the body dimensions and the diameter of the fittings;
- the presence of plastic clamps;
- brand (manufacturer).
The mounting clamp on the Kalina is designed for a case diameter of 56 mm
In order for the spare part to fit the mounting clamp, the case diameter must be 56 mm. The internal size of the gasoline pipes put on the fittings is 8 mm.
There are many different fuel filters sold in stores, and not all of them are equipped with clamps (in other cars, the hoses can be secured with clamps). The part for “Kalina” must have latches, otherwise the tubes cannot be secured.
A plastic latch secures the hose to the filter fitting
In the countries of the former USSR, the following manufacturers of gasoline filters have proven themselves best:
- BOSCH;
- FRAM;
- FILTRON;
- SCT Germany;
- UFI.
At the moment, second-generation Kalina machines are equipped with fine filters made of polyamide. But users are not very complimentary about the factory spare parts: after disassembly, it was discovered that the paper “accordion” was poorly glued to the body. As a result, half of the fuel passed through the gas pipeline without filtering. At the same time, based on the practice of isolated cases, it cannot be unequivocally stated that metal filters are better than plastic ones.
Inside the filter element there is porous paper that traps small particles
Using the Scan Tool
Trouble code P0171 or P0174 can be caused by a vacuum leak or a faulty sensor. Vacuum leak errors usually - not always - occur faster at lower speeds; like rough idle, for example.
Problems are more common at high engine speeds. Problems at high speeds are often caused by a faulty sensor or problem in the fuel system, including the MAF sensor, engine coolant temperature (ECT), throttle position (TPS), barometric pressure sensor, or others that monitor fuel delivery.
A capable scan tool can check fuel trim values at idle and at higher engine speeds and determine when leaning occurs. This may help find problems.
If your computer has other trouble codes that point to one or more sensors, check those first. These may be the cause of codes P0171 or P0174.
If you receive a code for the oxygen sensor, this may or may not be the cause of the problem; More often than not, other sensors are the problem. Therefore, you may want to check other components before testing and replacing the O2 sensor.
Replacing a faulty valve
The regulator to be replaced is located in the fuel block, which includes other elements: an electric fuel pump, a coarse filter and a Kalina fuel level sensor. You will need to remove the entire block from the tank and then change the regulator. To do this, relieve the pressure, as described above, and then remove the rear seat.
New Lada: Replacing the cabin filter - Lada Kalina Blog
The pressure ring holding the assembly is twisted to the left. You can move it from its place with light blows of a hammer on the protrusion through the adapter. Then the fuel module along with the float is carefully removed from the opening.
You need to remove the wire from the regulator installed in it and pull out the spring retainer with a Phillips screwdriver. After this, the valve can be easily removed and replaced with a new one. Before reinstalling, the O-rings of the new part must be lubricated with fresh engine oil.
When assembling the unit, it is important to monitor the condition of the gaskets and replace them if worn. When installing the fuel module into the opening, you must ensure its orientation; the arrow on the cover should point towards the trunk. At the end, it doesn’t hurt to check the pressure again, and only then you can screw in the spool and start the engine.
To be sure, the Lada Kalina should be tested in motion, making sure that the dynamic properties of the car are restored.
tweet
back The process of replacing the clutch on Kalina
Next Why doesn't the Lada Kalina ECU work?
Tags: replacement, umbrella, valve, fuel pressure regulator, installation
Vacuum leaks
Problems in the vacuum system often also contribute to a lean fuel mixture.
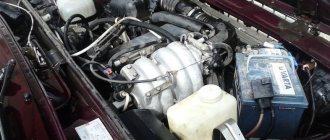
- Check for possible leaks around the air filter assembly, between the MAF sensor and the throttle body. A weak or damaged boot can introduce unmeasured air.
- To check for possible gasket problems under the throttle body and intake manifold: Spray carburetor cleaner around the gasket seal area while the engine is idling.
- If the idle speed changes when spraying a certain area, there may be a leak.
Other key areas to check for vacuum leaks:
- Check if the vacuum hoses are loose.
- Look for damaged or cut vacuum hoses.
- Inspect vacuum hoses routed near hot areas, such as the engine or exhaust system, for possible damage.
- Check vacuum devices for damage that could cause leakage.
- Inspect the vacuum hose between the intake manifold and the canister purge valve.
- Although exhaust gas recirculation valve not very common, it may also be a contributing factor to impoverishment. Check for loose bolts or damaged gasket under the valve.
- Check the exhaust system for leaks between the engine and the O2 sensor. Idle the engine speed and then increase the speed slightly, paying attention to sounds or smoke from the area of the gaskets, pipe joints, or anywhere between the engine and the catalytic converter.
This other post on finding and fixing vacuum leaks goes into more detail and may help you if you suspect a leak.
Using a vacuum gauge:
If necessary, you can use a vacuum gauge to check for possible leaks. Here's a simple procedure:
- Warm up the engine to operating temperature.
- Connect a vacuum gauge to the intake manifold.
- Set the parking brake and place the transmission in Park (automatic) or Neutral (manual).
- Start the engine and let it idle.
- Obtain vacuum readings from the sensor.
- An engine in good condition will produce a vacuum reading with the needle steady between 15 and 20 inches of mercury (inches of mercury) at sea level. At high altitudes (2,000 feet or more), subtract one inch of mercury for every 1,000 feet above sea level.
- An intake manifold leak will show a steady needle on the lower end of the gauge.
- A leaking head gasket can cause the needle to fluctuate between 6 and 20 inches of mercury.
Check and replace the PCV valve if necessary.
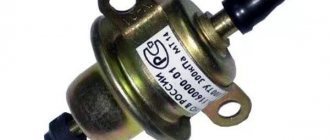
How does the regulator (RDT) work?
The fuel system has a fuel pressure regulator. This injection system component is a conventional diaphragm valve. Its task is to maintain a constant level of pressure in the line and ramp, regardless of the operating mode of the motor. The pressure generated by the pump is maintained within 3.7-3.9 bar.
The operating features of the power supply system are discussed in detail in the diagram below.
To correctly diagnose the fuel pressure regulator, you will need to familiarize yourself in detail with the algorithm of operation of the injection system.
- When the ignition is turned on, the fuel supply pump (item 6) comes into operation. It creates the required pressure in the ramp (item 2) and the line. If after a few seconds the starter is not turned on, the on-board controller gives a command to turn off the pump power circuit.
- First, the fuel passes through filters designed for coarse and fine (item 7) cleaning. Next, it is sent to the fuel pressure regulator, after which it is supplied through the line (pos. 4) to the ramp and injectors (pos. 3).
- The start and further operation of the LADA Kalina 8 valve engine is characterized by fuel combustion. It is sprayed into the manifold by means of nozzles, after which, mixing with air in a certain proportion, it is directed into the engine chambers, where combustion occurs.
New Lada: How to install speakers on Lada Kalina - Do-it-yourself vase repair
At idle speed, the RTD dumps the overwhelming share of fuel into the tank (position 5), because consumption is insignificant, and the pressure generated by the pump is constantly high.
At higher speeds the situation is different. Here the valve does not operate in reset mode, since the engine requires large portions of fuel.
Experts distinguish between two types of RTD faults. This is a decrease in the pressure level in the line or, conversely, its excessive increase. In the event of a breakdown, the LADA Kalina 8 valve element cannot be repaired. It is being replaced with a new analogue.
Reasons for error P0171
In reality, this will lead to flooding of candles. If the engine openly overuses fuel, misfires, shoots into the exhaust, but the ECU “complains” about the lean mixture, the death of the oxygen sensor is inevitable. The simplest tester connected to the signal terminal of the oxygen sensor will show a voltage within 0.25V.
Video: P0171 - lean mixture. One possible reason.
1. DMRV malfunctions
Failures of the mass flow sensor rarely lead to this error. The operating principle of the mass air flow sensor gives an overestimation of readings (contaminants on the sensitive element act as a heat insulator, which is interpreted by the injection system as an increase in air flow speed - that is, an increase in its quantity). More likely, it is not an “imaginary”, but a very real source of excess air at the intake.
2. Intake manifold leaking
Air leaks through cracks, which is not uncommon in plastic manifolds (in Renault Duster 2.0, for example, in 2013-2014 they were massively replaced under warranty). Through seals (if we remember Renault again, this is an eternal disease on a 1.6-liter engine K4M), through the vacuum booster pipe, and so on. In this case, the suction is maximum at idle and at low loads, when the vacuum in the manifold is greater. With significant suction, which can cause error P0171 to appear, it can even be heard by a characteristic hissing sound. Spraying a suspicious area with carburetor cleaner will immediately indicate a leak and change engine performance.
Changing the fine filter
The process of replacing this component in the Lada Kalina is a very simple action and is also included in the maintenance regulations. The most significant condition is to provide access under the bottom of the car, to where the filter itself is located, which may require a lift, overpass or pit.
How to remove the old filter? As a tool, you can arm yourself with a regular screwdriver. This operation will take a maximum of about forty minutes.
Information! Some modifications of the “Kalina” (for example, “1119”, “1186”, “21126” and “21127”) provide for fastening the filter component housing with a bolt, therefore, we can safely “change” the screwdriver to a wrench with a dimension of “10” .
1. At the very beginning of our “operation” we relieve the pressure present in the fuel circuit. For this purpose, we open the pump power circuit. This action can be accomplished in two ways:
- we take out the fuse with the number “F21”, located under the tunnel cover near the gearshift lever (to remove the cover you will need a screwdriver with a flat blade);
- disconnect the connector of the fuel pump itself, which is located under the rear seat cushion; here you will need to unscrew the 4 screws of the cover and after removing it, access to the connector will be provided.
Advice! We recommend using this method if it is necessary to replace the coarse filter component.
After turning off the pump, we start the Lada Kalina engine and wait for the fuel to be exhausted from the line, after which we observe a natural stop of the engine.
2. The filter itself is located under the tank and in most versions is secured with a plastic clip.
3. Before dismantling the filter, you will need to disconnect the fuel pipes, also secured with clamps. They should be disconnected, after which the filter can be freely removed.
Attention! The filter, which is fixed near the tank using a combination of clamp-bolt fasteners, is dismantled using a wrench of the specified standard size.
4. Installation of the new element (its catalog code is “2190-1117010”) on the LADA Kalina car is carried out between the provided stops and following the reverse dismantling algorithm.
5. We put the previously removed fuel pipes onto the corresponding fittings until the characteristic click of the clamps is felt.
New Lada: Maintenance of Lada (VAZ) Kalina 2 / Kalina 2 / LADA / Cars / Technical
Important! We carefully examine the surface of the filter housing and find a schematic arrow on it, which on the installed component should be oriented towards the direction of fuel supply.
6. Make sure that the specified fasteners are securely fixed and return the fuse marked “F21” to its original place (or connect the cable harness to the pump block and install the cover).
7. Start the engine. Here you will need several correct actions:
- turn the ignition on and off immediately several times in a row;
- wait a pause to allow the pump to pump fuel into the line;
- finally start the engine.
Now you know how to change the fuel filter in a car.
When the unit does not fully start on the first try, we repeat this procedure again. This is necessary for the pressure in the fuel supply system to reach its operating value.