May 11, 2017 Lada.Online 134 232 10
MD tuning stands for throttle modernization. There are quite a few ways to modify the throttle assembly, but this article will discuss the most popular scheme proposed by the American engineer Ron Hutton. According to him, correct MD tuning can increase engine power and reduce fuel consumption by up to 25%.
How to adapt the gas pedal?
We carry out adaptation either after repair, replacement of the computer, or long-term removal of the battery.
- We connect the battery.
- We insert the key for the first time after installing the battery and turn it to the “ignition” position. The indicators on the panel light up, wait at least 30 seconds and start the engine. Important: the temperature of the air and the engine must be at least 7 degrees warmer, otherwise adaptation is useless, the engine will operate in emergency mode.
- Next, we adapt the ignition diagnostic function: we accelerate in second gear and brake with the engine at 4 thousand rpm. Up to 1 thousand rpm - we must perform this operation six times during one trip.
Adaptation of the diagnostic function is necessary to preserve the catalyst and possible fire.
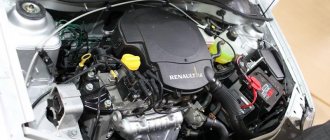
The revs began to fluctuate a little when cold, and they stayed for a long time at 1300 rpm when warming up; in general, Largus’s favorite problem with the K4M began to appear.
This is my second Largus, on the first I wound up the fum tape, then under warranty they changed the receiver, installed a new one with the inscription RENAULT, but the rings are of course a weak point. So, the known methods of treatment 1.) Rewind the fum tape, not reliably, not for long, the fum tape practically does not absorb shock, as a result, the ring presses its place in it and the suction appears again. 2.) Put a new ring with a code 8200068566
, good but expensive, the toad is against it and there is a chance that the ring will last for a year.
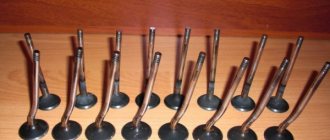
3.) Put on a Nisanov ring with code 16618-00QAA
, this is the same new ring only with a different code and a lower price, but still the toad is against it.
4.) Install the Gostov ring GOST 18829-73/9833-73 064-072-46
, cheap, reliable and cheerful, but mother is lazy, you need to look for such rings.
5.) There were Gost rings available, but not 4.6 but 6 mm, so I decided to make myself an eternal ring from it, because... the ring is thicker, the throttle with such a ring doesn’t fit into the receiver, so I’m redoing it a little. I just file off the excess rubber and it becomes a little flat. We assemble this device from a canister cap, a bolt with a nut and two washers, a drill and a file clamped in a vice.
Other
Makes and models of cars for which MD tuning was done
Audi - 100, Q5 BMW - X3, X5, 520i, 525, 528, 740 Cadillac - Escalade Chery - Amulet, Fora, Tiggo, Tuzo Chevrolet - Aveo, Blaizer, Cruze, Lacetti, Lanos, Niva, Suburban, Tahoe Chrysler - Sebring Daewoo - Espero, Matiz, Nexia, Rezzo Daihatsu - Terios Dodge - Caravan, Dacota Ford - Expedition, Explorer, Focus, Maverick, Mondeo Honda - Accord, CRV, Legend Hover Great Wall - H3, H5, Wingle Hummer - H3 Hyundai - Accent , Elantra, Getz, Santa-Fe, Solaris, Sonata, Terracan, Tucson IX35 Infiniti - G35x Sport, Qx4 Isuzu - Rodeo Jac - Refine Jaguar Jeely - Otaka, MK KIA - Ceed, Cerato, Picanto, Rio, Sorento, Spectra, Sportage Lexus - LS-430, LX-470, RX-300 Mazda - 3, 6, CX-7, Tribute Mercedes-Benz - E, C, G, CLK 320, SLK 230, Vito Mitsubishi - Airtrek, Carizma, Challenger, Delica , Galant, Lancer 9, 10, Montero Sport, Outlander, Pajero, Pajero Sport Nissan - Avenir, Almera Classic, Almera N16, Nout, Quashqai, Primera P12, Serena, Teana, Tiida, X-Trail Opel - Astra, Omega, Vectra Renault - Kangoo, Logan, Megan, Sandero Samand - Iran Khodro Škoda - Fabia, Octavia Tour, FSI Ssang Yong - Korando, Kuron Subaru - Forester, Forester Turbo, Impreza, Outback Suzuki - Grand Vitara, Jimny, Samurai Toyota - Altezza, Avalon , Cami, Camry, Corolla, Fortuna, Fun Cargo, Harrier, Land Cruiser Prado, 100, 200, Starlet, RAV-4, 4Runner, Windom Volkswagen - Caddy, Bora, Polo, Vento TagAZ - Tager, Vortex Tingo VAZ - all models GAZ - Gazelle UAZ - Patriot
Examples of throttle valve adaptation on VAG and Lancer IX vehicles
In this video, they will tell you and show you how to adapt the damper for a VAG car.
Adaptation of remote sensing for Volkswagen Golf 4:
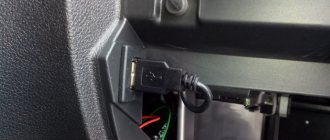
- We warm up the engine to t=80 0 C and turn off the car. Then we connect the USB-KKL cable to the diagnostic connector and, after turning on the ignition, launch the diagnostic program (VAG-COM 3.11).
- We enter section 01-engine.
- We poll the fault memory (02).
- We erase detected faults (05).
- After returning to the previous menu, enter the “adaptation-10” section.
- On channel 00, press the “read” button.
- Save the result and return to factory settings.
- Enter the basic settings (04) and go to the measurement mode.
- If the group value is 001, press “start”.
- We wait 2-3 minutes, then close the program and disconnect the cable. Adaptation is complete.
Adaptation of remote sensing of Nissan cars with an electronic gas pedal:
- Fully release the accelerator pedal.
- Turn on the ignition for at least 2 seconds.
- Turn off the ignition and wait at least 10 seconds.
- Turn on the ignition for at least 2 seconds.
- Turn off the ignition. The accelerator pedal adaptation procedure is completed.
- We are adapting the throttle valve. The accelerator pedal is released.
- Turn on the ignition and turn it off immediately. We wait at least 10 seconds. During this period of time, the damper moves.
- We teach air supply at idle speed (XX).
- Warm up the engine and gearbox to operating temperature.
- We turn off all electrical equipment of the car.
- We start the engine and bring it to operating temperature.
- Turn off the ignition and wait at least 10 seconds.
- Fully release the accelerator pedal.
- Turn on the ignition and wait at least 3 seconds.
- Within 5 seconds, press the accelerator pedal five times, then wait 7 seconds.
- Pressing the accelerator pedal, hold it until the CHECK stops flashing and lights up constantly (about 20 seconds are required).
- After the CHECK light comes on continuously, you must release the pedal within 3 seconds.
- We start the engine to run at XX.
- Press the pedal several times to check the stability of the XX.
Adaptation of remote sensing on VW Passat B5:
We recommend that you watch this video, it will show you how to adapt the damper for a Passat car.
- Warm up the engine to operating temperature and turn off the car.
- We turn on the ignition, but do not start the engine.
- We connect the cable to the diagnostic connector and launch the program.
- We enter section 01-engine.
- We enter the basic settings (04).
- In the damper adaptation we select 060 for cars with electronic damper control, and value 098 for cars with cable-controlled damper.
- Let's start the adaptation.
- We are waiting for the “ADP RUN” entry to appear on the screen and the subsequent “ADP OK” entry.
- We return to the basic settings.
- Turn off the ignition. Adaptation is complete.
Typical TPS problems
A malfunction of the throttle sensor can be determined by the following symptoms:
- increase in speed intensity when the load is off;
- deterioration of dynamic performance;
- the appearance of jerks when picking up speed;
- sudden stopping of the engine in neutral;
- warning light with a light bulb.
In addition, there are other malfunctions. One of the most common is a decrease in the base coating thickness in the initial part of the slider stroke. This prevents the linear voltage level of the output signal from increasing. Another causal relationship may lie in the failure of the movable core. The breakage of one tip contributes to the appearance of a large number of burrs at the base. As a result, others also break, causing the slider to lose contact with the resistive part.
You can test the throttle sensor yourself by following these steps. The first step is to start the ignition; if the warning light does not light up, then we take the converter directly. Using a multimeter, you should measure the potential difference between “−” and the slider wire. The obtained parameters should not be higher than 0.7 V.
Next, you need to expand the sector to fully open the damper. Then you should recheck the voltage again. The readings must be at least 4 V. After this, you need to turn on the ignition and remove the connector. Again measure the resistance at the point of contact of the slider with one of the terminals. While scrolling the sector, monitor the multimeter readings.
The pointer should be moved gently and slowly, since shocks and sudden vibrations indicate a breakdown. The smooth operation of the device depends on the condition of the film resistor.
There are several types of throttle position sensor: film-resistive and non-contact. The first of them is installed by the manufacturer, the second is chosen by the car owner while driving and operating the car. The service life of the TPS may vary depending on the quality and adherence to technology in the manufacture of the device. The standard unit may not need to be changed even for 60,000 km, and sometimes it requires replacement even after 5,000 km.
When purchasing a throttle sensor, the price depends on the choice of its type:
- Film-resistive ones are the most frequently purchased among motorists due to their budget price, but their service life practically does not stand up to criticism;
- Contactless - at a higher cost (almost twice) the long period of use covers all costs. The high-quality operation of the device is due to the principle of magnetoresistance. When purchasing, you should be aware that this type of device operates at a DC voltage proportional to the throttle valve opening angle in the electric motor fuel injection system.
The sensor shaft rotates clockwise from the damper side. The service life guarantee is 3 years. Drivers do not repair the resistive sensor, but replace it with a contactless one - it is undoubtedly more reliable. Its design includes a rotor and a stator. The rotor is not affected by the magnetic field, because there is a magnet at its base. The stator is a part that is quite sensitive to the electromagnetic field. Its assembly is associated with programming, so a device of this category is often used for installation in electrical control units.
When should you not perform remote sensing adaptation?
It is worth noting that it is appropriate to carry out the above procedures using software and special diagnostic equipment in the event of a failure of the damper settings. It does not matter whether the electronic parameters are broken or the mechanical settings of the equipment are lost.
If the operation of the throttle is impaired due to wear, then it is more advisable to think about repairing or replacing the part. If suddenly, after the steps described above, adaptation does not occur, it is worth checking the motor responsible for opening/closing the damper. There may not be enough power for the node to operate properly.
For example, cleaning the damper body inside and outside before starting adaptation is necessary for any make of car.
The only difference is that in some cars the damper is adjusted using a cable, and in others using electronics. This difference will manifest itself in the choice of adaptation parameters.
What to do additionally
After modernization of this type, it is necessary to perform a number of additional manipulations:
- Rechip the ECU, since using a new part the old program will not work adequately. It will not be able to properly control the ratio of air and fuel in the mixture.
- Install a sports receiver. But before installation, be sure to consult with specialists or simply contact a car service center for help.
- Replace existing camshafts with more advanced ones.
Refining the throttle assembly is a serious procedure, there are a lot of different disputes regarding it, those who have tried such tuning in practice praise the result, but theorists swear. But the opinion of practitioners still prevails, and the fact that after modernization fuel is saved by 30% is already a proven fact.
Lada Vesta repair books
Products from the Dustershop77 range on the topic of the article:
| Image | vendor code | Name | Manufacturer | Price | Availability | Add to cart |
| 35025 | Repair book for VAZ LADA Vesta | RF | 1500 / 1300 rub. Discount: 1200 rub. | 2 | ||
| 35026 | Repair book for VAZ LADA Xray | RF | 1700 / 1500 rub. Discount: 1300 rub. | 1 |
CancelAdd comment
Briefly what this article is about:
How to remove the throttle assembly on LADA cars
This is interesting: Replacing the front crankshaft oil seal (16V) Lada Largus
Other section materials
| Technical description |
| Vehicle specifications |
| Vehicle registration details |
| Safety precautions during maintenance and repair |
| Location of the main components and assemblies of the car |
| Vehicle technical check |
| Maintenance schedule |
| Checking the condition of wheels and tires |
| Wheel replacement |
| Replacing the windshield and trunk door glass wiper blades |
| Checking the fluid level in the windshield washer reservoir |
| Checking the oil level in the 1.6 (8V) engine |
| Changing the oil and oil filter of the 1.6 (8V) engine |
| Replacing spark plugs for 1.6 (8V) engine |
| Replacing the replacement element of the 1.6(8V) engine air filter |
| Replacing the accessory drive belt |
| Checking the condition and replacing the timing belt of the 1.6 (8V) engine |
| Checking the level and adding engine coolant 1.6(8V) |
| Replacing engine coolant 1.6 (8V) |
| Checking the oil level in the 1.6 (16V) engine |
| Changing the engine oil and oil filter |
| Replacing spark plugs for a 1.6 (16V) engine |
| Replacing the replacement element of the 1.6(16V) engine air filter |
| Replacing the 1.6(16V) engine accessory drive belt |
| Checking the condition and replacing the timing belt of the 1.6 (16V) engine |
| Checking the level and adding engine coolant 1.6(16V) |
| Checking the level and adding oil to the gearbox |
| Checking the fluid level in the master cylinder reservoir |
| Replacing fluid in brake and clutch hydraulic drives |
| Bleeding the hydraulic brake system |
| Checking the fluid level in the power steering reservoir |
| Checking the condition of the brake system |
| Checking the chassis and transmission |
| Checking the steering condition |
| Engine 1.6 (8V) |
| Replacing the cylinder head cover gasket for a 1.6 (8V) engine |
| Checking and adjusting thermal clearances in the valve drive of the 1.6 (8V) engine |
| Replacing the camshaft oil seal of the 1.6 (8V) engine |
| Replacing the exhaust manifold gasket for 1.6 (8V) engine |
| Replacing the exhaust manifold gasket for 1.6 (8V) engine |
| Replacing the rear crankshaft oil seal of a 1.6 (8V) engine |
| Replacing the 1.6 (8V) engine oil pressure warning sensor |
| Replacing the oil pan gasket for 1.6 (8V) engine |
| Removing the 1.6 (8V) engine oil pump |
| Replacement of engine power unit mounts 1.6 (8V) |
| Removal and installation of 1.6 (8V) engine engine |
| Engine 1.6 (16V) |
| Replacing the 1.6 (16V) engine oil pressure warning sensor |
| Removing the fuel rail protection for the 1.6 (16V) engine |
| Removing the oil separator for the engine crankcase ventilation system 1.6 (16V) |