Objectively, the carburetor installed on Oka cars has a simple design. And if you use it correctly, then no problems should arise.
The main thing here is to respond to changes in a timely manner, and also not to waste time and effort.
The carburetor is the main working element of the engine on the VAZ 11113. Depending on the period, different modifications were installed on the Oka. But in general their device was the same. The difference was observed only in certain settings.
Device
Oka first appeared on the Russian market in 1987. The production continued until 2008.
The first was the VAZ 1111 version. This is a car with a 2-cylinder engine and a 0.65-liter engine.
Then an updated version of the VAZ 11113 appeared. It has been produced since 1995. Here the engine already had a volume of 0.75 liters.
For the first version of Oka, a DAAZ 1111 carburetor was developed. For the subsequent modification with a 0.75-liter engine, carburetors of the DAAZ 11113 series were used. Then they were slightly adjusted.
Objectively speaking about the old carburetor is almost pointless. There are fewer and fewer cars with it. Yes, and the settings are carried out in the same way as on the updated version.
The DAAZ 11113 carburetor is a device that creates an air-fuel mixture in factory-specified proportions. This ensures stable operation of the internal combustion engine, regardless of the currently selected mode.
The body is made of 3 elements:
- top cover;
- the main part that comes with the float chamber;
- the lower part where the throttle valves are located.
The device itself is two-chamber. Sequential opening of existing throttles is provided.
Structurally, it is worth highlighting the following components:
- GDS. This is the main dosing system. Works in all available modes. It consists of diffusers, fuel supply jets, as well as air jets in both chambers.
- XX. This is the idle system. Serves to maintain stable operation of the internal combustion engine at minimum speed. Helps you use fuel wisely.
- Economizer. Helps enrich the air-fuel mixture when the speed increases and the engine operates under a fairly high load.
- Acceleration pump. Its main task is to work smoothly without noticeable failures. Even if the driver presses the gas pedal sharply.
- Starting device. Aimed at stable starting of the car engine in any weather.
- Float chamber. Ensures that a constant level of flammable liquid in the carburetor is maintained so that the engine runs stably;
- Transitional system. Helps to accelerate smoothly, eliminating jerking when the secondary chamber opens.
Each component of the system has its own specific task.
To set up and adjust the unit, special adjusting screws are used. Tuning is also carried out by selecting jets and changing the angles of the throttle and air dampers.
Cleaning the carburetor from carbon deposits and dirt
Most carburetor problems occur due to poor quality fuel. This is what causes plaque and soot to appear. It also causes blockages in the fuel channels. To eliminate all this, you will have to use a special cleaning fluid for carburetors. It is a spray can. The cylinder is usually accompanied by a set of nozzles for flushing the carburetor channels. There are many manufacturers of fluid, but HG3177 fluid is especially popular among car enthusiasts, allowing you to perfectly flush the carburetor in a few minutes.
Tools and Supplies
- rags;
- several toothpicks;
- a piece of thin steel wire 30 cm long;
- compressed air cylinder;
- protective rubber gloves and glasses;
- set of open-end wrenches;
- flat screwdriver;
- carburetor cleaning fluid.
Sequencing
- Once removed from the vehicle, the carburetor is completely disassembled.
Completely disassembled and prepared for cleaning, the DAAZ 1111 carburetor for the OKA car
How it works
The operation of the carburetor in question on Oka cars is based on the same principle as similar systems on other wheeled and widely used vehicles.
- First, fuel from the float chamber enters the well through the fuel system to form the air-fuel mixture.
- The nozzles then transfer the mixture to the diffusers of the main component, that is, the carburetor.
- The device responsible for idling takes gasoline from the wells. It follows the jets and forms a mixture with oxygen in specified proportions.
- Air coming from the second and first carburetor chambers is also added to the components.
- When the throttle is opened slightly, the gasoline mixture moves into the chamber. If the fuel fluctuates, the economizer regulates this phenomenon and stabilizes engine operation.
When ignited, the air-fuel mixture creates a force that allows the crankshaft to rotate and thereby set the wheeled vehicle in motion. In this case it is Oka's car.
How to clean a carburetor
Before you start adjusting the carburetor on the Oka, you must clean it. It is pollution that is the main reason for unstable engine operation on these machines.
The carburetor unit becomes clogged over time. Especially if you use low quality fuel. Dirt penetrates the jets, as well as the fuel channels.
This may result in the following symptoms:
- loss of idle speed;
- the engine does not gain speed;
- the effect of engine tripping occurs;
- fuel consumption increases;
- Black smoke comes out of the exhaust pipe.
In many of these situations, major repairs are not necessary. It’s enough just to clean the system and then start adjusting the carburetor on the Oka 11113.
Practice shows that most often the HDS channels become clogged when the engine does not gain speed when the damper of the first chamber is opened. Although the idle speed does not disappear.
Here you should remove dirt using compressed air without removing the carburetor.
The meaning is this:
- turn off the Oka engine and raise the hood;
- remove the air filter housing;
- use a pump, blower or compressor to blow out the channels from the GDS;
- start the engine;
- check the stability of its operation.
If the behavior has become normal, then the filter is put in place and the machine continues to be used. If not, then you need to blow it again.
What carburetors are installed on Oka cars?
To equip the power units of Oka cars, carburetors produced by the Dimitrovgrad Automotive Unit are used; DAAZ carburetors of a special series are produced.
The DAAZ-1111 carburetor has some specific differences from similar devices . Thus, the float chamber of the mechanism is placed not along the carburetor, but across it. Thanks to this device, the carburetor mechanism can receive additional enrichment of the mixture immediately at the moment of sudden acceleration or braking.
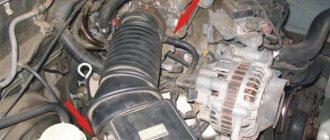
Carburetor mechanism used to equip Oka cars
The DAAZ-1111 itself has a simplified design, as it contains a minimum number of electronic components. The main parts of the unit are:
- engine starting device;
- union;
- valve mechanism;
- control lever;
- throttle valves;
- two internal combustion chambers;
- float chamber and float.
All elements of the device are combined in a common housing cup. Protection from dirt, dust adhesion and unfavorable climatic conditions is provided by the housing cover.
For ease of operation and maintenance, the carburetor is divided into three parts:
- The upper one, which consists of a cover with a flange, studs for fastening the air filter element and a fuel fitting.
- The middle one is the carburetor body itself, which contains diffusers and a float chamber.
- The lower one consists of throttle valves and drive rods.
The carburetor on the Oka performs its functions in exactly the same way as similar mechanisms installed on other vehicles. The fuel is supplied to the cavity of the float chamber, from where it is sent to the first or second chamber for air enrichment. Special sprayers crush gasoline droplets, so they easily mix with air and turn into an air-fuel mixture. This mixture enters the carburetor through diffusers and then into the engine.
Table: parameters of DAAZ-1111–1107010 carburetor dosing systems
| Options | Camera | |
| first | second | |
| Diffuser diameter, mm | 20 | 25 |
| Mixing chamber diameter, mm | 28 | 36 |
| Calibrating the main fuel jet | 95 | 95(102,5)* |
| Calibrating the main air jet | 170 | 85 |
| Calibration of the fuel jet of the idle jet and the diameter of the transition system of the second chamber | 41 | 0,50 |
| Diameter of idle air jets and transition system of the second chamber, mm | 1,5 | 0,7 |
| Econostat fuel jet diameter, mm | — | 0,95 |
| Diameter of accelerator pump nozzles, mm | 0,40 | 0,35 |
| Fuel supply by accelerator pump, cm3 per 10 strokes | 8,0+2,0 | |
| Starting gaps of dampers, mm air throttle | ||
| 2,2+0,2 | ||
| 0,7–0,8 | ||
How to adjust the fuel level
Another important point on how to properly and completely tune a simple carburetor installed on an Oka car.
Sometimes the owners of this domestic small car are faced with such a problem. The fuel level in the float chamber decreases. It turns out to be noticeably smaller than recommended. This causes the mixture to become lean. As a result, the car accelerates with difficulty, fuel consumption increases, etc. If the level increases, then the appetite also increases. In both situations, you need to adjust the position of the float.
Self-adjusting the fuel level in the carburetor of Oka cars should not cause any particular difficulties. It is important to remember the following. When the carburetor fills with fuel, this indicates problems that have nothing to do with adjustment. Most likely, the locking needle does not fit tightly enough to the seat. The problem with the situation is that adjusting the fuel level will not in any way correct the situation in the carburetor of the Oka small car. You will have to completely change the locking mechanism in the chamber.
When the level is low and there is not enough gasoline in the chamber, a simple adjustment will help correct the situation. You don't need any special skills to work.
The instructions are presented as follows:
- remove the air filter cover;
- disconnect the choke cable;
- disconnect both fuel hoses, that is, the supply hose, as well as the return;
- unscrew the 5 screws that secure the top cover;
- check the condition and remove the cover along with the gasket to the side;
- arm yourself with a caliper or a cut piece of a ruler;
- measure the distance between the upper edge of the housing and the surface of the fuel;
- Normally, this distance for Oka is 22-23 mm;
- if the actual data differs, you need to bend the float tongue to one side;
- bend the tongue until the distance corresponds to the norm;
- If the adjustment is successful, return the cover and filter to their place.
Now you understand how you can adjust the fuel level inside the carburetor float chamber on the Oka yourself. But you need to remember one thing. When making adjustments, the locking needle may fall out when removing and installing the cover.
How to stabilize idle speed
Several symptoms indicate problems with idle speed:
- idle speed disappears altogether;
- the engine behaves unstably at low speeds;
- The engine stops spontaneously and stalls.
In certain situations, such phenomena require removal of the carburetor. And this is a troublesome matter. But first, it makes sense to try to solve the problem without dismantling it. Purging is applied.
To clean the idle air system channels, you must:
- turn off the engine;
- remove the air filter cover;
- disconnect the power cable;
- unscrew the solenoid valve from the XX system;
- close the channel with your finger in the area where the solenoid valve was disconnected;
- start the engine of the car;
- give gas;
- let the power unit run for a while;
- Blow out the jets and valve with compressed air;
- return everything to its place;
- connect the power wire;
- use the quantity screw to add speed and start the internal combustion engine.
If the cleaning was effective, then the engine will run when idling. But the speed will be increased.
Then you need to tighten the quality screw and adjust the fuel mixture. Tighten until the internal combustion engine begins to reduce speed and show slight signs of failure.
Next, unscrew the quality screw a little. Until the engine starts running stably. Using the quantity screw, set the idle speed to normal. For Oka cars this is about 850-900 rpm.
In a situation where purging does not give the desired result, you will have to dismantle the carburetor, disassemble the element, and also thoroughly clean it.
How to remove
The removal procedure is quite simple, but it is recommended to follow a clear action plan so as not to damage the internal components of the carburetor during the dismantling process. To successfully carry out the work, you will need only three tools:
- open-end wrench 8;
- open-end wrench 13;
- flat screwdriver.
Before starting work, you must disconnect the wire from the negative terminal of the battery. This action will protect you from possible electric shock.
The procedure for dismantling the DAAZ-1111 carburetor is as follows:
- It will be necessary to remove the air filter box. It is located in such a way that it prevents free access to the carburetor.
- After this, you will need to loosen the bolted connection securing the damper drive rod to the lever. You will also have to slightly unscrew the bolt that secures the damper drive to the bracket.
- After loosening, the bolts can be easily unscrewed - you need to disconnect the drive rod from all connections.
- Using a screwdriver, disconnect the intermediate rod end from the lever.
- Next, you need to disconnect the crankcase ventilation hose, which is connected to the fitting.
- Afterwards, you can safely remove the wiring from the economizer valve.
- The next step is to disconnect the vacuum regulator hose.
- Next, you will need to loosen the clamp on the fuel supply pipe and remove the hose. Some fuel may spill out.
- After which you can begin the procedure of removing the carburetor body. To do this, you will need to unscrew the forced idle economizer valve; behind them there are two nuts that need to be unscrewed.
- After removing the filter element bracket, you can unscrew the two nuts that are located on the front side of the carburetor.
- The device is carefully removed from the studs.
The main thing is to follow the exact procedure
Immediately after dismantling the carburetor, it is recommended to block the resulting hole in the intake manifold with a lint-free cloth. This measure is necessary to ensure that dust and dirt do not get inside.
Cleaning carburetor elements from carbon deposits and dirt
It is advisable to have the carburetor cleaned both outside and inside at a service station. However, if the car owner has experience in independently servicing his car, then it is allowed to clean the carburetor from carbon deposits with his own hands. However, you should be as careful as possible, since some parts of the mechanism require special care.
How to clean jets
The fuel or air jets of the DAAZ-1111 carburetor are calibrated, that is, they have holes of a strictly adjusted diameter. That is, if the integrity of the surface is damaged, the normal supply of fuel or air may be disrupted.
Cleaning of jets is carried out every 50 thousand kilometers, since due to their structure and functions they are most susceptible to soot adhesion.
The jet body usually consists of a malleable metal alloy that is easily damaged. Therefore, it is not recommended to remove carbon deposits and dirt using wire. It is advisable to use a toothpick, which will gently remove soot from the part. To improve the result, you can blow out the nozzle from a can of compressed air or under the pressure of a stream from a conventional tire pump.
Small parts in the form of plugs
Cleaning the throttle valve
It is necessary to clean the throttle valve only if there are obvious reasons that indicate the formation of carbon deposits. For example, the engine began to start intermittently, operate unstably, at idle the speed begins to “float”, etc.
On Oka cars, it is recommended to clean the throttle valve no more often than every 80–100 thousand kilometers. For a successful operation, it is recommended to remove the part from the carburetor. To remove carbon deposits, you can only use soft, lint-free cloths and special cleaners for carburetor engines. You will need to lightly wipe all surfaces of the damper with cleaner, then wipe it with a clean, dry cloth.
Cleaning the float chamber from carbon deposits
It is recommended to clean the float chamber every 80 thousand kilometers. To remove carbon deposits efficiently, you will need to completely disassemble the device without removing the float. Carburetor cleaner (or kerosene) is poured into the cavity of the chamber; the liquid should dissolve carbon deposits in the chamber within two hours. After which it must be drained, the cavity must be blown out and wiped dry.
The float chamber often has to be cleaned of carbon deposits in cases where low-quality fuel is used. If the car owner carefully monitors the quality of gasoline consumed, the time frame for washing and cleaning may be increased.
How to adjust the carburetor "Oka" 11113
You can adjust your carburetor yourself. To do this, you need to remember a few rules:
- regulation is carried out only after the motor reaches its operating temperature;
- adjustment can be started only after the functionality of other vehicle systems has been checked;
- During the work process, it is advisable to turn on all energy consumers on the Oka - lighting devices, fan, acoustic system, etc.
The design of the DAAZ-1111 carburetor allows adjustment without dismantling and disassembling the mechanism. The only thing that needs to be removed is the air filter box, as it interferes with free access to the carburetor.
To regulate fuel consumption, stable idle speed and dynamics, there are several devices on the carburetor body:
- quality screw, which raises/lowers the number of revolutions of the power unit at idle;
- quantity screw, which regulates the creation of a rich air-fuel mixture;
- throttle valve locking screw of the first chamber;
- secondary chamber throttle valve retaining screw;
- holder of the jet responsible for idle speed stability.
Its turns provide an increase/decrease in mixture enrichment
The car owner, by adjusting the engine idle speed and fuel supply level, can optimize engine performance. To begin with, it is recommended to completely tighten all the screws until they stop, and then set the desired value 1/8 of a turn.
For the DAAZ-1111 carburetor, the optimal idle speed in summer is 800-900 rpm, and in winter - at least 900-1000 rpm.
Well, let's say building by eye is an empty matter... you turn it like this with the quantity screw and reduce the speed to the minimum possible. Turn the quality screw... you catch the maximum increase in speed. warmed up) worked steadily and smoothly at the required speed XX... with the throttle valve closed as much as possible. Regarding ignition Well, since I don’t think you have a strobe light and a probe for DH is the same... initially set the distributor to “zeros”. After starting and warming up the engine, turn the distributor to + (a little at a time), achieving an increase in speed (at XX) and stable operation. Then you roll it back a little... until the rpm starts to decrease... and back a little forward. Precise correction of the OZ... then while driving on detonation... you are looking for the earliest possible ignition at which there is no detonation (your fingers don’t ring)
Arkasha
https://tehnoforum.com/index.php?topic=680.0