Replacing ball joints on a VAZ 2109 yourself
Many parts of any car, including the VAZ 2109, require regular replacement or repair. The ball joint also belongs to such parts. In order not to pay for the work of replacing the ball joint on a VAZ 2109, you can do it yourself in your own garage - it’s not that difficult. In this article you will find photos explaining the essence of the process, as well as a video of the process of replacing the ball on a VAZ 2109. Instructions for choosing a new ball and diagnostics are also included.
- Choosing a new ball joint
- Ball joint diagnostics
- Replacing the ball joint
- Tool
- Replacement
Choosing a new ball joint
Replacement of ball VAZ 2109
You can simply come to the store and ask for a ball for the required car model. But, after a couple of months, you will have to go to the store again and buy another one! There is no meaning to this action, and it only benefits the store owner. Let's choose the right ball joints. Please pay attention to the following points:
- Manufacturers often rivet ball joints from rubbish and regardless of the quality of the product. Noticing this pattern, car enthusiasts identified several companies with normal price and quality indicators.
- Among such manufacturers is the Trek company, which is highly praised by drivers, as well as service station workers.
- If you decide to use another company, remember that there is no such thing as cheap quality! Beware of counterfeits - the stingy pays twice. The price for balls is not that high.
- Still, when choosing a ball joint for a VAZ 2109, you should pay attention to its appearance.
- The housing must not have any damage or signs of wear. Also, the body of a good ball joint will definitely be welded from two parts.
- Pay attention to the ball pin. If it is painted black, this is a bad sign. Yes, the finger should be black, but not from paint, but from temperature hardening.
Advice! When choosing a ball, try turning the support pin. In a good ball joint it is very difficult to move without a knob.
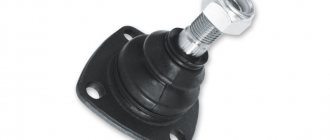
- Don't forget about the ball joint configuration. What should be included there? The ball itself, nut, mounting bolts and boot.
- The anther must be intact and have no weak points.
- The ball joint bolts must also be hardened. Yellow bolts are usually of disgusting quality - the thread is bypassed without even tightening the nut (in some cases).
- The nut must have a Teflon insert or a cotter pin included, and there must be a through hole in the ball joint pin.
Advice! Usually lubricant is already added inside the ball, but it is often not enough. Don't forget to pay attention to this.
How to change the ball joint on a VAZ 2109?
After detecting all signs of malfunction, you can begin to replace the element. This operation is not complicated, and therefore can be done by any driver who has a standard set of tools and a place to carry out the appropriate repairs.
First of all, you need to purchase the appropriate ball joint. The most important thing in this matter is to save yourself from buying a defective part. First of all, pay attention to the price of the product. It shouldn't be too low. To save on materials, manufacturers make such ball joints from all sorts of rubbish, resulting in a hinge that must be replaced after just a month of use. The most famous and proven. If possible, buy ball joints from this company.
Procedure:
- Remove the wheel bolts and lift the wheel using a jack. Next, you need to completely unscrew the bolts and remove the wheel. For convenience, it is recommended to turn the wheel in advance in the opposite direction from the work.
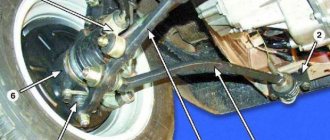
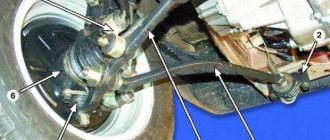
- Now you need to find the connection between the ball joint and the arms. It is located at the bottom of the pendant. Treat the area with a metal brush and WD-40.
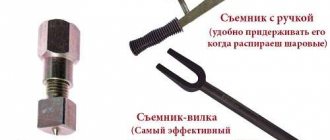
- Unscrew the pin nut, but not completely. Using a puller, press the ball joint out of the hub. After a corresponding click appears, pull out the puller and completely unscrew the pin securing nut.
- Now unscrew the ball joint on the arms and remove it. Install a new part in its place and tighten the fastening nuts.
- Drive a portion of lubricant under the boot of the new ball joint and install it in the reverse order. This time, during installation, the use of a puller is not at all necessary, since the pin can be tightened with a nut.
- Further assembly is carried out in reverse order.
This completes the replacement of the ball joint. We wish you good luck on the roads!
Ball joint diagnostics
It is very important to determine the time when the ball joint on the VAZ 2109 needs to be replaced and do it. Why? If on the road, at a good speed, the ball joint pin is pulled out of the ball joint itself, this does not bode well for either the car or the passengers. So:
- While driving, listen for knocking noises coming from the front of the car. A ball joint malfunction is especially evident when driving on an uneven road or when a wheel falls into a hole.
- If, when you hit a hole, you hear a dull thump from one of the front wheels, it is likely that the ball joint needs to be replaced.
- You can diagnose a ball joint in another way without special equipment. When parking the car, place your foot on the top of the front wheel.
- Next, you should make pushing movements with your foot towards the other wheel. If during this procedure you hear a dull impact sound, then you should turn to a more accurate diagnostic method and, most likely, replace the ball joint.
The following describes the most reliable way to check whether a ball joint needs to be replaced:
- For a more accurate diagnosis, you will need an inspection hole and a jack.
- The car is installed in a pit, with a parking brake and wheel chocks for greater safety.
- Using a jack, the car is raised.
Advice! You should select the jack's support point with extreme caution because the car will have to wobble from side to side.
- Once the wheel is off the ground, you can begin testing the ball joint.
- One hand is placed on the top point of the wheel, and the second on the bottom.
- Next, you should use careful and at the same time sharp movements to shake the wheels from top to bottom.
- If there is no sound of impact, move on to another wheel. If there is sound, then we do the following (a friend is needed).
- A second person should place two fingers where the ball joint pin connects to the control arm and onto the ball joint housing. If you feel the displacement of the finger in the ball body with your fingers, then it has become unusable.
Signs of breakdown
If the ball joint is severely worn, the car itself will let you know about it. You just need to pay attention to the characteristic symptoms.
- When hitting bumps, a distinct thud begins to be heard. It can only come from the front of the left or right side of the car if the problem is in the ball joint.
- When the ball joints wear out, the force applied to the steering wheel for turning increases noticeably. At the same time, the ball begins to creak.
- Moving on a flat road, the car begins to behave unstably, it is pulled in one direction or another.
- When the ball joints on one of the wheels wear out, it is positioned incorrectly and has a certain tilt to the side. This can be easily seen by comparing the position of both wheels. If you often drive your VAZ 2109, you will notice how one wheel wears out faster than the other.
If signs of wear are detected, it is recommended to check their actual current condition and then replace it.
Replacing the ball joint
When you are already convinced that the ball joint needs to be changed, you have chosen a good new ball joint and purchased it, then you can begin the repair. You need to start by preparing the necessary tool for the job. So, what does replacing ball joints on a VAZ 2109 require?
Tool
Replacing the ball joint VAZ 2109 - special puller
You will need:
- Jack
- Set of keys, heads
- Balonnik
- Wheel chocks
- Puller for ball joints VAZ 2109
- Hammer
- Mount
- Lubrication
- Metal brush
- WD-40 or equivalent
Now you can start - replacing ball joints on a VAZ 2109!
How to replace a Lada Priora?
In this case, the role of a puller can be performed by a hammer and a reinforcement rod. To remove a worn or broken ball joint, you will need:
- The car is raised using a jack.
- The front wheel is removed.
- The two ball mounting bolts are unscrewed and the fastening nut is unscrewed (wrench 17 and 19).
- The reinforcing rod is inserted between the lever and the support body, and then pulled down.
- The pin must be hit from bottom to top in different directions so that the cone of the ball pin pops out of the lever.
- Once the cone is out, the support turns away from the steering knuckle.
- To prevent the ball from being pressed against the fist by means of a lever, the hub is supported, or the wheel is placed and the jack is lowered.
- Next, the ball joint, which is attached to the lever and knuckle, is replaced.
Video instruction.
How to replace a ball joint on a VAZ 2108-VAZ 21099?
Note! At the beginning, if you raise the handbrake up and if you took shoes with you, then put them up to the rear wheels!
Removal: 1) First, use a jack to lift the side you need on which you will replace the ball joint, and then remove the wheel from the car. (For information on how to lift a car using a jack and remove a wheel, see the article “Replacing a wheel on a VAZ”)
2) Next, completely unscrew the lower nut that secures the ball joint to the lever.
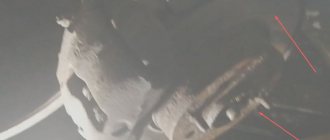
3) Then install a special puller as shown in the figure, and then use a wrench to tighten the puller bolt until the ball joint pin comes out of the lever.
4) Then remove both bolts that secure the ball joint to the steering knuckle.
Note! Unfortunately, the second bolt is not visible in the photo, but its approximate location is also indicated by the arrow!
5) Next, using a crowbar, press the lower arm down, and then remove the ball joint from the machine.
Installation: 1) Before proceeding with the installation of a new ball joint, check the functionality of the old and new ball joint, because it may not be functional (This applies to the new support), or it may also be fully operational (This applies to the old one). support), for this:
1. Grasp the ball joint pin with your hand, and then swing it in different directions, thereby feeling the presence or absence of play.
Note! There should be practically no play in the finger, and if the ball joint is in working order, as a rule, you will not be able to move the finger from the force of your hand, so shake your finger and perhaps it will only have a small play of about 0.7 mm (This is normal), but if it turns out that the play exceeds 0.7 mm , then in this case replace the ball joint with a new one!
2. Another small nuance related to the ball joint, after removing the support, look at the rubber boot that is present on the support itself, if it is torn, then remove it from the support and then remove the top layer of dirty lubricant from that place on the support, and if possible, apply new grease and in this regard, you can simply buy a new rubber boot and put it on the old support and continue to use it.
Note! But if it turns out that dirt has gotten into the inside of the ball joint and thus cannot be removed, then replace the ball joint with a new one!
3. Then take into account one important detail: there should be a spacer sleeve on the support, namely on its pin, so if you have it removed, be sure to put it on, otherwise the support will not work properly.
4. Now take the rubber boot in your hands and put grease into it half its volume.
Note! Before you begin installing the rubber boot, it is recommended to apply sealant to the place on the support on which this cover will be installed!
2) Finally, install a new ball or a repaired old one, in the reverse order of removal.
Note! When you install the support, try not to damage its protective cover, and if you do, then immediately replace it with a new one. Once the ball is installed, tighten all the nuts tightly, but not all the way. After this, rock the car a couple of times and only after that tighten all the nuts! (The lower nut of the support must be tightened with a torque of 80-96 Nm "8.0-9.6 kgf-m", and the two bolts that secure the support to the lever must be tightened with a torque of -50-63 Nm "5.0-6.3 kgf-m" m")
How to remove a ball joint without a special key?
1) First, slightly loosen the lower nut securing the ball joint to the lever.
Advice from experienced motorists
Some repair work involves disassembling certain components. And the ball joint is no exception. Experienced motorists give some practical advice on this matter, with the help of which you can kill two or even more birds with one stone.
- Inspect the condition of the entire underbody once you have climbed under the car.
- Check the quality of the cable tension from the handbrake, and also make sure that the cable itself is intact.
- Check the car for oil, lubricant, and coolant leaks.
- Make sure the sump and engine crankcase protection are intact.
- Check each unit for mechanical damage, cracks, and chips.
- Inspect the tensioner nut from the steering column. It has to be pulled up periodically. Once you are under the car, this is a good time to do this kind of work.
- Look into the transmission structure to make sure the transmission oil is at the correct level.
Plus, any independent repair, each small inspection is a coin into your own treasury of personal experience. With it you can perform much more complex procedures than replacing a ball joint.
Don't forget one more important point. Self-repair of many components means saving the family budget. With the money you save, you can take your family somewhere or buy something useful for your home. Or purchase a set of new high-quality tires, wheels, and do some tuning work. Indeed, technically, thanks to your efforts, the car is in excellent condition.
A ball joint is a suspension part that provides a rigid and at the same time movable attachment of the wheel hub to the vehicle's suspension arms. The ball joint bears the majority of the loads, which is why it is a consumable item and is replaced quite often.
