It is impossible to say exactly how much paint will be spent on painting a car, but there are basic principles that will help you understand the paint consumption when painting a car body.
The amount of paint is affected by:
- Machine size
- Paint color and original body color
- Paint quality
- Spray gun type
- Painter experience
Let's take a closer look at each point.
Paint color and original body color
The amount of paint required to paint a car depends on what color the car will be painted and what the original color of the surface to be painted is. If the body panel has a color contrasting to the one being sprayed, then more paint will be needed. Colors such as yellow, red, and blue are low opaque, so more paint may be needed to cover the original color. If the paint has low coverage, then it is necessary to apply more layers to paint the substrate. For example, when painting with red and yellow paint, up to 10 or more layers may be required.
Colors such as black, white, and bright green have good hiding power.
If a car is repainted due to numerous minor defects and scratches that are sanded off during preparation of the body for painting, then less paint will be used than when changing the color of the car.
The color of the substrate will affect the final shade of the paint.
Note: Hiding power is the ability of paint, when sprayed, to completely cover the color of the surface, that is, to cover the color of the substrate with the sprayed color. Thus, the more opaque the paint, the less it will be needed to paint the part.
Why do you need to release the trigger at the end of the passage?
The trigger is released before the panel border in order to avoid the formation of smudges on the edges of the part (as a result of the overlay of layers of paint). This also helps prevent paint from getting onto the adjacent panel.
Release the trigger at the end of each pass and when the gap between panels is reached. This method will help avoid smudges, minimize over-pollination and save materials.
The spray gun must be in motion before the trigger is pulled and when the trigger is released.
- If we consider this process in more detail, the algorithm of actions is as follows:
- We begin passing beyond the boundary of the part, press the trigger halfway, so that only air comes out (this will prevent a sharp release of paint when pressed fully).
- When the spray gun reaches the edge of the panel, press the trigger completely to spray paint.
- We release the trigger halfway, stopping the flow of paint when the gun reaches the other edge.
- Continue moving about another 5 cm.
- We repeat the sequence.
Spray gun type
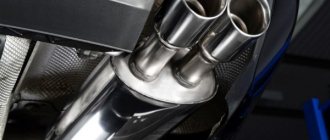
Paint consumption is significantly affected by the design of the spray gun. HVLP spray guns have a high percentage of paint and varnish material transfer to the surface being painted. For high-quality HVLP spray guns, this percentage is at least 75%. When painting with such spray guns, the paint gets onto the part as much as possible, and does not fly to the sides.
From personal experience I can say that when I take high-quality paint in the quantity recommended for painting the parts I need, the paint often remains (sometimes more than half). I paint with an Iwata W‑101 spray gun, purchased from an official representative in Russia. From my own experience I am convinced that a high-quality, economical spray gun significantly reduces paint consumption.
Surface cleaning
It is necessary to clean the damaged surface down to the metal. Then the metal must be thoroughly cleaned of dust with a compressor and degreased with a solvent.
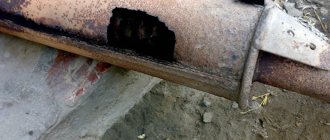
If there are pockets of corrosion, then all traces of rust must be completely removed, and then the surface must be treated with a rust converter.
Whether to rinse the surface after this or not - it all depends on the brand of the converter and what is indicated on its label. There is no need for such treatment for the entire surface; it is enough to completely clean only problem areas. The exception is when processing a new unpainted part. The factory primer must be completely removed over the entire surface.
Painter experience
The amount of paint required to paint a car body also depends on the professionalism of the car painter. An experienced painter will set up the paint gun correctly and distribute the paint correctly. The paint should not be applied in the form of dust, but should spread well when it hits the surface. It is wiser to first paint over repair areas and replacement body panels that are a different color than the rest of the body. Then you can proceed to the step-by-step painting of all body parts.
Main stages of work
The most important part of the work is the preparatory part. Car door painting includes:
- cleaning the surface from contamination;
- removal of old coating;
- surface cleaning;
- anti-corrosion treatment;
- putty;
- grinding;
- primer and wash (rubbing with sandpaper and water).
Base paint + varnish
If the car will be painted with paint that requires further varnish, then more varnish may be required than base paint. It is necessary to create a certain thickness with varnish, since it is a protective coating. For example, if it takes about 2 liters of base paint to paint the body, then 3 – 3.5 liters of varnish may be required. Even if a smaller amount of varnish is used, it is better to take it in reserve and dilute it not all at once, but as it is used. The remaining, undiluted varnish will be useful in the future when painting any car.
In general, the amount of varnish depends on the area to be varnished, and not on the amount of base paint. The amount of paint and varnish may be the same.
Average consumption rates
So how much paint does it take to paint an average sized car? Experts note that painting damaged areas of a car fender or door is a widely applicable service. This process requires about 150 ml of dye, but to paint a bumper (medium size) you need at least 300 ml.
To paint a larger bumper, the hood or the trim of the entire vehicle, you need from 600 to 1000 ml, respectively. It turns out that approximately 250 ml of paint is needed per square meter of coating.
Below is a table with car enamels consumption indicators:
| Part or area/vehicle type | Consumption in ml/l |
| Hood | 400-600 |
| Wing | 150 |
| Bumper | Up to 300 |
| Door | Up to 200 |
| Upper part (roof) | Maximum 400 |
| Trunk (lid) | 300-400 |
| For painting a medium sized car | 2-3 l |
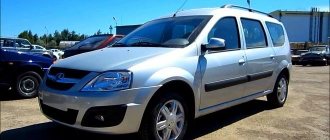
| For painting Gazelle | Up to 5 l |
The amount of paint required to paint the entire car
If you use paint economically, you may need 2 kg of paint for the entire car. You need about the same amount of varnish.
Basically, 2–2.5 kg of undiluted paint is enough to paint a four-door sedan. Since the base paint is diluted 1 to 1 (1 liter of paint is mixed with 1 liter of thinner), you will get twice as much diluted paint.
If the car needs to be painted along with all the openings, then you will need 0.5 - 1 kg more paint. Since the base paint is usually diluted 1 to 1, the amount of paint diluted for spraying will be 2 times greater.
Primer of the part
Before the next steps, you need to get rid of dust in the work area by wet cleaning it. Priming and painting are the most critical activities. Primer and paint are applied using a spray gun and compressor. The compressor must be equipped with an air dryer, otherwise it will be impossible to provide high-quality painting.
Work with the primer is carried out in several stages. Each layer must be completely dry. Most primers require elevated temperatures to dry. This can be done using powerful infrared lamps. At the priming stage, the surface is once again inspected for previously undetected defects. After complete drying, the primer layer is wet sanded with fine-grained sandpaper. With this technique, it is possible to avoid the appearance of dust, and the abrasive is not clogged with waste material.
After drying, the part is degreased again, and you can proceed directly to the most difficult part - painting.
Criterias of choice
Today, supermarkets and markets sell a variety of goods of varying prices and quality. What to choose and what to be guided by? The main selection criteria are:
- manufacturer - it is better to purchase goods from well-known brands that guarantee quality and have earned national recognition. These companies are Motip, KUDO, Molotow, MTN and Trane.
- volume - you need to know the approximate consumption of material, and take it with a small margin, preferably in a large container, it will be a little cheaper.
- the presence of an instruction manual and complete set so that there is no need to purchase any accessories separately.
It also makes sense to familiarize yourself with the prices - the difference in cost in different supermarkets for the same product can reach up to 30-40%.
Analysis of the main factors
Before you move on to choosing a material, you need to know what features affect the consumption of paint and varnish. There are actually several of them.
This also includes such a parameter as skill. It is also important, because if you have already done painting work with your own hands more than once, then you have probably become skilled in the technology of applying layers of paint and will be able to use material more economically.
Taking into account the viscosity parameter
Viscosity is one of the basic parameters of paints and varnishes. If you dilute the paint too thickly, you will end up with a layer defect in the form of an “orange peel”. If you dilute the material too much with a solvent, then smudges may form during application.
To avoid these defects, and this, in turn, is an overconsumption of material to eliminate them, you must strictly follow the instructions given by the paint manufacturer regarding the proportion of material and solvent. To maintain the dosage, you can use the tool as a viscometer, but if you don’t have one in the garage, you can use any containers with marks corresponding to the volume of the substance. You can also use a ruler as an indicator.
Also, the viscosity parameter may depend on the temperature conditions observed in the working area.
We determine the paint consumption per 1 sq.m. area when using different types of paint.
There is a rule among craftsmen that usually per 1 sq.m. For body parts, you need to prepare about 200-250 ml of paint. If we take varnish into account, then the calculation scheme is the same, but also take into account the volume of hardener and solvent. If there are several layers of any material, multiply this value by two.
Now, let's roughly determine how many liters of paint are needed to completely paint a car.
Also, if there are additional surfaces for painting, for example the same internal surfaces of a part, then the volume of paint for the entire car must be increased by 1 liter. And if you bought a new part that definitely needs to be painted on both sides, then the entire volume of material can be multiplied by 2.
Keep in mind that in any case, the minimum amount of paint you will need to repaint your car is 2 liters.
Here is a table as an example that will help you navigate the volume of paint required for different elements of the body structure.
First, keep in mind that the table shows the amount of paint in its thick form before diluting and adding pigment for the shade. Secondly, if you calculate the varnish, then add + 50 grams from above to this volume. Thirdly, the consumption is indicated here for those types of paints that have a low covering ability. In reality, the volume used may be less.
How much area can be painted with one can of spray paint?
If you decide to do local paintwork repairs using an aerosol can, then you need to first calculate at least the approximate number for all stages of work.
We will try to give you rough guidelines. A standard can of paint weighing 150 grams is enough for 0.25 sq.m. up to 0.5 sq.m. So, to process 1 sq.m. area of the body you will need about 2 - 4 cans of paint. The varnish is also calculated.
Based on these values, you can approximately calculate the required volume of material and already plan your budget.
How did you make the calculations? We are waiting for your advice in the comments.
Source