Malfunctions of the car’s clutch are externally expressed in its slipping, jerking, noise or hum, vibration when turned on, or incomplete engagement. It is necessary to distinguish between malfunctions of the clutch itself, as well as the clutch drive or the box itself. The drive can be mechanical or hydraulic, and each of them has its own design features and problems.
The clutch itself consists of a basket and a driven disc(s). The service life of the entire set depends on several parameters - the quality of manufacture and brand of the clutch, its technical characteristics, as well as the operating conditions of the machine, and in particular, the clutch assembly. Typically, on a standard passenger car, there should be no problems with the clutch up to a mileage of 100 thousand kilometers.
Clutch fault table
| Signs | Causes |
| The clutch “drives” (the discs do not separate) | Options:
|
| The clutch is slipping | Evidence of:
|
| Jerking of the car when the clutch operates (when starting the car and when changing gears while moving) | Possible failure options:
|
| Vibration when engaging clutch | May be:
|
| Noise when disengaging the clutch | Worn or damaged clutch release bearing. |
| Clutch won't disengage | Happens when:
|
| After pressing the clutch the pedal remains in the floor | Happens when:
|
What is a clutch in a car
The clutch in the design of a vehicle serves as an intermediary between the engine and the gearbox.
Allowing smooth transfer of power from the engine flywheel to the input shaft of the gearbox. Next, all the power from the power unit goes to the wheels. Thanks to the clutch, power is transferred to the wheels in increasing order, and not in its entire volume at once. This allows you to preserve the integrity of many elements of the engine and transmission, and also increases driving comfort, thanks to a soft start and imperceptible gear changes. Also, the clutch plays the role of a fuse, which takes all the power upon itself during heavy braking. And it prevents the transmission from receiving a sensitive blow, thereby saving the car owner from inevitable repairs.
Today, thanks to the constant work of engineering in the development departments of automakers, there are many options and clutch mechanisms that differ in some design elements, but are built on a single principle of torque transmission.
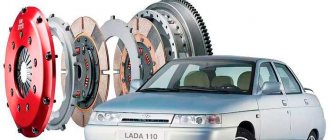
To explain it in simple words, the principle of operation of the clutch can be described as follows: the device itself is made in a metal case, called a basket, which is attached to the flywheel of the power unit. At the same time, inside the basket there is a clutch disk that interacts with the input shaft thanks to a splined connection, and the engine flywheel through the drive disk and special elements on it with an increased coefficient of friction. In normal mode, all discs are pressed tightly against each other, and the power from the engine flywheel is transmitted in full to the input shaft. But when you press the clutch pedal, the downforce of the springs decreases and the discs separate, thereby stopping the power supply.
The clutch is divided according to several features, one of them is the operating environment of the discs - dry or wet. In this case, a scheme with a dry type of power transmission is most often used. This design is easier to manufacture and operate, since no additional oil bath is required.
You can also distinguish the mechanism by the principle of operation of the clutch pedal. Sometimes, the downforce of the springs in the basket can be high, so various options for lightening the pedal are invented. At the moment, mechanical, hydraulic, electrical or a combination option is used.
By design, we can note some of the main elements of the mechanism - these are the clutch disc, the pressure plate (standing inside the basket and transmitting torque from the engine flywheel), the release bearing, the bearing drive fork and the entire structure of interaction of the clutch with the pedal in the cabin.
Separately, automatic transmissions can be distinguished. These devices have different design features, including different types of clutch, or no clutch at all.
But if the design includes a clutch (usually in robotic gearboxes), then a wet circuit is used, and pressing the pedal or switching gears is simulated using electric servos or hydraulic mechanisms.
Also, “automatic machines” can have a multi-disc clutch or a double clutch that works in turn. In this case, there is a clutch of a standard design and an additional one inside the gearbox.
A little about the device and purpose
The clutch is the main mechanism of a car's transmission, allowing us, without stopping the engine, to move away smoothly and change the intensity of traffic, changing gears while driving.
On passenger cars, single-plate friction clutches with a hydraulic drive are predominantly installed. The mechanism, located outside and inside the basket-casing, bolted to the flywheel, consists of the following parts:
- flywheel;
- driven and driven disks with friction linings;
- springs pressing the drive disk to the flywheel;
- clutch release forks;
- release levers;
- push clutch;
- release bearing;
- pedal shaft and clutch pedal.
ABOUT THE CLUTCH DEVICE
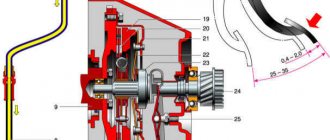
Its design on this car is similar to mechanisms 2113 and 2115. It is made of a dry, single-disc mechanism. It is produced with a device that dampens torsional vibrations, and also has a pressure spring. The VAZ 2114 clutch device is shown in the figure.
Clutch components
The VAZ 2114 clutch consists of (see picture):
- Cable with a casing;
- Cable tip (lower);
- Adjusting nut;
- Housing for attaching the shell to the gearbox;
- Separating washers;
- Nut for adjustments;
- Rubber protective shell;
- Cable lead;
- Shutdown plug;
- Basket;
- Bolts securing the basket to the flywheel;
- Pressure disk;
- Flywheel;
- Driven disk;
- Gearbox input shaft;
- Shield;
- casing;
- Spring (pressure);
- "Squeeze";
- Pad;
- Release housing;
- Cable end;
- Cable thrust washer;
- Cable fastening unit;
- Pedal axle;
- Release spring;
- Off pedal.
As can be seen from the mechanism diagram, there are two working units, one of them will be the master, and the second will be the slave. The second includes a disk with linings riveted on both sides and damper springs installed. It is installed and moves along the splines that are present on all gearbox input shafts. When the pedal is pressed, the driven disk is pressed against the flywheel by the pressure disk.
The drive unit includes a pressure disc with a clutch housing, which is attached to the flywheel with six bolts. To center it, there are pins on the flywheel and guide holes in the housing. The clutch has a backlash-free design and is operated by a cable.
To turn it off, a clutch drive is installed, which operates by pressing the pedal. The cable is hingedly attached to it with its upper tip. The lower end of the cable also has a hinged connection with the shutdown fork. With its movement, the “cable” turns it, and it moves the “releaser”.
Signs of a bad clutch
Problems with the clutch disc itself or associated parts can cause a variety of symptoms.
- Your car may run poorly: it may start to move slowly when you engage a gear, or it may jerk at low speeds, especially when starting in first gear. Or it may be difficult to force the car into reverse or into gear at all.
- Noises may indicate a problem: your pedal may be making noise, or your transmission may be making noise when the car is in neutral. You may hear a squealing or growling sound when you press the pedal, or a rustling sound when you change gears.
- The pedal may give you clues: it may vibrate, wobble or pulsate, be stiff and difficult to press, or sag and not return to its original position. Below I discuss all of these symptoms and tests you can do yourself to diagnose.
This is interesting: DIY car polishing products
When to replace the clutch disc
Unfortunately, not a single manufacturer indicates exact replacement figures or, and this is not surprising, since the serviceability and service life of this unit will largely depend on the driver. It should be noted that the service life and the risk of current malfunctions directly depend on the quality of clutch operation. According to statistics, the driven or driven clutch disc often breaks. The following defects may be observed:
- any mechanical deformations;
- damage to damper springs;
- malfunction of the hub splines;
- wear of friction linings.
All these troubles indicate an urgent change of the clutch disc.
Note! Since the manufacturer does not set deadlines for changing parts, you need to remember experience and national automotive advice. Almost all technicians advise diagnosing the element once every 80 thousand km. Of course, if during this period there are no signs of a unit malfunction.
Symptoms of a problem
This:
- clutch slip;
- shutdown is not performed;
- vibration is felt when turned on;
- the pedal does not return to the reverse position.
Note! Before deciding to replace the clutch disc, it is necessary to accurately diagnose its condition.
The corresponding check can be done either at a service center or on your own in a garage using detailed instructions. If the second replacement method is implied, the actions will need to be performed carefully and efficiently.
Clutch does not work: possible reasons
The main problem is wear of the clutch disc, since this is the most loaded element.
However, clutch malfunctions can be associated not only with the disc and arise for a variety of reasons.
Clutch drive
In the clutch drive device with a cable, it is the cable that often stretches and breaks. The clutch hydraulic drive may become airy or leaking, and the slave cylinder may also fail.
On robotic boxes with electric drive, the actuator electric motor becomes unusable, and malfunctions in the operation of the control unit also occur.
Clutch mechanism
As for the clutch itself, the release bearing and pressure plate often fail, and the pressure plate diaphragm spring becomes deformed or breaks.
We also recommend reading the article on how to change the clutch fork without removing the gearbox. From this article you will learn about available methods for installing the clutch fork without removing the gearbox.
The driven disc also suffers, since the friction linings are worn out or damaged, oil gets on them, the disc hub gets stuck on the splines of the gearbox shaft, and the damper springs wear out and break.
Replacement
Not all car owners decide to replace the release bearing (TR) themselves. But if you are ready for this kind of work, then go for it.
The main difficulty in replacing the gearbox is the need to dismantle the gearbox. Without this event, it will not be possible to replace the component.
Therefore, think twice before making a final decision. There is always the opportunity to contact a car service.
To work you will need the following set of tools and materials:
- Set of wrenches;
- Jack;
- Several durable bricks;
- New release bearing;
- Screwdriver Set;
- Container for draining transmission fluid;
- Clutch holder;
- Garage with a pit or lifting mechanism.
It is better to divide the entire replacement procedure into two main stages.
- Removing the gearbox.
- Bearing replacement.
Many people make the mistake of relaxing too much when they finally change the bearing. In practice, reassembly often causes more problems than dismantling work. Please take this into account.
Dismantling the gearbox
- Place the car over a hole or overpass.
- Lift the hood, remove the negative terminal from the battery and throw it aside.
- Disconnect the ground wire from the clutch housing.
- Use a screwdriver to remove the engine splash guard. To do this, you need to unscrew several screws that hold the mudguard to the elements of the side wings. For the VAZ 2109, a key size of 8 is used. Having removed all the screws there, remove the parts of the engine mudguard and put them away for now.
- Disconnect the transmission drive rod. To do this, use a 13mm wrench to loosen the clamp bolts. Next, use a screwdriver to separate the ends of the clamp and disconnect the element from the gearbox.
- Be sure to disable the reverse optics sensor.
- Place blocks or bricks under the rear wheels of the car to prevent the car from moving.
- Remove the front wheels by first loosening the bolts and lifting the front part of the body. After removing the wheels, place pre-prepared bricks under the body.
- Using a 17 wrench, unscrew the nuts securing the ball joint to the steering knuckle on both sides.
- The extension is moved to the side, and the fastening screws of the left extension to the vehicle's suspension arm are unscrewed.
- Using a 10 mm wrench, remove the fasteners of the lower clutch housing cover.
- Remove the transmission mounts. This is done as follows. Place supports or bricks under the engine and a jack under the box. Unscrew the mounting screws of the support to the body with a 17mm wrench. After removing the bolt, remove the support bracket by unscrewing several corresponding nuts.
- We proceed directly to dismantling the gearbox. Using a 19 wrench, unscrew the fasteners of the clutch housing to the cylinder block. Use a jack to lower the gearbox slightly and move it away from the engine. Lower until the input shaft begins to come out of the box.
- Enlist the support of a partner, since it is quite difficult to remove the gearbox alone.
- Make sure that the gearbox input shaft does not rest on the clutch spring petals. If you allow this situation to happen, you will simply damage them.
- Carefully place the gearbox on the supports, being careful not to hit it. Otherwise, repairs will cost much more than buying a new bearing.
Removing a gearbox is a complex procedure that requires a lot of time, patience and skills. Therefore, without these, it is better not to undertake work with your own hands.
Replacing VP
To change the release bearing, follow the instructions.
- After dismantling the gearbox, you can examine the condition of the release bearing. Spin it by hand. If at the same time there are extraneous noises and crunching sounds, then it is obvious that the VP has lost its former performance and needs to be replaced.
- Using a screwdriver, remove the ends of the spring clip and remove the clutch release.
- Move the spring petals of the pressure ring and remove the release bearing from the clutch. To do this you will need to remove the holder.
- At this point, bearing dismantling can be considered complete, so install a new bearing instead of the old element.
- Before installation, make sure that the element is in good condition, rotates freely along its axis, there are no jams, there are no crunches or extraneous noises.
- Swap the old and new bearings. Insert the element into the coupling so that its protruding part is directed towards the coupling.
- Secure the bearing with the clutch holder. You need to hold the bearing in place.
- Take some regular motor oil and apply it to the shaft.
- Install the squeezer onto the shaft and secure the part with a spring.
- During the reassembly process, strictly adhere to all recommendations and maintain surgical precision.
After such manipulations, many people forget about an important point - clutch adjustment. If the system is not adjusted, the service life will be significantly reduced, and therefore very complex repair work will soon have to be performed again.
Obviously, replacing such a small element as a release bearing requires a lot of time, effort and skill. A beginner should under no circumstances start such work.
Many people love the VAZ 2109 for its excellent maintainability. But this does not mean that it is necessary to bring its components and assemblies to such a state. And if this does happen, and even with the clutch, then most likely it will need to be replaced. This will be our topic today.
The procedure itself is simple, but it will require you to remove the gearbox. Therefore, this procedure can be time-consuming.
The good thing is that there is no need to dismantle the drives (the gearbox is removed along with them) and drain the oil. But you definitely need to find an assistant, because the gearbox is a heavy unit.
If you have never changed the clutch or removed the gearbox yourself before, then it is better to entrust this task to the experts from a car service center. Everything will take them 20-30 minutes, and it will cost you 1000-1500 rubles.
If you do not have experience, then replacing a VAZ 2109 clutch can take a lot of time and effort. If, despite the warning, you decide to carry out this operation yourself, then below we will present you with a number of recommendations. Namely:
- replacement procedure;
- the easiest way to remove the gearbox;
- other tips.
Diagnosis of problems
The clutch does not disengage (“drive”)
When the discs do not move completely apart when you press the pedal, they say the clutch is “driving.” That is, the disks remain in some contact, and it does not turn off completely. Experienced drivers know how to check the clutch for incomplete disengagement. Diagnosis is simple. If at low speeds with the pedal pressed all the way, first gear is engaged easily and without extraneous noise, the shutdown occurs completely. If switching occurs with difficulty and is accompanied by gear noise, it “drives.”
The reasons for this may be:
a) mechanical
- the driven disk linings are broken or the rivets on them are loose;
- decrease in full pedal travel (tight clutch);
- the driven disk is warped and its end runout exceeds 0.5 mm;
- the pressure plate is warped or warped;
- the hub of the driven disk jams on the splines of the input shaft in the gearbox;
- the rivets securing the pressure spring are loose;
- irregularities have formed on the surface of the friction linings of the driven disk.
b) associated with hydraulic drive
- fluid leakage from the hydraulic system;
- air has entered the system.
Elimination of mechanical causes involves adjusting the drive, cleaning and lubricating the splines, straightening or replacing the driven disk and, most often, replacing the friction linings. Every clutch has to be replaced at some point. Problems in the hydraulic system require bleeding to remove trapped air, checking the tightness of connections and the integrity of the pipeline. If necessary, you will have to replace failed parts, such as the main and working cylinders if fluid leaks from them.
Does not turn on (“slips”)
When, while driving, you begin to smell a burning smell, and on a climb your car noticeably slows down and generally begins to accelerate worse, you don’t even need diagnostics: the clutch is slipping. This means that the driven and driven discs do not close tightly enough when the clutch is engaged. There is an easy way to check the clutch. To do this, put the car on the parking brake and start the engine. Squeeze the clutch and engage the gear. Smoothly press the gas pedal and just as smoothly release the clutch. The engine should stall. If it continues to work, it means the clutch is slipping.
Reasons for incomplete inclusion:
- there is no free play of the pedal;
- the friction linings of the driven disk are burnt or worn out;
- oil has got or continues to get on the friction linings, on the surface of the pressure plate and flywheel.
These reasons can also be eliminated by adjusting the drive and replacing the linings. Oil that gets on the rubbing surfaces, which results in a slipping clutch, must be removed by thoroughly washing the contaminated areas with white alcohol. Of course, it is necessary to find out and eliminate the reason for its appearance.
This is interesting: We set the ignition on a car with our own hands
Checking clutch wear
It’s quite easy to check the degree of wear of the driven disc and understand that the clutch needs to be changed. In particular, you need:
- Start the engine and engage first gear.
- Without accelerating, try to move off and check the condition of the clutch disc.
- if the clutch “grabs” at the very beginning, it means that the disc and clutch as a whole are in excellent condition;
- if “seizing” occurs somewhere in the middle, the disc is worn out by 40...50% or the clutch requires additional adjustment;
- if the clutch is sufficient only at the end of the pedal stroke, it means that the disc is critically worn out and requires replacement. Or you simply need to adjust the clutch using the appropriate adjusting nuts.
How to check disk thickness
So:
- Using a measuring gauge, you can accurately determine the thickness of the disc. There is no need to remove the clutch to complete the process. You can't do without a lift with a gauge and instructions for use. This gauge is connected to the active clutch cylinder.
- It is not recommended to abuse traditional methods, since their use can increase wear. You need to start the engine with 4th-5th gear active, press the gas with the clutch. If the engine does not stall, this indicates wear on the driven disk.
How to repair a car clutch
This article is for informational purposes only, so it will not contain exact instructions on how to replace the clutch, but a few tips will not hurt. First of all, it is worth reminding inexperienced car owners that contacting a trusted technical inspection station is a guaranteed high-quality and fastest possible repair. Naturally, it will cost more, but if you take into account the time spent on independent repairs, especially if the car is an assistant in earning money, then this will be the most profitable solution. First of all, you need to decide whether the breakdown occurred in the mechanism itself or in the clutch pedal mechanism and its drive. This will vary the complexity and duration of the repair. And also, it will be less offensive if you disassemble the entire mechanism and it turns out that a jammed clutch cable is to blame for the malfunction.
If you decide to repair it yourself, you can purchase in advance the entire set of the clutch mechanism - basket, disc and release bearing. Of course, only one part can come out of the clutch, but you have to agree. If the car has already traveled 200,000 kilometers, and only the disc needs to be replaced, then after a short time. The transmission will have to be disassembled again to replace other mechanisms. That's why. A new kit should be installed immediately for reliable repairs.
Also, you should not crawl under the car and unscrew all the bolts in a row. Before repairs, it is advisable to study in detail all the necessary information on dismantling, installing and adjusting the clutch on your car model. It is in this case that a beginner in the repair business will be able to perform high-quality car repairs that will last for a long time.
Clutch basket malfunctions
Failure of the clutch basket elements can be expressed in the following:
- Noise when pressing the clutch pedal. However, this symptom may also indicate problems with the release bearing, as well as with the driven disk. But you need to check the elastic plates (so-called “petals”) of the clutch basket for wear. If they are significantly worn out, repair is impossible, but only replacement of the entire assembly.
- Deformation or breakage of the pressure plate diaphragm spring. It needs to be inspected and, if necessary, replaced.
- Warping of the pressure plate. Often simply cleaning helps. If not, you will most likely have to change the entire basket.
Clutch disc malfunction
Problems with the driven clutch disc result in the clutch “driving” or “slipping.” In the first case, for repair it is necessary to perform the following operations:
- Check the drive disk warpage. If the value of the end warpage is equal to or greater than 0.5 mm, then the pad on the disk will constantly cling to the basket, which will lead to a situation where it will constantly “lead”. In this case, you can either get rid of the warping mechanically, so that there is no end runout, or replace the driven disk with a new one.
- Check for jamming of the driven disk hub (that is, misalignment) on the splines of the transmission input shaft. You can get rid of the problem by mechanically cleaning the surface. After this, it is allowed to apply LSC15 lubricant to the cleaned surface. If cleaning does not help, you will have to change the driven disk, or in the worst case, the input shaft.
- Oil getting on the driven disc causes the clutch to slip. This usually happened with older cars where the seals are weak and engine oil can leak from the engine onto the disc. To eliminate it, it is necessary to inspect the seals and eliminate the cause of the leak.
- Friction lining wear. On old disks it could be replaced with a new one. However, nowadays car owners usually change the entire driven disk.
- Noise when pressing the clutch pedal. If the damper springs of the driven disk are significantly worn, a grinding or clanging noise may occur from the clutch assembly.
This is interesting: Reasons for the appearance of oil on spark plugs, solutions
Release bearing failure
Clutch release bearing: principle of operation, symptoms of malfunction
The clutch release bearing in the gearbox is engaged when the driven disk is separated from the drive disk. Having learned the principle of operation, you can understand the signs and causes of the malfunction, and also check it yourself Read more
Diagnosing a faulty clutch release bearing is quite simple. You just need to listen to its operation while the engine is idling. If you press the clutch pedal all the way in neutral and an unpleasant clanging sound comes from the gearbox, the release bearing has failed.
Please note that it is advisable not to delay replacing it. Otherwise, the entire clutch basket may fail and you will have to replace it entirely with a new one, which is much more expensive.
Clutch master cylinder malfunctions
One of the consequences of a malfunctioning clutch master cylinder (on machines that use a hydraulic system) is clutch slipping. In particular, this happens because the compensation hole is significantly clogged. To restore functionality, it is necessary to inspect the cylinder, dismantle and wash it and the hole. It is also advisable to verify the overall performance of the cylinder. We drive the car into the inspection hole, ask an assistant to press the clutch pedal. When pressing with the system working, you will see from below how the master cylinder rod pushes the clutch system fork.
Also, if the clutch master cylinder rod does not work well, then the pedal, after pressing it, may return very slowly or not at all to its original position. This can be caused by prolonged idle time of the machine in the fresh air, thickened oil, or damage to the cylinder surface mirror. True, the reason for this could be a failed release bearing. Accordingly, to fix the problem, it is necessary to dismantle and inspect the master cylinder. If necessary, you need to clean it, lubricate it and, preferably, change the oil.
Another failure associated with the master cylinder in the hydraulic clutch system is that the clutch disengages when the drive pedal is suddenly pressed. Reasons for this and solutions:
- Low fluid level in the clutch system. The solution is to add fluid or replace it with a new one (if it is dirty or according to regulations).
- Depressurization of the system. In this case, the pressure in the system decreases, which leads to abnormal operation.
- Damage to elements. Most often - the working cuff, but possibly the mirror of the clutch master cylinder. They need to be inspected, repaired or replaced.
Clutch pedal malfunctions
The reasons for the clutch pedal not working correctly depend on which clutch is used - mechanical, hydraulic or electronic.
If the car has a hydraulic clutch and at the same time it has a “soft” pedal, then the system may become air-tight (the system has lost its tightness). In this case, you need to bleed the clutch (expel the air) by replacing the brake fluid.
On a mechanical clutch, often the reason that the pedal falls “to the floor” is that the clutch fork has worn out, after which it is usually put on the hinge. Such a breakdown is usually repaired by welding on the part or simply by adjusting it.
Required Tools
Owning a domestically produced car is convenient because to repair it, it is enough to have a set of keys, screwdrivers and a pair of special pullers. In the case of replacing the clutch disc, this kit will also come in handy. Full list of tools required for work:
- Set of wrenches or sockets with ratchet;
- Wheelbrace wrench for wheel removal;
- A jack and a small beam for raising the engine above the gearbox;
- Mount;
- Rope and screwdrivers.
The presence of tools from this list makes it possible to carry out the work independently. Note that for those who want to replace the disk quickly, it is better to contact the service. This especially applies to inexperienced car owners. Before starting work, you can call the services and find out how much it costs to replace the clutch on a VAZ 2114. If you decide to improve your repair skills, read the replacement instructions.
How to avoid clutch problems?
To extend the life of the clutch, it is enough to follow a few simple rules. Firstly, you need to ensure that it is adjusted correctly, otherwise the clutch can either “drive” or “slip”. Secondly, you should not overload the clutch - for example, skidding intensively and for a long time in snow or mud, starting abruptly, changing gears with the clutch pedal not fully depressed, keeping it half-depressed, and so on. Finally, you should be wary of requests to “tow,” especially if the clutch condition is unknown and the weight of the vehicle being towed is similar to or greater than the weight of your own vehicle. Of course, the clutch can fail due to simple wear and tear or a manufacturing defect, but often the one who presses the leftmost pedal is to blame for its premature death.
Sources
- https://carsweek.ru/articles/kak-ponyat-chto-stseplenie-vyshlo-iz-stroya/
- https://ZnanieAvto.ru/mufta/neispravnosti-scepleniya.html
- https://santavod.ru/propalo-sczeplenie-prichiny-neispravnosti-priznaki/
- https://KrutiMotor.ru/neispravnosti-stsepleniya-priznaki-i-prichiny/
- https://etlib.ru/blog/1137-neispravnosti-stsepleniya
- https://www.kolesa.ru/article/kak-rabotaet-stseplenie-kakovy-ego-tipichnye-neispravnosti-i-kak-ih-izbezhat
[collapse]
