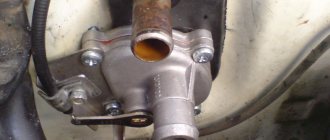
Removing the Priora heater fan
You will need to : remove the throttle assembly and move it to the side, remove the frill and sound insulation of the engine shield.
Prepare a Phillips and flathead screwdriver. Procedure :
- Bend the end of the brake pedal bracket upward.
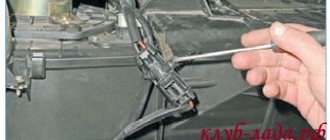
- Unfasten and cut the clamp securing the heater fan wire block.
- Disconnect the block with wires from the heater fan by pressing the lock.
- Disconnect the block with wires from the additional resistor. Then unscrew the self-tapping screw and nuts securing the heater so that you can move it forward (see “Removing the heater heater”).
- Disconnect the fan ventilation hose from the nozzle.
- Unscrew the 3 self-tapping screws securing the heater fan using a Phillips screwdriver.
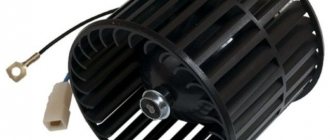
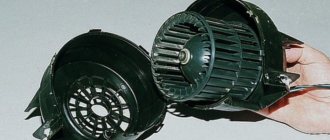
- Remove the Priora heater fan together with the impeller from the heater housing by prying it off the flange with a flat-head screwdriver.
The fan flange is attached to the heater through rubber pads. To replace them, remove the plastic bushings and then remove the cushions from the holes in the fan flange.
Fan doesn't work
But sometimes another problem occurs with the Priora stove. The driver turns the heater switch, and in response there is silence. The electric motor is not working. What is the reason. There may be several of them:
- The fan motor burned out.
- The heater control unit has failed.
- The fan speed resistor has burned out.
- Broken electrical wiring.
The easiest way to determine if a resistor is broken. In this case, only the maximum speed is turned on, and the stove does not respond to other positions of the handle.
The control unit is checked either by computer diagnostics or by a simple replacement. There are no other options.
The condition of the electric motor can be determined by checking with a test lamp. It is enough to remove the top frill and gain access to the motor connector. Disconnect this connector and insert a test lamp instead of the chip going to the fan. When you turn on the stove handle, the light should light up if the unit and wiring are working properly. If there is no signal, start checking the wires sequentially. If the lamp lights up, replace the electric motor.
Replacing the motor
Although Hallo and Panasonic fan electric motors differ in size and installation point, they have one thing in common. Their location is in a vertical position. This allows you to dismantle them without removing the entire heater. As with a standard heater, the heater fan motor on a Priora with air conditioning is secured with 3 screws.
So, replacement. As in the case of a radiator, first of all you need to open access to the stove. That is, remove the frill and protection. Then disconnect the electrical connector. Now just unscrew the 3 fastening screws and remove the fan with the motor. That's it, you can install a new unit in its place. But this is only for the Hallo heater. With the Panasonic compressor, everything is somewhat more complicated. The fact is that it is also separated from the engine compartment by a plastic casing. According to factory documentation, it is necessary to remove the entire heater to replace the electric motor. And this is draining and refilling freon. But our craftsmen found a way out.
Cut the protection at the narrowest point approximately in the middle of the compartment and remove it by unscrewing 2 fasteners. After this, access to the part being replaced is open. Sometimes, however, in most cases, the engine mount prevents you from pulling out the motor. Don't panic. This problem can be solved by disassembling the motor on site. That is, separate it into 2 halves and pull them out separately. Then insert a new one using the same method.
Installing a Priora interior fan
The catalog number of the electric heater fan of the Priora is 2111-8118020. When installing the fan, turn it so that its branch pipe is opposite the motor ventilation hose. The rest of the assembly is done in reverse order.
By the way, if after replacing the heater fan there is poor air flow into the cabin, then try replacing the cabin filter.
Instructions for replacing the stove radiator
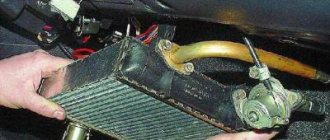
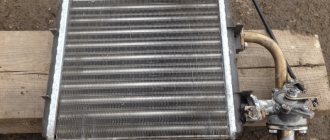
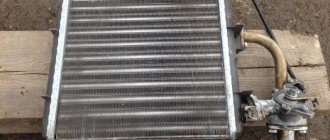
If you need to change a heater resistor or heater radiator, it would be better to dismantle the system in any case.
To replace the device, follow these steps:
- The heating device itself is fixed with four or five nuts, depending on the configuration and year of manufacture of the car. There is nothing complicated about this, these nuts need to be unscrewed.
- The next step is the most difficult, you need to dismantle the system. The heater is removed from the engine compartment at a certain angle. It is advisable to have someone help you at this stage, since removing the device yourself can be problematic.
- When the device is removed, you will need to unscrew the three screws that directly secure the radiator itself.
- The element is simply removed from its installation location and replaced with a new one. Further assembly steps are carried out in reverse order.
Replacing the stove fan on a Priora
Welcome! Heater fan - thanks to it, air is sent from the environment into the car interior, but it comes from the environment cold, and after it flies into the instrument panel, it passes through the heater radiator (heating radiator, it is correctly called) which can either be very heated , or be too cold (This depends on how the coolant has warmed up, if it has reached its cherished operating temperature of 95 degrees, aiming, then the radiator also heats up very well and all the air passing through it becomes just as warm), that is, simple In other words, a fan is needed for only one purpose: to suck in air from the environment and release it in a certain flow into the car’s interior, where it, after passing through the radiator of the stove, heats up well and comes out warm into the interior.
Note! To replace the stove fan, it will not take very much but also not very little time (Here it still depends on which way you go), strength and tools, the main ones being: All kinds of wrenches, from wrenches to wrenches with socket heads, in addition to this set of various types of screwdrivers you will need and, of course, a new stove fan itself!
Summary:
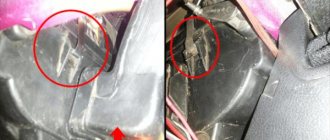
Where is the heater fan located? It is located under the right side of the windshield if you look in the direction of travel of the car; next to it there is also a cabin filter which is located periodically every 15,000 thousand kilometers, or better even once every 10,000 thousand kilometers, it is recommended to change it to a new one, because when the filter becomes clogged, firstly (If it is a carbon filter) at a certain time, desorption occurs (This is a process in which all the dirt that has accumulated on the filter comes out of it, and when leaving it, it flies straight into the car interior, and the filter collects far from being pleasant things, dust firstly and toxic exhaust gases secondly, we think this will be enough for you to start changing this filter on your car more often and not delay replacing it), but this is not what this article is about We are talking about the location of the heater fan, for clarity, by the way, in the photo below it is indicated with a red arrow, and the blue one shows the same cabin filter that is periodically recommended to be changed on the car.
When should you change your furnace fan? If the fan completely fails, the stove stops working altogether (That is, when you turn the knob of the stove regulator, it will not turn on), if the fan partially fails (And partial failure may include breakage of the blades, the fan motor itself is acting up, etc. .d.) the stove will still work, but during its operation extraneous noises will be heard, such as rustling, humming, whistling, in addition to this, the stove may also work worse and weaker, these will be the most basic symptoms that will appear with partial or complete the stove fan fails.
How to replace the heater fan on a VAZ 2170-VAZ 2172?
Note! When replacing the fan, if the cabin filter has not been replaced for a long time, then it can be removed and replaced with a new one, it doesn’t cost a lot of money in car dealerships, but just so you don’t have to get into the car (Still, to change the heater fan, you need to go to that place choose where the filter is installed), you can immediately change it if it is too dirty and thereby drive in the near future with clean air in the car!
Removal: 1) There are two ways by which you can remove the stove fan, we will tell you both, but before we start describing them, let’s talk about them briefly, and which one you will use during the work is up to you to decide, the first method is in removing the throttle assembly, in removing the front panel upholstery and in removing the cooling expansion tank, the second method does not imply this; when choosing the second method, you will only need to unscrew the screws and nuts securing the fan and then remove it from the car.
Note! It would seem that the second method is much more convenient and faster, in fact it is, it is done much faster but is very inconvenient, because in this case you will have to get to hard-to-reach nuts, as well as hard-to-reach screws, etc. etc., while when carrying out the second method, you will no longer need to crawl to hard-to-reach places, all the nuts and screws will be before your eyes, but you will still spend more time, because you will remove other parts that are in the first way and you won’t need to touch it!
2) After you have decided and made your choice, go to work; at the beginning of the operation, in any case, you will need to remove the windshield lining (How to remove the lining, read the article: “Replacing the cabin filter on a Lada Priore”), then the block Disconnect the wires and the connector from each other (They are indicated by a red arrow) and remove the wire block from the additional resistor (It is connected to it, this block is indicated in both photographs by a blue arrow), these are all general operations and will need to be carried out in any case.
3) Read this point only if you are carrying out the second method, but if you don’t want to remove anything unnecessary and if you are not going to do the work using the second method, then in this case go straight to point 4, so about the second method, if it First, you will need to remove the throttle assembly (How to do this, read the article: “Replacing the throttle assembly on a car”), but only when you remove it, do not disconnect any hoses, but simply unscrew the nuts that secure the assembly to the receiver and then remove it, and as soon as the assembly is removed, proceed to removing the dashboard upholstery, to do this, use a screwdriver to loosen the screw that secures the steam removal hose to the cooling expansion tank (This is the tank into which coolant needs to be poured, you will immediately find it), loosening the screw, disconnect the hose from the tank and lead it through the hole in the upholstery (see photo 1), then lift the expansion tank and without disconnecting any other hoses from it, carefully move it, otherwise it will interfere with removing the upholstery, then again, use a screwdriver to unscrew it but this once the lower screw, which secures the upholstery (see. photo 2) and the left part of the upholstery (look as the car is moving) remove from the car, then find three clamps that are attached to the clamps and secure the vacuum brake booster hose so that it does not dangle, and so, overcoming the force of the clamps, remove them from the brackets ( see photo 3), immediately after which, using a socket wrench or wrench, unscrew the nut that secures the steering rack screen in the upper part (see photo 4), as soon as the nut is unscrewed, pull this metal screen and remove it from the top the studs and finally the right (last part) of the upholstery (see photo 5) from the car and bend up the end of the brake pedal bracket (see photo 6).
How to check the impeller for foreign objects
The first thing to do if the stove fan on a Priora is noisy is to check the impeller and casing. This can be done without disassembling the climate control system or removing the impeller. In this way, you can remove leaves, small branches, and foreign objects that have gotten into the heater.
Attention: the fan must be turned off while checking and cleaning the casing and impeller! If the airbag is installed on the passenger side, you will have to remove it, which is quite difficult.
The operation is performed through the air recirculation hole, which is located in the glove compartment (glove compartment). Checking and cleaning is done like this:
put your hand into the glove compartment and feel the movable flap;
feel the flap with your fingers and open it by pulling it towards you (the flap feels like a small plastic barrel to the touch);
Note: The lid is hinged and pressed against the housing by springs so it can be opened safely without breaking the mechanism.
Use your fingers to check the space near the impeller for foreign objects and remove them, if any;
pull out your hand (the lid will close under the influence of springs).
Repair, diagnostics and replacement of the heater damper on Lada Priora
A comfortable temperature in the interior of the Lada Priora at low temperatures is maintained using a stove. If it breaks down, noise appears in the heater operation, and the ability to adjust the temperature, direction and intensity of the air flow is lost. In most cases, the sources of problems are the motor or damper of the Lada Priora stove, which fail.
Heater device on Priora
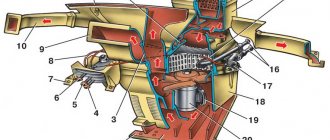
The liquid-type heating system on the Lada Priora is structurally connected to the engine cooling system and includes:
- radiator or heat exchanger of the heating system;
- a fan supplying air to the cabin;
- damper that regulates air temperature;
- heater damper reducer;
- damper for flow distribution on deflectors;
- deflectors.
A failed heater damper on a Priora does not close completely, so the warm flow mixes with cold air without warming up to the required temperature and the cabin is always cool and uncomfortable. To fix the problem, you need to remove, replace or repair the heater damper gear motor.
The principle of operation of the stove - what it consists of on Priora, article numbers
For the VAZ-2170 restyling, two types of heaters were installed - with a Panasonic control controller or with an NSS control controller. The last type contains the following parts:
- air recirculation damper gearmotor (21700-8127300-10);
- Priora car heater fan (motor) (21700-8118020-10);
- air filter (21700-8122090-00);
- motor speed controller (2170-38127025-10);
- heating system damper motor (21700-8127200-10);
- heater radiator (21700-8101060-10);
- outlet hose (21700-8101208-00);
- outlet pipe (21700-8101200-10).
As for the second option from Panasonic, the device around the radiator of the heating system on the Priora is slightly different:
- recirculation valve (21700-811908-00);
- fan (stove motor) (21700-8118020-10; 21700-8118020-00);
- vacuum hoses with check valve (21700-8119100-00);
- solenoid valve (21700-8119130-00);
- air filter (21700-8122020-00);
- inlet pipe (21700-8101200-00);
- damper gear motor (21700-8127200-00);
- radiator temperature sensor (21700-8101250-00);
- radiator (21700-8101060-00);
- outlet hose (21700-810120800).
The pre-restyling car has a lot of parts from the “tens” - even the gearmotors are different. Much was inherited from the VAZ-2110, and the first cars before restyling were almost completely equipped with its heater. The assembled stove for the VAZ-2170 Priora pre-styling received catalog number 2111-8101012-10, a more updated version – 2170-81010-12. Price from 5500 rubles.
The device is as follows:
- air flow reducer (2170-81271-00);
- air temperature sensor (inside the car) (11186-81280-50);
- control unit (switches that are built into the central console to set operating modes) (21703-81880-20);
- resistor for setting the motor speed (2123-81180-22);
- heater motor (2111-81180-20);
- damper gear motor (2110-81272-00);
- air filter (2110-81220-20);
- radiator (2110-81010-60).
The heating radiator of the Priora car can operate in two modes: automatic and manual.
- The manual mode is performed when a person independently sets the desired temperature in the cabin on the control unit.
- The automatic mode operates almost constantly - the required and actual air temperature is checked and the control controller issues a command to change the damper angle, supply hot or cold air to bring the temperature to the set level.
When the driver adjusts the settings on the control unit, the resistor sends a signal with the necessary data to the motor. The fan can produce maximum power, although the resistor will not be used to its maximum. The same process with the direction of air - the driver sets it, and the gearmotor sets the desired position of the damper.
By its principle, the heating device “lies next to” the engine cooling system. When the driver turns it on, the heater tap opens, and hot coolant moves through the pipes, which passes through the radiator of the Priora car’s heater and returns back. This increases the distance over which the coolant circulates.
Therefore, turning on the heating is one of the ways to cool the engine. It will really become hot in the cabin, because all the heat will be directed there, and the engine will give off this heat more and more, the temperature of the coolant will drop.
Replacing the gearmotor
If the damper does not work, hot or cold air blows from the heater, and the ability to adjust it is lost. In such a situation, the cabin heater gearmotor must be replaced.
Replacing the damper on a Priora begins with raising the hood and removing the wipers. To do this, remove the plastic caps and unscrew the nuts with a 14 wrench, after which they are easily removed. Next, the left and right frills are dismantled by removing the rubber pad, protective plastic caps and unscrewing six screws. Then the plastic soundproofing of the engine compartment is removed, the cooling system hose passing through it is carefully disconnected from the expansion tank, then the tank itself is removed. To avoid draining the coolant, the holes in it must be plugged.
To inspect the heater gear motor, remove the expansion tank mounting bracket by unscrewing two bolts under the wing and removing the protection above the left front wheel. After this, the wiper motor and trapezoid are dismantled.
Now the unit is being dismantled; first you need to carefully disconnect the heater damper sensor and the power supply contacts. After this, install and check the new spare part, reassemble everything in the reverse order, and the replacement of the stove gear motor is completed.
Video: Replacing the gearmotor of the Lada Priora stove (Lada Priora)
Operating principle of the stove
Heater control panel on Priora
The air conditioning system may stop blowing for various reasons. If the heater blows cold air, and the car is without air conditioning, the driver will have to disassemble and replace some elements. This could be a malfunctioning control regulator, fan, heater valve, or other heating system component. In any case, first, let's understand the principle of operation.
The warm air flow is forced onto the device's radiator thanks to the fan. The speed of the latter varies depending on the temperature inside the car. The ratio of warm and cold air flows is regulated thanks to the valve. The air flow enters directly into the car interior through a filter element designed to clean the air. In the cabin, the car owner already chooses how the airflow will be carried out by adjusting the position of the dampers on the center console.
The Priora heater control unit is the main structural part; it is its regulator that is controlled by the driver. The stove control unit, by adjusting and analyzing all the necessary parameters, adjusts the stove motor so that it regulates the speed of the fan, as well as the position of the air damper.
Heating device radiator
Gearmotor repair
In most cases, the extraneous sounds produced by the heater damper drive on a Priora are associated with cracking of the plastic gear. When its teeth are cut off, the mechanism stops working normally. Replacing it is quite difficult, but possible. After dismantling the gearbox, release the compressed plastic cover and bend it, then carefully remove it.
After carefully inspecting the mechanism, determine which gears are faulty and install new ones. Determine the condition of the commutator, bearings and brushes of the mechanism. Lubricate the bearings with silicone grease, which does not harm other structural elements. If after assembly the system functions normally, replacing the heater gear motor will not be necessary.
Why can a fan fail?
There are several types of malfunctions of the Priora heater fan. The most common are:
- The heater stopped working completely. In most cases, this is caused by the failure of a 25 A or F 9 fuse. Power is not supplied and the unit does not operate. The second reason may be a malfunction of the heater control unit.
- Noise during fan operation is most often caused by a foreign object getting into it. Most often, dry leaves get stuck between the blades (especially in autumn), this leads to the appearance of extraneous sounds.
- Only mode 4 of the stove works; in all others it does not turn on. This failure can be caused by a faulty resistor or control unit.
Not every car enthusiast can check and repair a complex stove system. If you are not well versed in auto electrics, then you should turn to professionals. Otherwise, you can use the instructions below.
Search
Replacing a radiator heater on a Lada Priora (with or without air conditioning)
One of the reasons for poor heater performance is the furnace radiator . While the vehicle is in use, it begins to leak and can no longer provide the required amount of heat to the cabin. Depending on the year of manufacture and the complete set of Lada Priora, the process of removing the oven (radiator) can be very different.
How to remove a stove radiator on Priorat without air conditioning
Since the start of production, AvtoVAZ has installed a heater from the Top 10 on the Priora (catalog number: 21110-8101012). The disadvantage of this design was that the heater radiator was removed in the direction of the vacuum brake booster, which allows. As a result, the heater assembly must be removed.
The procedure looks like this:
- Remove the windshield wiper blades.
- Remove the protection (windshield).
- Remove the sound insulation from the engine shield.
- Disconnect the stack of connectors with wires.
- Unscrew the heater mount.
- Divide the heater into two parts (left and right).
- Remove the right side of the heater (in the direction of travel).
- Move the left side out of the way to gain access to the furnace radiator.
- Drain the antifreeze.
- replace the furnace radiator .
Replacing the motor plate
replacement
heater fan by weight
in
DIY.
Removing and installing the Prior motor plate.
heater motor
217230 1 part.
The whole procedure took several hours. This is shown in more detail in the video:
There is another way to replace it. To gain access to the furnace radiator, it is necessary to remove the vacuum brake booster along with the brake pedal instead of the heater housing. This allows access to the left side of the heater (in the direction of travel) and to the radiator itself.
Replacing the heater radiator with Prior for air conditioning
After some time, the manufacturer began to equip its cars with air conditioners (for example, HALLA or Panasonic (Ref: 21703-8101012). The design of the new Priora heater has become much more convenient in terms of maintenance. Now you do not need to remove the can, wiper blades, heater or vacuum brake booster for replacing the hob.
All you need to do is remove the engine shield noise shield, remove the air filter hose, the engine seal and the heater radiator . All! We drain the antifreeze and remove the radiator towards ourselves, towards the engine.
Video instructions are attached:
So, replacing the stove radiator. Priorities depend not only on the type of insulation, but also on the chosen method of replacing it. And how did you shoot the heater radiator in your car? Which method suits you best? Let us remind you that solutions to other problems with plates can be found in this article.
