On a car like Lanos, replacing the fuel pump grid is not particularly difficult. Therefore, if the time has come to replace this part on your car or characteristic symptoms of a clogged mesh appear, then you can safely get to work. The work will take about two hours at a leisurely pace.
Lanos: replacing the fuel pump mesh is done in a garage, you don’t need to go to a service station for such a simple job, you don’t need rare tools either. Before describing the replacement process, it is worth saying that the fuel pump mesh is located in the gas tank, specifically in the fuel pump glass. The purpose of the mesh is to filter the incoming gasoline into the fuel pump, and, consequently, into the engine. It traps debris and other dirt that somehow got into the gas tank.
Replacing the mesh on the fuel pump is recommended every 30 thousand km. But, if you give statistics, then one part of car owners changes it almost every 10 thousand km, while another, no less, part drives 50 thousand or more, without replacement. Then a logical question arises: when should it be changed?
As already mentioned, the task of this mesh is to trap debris that gets into the gas tank. Based on this, we can say that if you often have to fill gasoline from cans and other containers, then it is advisable to change the mesh every 10 thousand km. In cans, especially old ones, there is often all sorts of debris floating at the bottom that cannot be completely cleaned out due to the shape of the neck, so it turns out that some of the debris with the fuel always ends up in the gas tank. In such a situation, the grid quickly becomes clogged and problems begin.
If you always refuel at the same gas station, and you know that the gasoline there is clean and of high quality, based on previous inspections of the grid, then you can safely cross the threshold of 30 thousand km. After 35-40 thousand, it is advisable to carry out an inspection and look at the condition of the mesh; if it is dirty, then it is worth replacing. It is worth adding that the mesh does not need to be changed if it has noticeably darkened and become dark yellow, and not white, as it was originally. The main thing is that there is no dirt on it. It loses color because of gasoline.
If the mesh is clogged, it greatly complicates the fuel pump's suction. This situation cannot but affect the behavior of the car. The main symptoms include:
- After turning on the ignition, the fuel pump pumps longer than usual;
- Poor cold start. The car starts only the second or third time;
- While driving, when you sharply press the gas, the car begins to twitch and or “stupid”;
- Loss of power. When accelerating, there is a feeling that there is less horsepower in the engine;
- In particularly advanced cases, the idle speed will drop, until the engine stops working.
Before starting all work, remove the fuel pressure in the system. To do this, you need to pull out the fuel pump relay from the fuse block. If you stand opposite the car, the relay is located at the very bottom of the block, on the right. When the relay is removed, you need to start the car. The engine will start and stall after a few seconds, which means that the pressure in the fuel line has dropped.
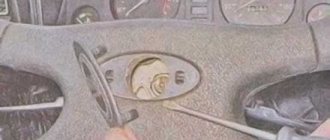
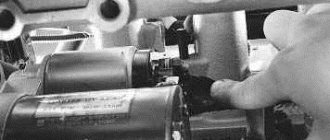
Now we move on to removing the rear sofa. Lifting the rear sofa on both sides you can see the brackets. You need to pull these two brackets towards yourself so that the sofa moves forward a little. Two bolts will become visible between the back and the sofa. We unscrew them with a head 12. Now the sofa can be completely removed.
Under the seat, on the right, we see a black plastic circle, it needs to be removed. Under this black cover there are hoses and a fuel pump connector that need to be disconnected. There is a lock on the chip; you need to move it towards the fuel hoses, then the chip can be removed without any problems. The hoses are removed by squeezing the clamps on the sides.
Next, using a hammer and a flathead screwdriver, you need to remove the retaining ring. This is done like this: the tip of the screwdriver must be inserted into the engagement of the ring and lightly hit the screwdriver with a hammer. After a few taps, the ring will come out of place. Now you can pull out the fuel pump glass. You need to pull it out slowly so that all the gasoline has time to drain into the tank.
When the glass is in your hand, you need to remove the locking chip that holds the float mechanism and then remove the float itself. Now you need to remove the fuel pump module from the glass. The module is fixed in the glass using three latches. Using a flat-head screwdriver, carefully pry up the latches one at a time. When the module is removed from the latches, we pull out the chip with the wires.
To pull the module itself out of the flask you will need some kind of hook. Such a hook can be made, for example, from a bicycle spoke or a welding electrode. We hook the module to the bottom part with a hook and slowly pull it out. When the module is removed, we proceed to removing the mesh.
Before removing the mesh, you need to remove the small retaining ring at the very bottom of the module. After this, the mesh can be removed without problems. We install a new mesh in its place and secure it with a locking ring. This is how the fuel pump mesh is replaced on a Lanos car. You can assemble everything in reverse order. It is important when installing the module back not to use force; it should fit in with a slight tension, but not rest in any way.
How to determine a faulty fuel pump on Lanos
The main sign of a fuel pump malfunction is the absence of the characteristic buzzing of the electric motor when the key is turned in the ignition. However, in this case, you should not rush to buy a new electric pump and install it in place of the existing one. After all, the absence of signs of inoperability can be caused by a burnt-out fuse link F10 under the hood. The first step is to check the serviceability of the fuse, and if the fuse link burns out, the element should be replaced.
A fuel pump malfunction can be caused by a failure of the relay, which is also located in the mounting block under the hood of the Lanos car. The relay rarely fails, but if the fuse is working, you should check it. The surest way to check the serviceability of the relays is to swap them. If, after replacing the relay, the fuel pump starts working, this means that a new relay needs to be installed, and this will complete the entire repair.
If the fuse and relay are working properly, you can judge that the fuel pump has failed. Moreover, its malfunction is of two types:
- Complete failure when the device shows no signs of life
- Partial malfunction - when the fuel pump operates intermittently
If in the case of a complete failure of the device everything is clear, then with a partial failure things are more complicated. In this case, there is no need to rush to change the pump until it is clearly established that it is faulty. Interruptions in the operation of the fuel pump may occur for the following reasons:
- Fuel pump strainer is clogged. Often drivers do not pay attention to this element, which leads to interruptions in the operation of the device, as well as a reduction in its service life
- Malfunction of the fuel filter located after the fuel pump. It is located in the engine compartment, and if it gets dirty, the load on the device will increase, resulting in interruptions
- Reduced quality of contact connections - an electric pump is an electrical device powered from the vehicle’s on-board network. In case of deterioration of contacts, broken wires or violation of insulation integrity, interruptions in the operation of the device will be observed
Before resorting to replacing the fuel pump, you should eliminate the above symptoms. Characteristic features of an electric pump malfunction are the following:
- Difficulty starting the engine
- The engine starts and stalls
- Extraneous noises in the operation of the fuel pump
- Reduced engine power
It is not recommended to drive a car with a faulty fuel pump, as at any moment it may stop functioning altogether. In this case, it will be impossible to drive a car, so at the first sign of a malfunction of the device in question, it should be replaced.
How to remove a fuel pump in Lanos
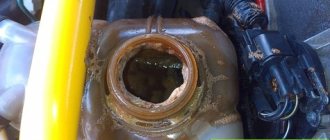
The inner cover was cracked, obviously after the previous replacement of the mesh in the service, so it easily stretched out. This is what it looked like: There was garbage inside the flask, as well as on the inner lid! I wonder where it came from, and why, in this case, this mesh at all?
By the way, my mesh was relatively clean. I saw photos of these black nets, as if they had been dipped in resin. To replace the resistor of the fuel reserve indicator lamp, remove it from the clamp. To remove the fuel level indicator sensor, pry off the sensor with a screwdriver. Assemble and install the fuel module in the reverse order. If the sealing ring of the module cover fails, replace it with a new one.
When installing the fuel module into the tank, align the cutout in the fuel module cover with the tongue on the flange of the tank opening. Before closing the hatch cover in the floor of the body under the seat, you need to check the tightness of the connections of the fuel module. The fuel pump module can be installed in the fuel tank in only one position, since the lower beveled part of the module cup rests with its two rubber buffers on the inclined wall of the fuel tank.
Causes of fuel pump failure
If the Lanos car engine does not start, then do not rush to conclusions. Even the absence of a characteristic sound in the area of the fuel tank does not mean that the device is faulty. One of the important elements in a car is the crankshaft position sensor. If it is not working properly, then the engine will not be able to start. When the ECU does not receive data from the DPKV, no power will be supplied to the electric pump. The driver may think that the fuel pump is faulty and resort to replacing it, but after successfully completing this procedure, the effect when starting the engine will be identical. That is why it is important to first establish the exact cause of the malfunction, and only then resort to eliminating it.
One of the reasons for fuel pump failure is the use of low-quality fuel. That is why it is recommended to refuel only at gas stations that have the appropriate certificates. In addition to contaminants in gasoline, which cause the device to fail, driving a car with an empty tank can reduce the service life of the electric fuel pump on Lanos. Many drivers drive their car until the indicator on the instrument panel lights up. However, it is not recommended to drive a car with a half-empty gas tank, because fuel is the coolant of the pump.
When entering steep turns, the fuel is displaced to one side of the tank, so the pump does not have access to it for a certain period of time, as a result of which it sucks in air. As a result, accelerated overheating of the windings occurs, and as a result, failure of the part. The issue of driving a car with HBO is especially relevant. If your car has an LPG system, then the gasoline tank must be at least ½ full. If you neglect this fact and drive a car with an empty gas tank, the consequences will be sad for the gas pump. The consequences of driving with an empty gas tank are shown in the photo below.
This is interesting!
The service life of the fuel pump depends on many factors.
If you use high-quality fuel and timely replace the fuel pump mesh, the original device will last at least 200 thousand kilometers. Preliminary checks of the fuse, relay, crankshaft position sensor, and pressure in the fuel rail will help you verify that the fuel pump is faulty on a Lanos car. And although it is easier for many to immediately remove the fuel module and check the serviceability of the fuel pump, it is recommended to perform one more preliminary procedure - measure the voltage on the chip connected to the module. To do this, you need to use a multimeter, connect the probes to the contacts on the chip, and turn on the ignition. After making sure that there is 12V voltage at the contacts, you can begin to remove the module and replace the fuel pump on the Lanos.
This is interesting!
Sometimes a fuel pump malfunction can be associated with a decrease in the quality of contacts.
Cleaning the injectors
Cleaning and washing the engine injectors, as well as replacing the fuel pump mesh on a Chevrolet Lanos, is necessary every 30,000-35,000 mileage (and with the current quality of gasoline, even more often). There are several washing options:
- instead of the factory power supply system, a unit is connected to the injectors that supplies a special cleaning solvent, the engine runs on it for 20-30 minutes. The efficiency of this method is very high; all deposits are removed from the injectors without leaving any residue;
is considered the most effective way of washing and cleaning. The advantage is that there is no need for an expensive solvent, but you have to remove the injectors from the engine;
There are also ways to wash it yourself; with the right approach, it will be no less effective, but we’ll talk about that separately.
Features of replacing the fuel pump on Chevrolet and Daewoo Lanos
The fuel pump for Lanos is a cylindrical part that is placed inside a plastic flask. Many people do not want to waste time dismantling the fuel pump, so they buy an assembled fuel pump module. As a result, you have to overpay a lot. If the fuel pump on a Lanos is faulty, but the module is not damaged, then only the failed part needs to be replaced.
A module or block is a device that consists of a fuel intake, a fuel pump, a fuel gauge sensor and a low level alarm, as well as a filter. The need to replace the module arises in rare cases when the plastic flasks of the device are damaged. When it comes to replacing the fuel pump, the insert itself or the electric motor with the impeller changes.
When purchasing, it is important to consider one feature - the diameter of the gas suction hole. Today, manufacturers are releasing a new type that has a hole diameter of 11 mm. If Lanos or Sens were produced before 2002, then pumps with a hole diameter of 22 mm were installed on them. However, you can install a new type of fuel pump instead, but you will also need to buy a new filter mesh.
Removing and disassembling the fuel module Chevrolet Lanos
We carry out the work to replace the fuel level indicator sensor, the resistor of the fuel reserve indicator lamp or the fuel module assembly. We relieve the pressure in the power system (see Replacing the Chevrolet Lanos fuel filter). Disconnect the wire terminal from the negative terminal of the battery. Inside the car, raise the rear seat cushion. Using a slotted screwdriver, pry off the fuel module hatch cover...
...remove the cover. To disconnect the engine management system wiring harness connector from the fuel module cover connector...
...move the engine control system wiring harness block blocker (orange)...
...and, pressing the latch at the rear of the wiring harness block...
Squeeze the clamp on the tip of the drain pipe...
...and remove the tube tip from the fitting of the fuel module cover.
Similarly, remove the tip of the discharge line tube from the other fitting of the module cover.
Using a slotted screwdriver, turn the locking ring of the fuel module cover counterclockwise until the grooves in the ring and the protrusions in the fuel tank flange coincide...
...and remove the ring.
We remove the fuel module from the opening of the fuel tank.
The connection of the fuel module cover with the flange of the tank opening is sealed with a rubber ring.
To replace the fuel gauge sensor and fuel reserve warning lamp resistor...
...by pressing the latch of the wiring harness block, disconnect the block from the fuel module cover connector. To remove the sensor and resistor, you need to remove the tips of their wires from the wiring harness block (the wires for the sensor are blue and white, and the wires for the resistor are yellow and gray). Mark the location of the wires in the block.
Through the two holes of the block (shown by the arrow), we alternately press with an awl onto the protrusions of the wire tip retainer...
...and use pliers to remove the wire tip retainer from the block.
Using an awl or the wire of a paper clip, press out the tongue of the block that holds the tip of the desired wire...
...and remove the wire tip from the block. Similarly, we remove the tips of other wires from the block.
How to replace the fuel pump on Lanos, Sense and Chance
The process of replacing the device in question is not difficult, however, its implementation must be carried out with strict adherence to the sequence of actions. To replace the fuel pump on a Lanos, you will first need to remove the fuel module, then disassemble it and install a new fuel pump in place of the faulty device. Let's look at how to do this correctly below.
- First you need to remove the fuse or relay in the mounting block under the hood. The photo below shows which fuse and relay are responsible for the operation of the fuel pump on Lanos
- After this we try to start the engine. This procedure is necessary to reduce the fuel pressure in the fuel line.
- Disconnect the negative terminal from the battery and move to the location of the fuel module. It is located under the rear sofa on the right side
- The sofa seat is attached using one “12” bolt
- After removing the rear sofa seat, we find a protective cover that needs to be pryed off with a screwdriver to remove it
- Under the cover there is a chip with wires and two tubes for supplying gasoline and return drainage. Before proceeding further, you should first carefully remove contaminants to prevent them from getting inside the tank.
- To remove the chip, you need to move the orange lock to the side towards the fuel pipes, and then press the tongue and pull the block to the side
- Next, the hoses are removed. To do this, press the white latches and then pull them to the side.
- At the next stage, we take a punch or a chisel with a hammer, and work on the locking ring, through which the module is attached to the tank. Turn the ring to the side counterclockwise until it disengages
- The retaining ring is removed
- Carefully, grasping the chip, you need to remove the module from the tank, pointing it to the right side
- When removing it, it is important not to bend the float, which is located at the very bottom
- After removing the module, you will see that there is gasoline inside the flask. It can be drained back into the tank or other container
- The extracted part is placed on the table, after which we proceed to disassemble it to remove the fuel pump
- Using a screwdriver on the three latches in the plastic outer flask, you need to remove the top cover
- Disconnect the power supply for the sensor and fuel level indicator in the tank
- You can detach the float so that it does not interfere. It is attached using a plastic plate that needs to be squeezed and pulled out
- Next, you can heat the outer flask with a hairdryer to remove the inner part along with the fuel pump. When it warms up, it will be easier to dismantle it, but in any case you will need to bend the steel rod into a hook and use it to pry off the plastic part with the fuel pump
- There is dirt inside the glass that needs to be removed
- Remove the fuel pump strainer. If it is clean, then it does not need to be changed, but it is better to replace it so that you do not have to repeat the procedure again in the near future. A detailed description of how to replace the fuel pump mesh on Lanos, Sense and Chance is described here
- To remove the mesh, you need to pry off the retaining ring with a screwdriver
- The fuel pump is attached using plastic latches that need to be pressed out
- After removing the pump, you should unclip the chip with the power wires
- Loosen the clamp securing the tube. To do this you will need to use pliers. This clamp is disposable, so it will need to be replaced during assembly.
- Disconnect the tube from the fuel pump using a screwdriver as a lever
- Now, instead of the faulty fuel pump, we install a new one. To do this, install the tube in place and fix it with a new clamp of 8-12 mm
All subsequent assembly operations are carried out in the reverse order of removal. When assembling, it is important to take into account one point - cleaning the surface of the tank near the hole for installing the module. The module is attached to the tank through a rubber sealing gasket in the form of a ring.
It must be cleaned or replaced if deformed. The area around the hole should be cleaned, and this should only be done with a clean cloth. Using a vacuum cleaner or other types of electrical appliances is strictly contraindicated.
After replacing the fuel pump, you can install the fuse and relay in their places, and also connect the minus terminal to the battery. We turn on the ignition and wait until the new fuel pump pumps fuel into the tank. We start the engine and enjoy its operation.
This is interesting!
After removing the device, you can check it by connecting it to a 12V power supply, which will once again confirm the malfunction.
Fuel filter on a Chevrolet Lanos: where is it located, replacement - AutoExpert
14.01.2020
The fuel pump on Lanos cars is located in the tank. It is designed to pump gasoline from the tank to the engine fuel rail. The operation of the Lanos electric fuel pump is associated with a mesh filter element.
It is designed to filter gasoline sucked from the tank. Over time, this element becomes clogged and therefore needs to be replaced. Many people do not pay due attention to this detail, which leads to unexpected consequences.
The material will discuss how to replace the fuel pump grid on Lanos, Sense and Chance (the replacement principle is identical on all models of these cars).
Filter at the inlet of the fuel pump - purpose
It is clear that the main purpose of the filter is to retain various contaminants. The mesh on the Lanos fuel pump (popularly also called a diaper) is a filter element for rough cleaning of fuel. It serves to prevent contaminants from entering the fuel pump.
The absence of a mesh will lead to accelerated failure of the pump. That is why a mesh is installed at the entrance to the gasoline pump to prevent large and medium-sized contaminants from entering the electrical mechanism.
After the fuel pump there is another filter, which is designed to clean the gasoline pumped from the tank to the fuel rail.
The absence of this filter will lead to accelerated clogging of the injectors and a decrease in their performance.
When to change the fuel pump mesh Lanos, Sense and Chance
Any filter becomes dirty over time, and this also applies to the mesh installed at the inlet of the gas pump.
When the element becomes clogged, there is a decrease in its throughput, resulting in a decrease in the amount of intake fuel.
Reduced gasoline absorption has a negative effect not only on the fuel pump itself, but also on the functioning of the engine. A clogged mesh of the Lanos suction device leads to the following consequences:
- The load on the pump electric motor increases, causing it to heat up more. This reduces the service life of the device
- The absorption of the amount of fuel decreases, which ultimately leads to a decrease in the quality of cooling of the pump electric motor.
- The pressure in the fuel line decreases, which negatively affects the functioning of the internal combustion engine
The main signs of a clogged fuel pump filter on Lanos are:
- Problem starting the engine due to low pressure in the fuel line
- The engine does not start at all if the filter is heavily clogged
- When the car moves, jerking and jerking appears, indicating problems with the fuel supply
If the above symptoms occur on Lanos, it is necessary to resort to replacing the part. Every driver can cope with this, but the biggest drawback of the process of replacing the fuel pump grid on Lanos is that this will require dismantling the entire module.
!Some drivers prefer to clean it instead of replacing the mesh. This is not a rational approach to such an event, since it is impossible to clean the element to perfect condition. However, this method is suitable when the engine does not start due to a clogged filter mesh, but you still need to get home or to a car service center.
Instructions for replacing the fuel pump mesh on Chevrolet, ZAZ and Daewoo Lanos, Sens and Chance
It should be noted right away that the resource of this filter element ranges from 50 to 100 thousand kilometers. It all depends on the quality of the gasoline being poured into the tank, but you can refuel once unsuccessfully and, at best, end up having to replace the filter, and in the worst case, you will have to change the fuel pump.
Next, we’ll look at how to replace the Lanos fuel pump mesh yourself, and what you’ll need for this. When carrying out the work, you will need a minimum set of tools, consisting of a flat or slotted screwdriver, steel wire and a hair dryer.
To replace the mesh, you will need to remove the entire fuel pump module. How to do this yourself is described in detail in the material on removing the gas tank or instructions for replacing the Lanos fuel pump.
The process of dismantling the fuel pump assembly with the mesh must begin by disconnecting the negative terminal of the battery.
After the fuel pump module assembly is removed from the mounting hole of the tank, we proceed to further steps to replace the strainer:
- After removing the pump, there will be some fuel left in it, which can be drained back into the tank or container by turning it upside down
- We place the entire mechanism assembly on a clean cloth or newspaper, and proceed to replacing the mesh
- The first step is to dismantle the float, for which the plastic clip in the shape of the letter “C” is removed. To remove the clip, you need to squeeze it and remove it from its seat.
- To get to the fuel pump coarse filter, you should remove the top cover of the plastic flask. It is attached using three protruding slots, which you need to press with a screwdriver.
- Before removing the top cap of the flask, you need to disconnect the power supply connector for the fuel level sensor. This sensor is attached to the outer flask (also called a glass)
- Next, we move on to dismantling the inner flask with the fuel pump, since the mesh is attached specifically to it. You can dismantle the inner flask using strong steel wire, from which you need to make a hook. An example of such a hook is shown in the photo below.
- The hook is needed to dismantle the inner flask (with the fuel pump), to which the mesh is attached. This flask is fixed using an internal protrusion along the circumference on the outer flask. The photo below shows a protrusion in the inner part of the outer flask, through which the fuel pump bracket with filter is fixed
- To simplify the process of dismantling the inner flask, it is necessary to heat the walls of the outer bowl with a hairdryer. This will lead to its expansion, which will allow you to easily and quickly remove the flask (it is important not to overdo it with a hairdryer)
- Using a hook, you need to hook onto the plastic protrusion on the inner flask and pull towards you (moderately). To increase the effectiveness of actions, efforts should be made alternately at several points. As a result, the inner flask with the fuel pump and the mesh located at the bottom is removed
- It is this mesh that needs to be replaced, having previously assessed its condition
- In 100% of cases, the inside of the outer flask will have contaminants that should be removed
- Let's start removing the mesh, for which you first need to remove the locking ring (washer) by prying it off with a screwdriver
- The old filter is removed, replaced by a new one, and secured with a retaining ring. It is recommended to purchase a new ring, since when it is removed, the quality of fixation has significantly decreased. If you install an old ring, there is a high probability that the mesh may come loose during use.
- We install the Lanos gas tank mesh in place and carry out the assembly in the reverse order
Manufacturers of fuel pumps for Lanos - what to choose and how much they cost
It is recommended to install an original General Motors fuel pump on Lanos. This item has an article number - 96344792. The main disadvantage of the original fuel pump is that it costs more than $300. Alternative fuel pump options for Lanos, Sens and Chance cars:
- Bosch - has article number 1987580030
- Marco - catalog number 22512
- Stellox - article number 10-01693-SX
- FSO - catalog number 580453453
- TSN - article 7.2.21
- SHIN KUM is one of the cheapest fuel pump models from a Chinese manufacturer. Article number SK 070/SK0580453453
- Japan Line - article number FJP 058045 J
You can find many other manufacturers, but the most important thing when purchasing is to consider the price of the fuel pump. On average, a high-quality electric fuel pump for Lanos, Sense and Chance costs about $100. It is not recommended to purchase devices that cost 10-30 dollars, since they will soon need to be replaced again.
In conclusion, we must summarize and note that the process of replacing an electric fuel pump does not take much time, and every car owner can complete the procedure. By following the sequence of actions described in the material and adhering to the safety instructions, replacing the fuel pump on Lanos, Sense and Chance will be done correctly and quickly.
What did we use to replace the Daewoo Lanos mesh?
- Rags
- A set of keys
- Screwdriver set (impact screwdriver is especially necessary)
- Hammer
You will also need a new Daewoo Lanos coarse filter.
Additional Information
A clogged Daewoo Lanos fuel pump mesh significantly reduces ride quality . The need to replace the fuel pump mesh is hinted at:
- Jerks when accelerating
- Unstable idle
Replacing the Daewoo Lanos fuel pump mesh allows you to make the car run more predictable, smoother and more reliable .
Replacing the fuel pump mesh on Daewoo Lanos (Deo Lanos) detailed photo report
The odometer had already clocked up 31,200 km, so I decided to clean the fuel system a little. Somewhere around 10 already. I cleaned the injectors for thousands of kilometers, but there was no effect. Now I’ve decided to replace the fuel pump mesh , change the fuel filter and also clean the injectors.
Today we’ll talk specifically about the fuel pump grid, and in the next article I’ll write about the process of cleaning injectors. The procedure for replacing the fuel pump mesh on a fairly Lanos is simple. About an hour or two at most is needed. The issue price is only 11 rubles. (
40 UAH) for the mesh and that’s it, no more financial investments are required. When you decide to do this procedure, it is advisable that there is not a lot of gasoline in the tank.
Well, let's go.
So, the first thing we need is to reduce the pressure in the fuel system. To do this, you need to remove the fuel pump relay located in the fuse box in the engine start:
and cut off the car. When it stalls, or sometimes it won’t start at all, then consider the job done. We remove the minus terminal (in principle, it is not possible to remove it, but for an additional safety measure, I still removed everything) and begin to get to this mesh itself. To do this, we remove the rear one and unscrew it (there is one bolt behind the seat and we tear it out on the right and left sides). And remove the plastic cover:
After this, disconnect the fuel block (1), and the wire pipelines (2 and 3):
To remove the block you need an orange wire clamp marked with a dot on the pull out figure, as shown by the arrow, that is, to the pipelines there it is not completely pulled out, about half a centimeter. To remove the hoses, you need to press the white clamps. And then you need to remove which (5), the ring holds the fuel pump. You need to take a screwdriver, insert it into the mesh and hit it with a hammer, as if unscrewing it counterclockwise, until it comes out of the grooves.
Once we remove the ring, you can pull out the pump. You immediately need to drain the gasoline from it, then remove the float, so as not to interfere with this, remove the corkscrew clip:
And remove the float itself from the grooves. Then you need to open the flask; it is held in place by three hooks:
We take it with a screwdriver, carefully pry it up, and disengage it. The main thing is that you don’t break the body alone. Then we disconnect the wires:
and you need to pull out the entire module from So. You won’t be able to simply pull it out of the flask; you need to take a small twig or whatever you have under your hand, slightly bent on one side so that you can hook the module on the sides and pull it. I took an old roller for painting and bent it like this:
and with this hook you need to hook it onto the module itself so that it comes out. The main thing is to break it so that it gets out of the engagement, there is a bulge all around the flask, and then it will go further. It’s easy to pull out the wires, we push the module block between the hoses, so that it is as close as possible where the wires go into the bulb, on the spot you will already understand what’s what. I think there should be no problems with removing the module, it comes out quite well.
This is just how everything looks when disassembled. Like:
we pulled out the module, remove the old one, install it and put the new mesh in the same way, securing it with a corkscrew ring:
For clarity, I’ll show you what my old mesh looks like after more than a little 30 thousand mileage:
replacement After the fuel pump mesh, we assemble everything in the reverse order of the design, slowly slowly, so that everything falls into place without breaking anything, and without leaving unnecessary parts, and we go to put it all back in the miracle tank. As far as I understand, there is no other way to insert the fuel pump, but still remember, it is advisable to put it in the same position as it was, so that you can install it the same way. Be sure to leave the rubber sealing ring in place, try to make sure the pump is seated well, install the corkscrew ring, hook up the wires, hoses and check. First, I recommend driving around a little to see if anything is leaking from underneath, and then installing the seat on the pump.
Checking the fuel pump directly
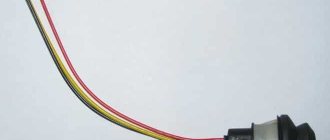
Having suffered a fair amount, it’s time to suffer even more... To gain access to the fuel pump cover, you need to “pull” the rear sofa: it is attached in two places to the floor (seen in the photo above), approximately in those places you need to pull. We removed the sofa - we unscrew the cover with a screwdriver and see the fuel pump connector (in the photo above on the right). To check the fuel pump directly , excluding all other elements of the car's electrical wiring, you need to apply voltage to the fuel pump directly from the battery. To do this, you first need to find which contacts in connector C901 are responsible for powering the fuel pump.
The picture above shows a connector (or, as people say, a chip) of a fuel pump (view from the pins). I didn’t remove the fuel pump from the gas tank, I just used a long wire to connect it to the battery. The fuel pump turned out to be alive!
Having experienced some bewilderment in connection with the diagnostic information received ( the pump is working, the fuse is working, the relay is working - all the obvious participants in the circuit are working! ), I decided to use a tester to check the voltage on the second half of the fuel pump connector (C901), coming from the bowels of the car. There was tension on him! That is, voltage was supplied to the fuel pump, the fuel pump was working, but did not work! How is this possible, you ask?
Why this situation has arisen and what transient contact resistance is, I will tell you in the next part of my adventures as a car enthusiast: Lanos (Lanos 1.5) will not start, part 2: the “Check” does not light up, the fuel pump or “C301 connector” does not hum