Location, principle of operation and design of the pump
The standard VAZ 2106 oil pump, the price of which is quite reasonable, is a product with a gear pair and a shaft installed in the internal cavity of the crankcase pan. This device is held on the cylinder block by 2 fasteners. The drive type gear is rigidly mounted on the shaft, and the driven element, pressed into the body of the product, rotates on the console in free mode.
An oil receiver pipe with a filter mesh and a pressure-reducing valve built into the part is attached to the pump body. An automobile oil pump operates on the following principle: it sucks in engine lubricant and directs it through an oil line running inside the wall of the cylinder block to the oil purification filter. At the exit from the cleaning filter, the aggregate oil spreads further through the main channels and is supplied to lubricate the main and 2 bearings of the vehicle oil pump drive shaft installed on its axle.
It is necessary to install only parts on the “six” that, according to the nomenclature code, correspond to the catalog numbers of the products installed on the vehicle. Thus, the VAZ 2106 oil pump differs from the same products that are mounted on other versions of Volzhsky Automobile Plant cars. They differ from similar parts, for example, in the geometry of the oil intake device, which is adapted to the configuration of the oil pan.
When comparing the design of the VAZ oil pump of the sixth series with analogues for other versions of the VAZ, you can see differences in the linear dimensions of the shaft with splines and gear. If it is necessary to replace the pump due to the mileage between operations, or due to a sharp drop in engine lubricant pressure, then you need to select parts with the designation 2101.
What type of oil pump is used on Lanos and Chance 1.5 cars and why
The oil pump was invented almost immediately after the advent of internal combustion engines. Like the internal combustion engine, this mechanism was constantly improved and modified, which was carried out with the aim of increasing not only the operating efficiency, but also the reliability of the unit.
As a result, today modern cars are equipped with two types of oil pumps, which differ in the type of control. They come in adjustable and non-adjustable types. The only difference is that the first type provides a function for changing the performance of the mechanism. This is done in order to obtain optimal oil pressure in the system. Lanos cars use unregulated oil pumps that adjust performance parameters using pressure reducing valves, that is, automatically. When the pressure in the system reaches a critical point at increased vehicle speed, the pressure relief valve opens and releases excess oil, directing it back to the engine crankcase.
In addition to differences in type of control, oil pumps also differ in design. They are:
- Gear or gear type with external or external gearing. They consist of two gears that mesh with each other, pumping oil in the system. One of the gears is driving (connected to the shaft), and the second is driven. When the parts rotate, the oil is picked up and transferred in the opposite direction at a certain speed, entering the oil channels.
- With internal gearing. They have two gears of different sizes. The smaller gear is inside the larger one. They engage with each other, forming a crescent shape. The rotating inner gear from the drive shaft drives the outer gear, resulting in the process of pumping lubricant. A jammed pressure relief valve causes the oil pump to malfunction.
Lanos use oil pumps with internal gears, which are characterized not only by efficiency, but also by saving space. Such modifications have smaller dimensions, so they are used not only on Lanos and Chances 1.5, but also on other modern cars. By design, they also distinguish between vane and rotary (an improved model of devices with internal gearing) oil pumps, about which you can learn more from the relevant sources.
Based on the type of drive, oil pumps are classified into mechanical and electrical. However, not only Lanos, but also almost all modern foreign cars use mechanical modifications of devices. Electric models are used in turbocharged engines, where heavy loads predominate. Mechanical devices are more efficient, since the speed of oil pumping depends on the crankshaft speed. The faster the car moves, the correspondingly higher the speed of oil supply to the working parts, which are cooled, cleaned and lubricated.
This is interesting!
Mechanical oil pumps are characterized by high reliability, which is directly related to the simplicity of their design. That is why Lanos and Chance 1.5 cars are equipped with mechanical unregulated oil pumps with internal gears.
Removing and installing the oil pump
The oil pump is removed for replacement when its supply decreases, causing a constant drop in oil pressure in the engine lubrication system, as well as when oil leaks through the sealing surfaces of the pump housing and cylinder block.
Spare parts only supply the pump assembly, so this section only covers pump removal and installation. The work is shown using the example of the A16 XER engine; on other engines the pump is removed using almost similar techniques.
Repairing an oil pump requires a set of new spare parts, which are not available separately at retail. Therefore, if the pump fails, replace it as an assembly or contact a specialized service for repair.
You will need: all the tools necessary to remove the accessory drive belts and timing gear, the right power unit suspension mount, as well as a TORX T30 wrench and a TORX E12 socket.
1. Disconnect the wire from the negative terminal of the battery.
2. Drain the cooling system (see Replacing the coolant).
3. Remove the accessory drive belt (see Replacing the accessory drive belt).
4. Remove the right power unit suspension mount...
5. ...and the bracket for attaching it to the engine (see Replacing the power unit suspension mounts).
6. Remove the crankshaft pulley...
7. ... auxiliary drive belt tension roller...
8. ...and the lower timing cover (see Replacing the timing belt).
9. Remove the intermediate roller of the timing belt by unscrewing the bolt securing it...
10. ...timing belt...
WARNING
After removing the timing belt, do not rotate the crankshaft and camshafts, as the pistons may damage the valves.
11. ...and the tension roller of the timing belt by unscrewing the bolt securing it (see Replacing the timing belt).
12. Remove the timing pulley from the crankshaft shank.
13. Remove the two bolts securing the water distribution pipe to the water pump.
NOTE
For clarity, the catcollector has been removed.
WARNING
The flange of the water distribution pipe is sealed with a rubber ring. Replace this ring every time the connection is disassembled.
14. Remove the three bolts securing the oil sump to the oil pump...
15. ...nine bolts securing the oil pump to the engine cylinder block...
NOTES
Please note: the oil pump mounting bolts vary in length (bolts A are short, bolts B are long). For clarity, shown with the engine removed
16. ...and remove the oil pump assembly with the water pump.
NOTE
For clarity, shown with the engine removed.
17. Remove the sealing gasket installed under the oil pump housing flange.
NOTE
Replace the oil pump gasket with a new one each time you disassemble the connection, since the old gasket may not ensure a tight connection when reinstalled.
HELPFUL ADVICE
Whenever you remove the pump, replace the crankshaft front oil seal (see Replacing Crankshaft Oil Seals).
18. Install the pump in the reverse order of removal and tighten its mounting bolts evenly crosswise to a torque of 20 N·m (2.0 kgf·m).
19. Install all previously removed parts and fill with coolant (see Replacing the coolant).
HELPFUL ADVICE
When installing a new oil pump, we recommend replacing the oil filter element.
Maintenance
According to AvtoVAZ recommendations, the 11183 engine must be serviced according to the regulations:
| Maintenance object | Time (month) or mileage (10,000 km), whichever comes first |
| Timing drive | 36/ 1 |
| Battery | 12/2 |
| Valve clearance | 24/2 |
| Crankcase ventilation | 24/2 |
| Belts that drive attachments | 24/2 |
| Fuel line and tank cap | 24/2 |
| Engine oil | 12/1 |
| Oil filter | 12/1 |
| Air filter | 12 – 24/4 |
| Fuel filter | 48/4 |
| Heating/cooling circuits | 24/4 |
| coolant | 24/4 |
| Oxygen sensor | 10 |
| Spark plug | 12 – 24/2 |
| Exhaust manifold | 12/1 |
By default, the cooling system has a volume of 7.8 liters. Red Felix Carbox 40 antifreeze is usually poured on the conveyor. Replacement is made with any coolant, taking into account the temperature range of 85 degrees. Since the internal combustion engine device is quite simple, the maintenance operation can be performed on your own.
Repair
If you have the desire and time, you can repair the unit, because this is not a VAZ pump, which cannot be restored. There is nothing complicated in such work. For repairs you need a small number of tools:
- wrenches 10 (open-end, box, socket);
- ruler;
- set of probes (flat);
- vice.
Replacing the drive gear in this vehicle unit
Replacing the oil pump on a VAZ-2112 16 valves photo, video
If a red indicator lights up on your instrument panel, signaling a lack of oil pressure in the system, then do not rush to run to the store and buy a new oil pump.
The video discusses the most basic reasons why oil pressure may drop in a VAZ engine:
Replacing the oil pump
There is nothing difficult about replacing an oil pump. We drive the car into the pit, prepare the tools and get to work.
- Disconnect the battery.
Removing the battery terminal for repair - Drain the oil into the prepared container (stopper on the tray).
The plug is unscrewed with a key - We jack up the car, place it on a good stand (a stump will do just fine) and remove the right wheel.
- Remove the timing belt.
Timing belt without casing. - Remove the crankshaft pulley and key (you will need an assistant to clamp the flywheel with a screwdriver).
- Remove the crankcase cover.
Removing the pallet - We remove the oil intake itself.
- We clean the oil receiver grid (with solvent or kerosene).
- And directly remove the oil pump itself (6 bolts on the cylinder block).
The location of the 6 bolts that secure the oil pump is marked with arrows
Reassemble the oil pump in reverse order.
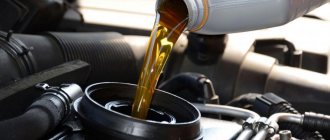
The pan and oil pump gaskets must be replaced with new ones. Also, the new oil pump should be washed out of preservative grease and filled with oil (to prevent it from running dry during the first start after repair).
Why is an oil pump needed?
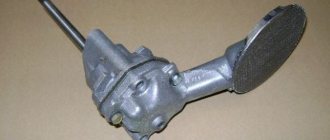
Pump appearance
The oil pump in the engine is designed to build up pressure in the oil system, for the necessary lubricating effect of all rubbing parts of the internal combustion engine. If the pressure in the system is insufficient, the lubrication effect will be ineffective, which in turn will lead to the engine being unsuitable for operation. In this case, the low oil pressure warning light on the instrument panel should light up. Therefore, you should not delay repairing the oil pump.
You are left with two options. Take the car to a service station and lose a lot of time and money, or change the oil pump yourself.
Pump diagnostics
Oil pump removed for diagnostics. Symptoms: oil leak.
First, you need to make sure that the oil pressure sensor itself is working properly - check whether the sensor itself is dry or oily.
Secondly, you need to check whether power is supplied to it correctly or whether a wire is broken somewhere. And only after these procedures, if the light does not go out, will you have to change the oil pump.
Why might it break prematurely?
An oil leak from the oil pump can lead to expensive engine repairs.
Replacement of the oil pump can also be caused by poor quality oil, which will lead to rapid clogging of the oil receiver grid and subsequent lack of oil pressure in the system. It is not uncommon for an oil pump to become wet and oil to leak from underneath it. In these cases, you can get by by replacing the gasket and cleaning the oil receiver mesh.
In general, the oil pump does not bring much trouble to VAZ-2112 owners. It is designed for 120 thousand kilometers. When purchasing a new pump and spare parts for its repair, choose original spare parts. The official manufacturer of oil pumps for the VAZ-2112 is the Tolyatti Plant (TZA).
Advantages and disadvantages
Advantages of version 11183 (1.6, 8kl):
time-tested power unit, has high maintainability; availability of spare parts; the design of the piston block minimizes the possibility of valves meeting the pistons in the event of a timing belt break; has good traction at low speeds.
Flaws:
- increased noise and vibration;
- sometimes there is a sound similar to the sound of a diesel engine;
- it is necessary to periodically adjust the valves;
- The manufacturer almost never supplies air conditioners with this version.
Advantages of modification 11194 (1.4, 16kl):
- minimal fuel consumption compared to analogues;
- quiet sound during operation and low vibration;
- good dynamics during acceleration (on the highway reaches 6 thousand revolutions);
- no valve adjustment is required; current repairs only require oil and filter changes.
Minuses:
- an expensive German-made piston group, which requires replacement when the timing belt breaks and subsequent deformation of the valves;
- after 4-5 thousand kilometers, increased oil consumption is observed.
Advantages of Kalina engines type 21126 (1.6, 16kl):
- minimal vibration and noise parameters during operation;
- the most powerful representative in the Lada family of cars;
- excellent acceleration dynamics;
- no need to adjust valves, only oil and filter changes required.
The main disadvantage of this modification is the deformation and bending of the valves in the event of a break in the timing belt.
Replacing the oil pump on a VAZ 2109, 2108
The power plant of a modern car is equipped with several pumps. They can be called “hearts”, each of which pumps a specific liquid - fuel, antifreeze or oil. Today we will talk about one of them – oil. Since it is impossible to diagnose this unit without partially disassembling the motor, the condition of the pump is determined by indirect signs.
If it malfunctions, events most often unfold as follows: the oil pressure warning light lights up on the instrument panel. The car enthusiast checks its level and sees that it is normal (or adds oil if necessary), but the lamp does not even think of going out, which leads to the need to troubleshoot.
There can be many reasons why the light comes on, but most likely the oil pressure sensor is broken or something is wrong with the pump. In this article we will tell you how to correctly replace this unit on a VAZ-2109 and other cars of this family.
Where is the oil pump on the VAZ 2109
Its location is behind the crankshaft pulley. As a result of this circumstance, it will not be possible to get to it without removing some parts, in particular, the pulley itself and the oil pan. Below is a photo showing the oil pump in its seat.
When to change the oil pump
If the pump fails, the following things happen:
- The oil pressure drops, as a result of which the corresponding control light on the dashboard lights up.
- Oil consumption increases, and it constantly has to be topped up (however, this does not always happen).
How to replace the oil pump on a VAZ 2109, 2108, 21099
Tools:
Before you begin the replacement, prepare all the necessary tools. This is a set of wrenches, a set of sockets, a universal joint and an extension. If the pump is replaced with a new one, then buy the necessary spare part (its catalog number is “2108-1011010″). Also, drive the car into a hole or overpass, otherwise it will be very difficult for you to get to the pump.
Removal:
1) Remove the crankshaft position sensor. It should be noted that this is only relevant for an injection engine; if the engine is carburetor, skip this point.
2) Drain the engine oil.
3) Next, remove the timing pulley.
4) Now you can remove the oil pan. Then find the oil receiver and unscrew the bolts that secure it, and then remove it.
5) Take a socket of the required size and an extension, and use them to unscrew the 6 bolts that secure the oil pump to the engine block
Be extremely careful as there are washers under the bolts and it is very important not to lose them
6) Ideally, after step 6, the pump should be removed, but in practice this does not always happen. If this is your case, take a thicker screwdriver, insert it between the pump and the main bearing and gently wiggle it (remember, do not damage the bearing!).
7) Carefully remove the oil pump.
Installation:
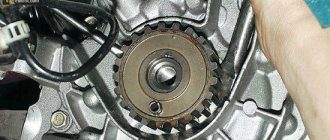
1) Before you install a new unit, perform one very important procedure. You need to find the drive gear and turn it like this... (continued below)
2) So that its position coincides with the special flats located on the crankshaft.
3) Now take some engine oil and lubricate the front crankshaft oil seal (more precisely, its working edge).
4) Is the oil seal lip lubricated? Install the pump onto the crankshaft. For this you will need an ordinary pencil. It will be needed to tuck the oil seal into its place (this must be done strictly with the unsharpened end of a pencil!). After this, screw back the 6 bolts securing the oil pump, not forgetting the washers.
5) Now reassemble the remaining parts in the reverse order of removal. Archive important!
Since you will have to remove the timing belt to get to the timing pulley (and at the same time the radiator along with a number of other parts), be extremely careful with the crankshaft when changing the pump.
It must not be allowed to rotate at a significant angle, otherwise the pistons have every chance of meeting the valves, as a result of which they may become deformed, and this will lead to dire consequences.
–
CONDITION 1
ROOM ÑÑ Ñеми же ÑпоÑобами и пÑиемами, коÑоÑÑе Ð ¸Ð·Ð»Ð¾Ð¶ÐµÐ½Ñ Ð´Ð»Ñ Ð¾Ñевого дÑмоÑоÑа. â
ROOM ÑÑ Ñеми же ÑпоÑобами и пÑиемами, коÑоÑÑе Ð ¿ÑименÑÑÑ Ð¿¿Ñи ÑемонÑе оÑевого дѼоÑоÑа. â
RESULTS ¸Ðµ клапанов и пÑÑжин. RESULTS RESULTS. â
RESEARCH Ñивода. â
RESEARCH го пивода â
RESEARCH го пÑивада â
RESEARCH го пивода â
RESULTS RESEARCH RESEARCH ´Ñ зÑбÑаÑÑми колеÑами и коÑпÑÑом, зазоÑов Ð²Ñ SMALLERY ROOM ROOM ROOM ¾Ð¹ пÑÑжинÑ. OPTIONAL RESEARCH RESULTS ¾Ð²Ð°; RESEARCH RESEARCH â
| RESULTS. â |
4 points 4 points 4 points аÑоÑом. RESULTS µÑедаÑÑ, Ð²ÐµÐ´Ð¾Ð¼Ð°Ñ ÑеÑÑеÑÐ½Ñ ÐºÐ¾ÑоÑой 8 пока RESULTS. RESULTS ¾Ð±ÑÑнÑми Ñп¾Ñобами, ÑоблÑÐ´Ð°Ñ ÑÑÐµÐ±Ð¾Ð²Ð°Ð½Ð¸Ñ , , , , , , , , , , , , , , , , , , , ов. RESULTS ROOM ¿Ð»Ð¾ÑноÑÑей ка ROOM RESULTS, ASSESSMENT »Ð¾Ð²Ð»ÐµÐ½Ð¾ его назнаÑением. â
The oil pump must be removed from the engine in the following order:
- Remove the distributor cover and turn the crankshaft to a position in which ball 2 on the flywheel (mark “MZ”) is installed against the edge of pin 1 fixed in the inspection hatch of the clutch housing, and the distributor rotor plate is directed towards the housing terminal to which the low-voltage wire is connected. voltage from the ignition coil.
- Unscrew the union nut and disconnect the vacuum tube from the fitting of the ignition distributor regulator chamber. Disconnect the low voltage wire from the terminal on the distributor body, loosen the bolt of the clamp securing the distributor in the cylinder head socket, and remove the distributor.
- Remove the oil sump.
- Unscrew the two bolts securing the pump housing flange to the bottom plane of the cylinder block and remove the pump. Installation of the oil pump into the engine is carried out in the reverse order. It must be taken into account that the oil pump drive gear must be engaged with the camshaft helical gear in a strictly defined position.
This is necessary to ensure correct mutual connection of the ignition distributor drive shaft with the pump shaft, since the position of the distributor vacuum regulator housing relative to the cylinder head casing depends on this.At the upper end of the pump drive shaft there is a shank 1, which fits into the slot of the distributor shaft. When installing the pump correctly, shank 1 should be positioned perpendicular to axis 2 of the crankshaft when the piston of the first cylinder is at idle. compression stroke. To install the pump correctly, you need to rotate its drive shaft so that shank 1 is approximately parallel to axis a, connecting the two holes attaching the pump to the cylinder block, as shown by the line.
When installing the pump in place, do not rotate its housing. When the pump drive gear engages with the camshaft gear and rotates through a certain angle, the pump shaft shank will take the correct position. When installing the pump on the engine, it is necessary to install a new paper gasket between the pump housing flange and the bottom plane of the cylinder block. After installing the oil pump and distributor, adjust the initial ignition timing and secure the distributor body in the required position using the clamp bolt. If the oil pump and initial ignition timing have been set correctly, then after fixing the distributor, its vacuum regulator will take the position shown in the figure.
- Reinstall the oil pan.
Eliminating oil leaks
Many models of saws experience oil pump malfunctions during their operation. The nature of these defects may vary, but ultimately this leads to an oil leak. Moreover, such leaks can appear even when the saw is in a lying position. Oil pump pf-43 on a chainsaw and its design. Why doesn't the oil pump work? This is justified by the uneven distribution of water in the storage tank.
Leaks also occur due to the fact that oil pumps for chainsaws have a fitting on their own body for attaching a hose. A loose connection between the water tank and the pump may result in oily droplets.
Such difficulties can be solved by disassembling the saw and repairing the oil pump.
The disassembly process should be approached very carefully so as not to destroy the moving parts of the pump. The following tools will also be useful for this:
In most cases, all chainsaw oil pumps consist of 2 main halves. In one half there is a working mechanism, and in the second there is a storage chamber.
The video discusses repairing a chainsaw
and its sealing in the housing. And this is a similar video.
If the pump leaks, it is necessary to replace the gasket between the two parts of the mechanism.
For repairs, you should disassemble the unit into halves, without touching the working part. There should be a gasket at the junction. Hello everyone, tell me how to remove the oil pump and replace it like in a chainsaw. In this case, if it has huge compressed areas, then the gasket needs to be changed.
If the gasket is not bad, then it should be wiped and replaced. Then the hose is checked. There should be no cracks or diaper rashes on it that will disturb its density. As a rule, when the engine operates normally at low speeds, the oil pump. If similar defects are detected, the hose must be replaced. How to change the oil pump in an alligator chainsaw at home, you will need a few tools and desire, everything is very simple, support our channel in any way you can. If the hose is not bad, then it needs to be washed, degreased and sealed.
Then all output channels are checked, in which there should be no third-party inclusions (garbage, slag, etc.). How to change the oil pump in an alligator chainsaw at home, replacing the oil pump. This debris will lead to congestion, which will create vacuum plugs. If they are detected, the channels should be cleaned. This can be done with compressed air.
Preventive measures
In order to reduce the possibility of various oil leaks while using the saw, it should be periodically serviced. During this process, it is necessary to monitor the tightness of all hoses and gaskets. How does a chainsaw oil pump work | husqvarna. If they are detected, the connecting parts should be pulled.
It is imperative to inspect the quality of the oil being poured. It must be of high quality and used in strict accordance with the features indicated in the product passport. With all this, under no circumstances can you use mining, since it has a heterogeneous structure. Also, it is imperative to do repeated purging of the oil pump. How to remove the oil pump of a Huskvarna chainsaw, kak-snyat-maslyanyiy-nasos-benzopilyi-huskvarna. This will help prevent debris from coking in its working channels.
Low quality lubricating water will worsen the quality of the tool and reduce its service life.
In addition, if the lubrication is poor, the chain may fail, replacing which will be a rather expensive procedure.
After performing sawing work, it is necessary to make sure to clean the saw from any sawdust that has fallen on it. Oil pump; Generally, the oil pump consists of two on the surface should not. During long breaks in work, the chainsaw should be hung in a vertical position. This will allow the oil water to spread moderately throughout all the channels of the instrument. Such uniform distribution will avoid vacuum plugs, which can cause oil pump malfunctions.
Consequences of untimely replacement
It is important to regularly check the condition of the oil pump and other elements of the lubrication system to avoid undesirable consequences. For example, if the oil pump is not replaced in a timely manner, more serious malfunctions may occur. The engine itself can also fail, repairing which is much more expensive than buying and replacing a pump.
Consequences of untimely replacement of the oil pump